Air Fryer Corn on the Cob is going to change the way you cook corn. Super fast, tender, and full of toasted corn flavor air fryer, corn is insanely delicious.
Summertime means corn season and there’s nothing better than sweet crisp-tender corn. Try it in these favorite recipes Corn Salad, Jiffy Corn Casserole, and Grilled Mexican Street Corn.

Easy Air Fryer Corn on the Cob
I love corn on the cob, it’s sweet tender kernels of corn cooked to perfection and then smothered in butter with salt and pepper as an added touch. Cooking the corn in the air fryer changed everything for me. No longer did I have to boil a pot of water and heat up the kitchen in the process. Throwing them in the air fryer saved me so much time as well as keeping the kitchen cool. Serve these air fryer corn on the cob with some Chicken, Salad, and some Neiman Marcus Bars for dessert for a perfect summer meal!
Air frying corn on the cob is a great way to prep corn for your favorite dishes as well. Use corn cooked in the air fryer for this Salad, Cheesy Hot Corn Dip, and this Corn Chowder. You are going to love the taste and texture too! It has a similar flavor as grilled corn without firing up the grill. The olive oil gives allows the corn to crisp up and caramelize. It is so good, you have to try this air fryer corn on the cob today!
What You Need For Corn on the Cob in the Air Fryer
It is quick and easy with only 3 ingredients if you like salt and pepper! Enjoy this air fryer corn on the cob the best way! For all measurements, see the recipe card below.
- Corn: Pick a good sweet corn that your family loves to eat. I like to go to farmers markets for the best selection.
- Olive oil: This is to help “air fry” the corn and keep it from sticking.
- Salt and pepper: Add to taste.
How To Make Air Fryer Corn on the Cob
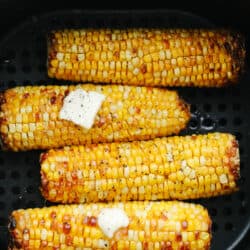
Simply place the corn in the basket of the air fryer. Rub the olive oil evenly on the corn. Add salt and pepper. Cook in the air fryer at 370 degrees for 12-15 minutes or until tender. It is that simple to cook air fryer corn on the cob.

Tips For the Ultimate Air Fryer Corn on the Cob
Air fryer corn on the cob gives a unique flavor you just have to try! Fresh or frozen corn will work too.
- Air Frying: It’s important to remember when you are air frying corn that every air fryer cooks a bit differently. Be sure to check your corn half way through so that you do not burn your corn.
- Oil: When you putting oil on your corn, you can use a spoon and drizzle it or use a non-aerosal oil spray. Using cooking spray with an accelerant can ruin your air fryer basket.
- Do not Stack or over fill: To get the perfect bake on your corn, make sure there is room between the cobs for the air to circulate and do not stack.
- Cut: You may have to cut your ears of corn to fit your basket. Just cut them in half and cook in batches if needed.
- Frozen Corn on the Cob: This method will also work with frozen corn on the cob. You can thaw it or add a few extra minutes and cooke it from frozen.

How to Pick the Perfect Corn
Did you know it’s bad shopping etiquette to pull back the husks to check corn out before buying it? It is! So don’t do it. It shortens the shelf life of the corn, making it dry out faster, and then it’s unsellable. Causing farmers and store owners to lose money. But you can get dynamite corn without peeking. Here’s how to pick the perfect corn in the air fryer.
- Silks: First check out the silks which are the long hair like strands that stick out of the top. They should be brown and tacky. This means there is still moisture in the cob and hasn’t dried out yet. If the silk is dark brown, dry or black, the corn is too old and should be passed by.
- Husks: The green leaf like husks that wrap around the corn should be bright green free from lots of brown spots or little holes at the tops. Those little holes mean there are probably worms in the corn. The husks should be clinging to the corn wrapping it fairly tightly. If the husks are damp that is sign that the corn is fresh and a good pick.
- Give it a Squeeze: Starting at the bottom work your way up the cob gently squeezing as you go. The ear of corn should feel firm, and the individual kernels should feel plump. If there are any voids where kernels are missing or if has soft spots, pass on that ear of corn.
How to Store Corn on the Cob
Once you get your corn home you can keep it at room temperature if you are cooking it within a few hours. If you are saving it for another day you can either shuck it and store the corn in a plastic bag or leave the husks on and keep in a tightly sealed plastic bag in the crisper.

More Air Fryer Recipes to Try
Dinner
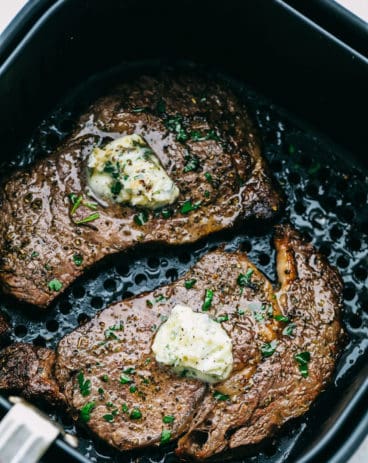
Perfect Air Fryer Steak
Side Dishes
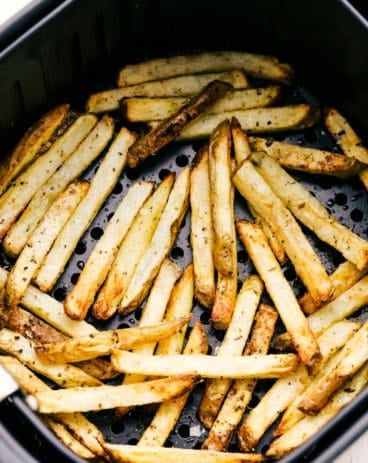
Amazing Air Fryer French Fries
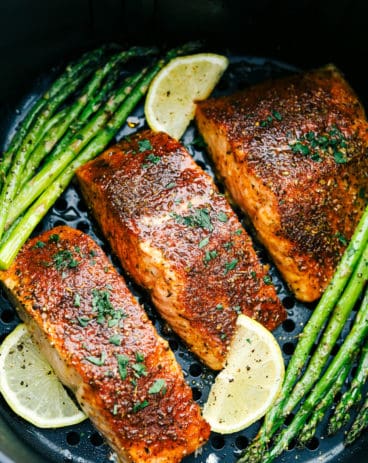
Side Dishes
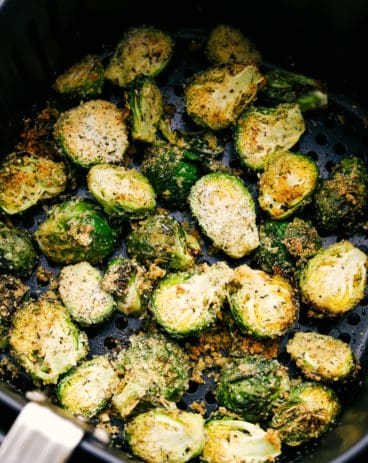
Crispy Parmesan Air Fryer Brussels Sprouts
Air Fryer Corn on the Cob
Ingredients
- 4 ears of corn
- 1 Tablespoon olive oil
- salt and pepper
Instructions
-
Place the corn in the basket of the air fryer. Rub the olive oil evenly on the corn. Add salt and pepper.
-
Cook in the air fryer at 370 degrees for 12-15 minutes or until tender.
Nutrition
from The Recipe Critic https://ift.tt/2UzVmyJ
https://ift.tt/3xBDdiK