बुधवार, 4 अगस्त 2021

How to Make the Best Omelette

A savory breakfast omelet is so classic and my go-to for a home run breakfast! Quick, easy, and delicious, this healthy breakfast option will leave you feeling full and satisfied!

Omelets are the best because of how versatile they are! If you have lots of eggs in your fridge and are dying to try something new with them, try this scrambled egg recipe or these easy egg muffins. You can even make these delicious breakfast burritos that you can freeze ahead and have all week!

A cooked omelet with toppings in a pan.

Why are Omelets such a Great Breakfast Option?

I love a good savory breakfast item and eggs are one of the best options out there! These omelets take about 10 minutes and before you know it, you’ll have a delicious breakfast that is quick and ready to eat! As an added bonus, omelets are one of the healthiest breakfast options! It’s a win-win! I love that you can just add in a few of the vegetables that you have leftover in your fridge and you have a tasty meal ready to go! That golden, fluffy texture on the outside followed by that delicious creamy center makes me so hungry just thinking about these!

Did you know that when omelets were first invented they were considered “a culinary delight”?? Napoleon Bonaparte ate them for the first time and because he loved them so much, he had the townspeople in France gather all of the eggs in the village and prepare a huge omelet for his army the next day. I mean, if they are filling enough to literally feed an army, I think this is a winning dish for the whole family!

What Do I Need to Make an Omelet?

If you have eggs in your refrigerator then you are in luck because that’s just about all you need to make this amazing recipe ready to devour in no time! You can add as little or as many toppings as you want and you can make this all your own. Scroll to the bottom of the post for the recipe card to find full ingredient amounts.

  • Eggs: Eggs are the key ingredient to this recipe. Just remember to whisk them well before you start cooking!
  • Butter: Make sure to include this ingredient even if you are using a nonstick pan because the butter helps add flavor to your dish!
  • Salt and pepper: Sprinkle in some salt and pepper to make this dish extra savory and delicious!
  • Optional toppings: mushrooms sautéed, tomatoes, feta cheese, spinach, chives

How to Make an Easy Omelet

This omelet is something that even the most beginner of cooks can make! It is simple yet completely satisfying. It is so easy to add in as little or as many toppings as you want and be creative to make this your own concoction!

  1. Whisk: In a small bowl whisk the eggs.
  2. Melt butter: In a small nonstick skillet over medium-low heat melt the butter.
  3. Pour: Pour the eggs into the skillet and desired amount of salt and pepper and make sure they are spread evenly along the bottom of the pan.
  4. Cook: Cook the eggs until you start to notice the edges folding up and the center starting to set.
  5. Lift: Taking a rubber spatula gently lift the edges.
  6. Add Toppings: Place desired toppings on one side of the omelet.
  7. Fold: Carefully fold the omelet in half and slide it onto a plate. Garnish with chopped chives.

Four pictures of the cooking process of an omelet from start to finish.

What Kind of Pan Should I Use?

Because you have to move an omelet around on the pan, it’s SO important that you use a nonstick skillet while cooking these! This helps the omelet from sticking and allows you to flip it easily with your spatula. If you don’t have a nonstick pan, try this GreenPan skillet on Amazon! This pan is a tried and true favorite! Grab the large one (12″) to have extra room to flip those omelets! This option is really affordable, high quality, and a great option that will last you a long time!
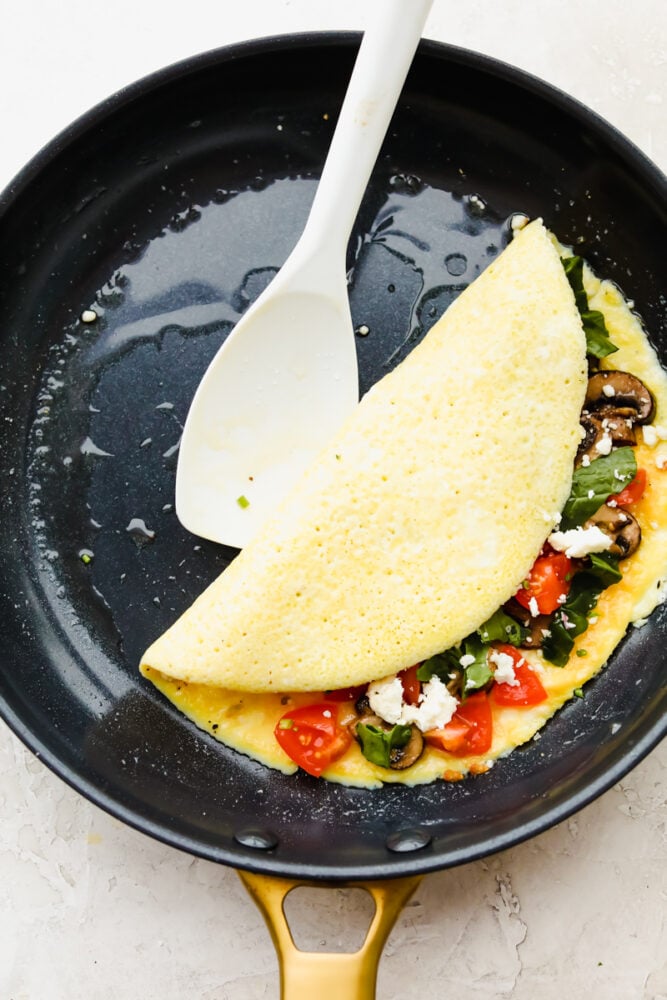
An omelet in a pan, filled with ingredients being folded in half.

Quick Tips for Fluffy, Golden Omelets

Omelets don’t require too much prior knowledge before cooking but follow these quick tips to make sure that your omelet turns out EXTRA delicious!

  • Spatula: Make sure that you keep your spatula clean because a messy spatula makes the omelet stick to the pan.
  • Even Cooking: To guarantee that your omelet cooks evenly, make sure that after you pour the eggs into the pan. Once they start to set, use the rubber spatula to drag them into the middle. After this, you can begin to tilt the pan so that the uncooked eggs in the center come to the outside edge. Doing this will create layers and helps your omelet be fluffy and evenly cooked!
  • Less is more: If you cook smaller omelets (fewer eggs at a time) instead of large ones, this will help cook them more evenly with less chance that any eggs will be left undercooked. Because large omelets are hard to flip, cooking with smaller omelets makes this part easier as well!
  • Preheat your pan: Try to heat up your pan on the stove for 2-3 minutes before you actually start adding ingredients. A nonstick pan has tiny pores that your food can fill in and so heating it up beforehand expands the metals and squeezes those openings shut. This creates a smoother surface that is less likely to cook your food unevenly!
A cooked, finished omelet on a plate.

Quick and Easy Omelet Variations

Omelets are such an easy meal to change up and pack with new and delicious ingredients! The feta cheese is one of my favorite toppings. The texture and the flavor bring it up a level to make me feel like I’m eating at a restaurant! The great thing about the omelet is you can customize it to whatever you are in the mood for that day!

  • Toppings: If you are looking to add something to the tp of your cooked omelet, try Pico de gallo, sour cream, salsa, or guacamole.
  • Additional Fillings: Switch things up by adding ham, bacon, sausage, cheddar cheese, red pepper, or cilantro.
  • Seasonings: Add some additional salt or pepper to the finished product to add some extra flavor. If you like some spice, try topping it with a dash of chili powder or paprika!
  • Don’t want to flip the eggs? Try cooking an omelet in a bag! Whip up the eggs and mix with your filling (Leave out the chives and feta to put on top!). Place it in a gallon ziplock bag and shake! After you have shaken it well, then place the bag into a boiling pot of water and cook for about 8 minutes or until set!

Can I Store My Leftover Omelette?

Yes! Storing leftover omelets is an easy way to have an on-the-go breakfast ready for you the next day! Here are a few ways to store it:

  • Refrigerate: Store in an airtight container for 3-4 days in the refrigerator.
  • Freeze: You can freeze an omelet for up to 3 months. Make sure it is stored in an air-tight container!
  • To re-heat:  Take out your frozen omelet and place it on a plate. Cover it and cook on high for about 1-1 ½ minutes. Flip it about halfway through. If it still isn’t completely heated, continue adding 30 seconds at a time until it is hot. Enjoy!

A fully cooked omelet on a plate with a fork cutting into it.
Print

How to Make the Best Omelette

Savory breakfast omelets are so classic and my go-to for a home run breakfast! Quick, easy, and delicious, this healthy breakfast option will leave you feeling full and satisfied!
Course Breakfast
Cuisine French
Keyword how to make an omelette, omelette, omelette recipe
Prep Time 5 minutes
Cook Time 10 minutes
Total Time 15 minutes
Servings 1 omelette
Calories 315kcal
Author Alyssa Rivers

Ingredients

  • 3 large eggs
  • 1 Tablespoon butter
  • salt and pepper

Optional Toppings:

  • mushrooms sautéed
  • tomatoes
  • feta cheese
  • spinach
  • chives

Instructions

  • In a small bowl whisk the eggs.
  • In a small nonstick skillet over medium-low heat melt the butter.
  • Pour the eggs into the skillet and desired amount of salt and pepper and make sure they are spread evenly along the bottom of the pan.
  • Cook the eggs until you start to notice the edges folding up and the center starting to set.
  • Taking a rubber spatula gently lift the edges.
  • Place desired toppings on one side of the omelet.
  • Carefully fold the omelet in half and slide it onto a plate. Garnish with chopped chives.

Nutrition

Calories: 315kcal | Carbohydrates: 1g | Protein: 19g | Fat: 26g | Saturated Fat: 12g | Polyunsaturated Fat: 3g | Monounsaturated Fat: 8g | Trans Fat: 1g | Cholesterol: 588mg | Sodium: 313mg | Potassium: 210mg | Sugar: 1g | Vitamin A: 1160IU | Calcium: 87mg | Iron: 3mg


from The Recipe Critic https://ift.tt/3fuRtCP
https://ift.tt/2VwXpUQ

The Ultimate Ribeye Steak

Achieving steakhouse-worthy flavors doesn’t have to be difficult! The ultimate ribeye steak is juicy, flavorful, and seared to perfection all in the comfort of your kitchen.

In the mood for a perfectly cooked steak? Garlic herb, New York, and lemon garlic are more supremely tender, flavor-packed steak recipes that will not disappoint!

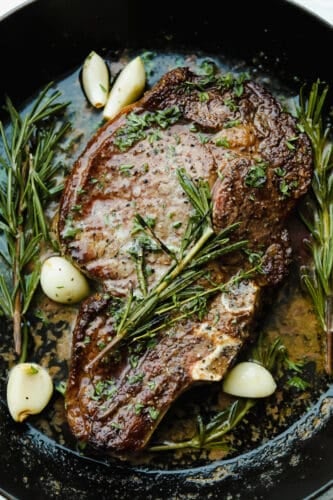
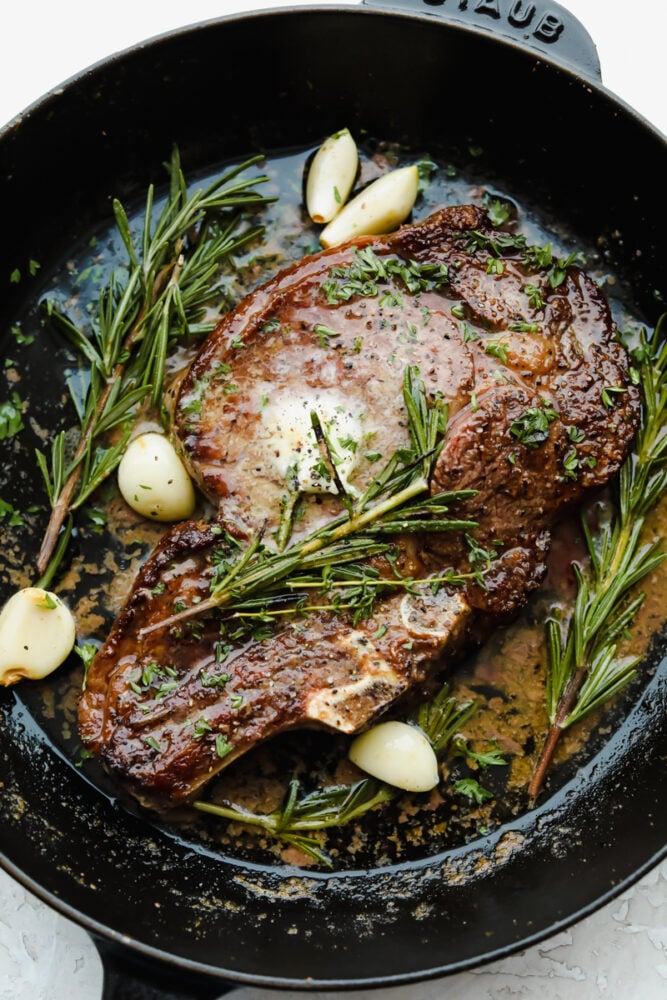
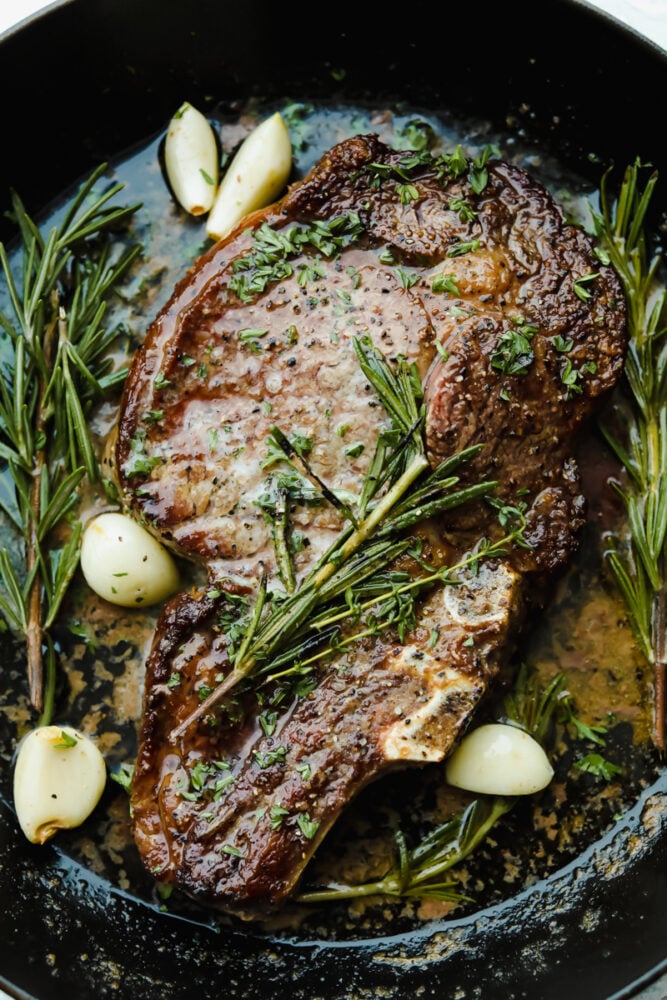
Cooked ribeye steak in a skillet, garnished with garlic, rosemary, and thyme.

Rosemary Garlic Ribeye Steak Recipe

Aromatic and glistening with butter, there is nothing quite as impressive or delicious as a perfectly cooked ribeye steak. Between the tender marbling and mouthwatering garlic rosemary flavors, this ultimate protein is going to be the star of the show. You will love the way this flavorful steak melts in your mouth! Just 5 simple ingredients enhance this amazing ribeye to rival anything you can get from a steakhouse! Yeah, I said it!

I will walk you step-by-step through the process of creating the most wonderful steak at home- from picking out your meat to searing it up in your pan! As intimidating as it sounds, making a buttery-soft steak in your kitchen is actually quite easy! Most importantly, only a few minutes of prep and cooking are needed. Simplicity is key here- no fancy ingredients or cooking techniques are required!

What You Need To Make the Best Ribeye Steak

Really, the most important part of this recipe is finding the perfect cut of meat. From there, it is all about using butter and fresh herbs to enhance its natural flavor and tenderness! I will tell you everything you need to know about picking the perfect ribeye steak in my tips section below. First, let’s talk about how simple the ingredients in this recipe are! Measurements for each ingredient can be found in the printable recipe card at the end of the post.

  • Ribeye Steak: I like to use ribeye with a lot of marbling. This will ensure that they are soft and tender after being cooked.
  • Salt and Pepper: This is the foundation of the steak’s flavor. Heavily seasoning both sides of your steak will help flavors infuse once you start cooking.
  • Olive Oil: Olive oil adds moisture to your steak. Also, it helps it to cook up perfectly.
  • Butter: Butter not only adds amazing flavor and richness to your steak, but keeps it soft and tender.
  • Garlic: Garlic will make your ribeye steak have the most perfect savory flavor. To add, garlic pairs really well with rosemary. You will love this flavor combination!
  • Fresh Rosemary and Thyme: Rosemary adds an earthy, minty flavor while thyme is sharp and peppery. Together, they make a winning aromatic combination.

Ribeye Steak Instructions

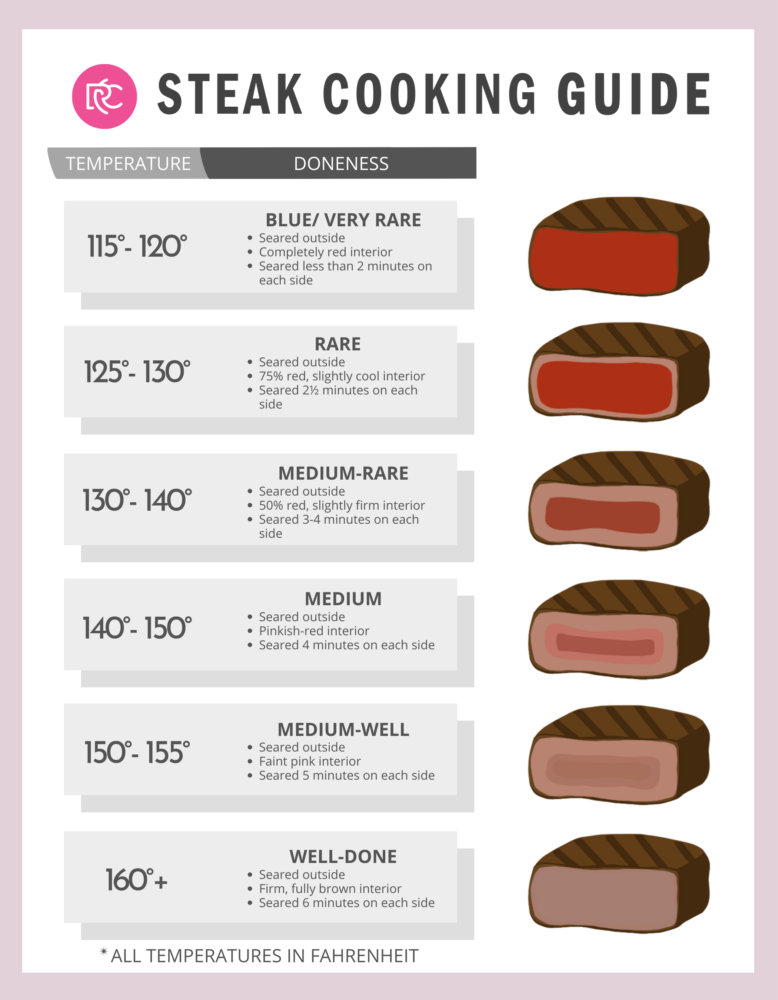
Making a tasty ribeye steak is something even beginner cooks can accomplish. The fresh ingredients do a lot of the heavy lifting. So, all you have to do is keep an eye on your steak as it cooks. An in-depth guide to cooking times can be found in my graphic below!

  1. Let Steak Rest: To begin, let the steak rest for 30 minutes to come to room temperature. Salt and pepper to taste.
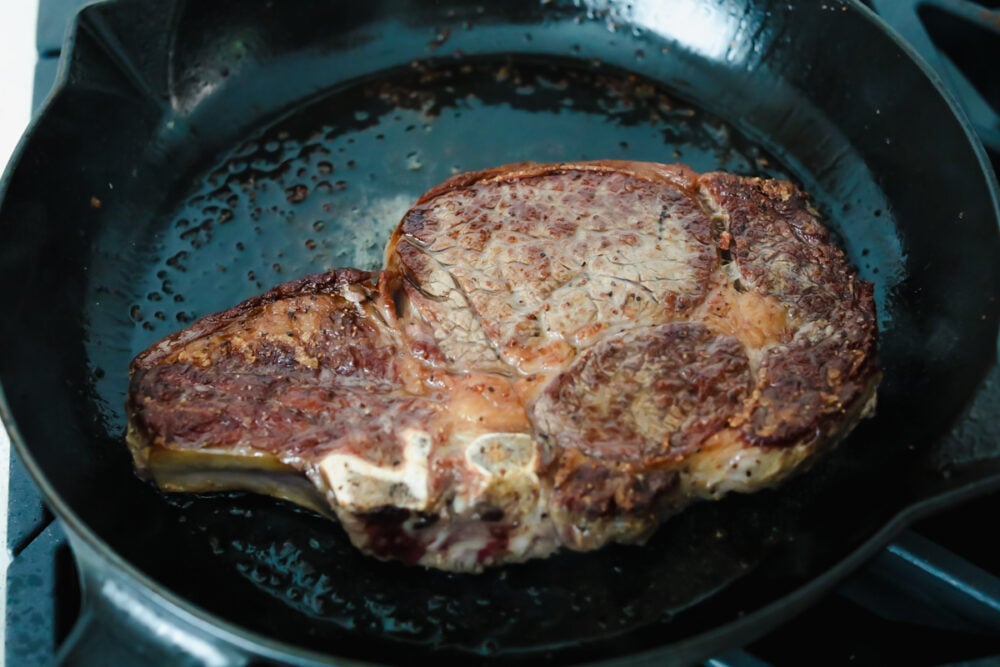
  2. Prep Skillet and Sear: Next, in a medium sized skillet over medium high heat add the olive oil. Once it starts to smoke add the steaks to the skillet. Sear on all of the sides until they have a golden brown crust.
    Add Butter and Herbs: Add the butter and let melt in the skillet. Add in the garlic and fresh sprigs.
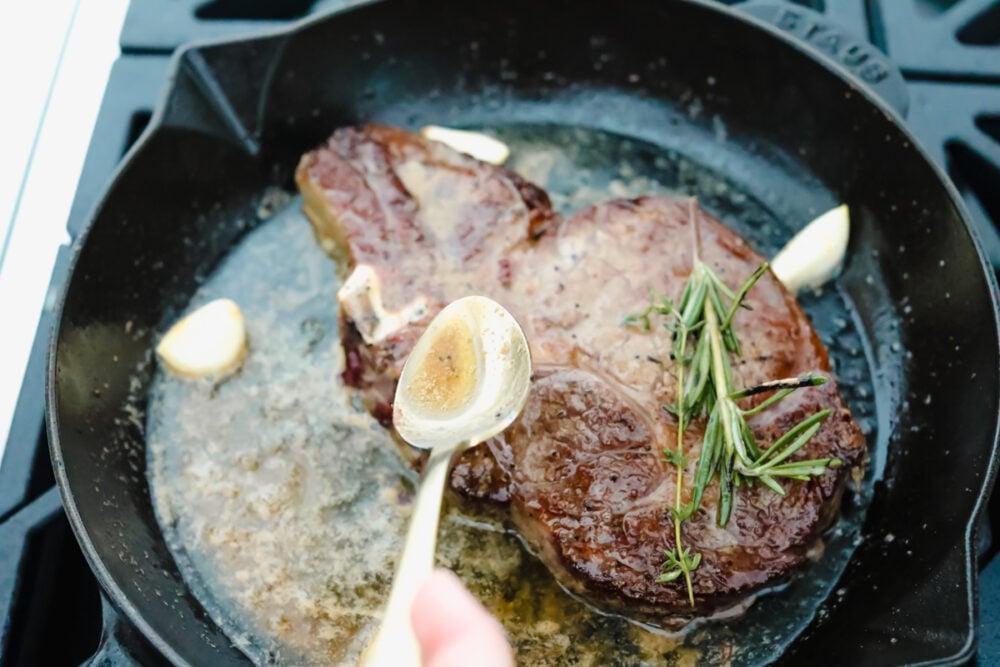
  3. Reduce Heat and Continue Cooking: Reduce the heat to medium and let them cook until they reach the desired internal temperature. Lastly, spoon the butter over the steak while they are cooking.
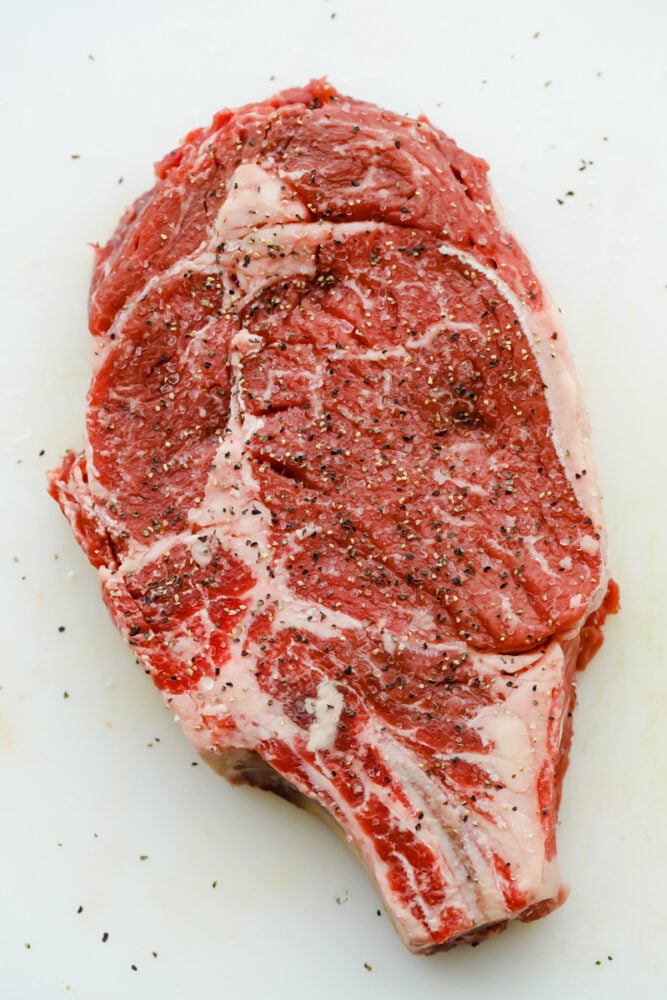
A raw ribeye steak salted and peppered.

How Long Do I Cook My Steak?

An infographic on steak cooking times.
Cooking ribeye steak in a skillet.

The Best Ribeye Steak Tips

From picking the perfect steak to ensuring it is cooked impeccably, these great ribeye steak tips will not let you down! From there, you can easily create an unforgettable dinner your family will go crazy over!

  • Choosing Your Steak: Look for ribeye cuts with plenty of marbling. These little flecks of fat meld into your ribeye during the cooking process and help it become soft and tender. Also, try to pick a ribeye steak that is at least an inch thick. The thicker the steak, the more easily you are able to prepare it to your chosen temperature without losing any flavor or texture.
  • Grass-fed or Grain-fed: Grass-fed cows typically yield leaner meat because of their diet and ability to free roam. This makes it a healthier choice with a slightly more complex flavor compared to grain-fed steaks.
  • Using Frozen Steak: If using frozen steak, thaw completely before cooking.
  • Keep Your Pan Hot: Make sure your pan is hot before adding your steak or it won’t sear properly.
  • Searing Your Steaks: If you sear the outside of your meat, you will make sure all of the tasty juices are sealed inside.
  • Use a Meat Thermometer: Using a thermometer takes the guesswork out of cooking your ribeye steak. It is the easiest way to know when the steak has reached your desired temperature. Refer to my graphic for temperatures of each level of steak doneness.
  • Allow Steak to Rest: Resting your ribeye after cooking allows the juices to reabsorb and distribute throughout your meat, leaving you with the most juicy and tender result.
Spooning butter over ribeye steak.

What to Serve With The Ultimate Ribeye Steak

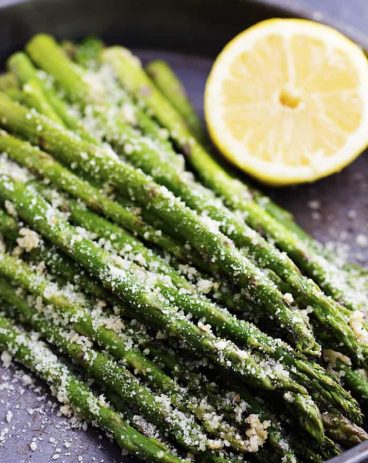
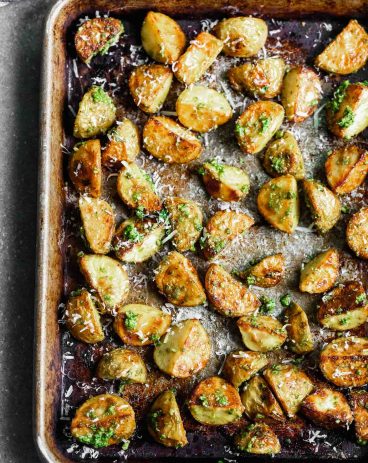
With a steak this good, you have to serve it up alongside other hearty, tasty sides! Steak and potatoes is always a classic- whether you want mashed, roasted, or hasselback potatoes, the flavor of each will pair perfectly with a tender, flavorful steak. I also like serving steaks up with some fresh grilled veggies and a casserole for a complete, satisfying meal.

Cooked ribeye steak garnished with rosemary, thyme, and garlic.

Storing and Reheating Leftover Ribeye

You can easily store and reheat your steak for a tasty, lavish meal on the go!

  • In the Refrigerator: Store your cooked steak in an airtight container. It will keep in the fridge for up to 3 days.
  • In the Freezer: You can either wrap your steak in plastic wrap or keep it in an airtight container. It will stay good for up to 2 months.
  • Reheating: First, thaw your steak overnight in the fridge. Next, let it sit at room temperature for 30 minutes. You can then warm it up in a skillet until internal temperatures reach at least 120 degrees Fahrenheit.
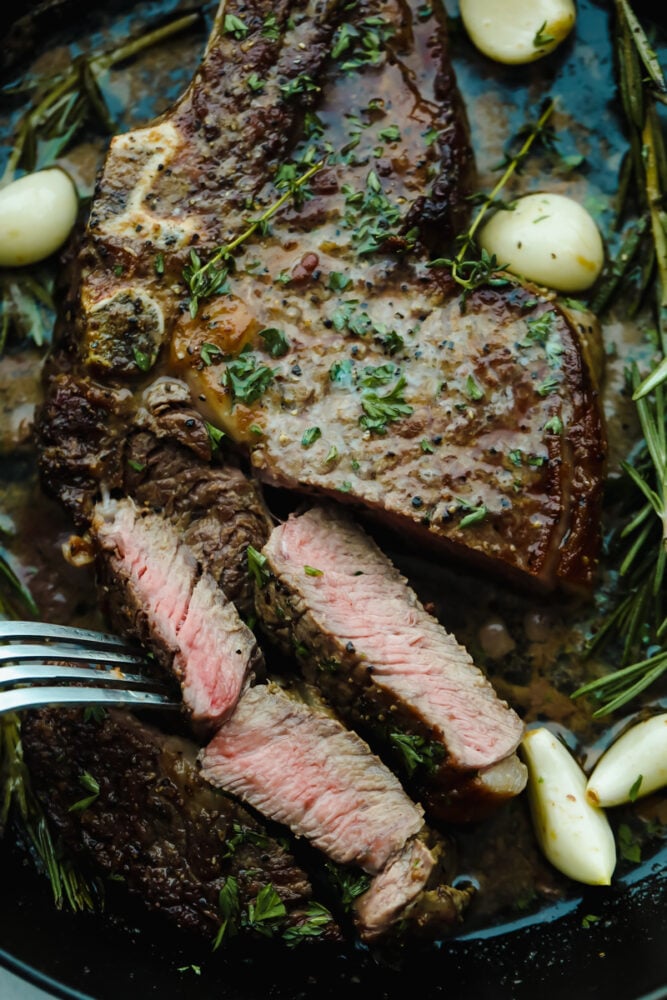
Cutting off slices of steak.
Print

Ribeye Steak Recipe

Achieving steakhouse-worthy flavors doesn’t have to be difficult! The ultimate ribeye steak is juicy, flavorful, and seared to perfection all in the comfort of your kitchen.
Course Dinner, Main Course
Cuisine American
Keyword how to make ribeye steak, ribeye steak recipe
Prep Time 5 minutes
Cook Time 15 minutes
Total Time 20 minutes
Servings 4 steaks
Calories 510kcal
Author Alyssa Rivers

Ingredients

  • 1 pound ribeye steak
  • Salt and Pepper
  • 2 Tablespoons olive oil
  • 1/2 cup butter
  • 8 garlic cloves smashed
  • Fresh rosemary and thyme sprigs

Instructions

  • Let the steak rest for 30 minutes to come to room temperature. Salt and pepper to taste.
  • In a medium-sized skillet over medium-high heat the olive oil. Once it starts to smoke add the steaks to the skillet. Sear on all of the sides until they have a golden-brown crust. Add the butter and let melt in the skillet. Add in the garlic and fresh sprigs.
  • Reduce the heat to medium and let them cook until they reach the desired internal temperature. Spoon the butter over the steak while they are cooking.

Nutrition

Calories: 510kcal | Carbohydrates: 2g | Protein: 23g | Fat: 46g | Saturated Fat: 23g | Polyunsaturated Fat: 2g | Monounsaturated Fat: 19g | Trans Fat: 1g | Cholesterol: 130mg | Sodium: 263mg | Potassium: 335mg | Fiber: 1g | Sugar: 1g | Vitamin A: 727IU | Vitamin C: 2mg | Calcium: 26mg | Iron: 2mg


from The Recipe Critic https://ift.tt/37kY2mR
https://ift.tt/3jhwhkR

मंगलवार, 3 अगस्त 2021

Amazing Homemade Applesauce

Homemade applesauce is a simple way to incorporate all of the apples that I have in my fridge! PLUS as a bonus, my kids are more inclined to eat something so simple!

Homemade applesauce is so versatile! You can serve it at breakfast, lunch, dinner, and dessert or you can use it as a quick snack or make your own to add to recipes that use it as an ingredient! Try topping this on my granola or on cinnamon almonds! You can also use it as the fresh applesauce needed in my carrot cake!

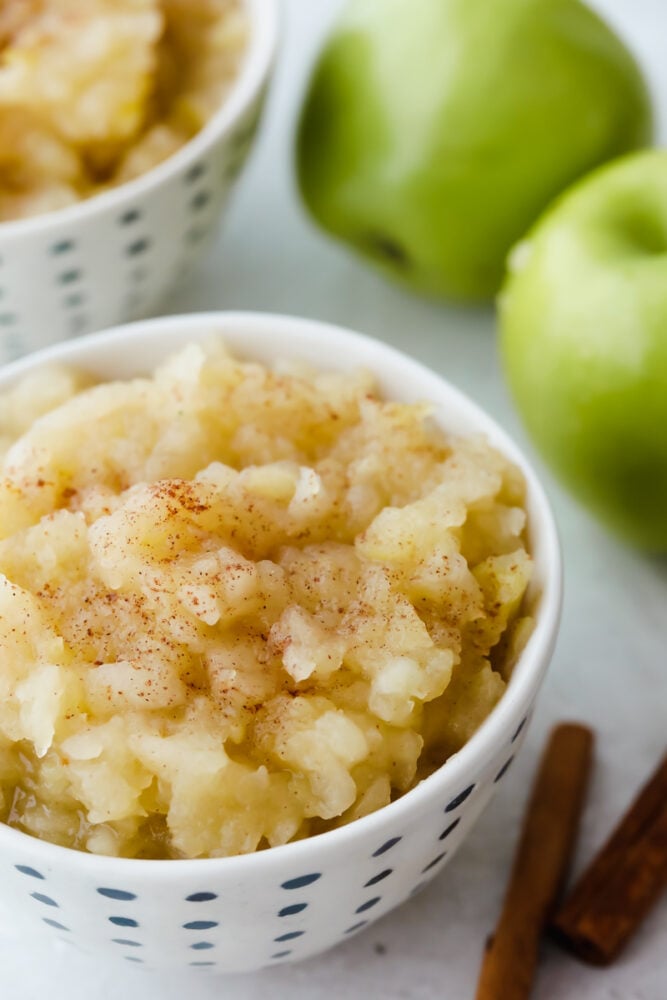
Applesauce in a bowl topped with cinnamon.

Why is Homemade Applesauce So Amazing?

I love things that remind me of simpler times and homemade applesauce does just that! Remember when your parents would make your lunch as a kid and inside, there would be some delicious applesauce? Those were the good ol’ days! I love the way that it takes you back to your childhood and is such an inexpensive way to create something new and delicious!

This homemade applesauce recipe is great to have on hand and use as a substitute in baking! Try using it while baking cakes, bread, and even muffins! It gives a different taste and texture to your baking and can be an easy way to switch up your recipes! Also, who knew that applesauce was so great for your digestion? Make some to keep on hand and try it as a mid-day snack. It’s healthier AND it will keep your insides happy!

What You Need For Homemade Applesauce

Quick and easy, homemade applesauce is something that even the most beginner of cooks can make! For all ingredient measurements, see the recipe card at the end of the post!

  • Apples:  We used Granny Smith apples.
  • Water: You can use room temperature water for this recipe.
  • Sugar: The sugar is used to balance out any natural tartness from the apples.
  • Lemon Juice: You can use this from either a fresh lemon or lemon juice that you already have on hand.
  • Cinnamon: Using cinnamon is optional. It’s great to use this when eating the applesauce on its own but if you are using the homemade applesauce as an ingredient in another recipe then leave this out!

How to Make Homemade Applesauce

The taste of this homemade applesauce is subtle but has just enough flavor that you keep on coming back for more! I especially love that it is something that I can make often and use it so much without getting sick of it.

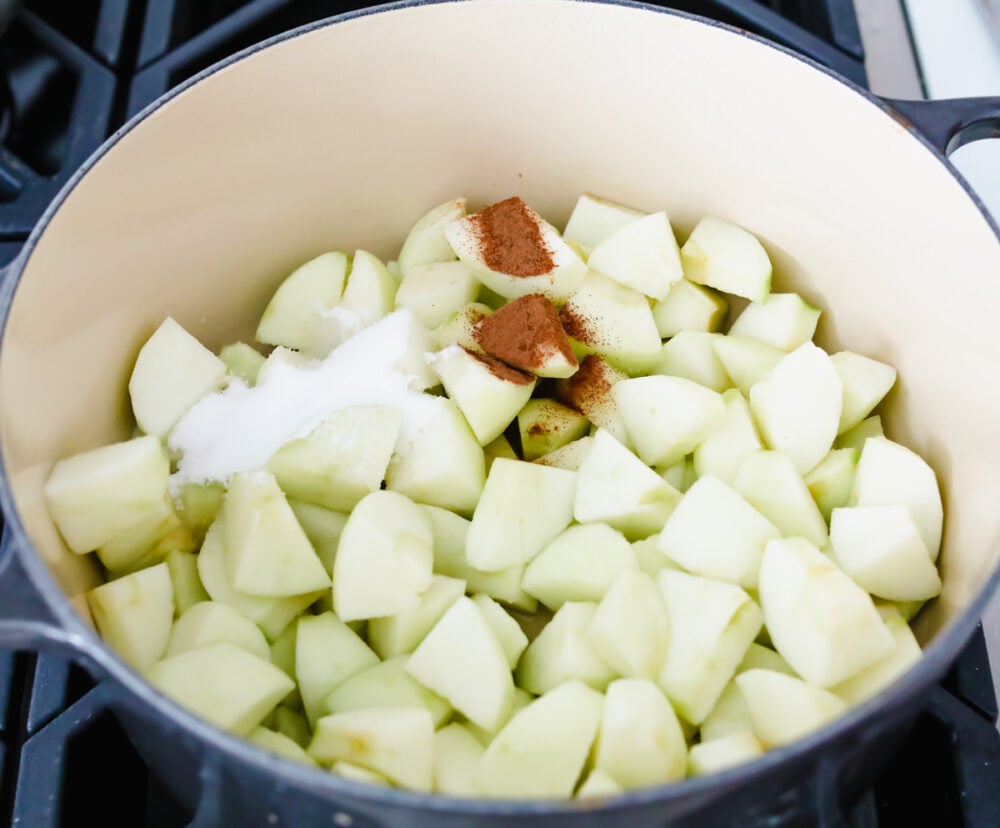
  1. Peel your apples: After peeling them, chop them into 1-inch pieces. Add them to a large pot with water, sugar, lemon juice, and cinnamon.
  2. Bring to a boil: After you’ve brought them to a boil, then reduce the heat to medium-low and simmer for 25-30 minutes.
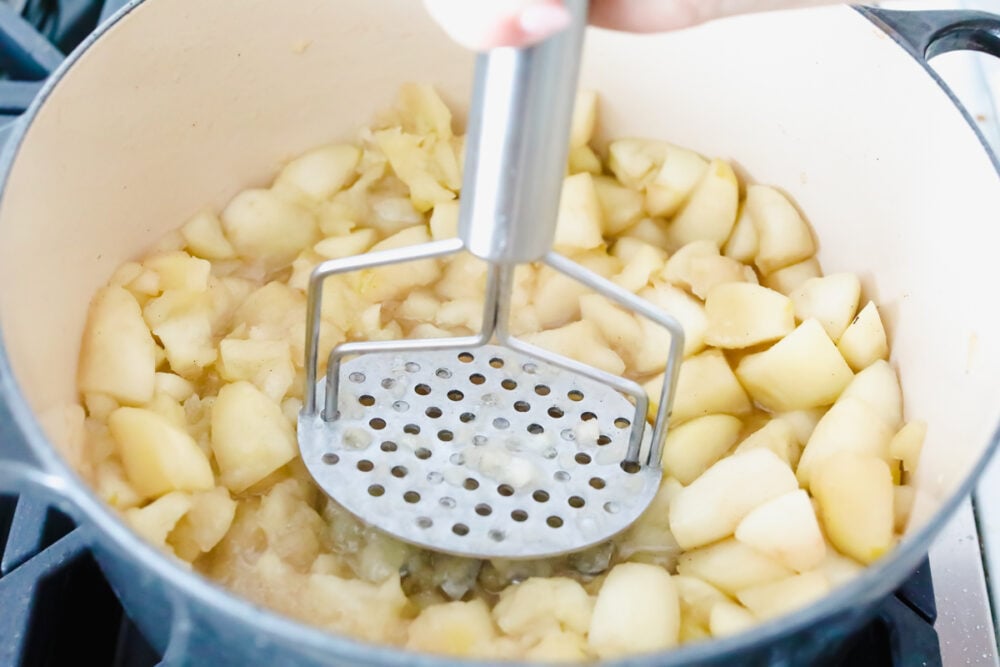
  3. Mash the apples: Once your apples are tender then mash to desired consistency.
  4. NOTE: For a thinner applesauce use an immersion blender, food processor, or blender.
Chopped apples in a bowl with sugar and cinnamon being added as ingredients.

Quick Tips for the Perfect Homemade Applesauce

Applesauce is a staple in our house! Here are some quick tips for making your applesauce just right. These will help make your homemade applesauce last longer and retain its delicious flavor!

  • Choosing your apples: You can use any kind of apples to make your applesauce. The good news is that they don’t need to be super crisp because you are going to be mashing them up anyways!
  • Cutting the apples: Make sure that when you chop up the apples that you chop them into evenly sized pieces. This helps them cook evenly so that they are all cooked through at the same time!
  • Adding the sugar: Sometimes your apples are sweet and some are more tart. You can add or take away the amount of sugar to get the sweetness level to just where you would like it!
Cooked apples being mashed up.

Storing Homemade Applesauce

  • In the Refrigerator: Keep in a sealed container for a week to 10 days in the fridge.
  • In the Freezer: You can place applesauce in freezer bags, or sealed plastic storage containers. You can also pour some in ice cube trays if you are using smaller amounts for baby food or baking! Homemade applesauce can last in your freezer for about 6-8 months.
  • Thawing Frozen Applesauce: To thaw frozen applesauce, remove the container from the refrigerator and place it in the fridge for several hours or overnight. The water may separate from the apple but once thawed, give it a good mix and that will help in returning it to its original texture.
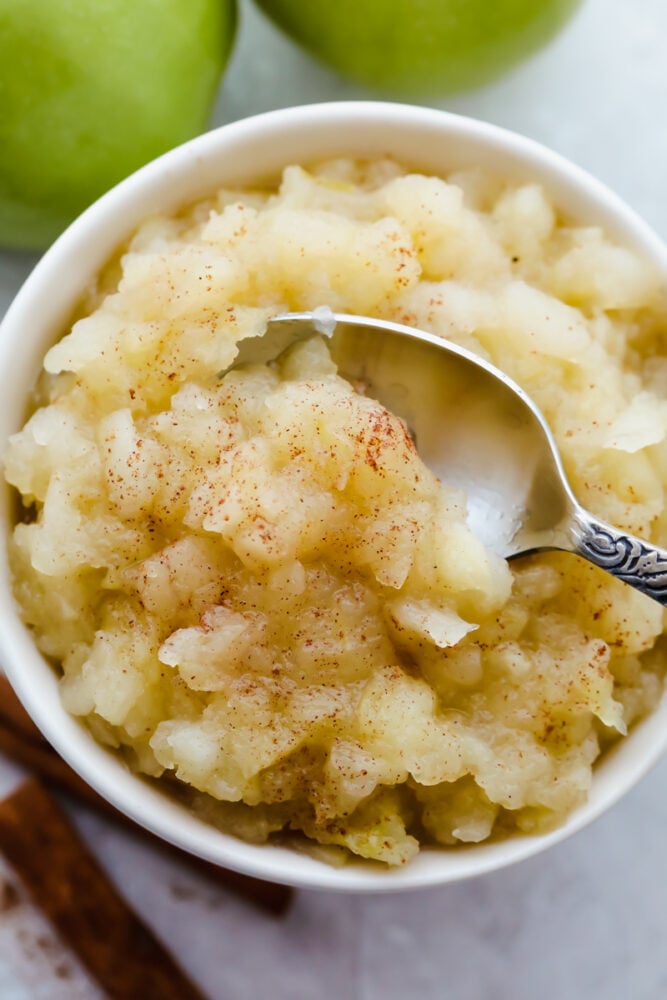
Finished homemade applesauce with spoon, ready to eat.
Print

Homemade Applesauce

Homemade applesauce is a simple way to incorporate all of the apples that I have in my fridge! PLUS as a bonus, my kids are more inclined to eat something so simple!
Course Sauce
Cuisine American
Keyword applesauce, homemade applesauce, homemade applesauce recipe
Prep Time 10 minutes
Cook Time 30 minutes
Total Time 40 minutes
Servings 4 servings
Calories 286kcal
Author Alyssa Rivers

Ingredients

  • 10-12 apples we used Granny Smith
  • 3/4 cup water
  • 1/4 cup sugar
  • Juice from half a lemon
  • 1 teaspoon cinnamon optional

Instructions

  • Peel your apples and chop them into 1-inch pieces. Add them to a large pot with water, sugar, lemon juice, and cinnamon.
  • Bring to a boil, then reduce the heat to medium-low and simmer for 25-30 minutes.
  • Once your apples are tender then mash to desired consistency.

Notes

For a thinner applesauce use an immersion blender, food processor, or blender.  

Nutrition

Calories: 286kcal | Carbohydrates: 76g | Protein: 1g | Fat: 1g | Saturated Fat: 1g | Polyunsaturated Fat: 1g | Monounsaturated Fat: 1g | Sodium: 7mg | Potassium: 489mg | Fiber: 11g | Sugar: 60g | Vitamin A: 247IU | Vitamin C: 21mg | Calcium: 34mg | Iron: 1mg


from The Recipe Critic https://ift.tt/2WLduGV
https://ift.tt/3CaCAiC