सोमवार, 9 अगस्त 2021

Zucchini Oat Chocolate Chip Cookies

These zucchini chocolate chip cookies are a twist on the traditional cookie recipe and are absolutely delicious! Cookies are the ultimate comfort food that we all love and adore and after trying these, I bet you won’t be able to just have one!

Zucchini chocolate chip cookies are just as delicious as they sound. These cookies are delightfully soft and ooey-gooey. If you love cookies some other recipes to try are this no-bake, these delicious s’mores, or these amazing pecan cookies.

Cookie broken in half with melted chocolate chips.

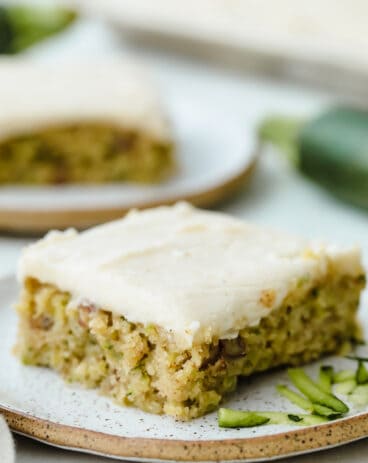
Zucchini Chocolate Chip Cookies

These zucchini chocolate chip cookies are the BEST! I always have a few extra zucchini lying around at the end of the summer that I don’t know what to do with. Because this is the time of year for zucchinis, I get burnt out of all of the traditional recipes. Making cookies is a favorite for me and these zucchini cookies are quick and easy! This recipe is a game-changer and an easy way to switch things up! It’s a treat that your family and friends will gobble right up.

I love these cookies so much because it’s a mix between zucchini bread and oatmeal chocolate chip cookies. Just like when you bake with zucchini in other recipes, this creates a fluffy, cake-like texture. It has a moist and tender center with the melted ooey-gooey chocolate chips. It is light and tasty! Such a great way to mask that vegetable in something sweet! I am embracing all of the extra zucchini and even asking for more because these are so delicious! They disappear off of my counter so quickly and I know you will love them too!!

Ingredients You Will Need for Zucchini Cookies

This recipe for zucchini chocolate chip cookies is so simple and all you need is some staple pantry ingredients plus some zucchini! Be ready to enjoy these delicious cookies because I know that you’ll make them again and again! See the recipe card below for a full list of the ingredient measurements.

  • Flour: I used all purpose flour for this recipe.
  • Cinnamon: This ingredient helps to add a little bit of additional flavor to the cookies
  • Baking soda: This will help make your cookies chewy and soft!
  • Salt: Salt acts as a flavor enhancer in recipes.
  • Oats: Old fashioned oats (rolled oats) will yield a chewy texture to these cookies. They are richer and heartier than quick oats.
  • Butter: Make sure that you use unsalted butter and that it is softened (NOT melted) before using it in the recipe!
  • Sugar: This will help add sweetness to the dish.
  • Brown sugar: When you are measuring this, make sure that it is packed into the measuring cup and not just lightly scooped.
  • Egg: The egg will help bind the ingredients together.
  • Vanilla: This enhances the flavor of the cookies!
  • Zucchini: If you want the zucchini to disappear in the cookies, make sure to peel it before shredding. If not, just shredded is fine!
  • Chocolate chips: You can use milk chocolate, semi sweet or dark chocolate chips in this recipe.
4 photos of the baking process of adding and mixing the ingredients together.

How to Make Zucchini and Oatmeal Chocolate Chip Cookies

These zucchini cookies are so simple and quick to make! Add them to your end-of-summer zucchini recipe rotation and you will be so glad that you tried them!

  1. Preheat and mix: Preheat oven to 350. In a medium bowl whisk together flour, cinnamon, baking powder, oats, and salt.
  2. Cream, mix and fold: In a large bowl cream butter and sugars until light and fluffy. Add egg, vanilla, and zucchini and mix well. Add dry ingredients to wet ingredients and mix until incorporated. Fold in the chocolate chips.
  3. Scoop and bake: Drop spoonfuls of cookie dough onto a lightly greased cookie sheet at least 2 inches apart. Bake for 12-14 minutes until golden brown. Allow them to cool 10 minutes on the baking sheet before transferring to a cooling rack or sheet of parchment or wax paper to finish cooling completely.
Scooping the dough onto parchment paper.

Quick Tips for Baking Zucchini Oat Cookies

Sometimes it helps to have a few extra tips on hand when baking these cookies. Here are a couple of ideas that will help make these cookies delicious and easy!

  • Double the recipe and freeze the dough! These cookies are so easy to make and store (see storing tips below) that you might as well save yourself some time!
  • Peel the zucchini: Sometimes kid wont eat something if they see green, right? If you want to conceal the zucchini more then go ahead and peel it before shredding. You’ll still get the same flavor but without the sight of green!
  • Crunchy cookies: If you would like a little bit more crunchy cookie instead of soft ones, bake them for an additional 3-4 minutes. Dipping the crunchier cookies in milk tastes delicious!
  • Change it up: Try adding walnuts to the recipe for a different, yummy taste!
Finished zucchini oat chocolate chip cookies.

Can I Make These Ahead and Store Them?

Yes! You can make these ahead or even freeze the dough for later! Follow these instructions and you can be enjoying these cookies all year round!

  • Freezing the dough: After making the dough, roll it up into small balls and place them onto a cookie sheet lined with parchment paper. Freeze for about an hour (or until solid) and then transfer them all to a freezer ziplock bag and freeze them for up to 3 months.
  • Cooking frozen dough: If you have frozen the dough ahead of time, take them out of the freezer and thaw them in the fridge (not on the counter). Once thawed, bake as normal.
  • Freezing baked cookies: If you want to prepare more cookies ahead of time, bake them all and freeze the extras for later! Place them into an airtight container. If you stack them, make sure to place parchment paper between each layer so that the cookies don’t stick to each other! They can be stored in the freezer for 2-3 months. When you are ready to eat, thaw them in the refrigerator.
Zoomed in photo of a finished zucchini oat chocolate chip cookie.
Print

Zucchini Oat Chocolate Chip Cookies

These zucchini oat chocolate chip cookies are a twist on the traditional cookie recipe and are absolutely delicious! Cookies are the ultimate comfort food that we all love and adore and after trying these, I bet you won't be able to just have one!!
Course Dessert
Cuisine American
Keyword zucchini chocolate chip cookies, zucchini cookies
Prep Time 10 minutes
Cook Time 15 minutes
Total Time 25 minutes
Servings 24 cookies
Calories 144kcal
Author Alyssa Rivers

Ingredients

  • 1 1/2 cups flour
  • 1 teaspoon cinnamon
  • 1/2 teaspoon baking soda
  • 1/4 teaspoon salt
  • 1 cup oats
  • 1/2 cup butter softened
  • 1/2 cup sugar
  • 1/3 cup brown sugar
  • 1 large egg
  • 1 teaspoon vanilla
  • 1 1/2 cups zucchini shredded
  • 1 cups chocolate chips

Instructions

  • Preheat oven to 350. In a medium bowl whisk together flour, cinnamon, baking powder, oats, and salt.
  • In a large bowl cream butter and sugars until light and fluffy. Add egg, vanilla, and zucchini and mix well. Add dry ingredients to wet ingredients and mix until incorporated. Fold in the chocolate chips.
  • Drop spoonfuls of cookie dough onto a lightly greased cookie sheet at least 2 inches apart. Bake for 12-14 minutes until golden brown. Allow cooling 10 minutes on the baking sheet before transferring to a cooling rack or sheet of parchment or wax paper to finish cooling completely.

Nutrition

Calories: 144kcal | Carbohydrates: 21g | Protein: 2g | Fat: 6g | Saturated Fat: 4g | Polyunsaturated Fat: 1g | Monounsaturated Fat: 1g | Trans Fat: 1g | Cholesterol: 19mg | Sodium: 90mg | Potassium: 29mg | Fiber: 1g | Sugar: 12g | Vitamin A: 146IU | Vitamin C: 1mg | Calcium: 17mg | Iron: 1mg


from The Recipe Critic https://ift.tt/2X5igiB
https://ift.tt/2X5mczT

रविवार, 8 अगस्त 2021

Pork Chops with an Apple Bacon Sauce

Pork Chops with an Apple Bacon Sauce are the answer to what’s for dinner! Savory pork is smothered in a sweet and salty sauce that is going to wow your tastebuds!

Pork is a protein-packed powerhouse food. Try pork in these tried and true favorites, Sweet and Sour, Easy Pork Schnitzel, and Juicy Air Fryer Pork Chops.

Pork chops with apples and bacon in a spicy sauce.

Skillet Pork Chops with Apples Recipe

I love a good pork dish, including my Fall of the Bone Ribs, Ham and Cheese Sliders, and my Mushroom Smothered Pork Chops. Now I can add these pork chops with apples! Hands down these are one of the best recipes I’ve ever had! The spicy rub on the pork begins the flavor punch with a touch of heat. Next, you cook it in the bacon drippings adding a layer of saltiness. Then you add the apples for caramelized sweetness. You and your loved ones are going to love this flavor explosion!

This is an easy recipe that comes together for an absolute show-stopping dish. Perfect for Sunday dinner or a great family weekday meal, when the week just calls for it. These pork chops with apples will look like you’ve slaved all day, but we’ll keep the secret to ourselves. The freshness that comes from the thyme and rosemary goes perfectly with the smokey bacon and spiced pork chops. Apples just complement the whole dish. This looks intimidating but trusts me, this is super easy and absolutely divine!

What You Need For Pork Chops with Apples

The ingredients come together for a combination of flavors that is unparallel. The sweetness from the apples and the saltiness from the bacon and pork is a combination made in heaven. You are going to love this pork chops with apple recipe as will your family. For all ingredients listings and measurements, see the recipe card below.

  • Bone in pork chops: Bone in creates a more tender moist pork chop, but you can use boneless too.
  • Salt and pepper: Add more or less to taste.
  • Brown sugar: Both dark and light brown sugar will both taste divine.
  • Chili powder: An earthy spicy spice adds a bit of heat.
  • Paprika: Made from dried red peppers, it adds a vibrant color and a mild flavor.
  • Italian seasoning: Make your own Italian seasoning for the best flavor.
  • Garlic powder: A pungent flavor that is golden in this recipe.
  • Bacon chopped: Bacon amps up the flavor and adds a nice salty taste.
  • Chicken broth: Mild in flavor it is a perfect broth to make the sauce.
  • Dijon mustard: Intense and complex mix of flavor creates a nice kick.
  • Cider vinegar: Acidity helps tenderize the meat and adds flavor.
  • Honey: Golden sweet honey adds flavor and a hint of carmalization.
  • Fresh thyme: Mince the fresh thyme, fresh will add a bright flavor.
  • Fresh rosemary: Fresh and aromatic, it pairs perfectly with pork.
  • Apple sliced: Use a good crisp sweet apple.

How to Cook Pork Chops and Apples

There are a few steps here but it comes together really easily. The apples will cook in the sauce giving them flavor as they soften. Make sure you cook your bacon till it’s crisp. It will add flavor and texture to the pork chops with the apple.

  1. Seasoning for Pork: Salt and pepper the pork chops. In a small bowl combine the brown sugar, chili powder, paprika, Italian seasoning, and garlic powder. Rub on all sides of the pork chops.
  2. Cook Bacon: In a large skillet add the bacon and cook until no longer pink. Remove from the pan with a slotted spoon and set aside on a plate.
  3. Cook Pork: Add the pork chops to the skillet and cook until no longer pink and 145 degrees. Remove the pork chops and set aside on a plate.
  4. Sauce for Pork Chops: Add the chicken broth, Dijon Mustard, cider vinegar, honey, thyme and rosemary. Whisk until it starts to simmer and reduce the heat and add apples. Let the sauce deglaze and simmer the apples until they start to soften.
  5. Put it together: Add in the pork chops and bacon and allow to heat through.
Pork chops with spice rub, cooking bacon, the chops and apples.

Tips for Perfect Pork Chops With Apple Bacon Sauce

The pork cooks faster than you might think. You do not want to overcook it. The sauce will help keep the pork tender and moist. And the bacon will add flavor as well as keeping it juicy.

  • Pork: Pork chops are a lean cut of meat, especially if you use boneless pork chops. Lean meat will cook faster than other cuts. Use a meat thermometer and cook till the pork is 145 degrees. This way you’ll avoid dry pork. You can use both boneless and bone-in.
  • Size: Try to keep the pork chops the same size when you buy them, they will cook more evenly.
  • Spice: If you want to tone down the spice you can reduce the amount of chili powder. If you want it a bit spicer add a half a teaspoon more.
  • Bacon: Use thick cut bacon. It is easier to cut and cook. Plus it will add even more smokey goodness.
  • Apples: Any good sweet crisp apples will work. I like Jazz or Gala Apples. Avoid sour green apples. I find them too tart.

What to Serve With Pork Chops

These pork chops with apples and bacon are effortlessly incredible. These make a great family dinner. All you have to do is add some great side dishes to complete the meal. Pork chops go with so many dishes including Potatoes, Salad and Carrots. Round it out with some Bread and you have a meal worth sitting down for. Here are some other great options.

Making These Pork Chops in the Instant Pot

Pork is a fantastic candidate for cooking in the instant pot. It holds up so well in the instant and comes out tender and juicy. It makes for a hands-off option to this pork chops with apples dish.

  • Bacon: Turn the instant pot to saute and cook the bacon till done. Remove the bacon and set it aside.
  • Sear the Pork Chops: Place the seasoned pork chops in the instant pot and sear on both sides in the bacon fat.
  • Add: Add the rest of the sauce ingredients and apples and turn the instant pot to manual and cook for 8 -10 minutes. Let the pressuer relase manually. Serve with reserved bacon.
A pork chop with apples in a bacon sauce.
Print

Pork Chops with an Apple Bacon Sauce

Pork Chops with an Apple Bacon Sauce are the answer to what's for dinner! Savory pork is smothered in a sweet and salty sauce that is going to wow your tastebuds!
Course Dinner, Main Course
Cuisine American
Keyword pork chops with apples, skillet pork chops with apples
Prep Time 10 minutes
Cook Time 25 minutes
Total Time 35 minutes
Servings 4 people
Calories 438kcal
Author Alyssa Rivers

Ingredients

  • 3-4 bone in pork chops
  • salt and pepper
  • 1 tablespoons brown sugar
  • 1 teaspoon chili powder
  • 1/2 teaspoon paprika
  • 1 teaspoon Italian seasoning
  • 1 teaspoon garlic powder
  • 6 slices bacon chopped
  • 1 1/2 cups chicken broth
  • 1 Tablespoon dijon mustard
  • 2 Tablespoons cider vinegar
  • 2 Tablespoons honey
  • 1 Tablespoon fresh thyme minced
  • 1 Tablespoon fresh rosemary minced
  • 1 apple sliced

Instructions

  • Salt and pepper the pork chops. In a small bowl combine the brown sugar, chili powder, paprika, Italian seasoning, and garlic powder. Rub on all sides of the pork chops.
  • In a large skillet add the bacon and cook until no longer pink. Remove from the pan with a slotted spoon and set aside on a plate.
  • Add the pork chops to the skillet and cook until no longer pink and 145 degrees. Remove the pork chops and set aside on a plate.
  • Add the chicken broth, Dijon Mustard, cider vinegar, honey, thyme and rosemary. Whisk until it starts to simmer and reduce the heat and add apples. Let the sauce deglaze and simmer the apples until they start to soften.
  • Add in the pork chops and bacon and allow to heat through.

Nutrition

Calories: 438kcal | Carbohydrates: 21g | Protein: 32g | Fat: 25g | Saturated Fat: 8g | Polyunsaturated Fat: 4g | Monounsaturated Fat: 10g | Trans Fat: 1g | Cholesterol: 109mg | Sodium: 665mg | Potassium: 685mg | Fiber: 2g | Sugar: 16g | Vitamin A: 426IU | Vitamin C: 11mg | Calcium: 59mg | Iron: 2mg


from The Recipe Critic https://ift.tt/3As9b1X
https://ift.tt/3xwxyto

Perfect and Juicy Baked Chicken

This perfect and juicy baked chicken will be sure to get a WOW at your next family get-together! It is seasoned with a delightful array of spices and baked to perfection! Your tastebuds will thank you later!!

This chicken is AMAZING and you will not believe how easy it is to make! Within 5 minutes, you will have this chicken seasoned and ready to bake. It doesn’t get much better than that! If you love easy chicken recipes as much as I do then try my wings, chicken breast, and these thighs!

Baked chicken being served from a platter.

Why is This Chicken so Perfect and Juicy?

There is nothing better than a chicken that retains its natural juices after it’s cooked. This baked chicken is a home run recipe that delivers mouthwatering flavor AND texture. I have tried so many recipes and have been disappointed that the end result was always dry overcooked chicken. No matter how much sauce I would add to it to make it tolerable, it was just that. Tolerable. I wanted a recipe that was easy AND delivered delicious, juicy results and this recipe is exactly that!!

The brown sugar in this recipe helps to meat to sweat which is precisely how you are going to get that juice to remain even after baking. And guess what?? It’s easy too! No covering it in foil, no marinating it beforehand. It only takes a quick 5 minutes to put together a rub! A great recipe doesn’t have to take a lot of time and this is SO tasty. Your family will love it!!

Ingredients You Will Need

Open up that spice drawer and I bet that you already have all that you need in order to make this rub for your chicken. You will love the subtle spice but mixed with the brown sugar, it doesn’t take on too much heat so even the kids will enjoy it! See the recipe below for a list of full ingredient measurements.

  • Chicken breasts: Make sure that your chicken is either fresh or thawed. The rub won’t stick to frozen chicken!
  • Brown sugar: This is the secret ingredient that will retain all of the natural juice from the chicken.
  • Chili powder: Chili powder adds a mild spice to the dish.
  • Paprika: Paprika naturally enhances the flavor and taste of the meat.
  • Italian seasoning: Try using this Italian seasoning that will customize this dish!
  • Garlic powder: The fine texture of garlic powder helps distribute this taste evenly through the rub.
Raw chicken with a rub of spices on it.

How to Make Juicy Baked Chicken

The best part of this chicken is the combination of the golden, caramelized outside with the juicy and tender inside. Because of this, the chicken falls apart in your mouth and fills you right up!

  1. Get the oven ready: Preheat oven to 425 degrees. Prepare your chicken by using a rubber mallet to pound the chicken to even thickness.
  2. Mix sugar and spices: In a small bowl add the brown sugar, chili powder, paprika, Italian seasoning and garlic powder.
  3. Coat chicken: Rub evenly and on both sides of the chicken.
  4. Grease pan and bake: Grease a 9×13 inch pan and add the chicken. Bake in preheated oven for 15-20 minutes or until a thermometer reads 165 degrees.
  5. Let it rest!: Remove the chicken from the oven and let rest for 10 minutes to adsorb the juices.
Chicken that is cooked and ready to eat.

Tips for Cooking Chicken

Sometimes cooking chicken doesn’t turn out right because of a small step missed here or there. Read through these tips before cooking so that you can make sure to get the best result!

  • How do I know if my chicken is done? This is a very common question! When cooking meat, it’s always important to check the internal temperature before eating. An internal digital meat thermometer can help you do just that! Stick the meat thermometer into the thickest part of the breast. Chicken is safe to eat at 165°F.
  • If you want the best, let it rest! A lot of times, people will skip this part… Don’t! It’s so easy and SO important! Once your meat is done cooking and out of the oven, leave it alone! This is the moment where your meat is locking in all of the juice and can dry out if you cut into it soon!
  • Thick chicken breast: If you feel like your chicken breast is too thick, you can consider pounding it down so that your chicken is all similar in size. This will help tenderize the meat as well as let them all cook evenly. If they are already thin, skip the pounding.
  • High Temperature: If you are worried about drying out your chicken or burning it, don’t be tempted to lower the temperature. A lower temperature means that you have to cook your chicken longer, therefore drying it out! The high temperature and lower cooking time is what will deliver on the juicy, tender inside!

How to Store Baked Chicken

This dish is so yummy, you may want to bake extra for leftovers! Here is how you can enjoy this chicken multiple days in a row! It is quick and simple!

  • Refrigerate: Wait until the chicken has cooled completly and then place it into an airtight container. It can be stored for up to 3 days in the fridge.
  • Freeze: Once the chicken is cool, freeze leftovers in an airtight freezer-safe storage container for up to 3 months.
  • Reheat: Let the chicken thaw in the fridge overnight before reheating. Set oven to 350°F and place chicken in a baking dish. Warm chicken to desired temperature. Enjoy!
Baked chicken cut up with broccoli in a bowl over brown rice.

Ways to Use Baked Chicken

The best part about baking chicken breasts is that they are SO versatile. I love that I can cook it and eat it one way and then use the leftovers for something else the next day! That’s two meals in one!

  • In a salad: Put together a favorite salad recipe, chop this this chicken up into cubes and add it in as some extra protien!
  • With Vegetables: Pair this chicken breast with some vegetables. I love it with broccoli, asparagus or some cooked carrots.
  • When a recipe calls for chicken: Use this! It’s such a delicious, flavorful chicken! You could use it in stir fry, with rice, or even as a snack. Make some extra and have it on hand for future recipes and make your cooking experience that much easier!
Print

Perfect and Juicy Baked Chicken

This perfect and juicy baked chicken will be sure to get a WOW at your next family get-together! It is seasoned with a delightful array of spices and baked to perfection! Your tastebuds will thank you later!!
Course Dinner, Main Course
Cuisine American
Keyword asian chicken recipes, baked chicken, baked chicken recipe
Prep Time 10 minutes
Cook Time 20 minutes
Total Time 30 minutes
Servings 4 chicken breasts
Author Alyssa Rivers

Ingredients

  • 1 pound chicken breasts
  • 1 tablespoons brown sugar
  • 1 teaspoon chili powder
  • 1/2 teaspoon paprika
  • 1 teaspoon Italian seasoning
  • 1 teaspoon garlic powder

Instructions

  • Preheat oven to 425 degrees. Prepare your chicken by using a rubber mallet to pound the chicken to even thickness.
  • In a small bowl add the brown sugar, chili powder, paprika, Italian seasoning, and garlic powder.
  • Rub evenly and on both sides of the chicken.
  • Grease a 9×13 inch pan and add the chicken. Bake in preheated oven for 15-20 minutes or until a thermometer reads 165 degrees.
  • Remove the chicken from the oven and let rest for 10 minutes to adsorb the juices.


from The Recipe Critic https://ift.tt/3lNe4yB
https://ift.tt/3lIdou0

शुक्रवार, 6 अगस्त 2021

Dole Pineapple Whips

Dole Pineapple Whips are the perfect summertime treat that you can make at home. Similar to Disneyland’s and Hawaii’s Dole whips, they are refreshing and quick.

Summer wouldn’t be complete without refreshing drinks to help cool down. Try these winners, Frozen Lemonade, Pina Coladas, and Horchata!

Dole pineapple whip in a glass with fresh pineapple garnish.

The Best Pineapple Dole Whips

One of my FAVORITE things to do in Hawaii was going to the Dole Pineapple Plantation. I begged to go there every day that we were there and I was lucky enough to get to go there twice. Going and getting one of these pineapple dole whips is worth a trip to Hawaii. Soft serve creamy pineapple ice cream with pineapple juice surrounding it making it the best ice cream float you will ever have! It was so fun seeing how huge the plantation is and how the pineapple grows and is harvested. After walking around for a bit, we HAD to get a pineapple dole whips. It literally blows your mind with how amazing it is.

Nothing compares to a Hawaiian pineapple and they are perfectly ripe and sweet! I couldn’t wait to get home and try this recipe for homemade pineapple whips! These were easy to make and really did resemble a dole pineapple whip. Pineapple whips are soft and creamy and so delicious! They are absolutely delicious! Apparently, they are in such high demand they now serve them at all Six Flags and at Disneyland. But you don’t have to travel further than your kitchen for one of these delectable drinks.

What you need for Pineapple Dole Whips Recipe

Simple ingredients combine to make a tropical paradise in a glass. You are going to have this recipe for dole pineapple whips memorized because you will want to make it every day.

  • Frozen pineapple chunks: You can use canned or fresh pineapple that has been frozen. Also look for frozen pineapple in your freezer section.
  • Lemon juice: Fresh lemon juice would be best but you can use store bought.
  • Lime juice: Fresh lime juice is the best and adds zing and freshness.
  • Sugar: Adds a bit of sweetness. Use less or more depending on your taste.
  • Vanilla ice cream: Gives the dole whip a nice creamy texture.
  • Pineapple Juice: Adds extra bit of pineapple flavor and gives it the best consistency.

How to Make Dole Whips

The key to making this dole whip is to have a really good blender. You will want to make sure this is smooth and not chunky.

  1. Blend: Place the frozen pineapple, lemon juice, lime juice, sugar, vanilla ice cream and pineapple juice in a blender. Blend until smooth.
  2. Freeze: Put in a gallon sized bag and let freeze for 1 hour or until it reaches desired consistency.
  3. Make it a float (Optional): Scoop the mixture into a cup and pour pineapple juice on top to make it a float!
Adding lemon juice, sugar, ice cream and pineapple juice to blend up.

Quick Tips For Easy Dole Pineapple Whips

Pineapple Dole whips are super refreshing and will cool you and your family off on hot summer days, or can make the perfect evening finisher. Just like these other ice cream treats, Brownie Batter, Raspberry Cheesecake, and Ice Cream in a Bag, this will make your summer amazing!

  • Blend: The key to a smooth creamy pineapple whip is to have a great blender. One that is high powered and can handle the frozen fruit. If you feel like your blender can’t, don’t fret. Just cut the recipe in half and blend half at a time. Then put together to freeze. Also letting the pineapple thaw slightly will help it blend up easier.
  • Freeze: Placing it in the freezer allows it to firm up to a good consisentcy. This step can be skipped if you like your consistency and just can’t wait to sip it. I don’t blame you for not waiting either.
Collage of Alyssa at the Dole pineapple plantation.

Variations to Your Pineapple Dole Whips

Pineapple Dole Whips are a favorite but if you don’t love pineapple you can change it out for a different fruit. The basic recipe would stay the same. Adjust the juice to fit the fruit you choose.

  • Fruit: If you want to mix the pineapple with other fruit or exchange it for a different fruit, the sky is the limit on flavors. Try frozen bananas, peaches, strawberries, raspberries and mangos.
  • Sugar: Feel free to use less sugar if you want more of a tart flavor or add more for more sweetness. You can also switch it out for a sugar subsitute of choice, such as stevia for lower carbs.
  • Ice Cream: Vanilla is the perfect mild flavor to compliment pineapple, but you can substitute out for frozen yogurt, sherbert, or even frozen bananas. The frozen bananas are a great non-dairy alternative, although it will change the flavor a bit.
Creamy texture of a pineapple whip up close.
Print

Dole Pineapple Whips

Dole Pineapple Whips are the perfect summertime treat that you can make at home. Similar to Disneyland's and Hawaii's Dole whips, they are refreshing and quick.
Course Dessert, Drinks
Cuisine American
Keyword dole pineapple whips, pineapple beverage, pineapple dole whips, pineapple whips
Prep Time 10 minutes
Total Time 10 minutes
Servings 4 Servings
Calories 546kcal
Author Alyssa Rivers

Ingredients

  • 2 cups frozen pineapple chunks
  • 2 tablespoons lemon juice
  • 2 tablespoons lime juice
  • 1/3 cup sugar
  • 1 cup vanilla ice cream
  • 1/2 cup Pineapple Juice

Instructions

  • Place the frozen pineapple, lemon juice, lime juice, sugar, vanilla ice cream and pineapple juice in a blender. Blend until smooth.
  • Put in a gallon sized back and let freeze for 1 hour or until it reaches desired consistency.
  • Scoop the mixture into a cup and pour pineapple juice on top to make it a float!

Notes

Updated on August 6, 2021
Originally Posted on September 12, 2013

Nutrition

Calories: 546kcal | Carbohydrates: 64g | Protein: 3g | Fat: 33g | Saturated Fat: 21g | Cholesterol: 122mg | Sodium: 37mg | Potassium: 418mg | Fiber: 4g | Sugar: 57g | Vitamin A: 1453IU | Vitamin C: 32mg | Calcium: 103mg | Iron: 1mg


from The Recipe Critic https://ift.tt/3lKoT46
https://ift.tt/3Cn1fko