Alyssa Rivers August 06 लेबलों वाले संदेश दिखाए जा रहे हैं. सभी संदेश दिखाएं

शुक्रवार, 6 अगस्त 2021

Dole Pineapple Whips

Dole Pineapple Whips are the perfect summertime treat that you can make at home. Similar to Disneyland’s and Hawaii’s Dole whips, they are refreshing and quick.

Summer wouldn’t be complete without refreshing drinks to help cool down. Try these winners, Frozen Lemonade, Pina Coladas, and Horchata!

Dole pineapple whip in a glass with fresh pineapple garnish.

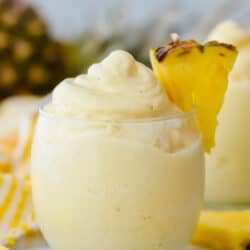
The Best Pineapple Dole Whips

One of my FAVORITE things to do in Hawaii was going to the Dole Pineapple Plantation. I begged to go there every day that we were there and I was lucky enough to get to go there twice. Going and getting one of these pineapple dole whips is worth a trip to Hawaii. Soft serve creamy pineapple ice cream with pineapple juice surrounding it making it the best ice cream float you will ever have! It was so fun seeing how huge the plantation is and how the pineapple grows and is harvested. After walking around for a bit, we HAD to get a pineapple dole whips. It literally blows your mind with how amazing it is.

Nothing compares to a Hawaiian pineapple and they are perfectly ripe and sweet! I couldn’t wait to get home and try this recipe for homemade pineapple whips! These were easy to make and really did resemble a dole pineapple whip. Pineapple whips are soft and creamy and so delicious! They are absolutely delicious! Apparently, they are in such high demand they now serve them at all Six Flags and at Disneyland. But you don’t have to travel further than your kitchen for one of these delectable drinks.

What you need for Pineapple Dole Whips Recipe

Simple ingredients combine to make a tropical paradise in a glass. You are going to have this recipe for dole pineapple whips memorized because you will want to make it every day.

  • Frozen pineapple chunks: You can use canned or fresh pineapple that has been frozen. Also look for frozen pineapple in your freezer section.
  • Lemon juice: Fresh lemon juice would be best but you can use store bought.
  • Lime juice: Fresh lime juice is the best and adds zing and freshness.
  • Sugar: Adds a bit of sweetness. Use less or more depending on your taste.
  • Vanilla ice cream: Gives the dole whip a nice creamy texture.
  • Pineapple Juice: Adds extra bit of pineapple flavor and gives it the best consistency.

How to Make Dole Whips

The key to making this dole whip is to have a really good blender. You will want to make sure this is smooth and not chunky.

  1. Blend: Place the frozen pineapple, lemon juice, lime juice, sugar, vanilla ice cream and pineapple juice in a blender. Blend until smooth.
  2. Freeze: Put in a gallon sized bag and let freeze for 1 hour or until it reaches desired consistency.
  3. Make it a float (Optional): Scoop the mixture into a cup and pour pineapple juice on top to make it a float!
Adding lemon juice, sugar, ice cream and pineapple juice to blend up.

Quick Tips For Easy Dole Pineapple Whips

Pineapple Dole whips are super refreshing and will cool you and your family off on hot summer days, or can make the perfect evening finisher. Just like these other ice cream treats, Brownie Batter, Raspberry Cheesecake, and Ice Cream in a Bag, this will make your summer amazing!

  • Blend: The key to a smooth creamy pineapple whip is to have a great blender. One that is high powered and can handle the frozen fruit. If you feel like your blender can’t, don’t fret. Just cut the recipe in half and blend half at a time. Then put together to freeze. Also letting the pineapple thaw slightly will help it blend up easier.
  • Freeze: Placing it in the freezer allows it to firm up to a good consisentcy. This step can be skipped if you like your consistency and just can’t wait to sip it. I don’t blame you for not waiting either.
Collage of Alyssa at the Dole pineapple plantation.

Variations to Your Pineapple Dole Whips

Pineapple Dole Whips are a favorite but if you don’t love pineapple you can change it out for a different fruit. The basic recipe would stay the same. Adjust the juice to fit the fruit you choose.

  • Fruit: If you want to mix the pineapple with other fruit or exchange it for a different fruit, the sky is the limit on flavors. Try frozen bananas, peaches, strawberries, raspberries and mangos.
  • Sugar: Feel free to use less sugar if you want more of a tart flavor or add more for more sweetness. You can also switch it out for a sugar subsitute of choice, such as stevia for lower carbs.
  • Ice Cream: Vanilla is the perfect mild flavor to compliment pineapple, but you can substitute out for frozen yogurt, sherbert, or even frozen bananas. The frozen bananas are a great non-dairy alternative, although it will change the flavor a bit.
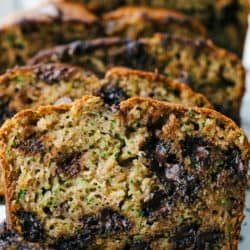
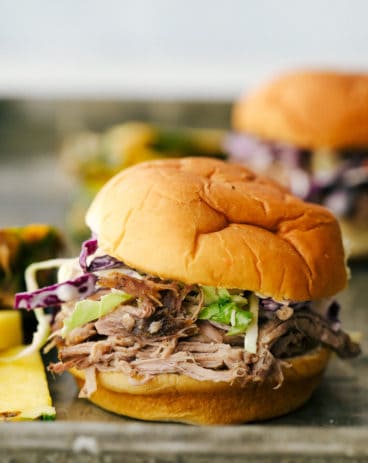
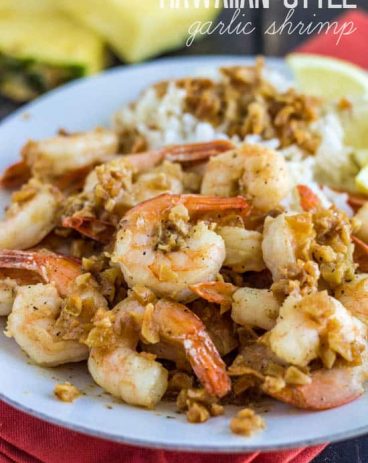
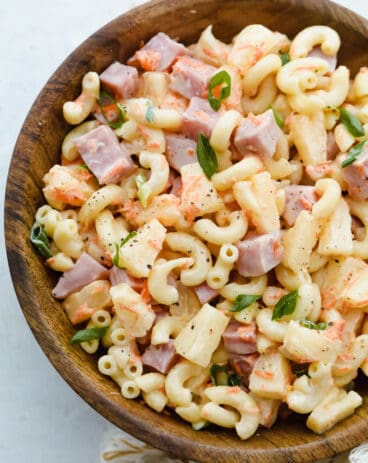
Creamy texture of a pineapple whip up close.
Print

Dole Pineapple Whips

Dole Pineapple Whips are the perfect summertime treat that you can make at home. Similar to Disneyland's and Hawaii's Dole whips, they are refreshing and quick.
Course Dessert, Drinks
Cuisine American
Keyword dole pineapple whips, pineapple beverage, pineapple dole whips, pineapple whips
Prep Time 10 minutes
Total Time 10 minutes
Servings 4 Servings
Calories 546kcal
Author Alyssa Rivers

Ingredients

  • 2 cups frozen pineapple chunks
  • 2 tablespoons lemon juice
  • 2 tablespoons lime juice
  • 1/3 cup sugar
  • 1 cup vanilla ice cream
  • 1/2 cup Pineapple Juice

Instructions

  • Place the frozen pineapple, lemon juice, lime juice, sugar, vanilla ice cream and pineapple juice in a blender. Blend until smooth.
  • Put in a gallon sized back and let freeze for 1 hour or until it reaches desired consistency.
  • Scoop the mixture into a cup and pour pineapple juice on top to make it a float!

Notes

Updated on August 6, 2021
Originally Posted on September 12, 2013

Nutrition

Calories: 546kcal | Carbohydrates: 64g | Protein: 3g | Fat: 33g | Saturated Fat: 21g | Cholesterol: 122mg | Sodium: 37mg | Potassium: 418mg | Fiber: 4g | Sugar: 57g | Vitamin A: 1453IU | Vitamin C: 32mg | Calcium: 103mg | Iron: 1mg


from The Recipe Critic https://ift.tt/3lKoT46
https://ift.tt/3Cn1fko

Nanaimo Bars

Nanaimo bars are a nutty, decadent dessert made with a graham cracker, coconut, and almond crust. Topped with buttery custard and melted chocolate, this creamy treat is the perfect sweet tooth fix.

Let’s just talk about nutty chocolate bars for a second. They are so hard to resist with how rich, flavorful and ooey-gooey they are! Snickers bars, fantasy fudge, and turtle pecan bars are some of my other favorites sure to be the star of your next party.

A stack of 3 nanaimo bars.

Easy Nanaimo Bar Recipe

If you are not familiar with Nanaimo bars, this triple-layer, chocolatey dessert originates from British Columbia, Canada. First appearing in a cookbook in 1952, these bars have now grown to be extremely popular throughout many other countries! This dessert is known by various names- New York slice, London fog bar, and prayer bar to name a few. Honestly, with how insanely good these are, it is no surprise that this Canadian treat has won the hearts of so many. Thinking about the texture of the almond-coconut crust paired with buttery, sweet custard and rich chocolate is enough to get me drooling.

Not only are these super delicious, but easy to make, too! No fancy ingredients are needed here- chocolate, pudding, coconut, almonds, and a couple of other pantry staples are all you need for Nanaimo bars. Then, all you have to do is mix up your crust, add some layers, and voila! An indulgent, delicious treat awaits. These get gobbled up at every family gathering. I have to make sure I grab some for myself before they all disappear. I know my waistline probably hates me, but these bars are so ooey-gooey I can’t resist! With just a few easy steps and ingredients, I know that you, too, will love these tasty treats from BC!

What You Need For Nanaimo Bars Recipe

A lot of these ingredients will probably already be in your pantry, but if not, I promise the grocery store run is worth it to make these bad boys! Nanaimo bars are the ultimate indulgence. You can find exact measurements for each ingredient below.

  • Butter: For the crust, I use melted, unsalted butter.
  • Granulated Sugar: Adds sweetness to the crust and melts down to help the ingredients meld together.
  • Cocoa Powder: Since we are adding sugar separately, I use unsweetened cocoa powder.
  • Salt: Added to enhance flavor.
  • Egg: The egg in the crust works to bind everything together.
  • Graham Cracker Crumbs: This is one of the key flavors of these bars. It adds the best gritty sweetness.
  • Shredded Coconut: I use sweetened coconut in this recipe.
  • Almonds: For the perfect amount of nuttiness, I use finely chopped almonds.

Vanilla Pudding Filling

  • Vanilla Pudding Powder: Pudding is easy to find and tastes delicious, but you can also use Bird’s custard powder for a more traditional filling.
  • Powdered Sugar: Powdered sugar will make your custard sweet while also adding a smooth texture.
  • Vanilla Extract: I recommend using pure vanilla extract for the best depth of flavor!
  • Butter: For the filling, I also use unsalted butter, softened.
  • Heavy Whipping Cream: When whipped together, heavy cream will add the most amazing, light and fluffy texture to your custard filling.

Top Layer of Chocolate

  • Semi-sweet Chocolate Chips: I like to use semi-sweet chocolate chips to balance out the sweetness of the rest of the bar.
  • Unsalted Butter: Butter will be melted down with the chocolate chips to create a rich, tasty top layer.

How to Make The Homemade Nanaimo Bars

Nanaimo bars only require a few steps of melting, mixing, and layering. This is a great recipe for kids to help out with. It is so fun to see the end result come together!

  1. Prepare Pan: First, line a 9×9 pan with parchment and set aside.
  2. Make Crust Mixture: In a medium bowl, mix the butter, sugar, cocoa powder, and salt together until combined. Add the egg and mix thoroughly. Mix in the graham cracker crumbs, shredded coconut and almonds.
  3. Press Into Pan: Press the crust evenly into the prepared pan and put in the fridge to chill for about 10-15 minutes while you prepare the custard filling.
  4. Make Custard Filling: Next, in the bowl of a mixer combine the pudding powder, powdered sugar, vanilla extract and softened butter. Mix until combined, Add the heavy whipping cream a tbsp at a time until the frosting is fluffy and smooth.
  5. Add Custard: When the base layer is nice and firm and cool, add the frosting on top and smooth evenly across it and return to the fridge.
  6. Melt Chocolate: Put the chocolate and butter in a microwave safe bowl and heat in 30 second intervals until the chocolate is melted and it all mixes together smooth.
  7. Add Top Layer: Spread the chocolate evenly over the chilled frosting layer. Chill in the fridge for at least 4 hours.
  8. Serve: Remove from the pan and use a very sharp knife to cut into bars.
The process of making nanaimo bars.

The Best Nanaimo Bars Tips

A few simple tips and tricks can ensure you create the most delicious, chocolatey squares possible. Perfecting Nanaimo bars will keep everyone coming back for more!

  • Adding Egg: Don’t add your egg to a hot pan too quickly or it will curdle. Mix your egg and chocolate together slowly and whisk constantly.
  • Cutting Your Bars: It is easier to cut through your chocolate top layer at room temperature. Using a sharp knife, score only the tops of your bars, when your chocolate is almost hardened but still maluable. Then, return them to the fridge to finish chilling. Once your bars have chilled completely, you will not only know where to cut your bars but also not crack your chocolate in the cutting process!
  • Using a Food Processor for Your Crust: If you find it hard to pack down a crust with big pieces of almonds and graham crackers, you can first blend them together in a food processor. This way, you get smaller pieces and ultimately a denser crust.
  • Nut Substitutes: Instead of almonds, you can substitute for pecans or the traditional walnut.
  • Fruit Garnish: For a pop of beautiful ruby color and a slight fruity flavor, garnish your Nanaimo bars with cranberry or raspberry.

Storing Your Leftover Dessert Bars

Since they are best served cold, these tasty little bars are great for storing and eating later! Seeing them in my fridge when I’m craving something sweet has been a miracle, honestly.

  • In the Refrigerator: Nanaimo bars will keep in an airtight container for up to 4 days. Serve straight from the fridge.
  • In the Freezer: You can also keep your Nanaimo bars in the freezer for 2-3 months in an airtight container. Simply thaw in the fridge before consumption.
8 cut Nanaimo bars.
Print

Nanaimo Bars

Nanaimo bars are a nutty, decadent dessert made with a graham cracker, coconut, and almond crust. Topped with buttery custard and melted chocolate, this creamy treat is the perfect sweet tooth fix.
Course Dessert
Cuisine American
Keyword nanaimo bars, nanaimo bars recipe
Prep Time 30 minutes
Chill 4 hours
Total Time 4 hours 30 minutes
Servings 9 bars
Calories 644kcal
Author Alyssa Rivers

Ingredients

Crust

  • 1/2 cup unsalted butter melted
  • ½ cup granulated sugar
  • 6 Tablespoon unsweetened cocoa powder
  • ¼ teaspoon salt
  • 1 large egg
  • 2 cups graham cracker crumbs
  • 1 cup sweetened shredded coconut
  • ½ cup almonds finely chopped

Filling

  • 3 Tablespoon vanilla pudding powder or Bird’s custard powder, for a more traditional filling
  • 2 cups powdered sugar
  • 1/2 teaspoon vanilla extract
  • ½ cup unsalted butter softened
  • 2-3 Tablespoon heavy whipping cream

Top Layer

  • 5 ounces semi sweet chocolate chips
  • 2 Tablespoon unsalted butter

Instructions

  • Line a 9×9 pan with parchment and set it aside.
  • In a medium bowl, mix the butter, sugar, cocoa powder, and salt together until fully combined. Add the egg and mix thoroughly. Mix in the graham cracker crumbs, shredded coconut, and almonds.
  • Press the crust evenly into the prepared pan and put it in the fridge to chill for about 10-15 minutes while you prepare the custard filling.
  • In the bowl of a mixer, combine the pudding powder, powdered sugar, vanilla extract, and softened butter. Mix until combined, Add the heavy whipping cream a tbsp at a time until the frosting is fluffy and smooth.
  • Once the base layer is nice and firm and cool to the touch, add the frosting on top and smooth evenly across it and return to the fridge.
  • Put the chocolate and butter in a microwave-safe bowl and heat in 30-second intervals until the chocolate is melted and it all mixes together smooth. Spread the chocolate evenly over the chilled frosting layer. Chill in the fridge for at least 4 hours.
  • Remove from the pan and use a very sharp knife to cut into bars.

Nutrition

Calories: 644kcal | Carbohydrates: 69g | Protein: 6g | Fat: 41g | Saturated Fat: 23g | Polyunsaturated Fat: 2g | Monounsaturated Fat: 12g | Trans Fat: 1g | Cholesterol: 87mg | Sodium: 229mg | Potassium: 281mg | Fiber: 4g | Sugar: 52g | Vitamin A: 795IU | Vitamin C: 1mg | Calcium: 64mg | Iron: 3mg


from The Recipe Critic https://ift.tt/3jvzKfw
https://ift.tt/3yz3L4M

गुरुवार, 6 अगस्त 2020

Perfect Chocolate Chip Zucchini Bread

Perfect Chocolate Chip Zucchini Bread is soft and sweet and incredibly easy to make from scratch at home.  It’s the best zucchini bread and tastes amazing with coffee for a satisfying breakfast or as delicious afternoon snack!

If your garden is overflowing with fresh zucchini try some of my other quick and easy zucchini recipes too.  Bake Chocolate Zucchini Bread or Chocolate Chip Zucchini Muffins for more chocolate zucchini treats your family will love!

Sliced Zucchini Bread on a cooling rack.

Perfect Chocolate Chip Zucchini Bread

This Chocolate Chip Zucchini bread recipe is so delicious it is impossible to stop eating.  It can be enjoyed any time of the day and is tempting to keep going back to again and again!  It is moist and sweet enough to be a dessert, but its packed with healthy zucchini and hearty ingredients that make it a filling bread.  In fact, it’s a great way to sneak in vegetables because this light and tasty treat is bursting with semi-sweet chocolate flavor in every bite.  This bread is just what the name says, perfect!

Versatile would be an understatement with this quick and easy to make zucchini bread, because it can be whipped together and ready for the oven in almost no time, it’s easy to double, and saves well for months of enjoyment!  Either serve it fresh from the oven or store it for on-the-go zucchini filled breakfasts even after summer ends.  This is a must try, super adaptable recipe your family will love!

Chocolate Chip Zucchini Bread Ingredients:

This quick bread recipe is made up of basic and familiar ingredients.  They come together so easily to make the BEST homemade zucchini bread.

  • All-purpose flour: Thickens the bread.
  • Cinnamon: Adds the perfect warm spice.
  • Salt: To taste, but just a pinch should be plenty.
  • Baking Soda: Causes the bread to rise.
  • Canola Oil: Keeps the bread moist as it bakes.
  • Sugar: Adds sweetness!
  • Brown Sugar: Rich molasses sugar adds both moistness and sweetness.
  • Eggs:  Binding agent that holds the bread together.
  • Vanilla: Brings out all the flavors and adds its own rich taste.
  • Sour Cream: Combine with the egg mixture to make the moistest bread.
  • Zucchini: Grated and strained and dried as much as possible.
  • Semi-Sweet Chocolate Chips: Just the right chocolate flavor that’s not too sweet.

How to Make Quick Bread:

Simple and easy to make chocolate chip zucchini bread can be whipped together easily.  A stress-free breakfast, snack, or dinner is ready after a few minutes of prep and an hour of baking.  The hardest part is waiting for it to cook because this bread smells absolutely AMAZING as it bakes!

  1. Prep: First, preheat your oven to 350 degrees. Then, butter and flour a large 9″ bread pan and set aside.
  2. Whisk dry ingredients: Whisk together flour, cinnamon, baking soda, and salt in a small bowl until combined. Set aside.
  3. Beat sugars, oil, and eggs: In a stand mixer or using a hand mixer, beat together sugars, oil, and eggs for about 1-2 minutes until slightly fluffy. Add vanilla and sour cream.
  4. Combine ingredients: Next, fold in the grated zucchini and chocolate chips.  Then, add the remaining dry flour ingredients. Finally, stir to combine and pour into prepared 9″ bread pan.
  5. Bake: Place in preheated oven for 50-60 minutes. After 45 minutes mine was done. However, oven temperatures vary, so just make sure a toothpick entered in the center comes clean.
  6. Serve: Let cool for about 5-10 minutes and remove from pan. Delicious served a little warm, even with a little butter on top. 🙂

Steps to make chocolate chip zucchini bread.

Tips for Easy Zucchini Bread:

A made-from-scratch loaf of moist bread is easier than you think! If you are wondering how to make it happen, here are some tips to remember as you are working on this recipe that will give you the best results every time!

  • Peel: Grate your zucchini with or without the peel, either way works great. Finely shred the zucchini for best results.
  • Shortcut: Use a food processor for quicker prep time instead of using a grater.  It will be done with just a few pulses!
  • Remove excess moisture: Zucchini is usually very moist. Dry it as much as possible before mixing it in with your other ingredients. To do this simply blot between paper towels.
  • Don’t over-mix: Over-mixing will cause a the texture of your bread to be too dense instead of a light and soft texture.
  • Storing: Store in an airtight container at room temperature for 1-2 days. To enjoy these for longer place them in the fridge for up to a week or the freezer for 3 months.
  • Re-heating: Thaw for 3-4 hours and room temperature, or if you’re in a rush, microwave for 20 seconds.

Variations of Chocolate Chip Zucchini Bread:

Chocolate Chip Zucchini Bread can be enjoyed fresh from the oven or stored and heated in just seconds for a delicious on-the-go breakfast.  Versatile and easy to customize, this recipe makes the best zucchini bread and it will be a new favorite instantly!

  • Frosting or Glaze: Drizzle a sweet frosting or glaze to the top of your bread to make an out of this world treat that is a great healthier dessert.
  • Swirl: A smooth layer of cream cheese throughout the bread will make layers of soft and creamy flavor. To create the swirl, you will simply layer half the batter, then the cream cheese mixture and the other half of the batter.  The mixture comes together quickly by combining 8 ounces of cream cheese with an egg, ¼ cup sugar, and ¼ cup flour. Also try this Swirled Banana Cream Cheese Bread for incredible flavor.
  • Fruit: To make your bread even more moist add in up to a cup of mashed bananas for more depth of flavor and incredibly soft texture. Or try adding strawberries for an amazing chocolate and strawberry combination.
  • Crunch: Add peanuts, walnuts or pecans for a bit of crunch and nutty flavor.
  • Presentation: Bake in a loaf pan to slice or in a muffin tray to create hit muffins that are easy to store and enjoy one at a time.
  • Spice: To transition this bread between seasons add a pinch of Homemade Pumpkin Spice for a warm fall/winter flavor or a squeeze of lemon juice for a brighter flavor.
  • Serve: Spread Homemade Plant Butter, whipped cream, or nutella all over this warm freshly made bread for flavor you won’t be able to live without.

Sliced chocolate chip zucchini bread.

More Yummy Zucchini Recipes:

Print

Chocolate Chip Zucchini Bread

Perfect Chocolate Chip Zucchini Bread is soft and sweet and incredibly easy to make from scratch at home.  It's the best zucchini bread and tastes amazing with coffee for a satisfying breakfast or as delicious afternoon snack!
Course Appetizer, Bread, Side Dish, Snack
Cuisine American
Keyword chocolate chip zucchini bread, zucchini bread
Prep Time 10 minutes
Cook Time 1 hour
Total Time 1 hour 10 minutes
Servings 12 Slices
Calories 215kcal
Author Alyssa Rivers

Ingredients

  • 1 Cup All Purpose flour
  • 1 teaspoon cinnamon
  • 1/4 teaspoon salt
  • 3/4 teaspoon baking soda
  • 1/4 Cup canola oil
  • 1/2 Cup sugar
  • 1/4 Cup brown sugar
  • 2 eggs
  • 1 teaspoon vanilla
  • 1/4 Cup sour cream
  • 1 and 1/2 Cups zucchini grated and strained
  • 3/4 cup semi-sweet chocolate chips

Instructions

  • Preheat oven to 350 degrees. Butter and flour a large 9" bread pan and set aside. Whisk together flour, cinnamon, baking soda, and salt in a small bowl until combined. Set aside.
  • In a stand mixer or using a hand mixer, beat together sugars, oil, and eggs for about 1-2 minutes until slightly fluffy. Add vanilla and sour cream.
  • Fold in the grated zucchini and chocolate chips. Add the remaining dry flour ingredients. Stir to combine and pour into prepared 9" bread pan. Bake for 50-60 minutes. I set a time for 45 minutes and mine was done at that time. Oven temperatures vary, so just make sure a toothpick entered in the center comes clean.
  • Let cool for about 5-10 minutes and remove from pan. Delicious served a little warm, even with a little butter on top. 🙂

Nutrition

Calories: 215kcal | Carbohydrates: 27g | Protein: 3g | Fat: 11g | Saturated Fat: 4g | Cholesterol: 30mg | Sodium: 134mg | Potassium: 98mg | Fiber: 1g | Sugar: 17g | Vitamin A: 75IU | Calcium: 23mg | Iron: 1mg

Sliced Chocolate Chip Zucchini Bread on a cooling rack.


from The Recipe Critic https://ift.tt/2XA17ej
https://ift.tt/31pdQ4L