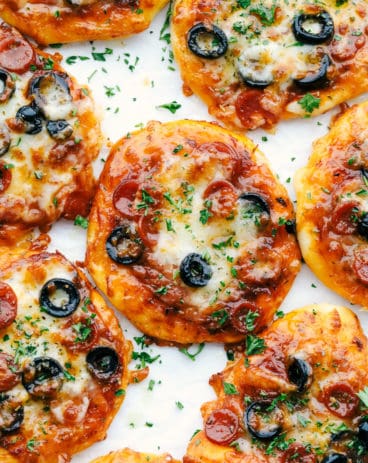
These melty, cheesy zucchini pizza bites have all the goodness of pizza without the carbs! In just 15 minutes, you have a tasty appetizer that you can feel great about eating!
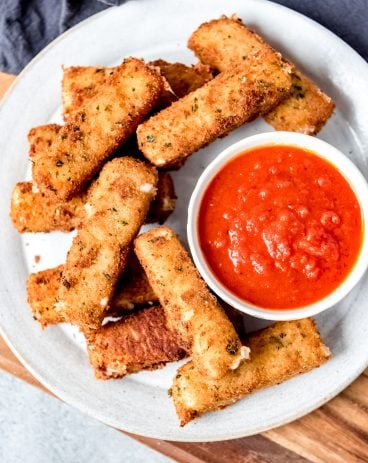
Indulging in pizza doesn’t have to break your diet. Eggplant, keto, and whole-wheat pizzas are more health-conscious varieties to try out!

Easy Baked Zucchini Pizza Bites
It is time to introduce you to the king of healthy snacking- zucchini pizza bites! This is the most ingenious recipe. It is honestly 100% as satisfying as a slice of pizza. It has all of the cheesy, perfectly seasoned flavor of pizza but on bite-sized zucchini pieces. Don’t let the thought of veggie as a pizza crust deter you. If you didn’t already know, zucchini is one of the most versatile veggies around! Zucchini doesn’t have an overpowering flavor. This makes it work as a substitute for basically anything. Try it in this casserole, lasagna, and even fries!
Next time you are wanting to make a pan of pizza rolls or bagel bites, go for the healthier option of zucchini pizza bites! You can utilize all of your leftover zucchini and have a delicious dinner ready in minutes. When baked, zucchini becomes amazingly tender. It also absorbs the flavor of pizza sauce, cheese, and toppings. Each bite is loaded with flavor! These are every bit as good, if not better, than traditional pizza and I love that they keep portions small. It makes it easy to customize toppings too. That way everyone in your family can get in on the action and create their own pizza bite! These zucchini bites are truly easy! Delicious and the perfect way to snack while fueling your body with the low-carb, antioxidant-packed goodness of zucchini.
What You Need For Zucchini Pizza Bites
The best thing about this recipe is that it uses basic pizza ingredients, just swapping out a crust for sliced zucchini. You have the freedom to switch up these pizza bites with whatever sauces and toppings your heart desires! For all measurements of ingredients, see the recipe card below.
- Zucchini: I use large zucchini in this recipe, but any kind of zucchini works! You can use smaller zucchini for more bite-sized pieces. 8 ball and yellow zucchini are also great substitutes!
- Salt and Pepper: To enhance the flavor of your zucchini pizza bites. I add to taste.
- Marinara: You can use any marinara you like here, or swap out for a different sauce like BBQ, buffalo, or alfredo. In this recipe, I use homemade marinara for the best fresh flavor!
- Mozzarella Cheese: I love how Mozzarella melts down in the oven. It is the perfect stretchy, ooey-gooey cheese. For substitutes, provolone and cheddar have a similar effect and taste great, too!
- Pepperoni: Pepperoni makes everything better! I use mini pepperoni to match the sizing of the zucchini slices.
- Olives: I use black olives, sliced into small pieces.
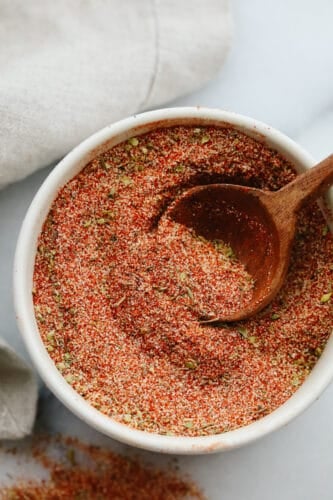
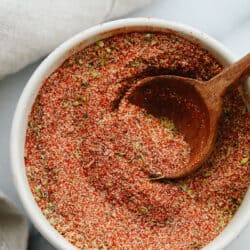
- Italian Seasoning: A pinch of Italian seasoning really enhances the overall flavor of these pizza bites. You can make it at home! It really comes in handy for so many different recipes.
- Basil: Who doesn’t love a good basil garnish? It is the perfect aromatic addition and makes your pizza bites look fancy, too.
Making Zucchini Pizza Bites
Making your pizza bites only requires a touch more effort than throwing premade snacks in the oven. The results are mind-blowing! I know you will become addicted to the fresh, delicious flavor of these easy snacks! These are always a hit!
- Prep: Preheat oven to 400 degrees. Slice a zucchini into ¼ inch slices. Put them on a single layer on a baking sheet and salt and pepper.
- Add Sauce and Toppings: Add marinara sauce then top with cheese and pepperoni and olives. Sprinkle the tops with Italian seasoning.
- Bake and Serve: Bake for 10-12 minutes or until the cheese is melted and zucchini is soft. Garnish with chopped basil.

Tips for Making Zucchini Pizza Bites
This recipe is super easy and straightforward! Here are a few extra tips to keep in mind so you get the best results! So many options for a great dinner!
- Cutting Zucchini: Try to cut your zucchini into uniform slices. This way, they cook at the same rate!
- Pat Zucchini Slices Dry: Zucchini naturally has a very high water content. If you are having trouble with your pizza bites becoming soggy, first salt your zucchini and then pat dry before baking.
- Zucchini Sticking to Pan: If you don’t have parchment paper to line your baking sheet with, you can toss your zucchini slices with olive oil before baking to ensure they don’t stick to the pan.
- Keep Skin On: I like to keep the skin on my zucchini. It is completely safe to eat and isn’t difficult to bite through. Additionally, Zucchini skin contains healthy cartenoids that boost your immune system and support things like eye health. Time to put away that peeler!
- Other Toppings: You can easily mix and match toppings to get different pizza flavors. The sky is the limit! For buffalo-style pizza bites, add buffalo sauce, chicken crumbles, red onions, blue cheese, and drizzle with ranch. Another easy variation would be alfredo pizza bites. Simply coat your zucchini in alfredo and top with mozzarella cheese, chicken crumbles and Italian seasoning!

What to Serve With Zucchini PIzza Bites
The great thing about these pizza bites is that they work as an easy snack, an appetizer, or even the main meal! For a complete meal, serve your pizza bites alongside breadsticks, salad, or soup for a dinner à la Olive Garden. Zucchini pizza bites also taste great with an assortment of other appetizers, perfect for get-togethers and game days! No matter what you serve your pizza bites with, their incredible flavor will shine through!

Storing Leftover Pizza Bites
Zucchini pizza bites are best when served fresh. They can also be kept in the fridge and heated up for a quick and easy treat! My kids love having these on hand and popping them in the microwave for an after-school snack. It’s a great way to sneak more veggies into their diet!
- In the Refrigerator: Zucchini pizza bites will keep in an airtight container for up to 3 days.
- Reheating: You can easily reheat your pizza bites in a skillet, microwave, or even an air fryer! I like to reheat mine in the oven until warmed through to preserve flavor and texture.

More Amazing Pizza Variations


Zucchini Pizza Bites
Ingredients
- 1 large zucchini
- salt and pepper
- 1/2 cup marinara
- 2 cups mozzarella cheese
- 1 cup mini pepperoni
- 1 cup sliced olives
- 1 Tablespoon Italian seasoning
- chopped basil for garnish
Instructions
-
Preheat oven to 400 degrees. Slice zucchini into ¼ inch slices. Put them on a single layer on a baking sheet and salt and pepper.
-
Add marinara sauce then top with cheese and pepperoni and olives. Sprinkle the tops with Italian seasoning.
-
Bake for 10-12 minutes or until the cheese is melted and zucchini is soft. Garnish with chopped basil.
Nutrition
from The Recipe Critic https://ift.tt/3m4ACLn
https://ift.tt/3yHLPF1