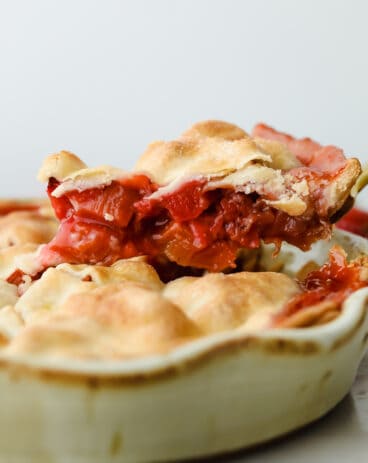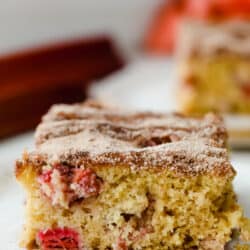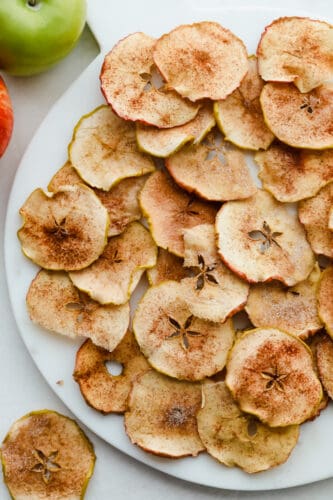
शुक्रवार, 27 अगस्त 2021

Baked Cinnamon Sugar Apple Chips

Baked Cinnamon Sugar Apple Chips is a healthy crunchy snack that is going to impress! Crunchy, crispy, sweet, and a bit spicy, these are going to change snack time!

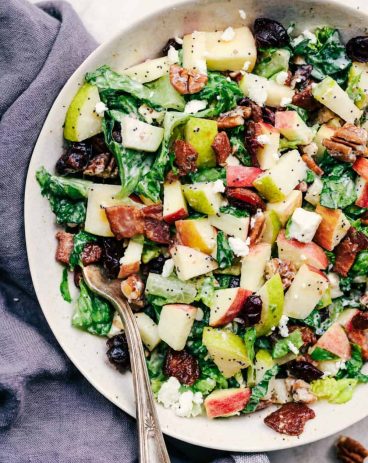
I love apples, they are sweet, crunchy, and are divine in all sorts of dishes. Try them in Apple Salad, Apple Cake, and Pork Chops with Apples.
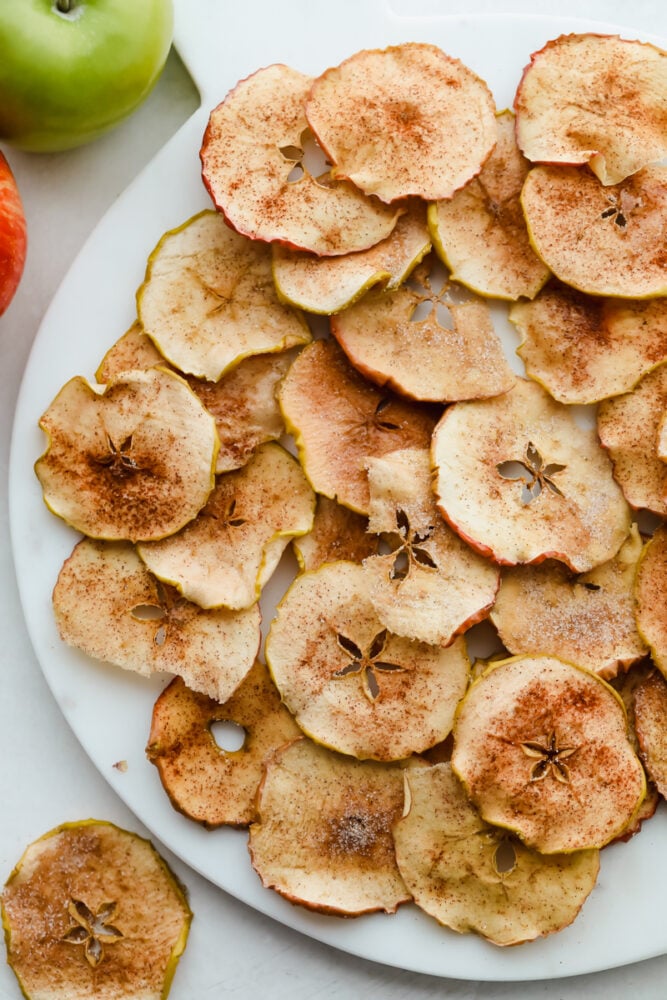
Crisp baked cinnamon sugar apple chips on a white plate.

Baked Cinnamon Sugar Apple Chips

Can you believe it, summer is almost over!? Summer seems to just fly by and with fall just around the corner, these crispy Baked Apple Chips make the perfect Fall snack. And the best part is that they are healthy and super delicious, which is a win-win in my book. These Bakes Apple Chips are super simple to make. All you do is slice each apple SUPER thin, sprinkle them with cinnamon sugar, and let the oven do the rest. Easy peasy! Unlike these Baked Apples which are soft and syrupy, these apple chips will be crunchy and spiced with cinnamon.

These make the best snack, perfect for after school, sports snacks, or just munching while you are doing just about anything. The apples you choose to use will vary the taste just a bit. If you like a tart apple use a Granny Smith. Sweeter apples like pink ladies and honey crisps are some of our favorites. Use what you like best. To slice the apples, you can use a knife, or what I like to use is a mandolin slicer, it makes it quicker and gets them thinner because remember you want your apple slices SUPER thin, if they are too thick they don’t come out crunchy.

Ingredients for Apple Chips

With only three ingredients, these come together in a pinch and are a perfect snack for after school, sports practice, and munching on during a movie. You have to try these and experiment with your favorite kinds of apples.

  • Apples: Using a crunchy apple is best. Granny Smith, Honey Crisp, and/or Pink Lady.
  • Granulated Sugar: White sugar is the best, but you can also try brown for a sweeter flavor.
  • Ground Cinnamon: Perfect combination for sugar and apples.

How To Make Baked Cinnamon and Sugar Apple Chips

Baking apples slowly over a low temp helps to give them a good crunch. They will continue to crisp as they cool, so don’t worry too much if they seem soft when you take them out.

  1. Bake: Preheat oven to 225F degrees. Line two baking sheets with silicone baking mats or parchment paper. Set aside.
  2. Cinnamon and Sugar: In a small bowl, mix sugar and cinnamon together. Set aside.
  3. Slice Apples: Using a mandoline or a sharp knife, thinly slice the apples. Evenly, spread the apple slices onto the prepared baking sheets. Sprinkle cinnamon-sugar mixture over top of each apple slice.
  4. Bake: Bake for 1 hour, flip the apple slices over, sprinkle with more cinnamon sugar, and bake for another hour.
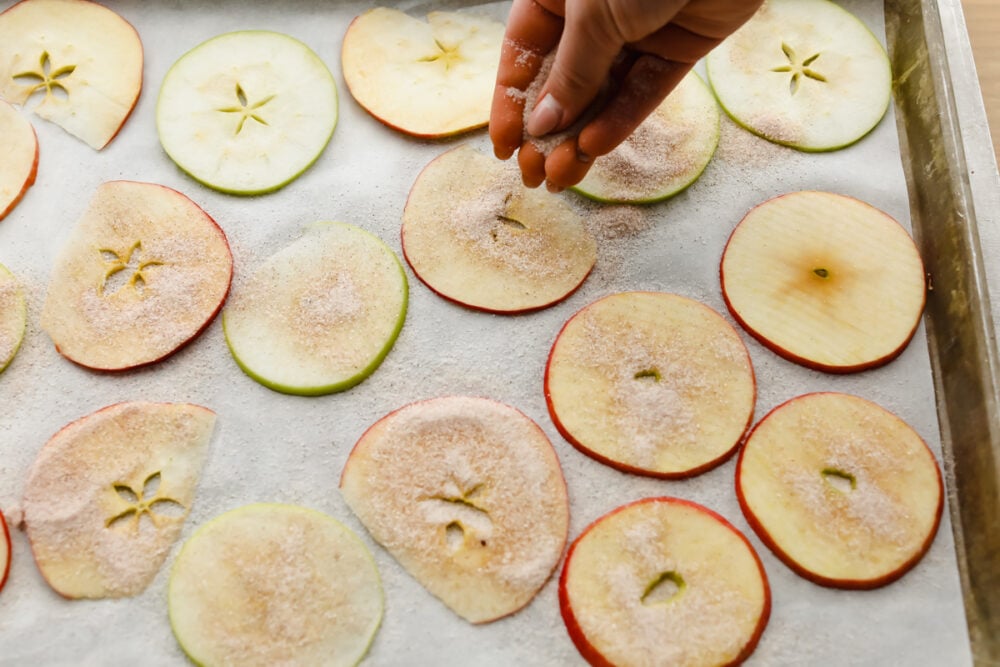
Sprinkling apple slices with cinnamon and sugar.

Tips For Crispy Cinnamon and Sugar Apple Chips

Everyone loves a good chip, go with apple chips and make them healthy. Full of nutrients and fiber they are a perfect choice.

  • Slicing: To really make sure the apples are crisp, you need to slice your apples as thin as possible. I like using a mandolin for this purpose, plus it protects the fingers a bit better. You can also use a sharp knife and cut the apples thinly. The key is to get the apple slices the same size so they are done at the same time.
  • To Core or not to Core: You do not have to core your apples before slicing. If you do not core them you’ll have a fun star shape in the middle. If you core your apples they will look more like a donut. Either way they will turn out perfectly and absolutely delicious.
  • Topping: Cinnamon and sugar will bake into the apple chips making it a seasoning of choice. You can add different flavors such as nutmeg or pumpkin pie spice for a bit of a twist. You can also just use cinnamon and skip the sugar if you are watching your sugars.
  • Cool: Letting the apples cool in the oven for up to an hour will help them crisp up faster.
  • Apples: I like to use Granny Smith, Honey Crisp, and/or Pink Lady. Golden delicious and fugi work well too.
  • Bake: I like to use parchment paper or a silicone mat to bake my apples on so they come off easily.
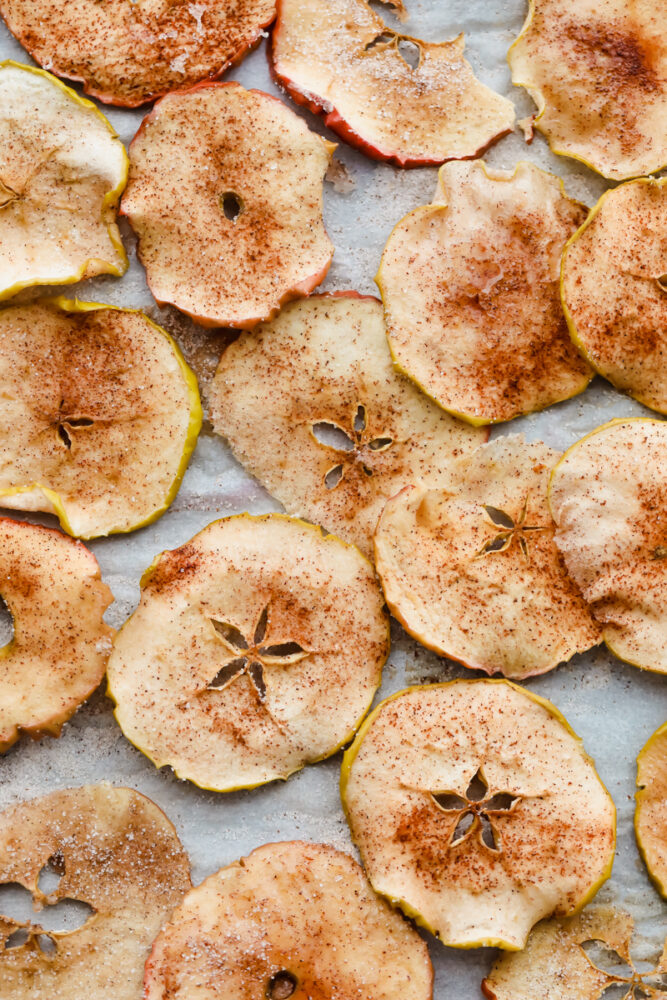
Baked apple chips on parchment.

Storing Apple Chips

These tasty sweet and spicy chips are not going to last long. Bake them and watch them disappear, they are very addictive. If you do have leftovers store them in an airtight container at room temperature for up to a week. If you live in a very humid climate your chips will soften up faster.
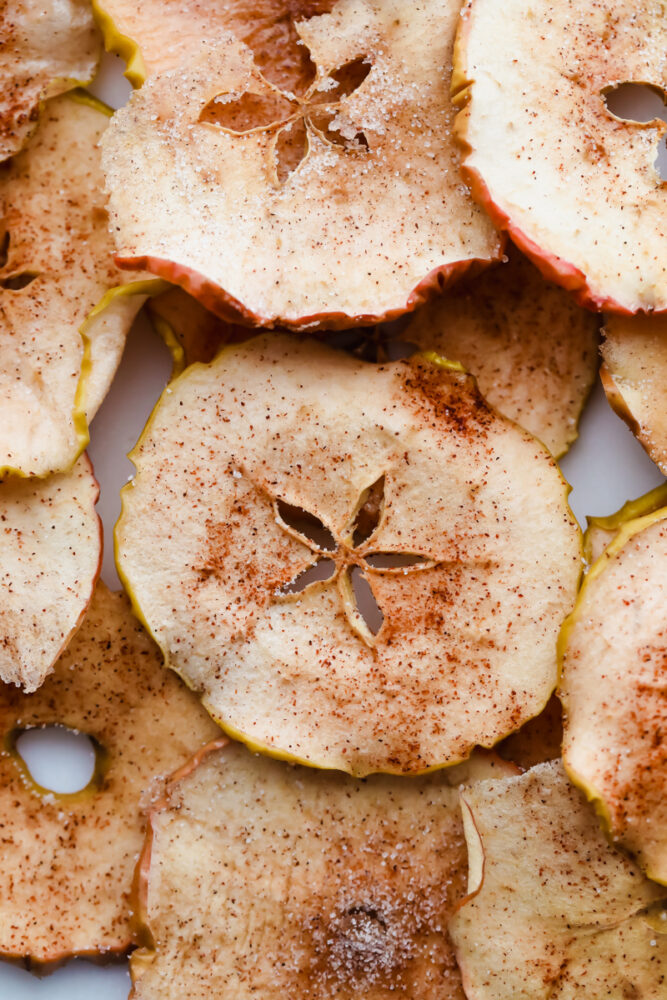
Thinly sliced apples baked to a crisp with cinnamon and sugar.
Print

Baked Cinnamon Sugar Apple Chips

These Bakes Apple Chips are super simple to make. All you do is slice each apple SUPER thin, sprinkle them with cinnamon-sugar and let the oven do the rest. Easy peasy!
Course Dessert, Snack
Cuisine American
Keyword apple chips, baked apple chips
Prep Time 10 minutes
Cook Time 1 hour
Total Time 1 hour 10 minutes
Servings 8 Servings
Calories 86kcal
Author Alyssa Rivers

Ingredients

  • 3 medium apples Granny Smith, Honey Crisp, and/or Pink Lady
  • 1/4 cup granulated sugar
  • 1/2 Tablespoon ground cinnamon

Instructions

  • Preheat oven to 225F degrees. Line two baking sheets with silicone baking mats or parchment paper. Set aside.
  • In a small bowl, mix sugar and cinnamon together. Set aside.
  • Using a mandoline or a sharp knife, thinly slice the apples. Evenly, spread the apple slices onto the prepared baking sheets. Sprinkle cinnamon-sugar mixture over top of each apple slice.
  • Bake for 1 hour, flip the apple slices over, sprinkle with more cinnamon sugar, and bake for another hour.

Notes

Updated on August 27, 2021
Originally Posted on August 19, 2015

Nutrition

Calories: 86kcal | Carbohydrates: 23g | Protein: 1g | Fat: 1g | Saturated Fat: 1g | Sodium: 1mg | Potassium: 73mg | Fiber: 2g | Sugar: 20g | Vitamin A: 37IU | Vitamin C: 3mg | Calcium: 14mg | Iron: 1mg


from The Recipe Critic https://ift.tt/2Wu3Acw
https://ift.tt/3jhDWkh
Homemade Caramel Apples

Celebrate fall by making these gourmet homemade caramel apples! They are the perfect blend of tart and sweet, topped with layers of indulgent caramel.

Need to satisfy a caramel craving? Check out salted caramel popcorn, caramel apple pie, and carmelitas recipes for a more rich, irresistible flavor.

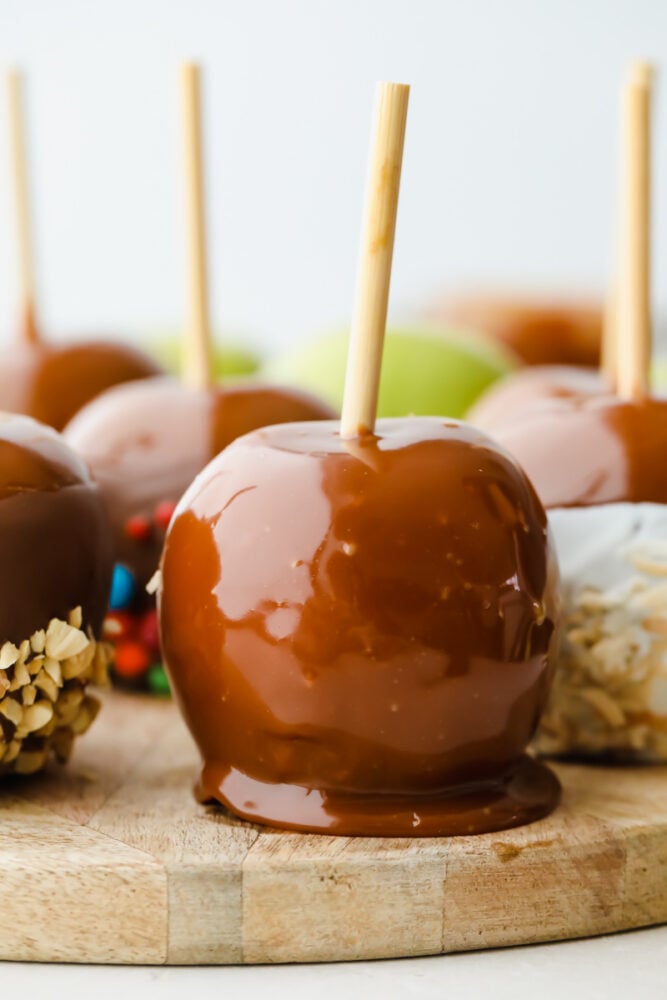
A variety of caramel apples with different toppings.

The BEST Homemade Caramel Apple Recipe

I am a serial caramel apple eater. Whether I’m passing a Rocky Mountain Chocolate Factory or at Disneyland, they are too hard to resist. I mean, how can you when they’re the perfect combination of rich, sweet, juicy, and tart? That first bite through layers of thick, glossy caramel and juicy granny smith apple is the best. Caramel apples are a delicious, classic staple no matter how you serve them. Whether it’s just a simple caramel layer or you coat your apple in candy pieces, this treat is a forever favorite. It is ludicrous that you really only see them popping up for one season.

This leads me to my main point- you can make these bad boys all year round with just a few straightforward steps! The key is to make your own caramel instead of melting down candies for that perfectly thick and chewy outer layer. It may seem a little intimidating, but really, all you need is a candy thermometer and a few simple ingredients to recreate that incredible gourmet flavor you love! You’re going to love how easy these are! I’ve broken down all of the tools and techniques you need to make the perfect batch, every time. Let’s get started!

Ingredients for Making Caramel Apples at Home

Making caramel is kind of like a science project. Each of these ingredients is necessary for creating the perfect caramel! The best part is that most of these ingredients are currently sitting in your cupboard. Translation: you can make these delicious treats right now. As always, measurements for each ingredient can be found in the recipe card at the end of the post!

  • Apples: I like to use small apples so they don’t become too heavy on the sticks. You can use any kind of apple you want here, but I always go for granny smith! They are so incredibly tart and juicy, which pairs perfectly with the sweet richness of caramel. No matter what you choose, make sure your apples are cold! This will help the caramel to stick.
  • Caramel Apple Sticks: You can use wooden caramel apple sticks, but lollipop or popsicle sticks work just as well.
  • Water: Water is used to thin out your caramel mixture.
  • Granulated Sugar: Added for sweetness and to help everything meld together when cooked. You can also use brown sugar, although it typically has a stronger flavor in candies.
  • Light Corn Syrup: This is the foundation for your caramel and easily the most important ingredient. It’s what will give you the perfect thick, sticky texture of caramel that we all know and love! Skip it, and the caramel won’t stick to your apples at all.
  • Salt: Used to enhance flavor.
  • Heavy Cream: For more fat content and a creamy texture, I add in chilled heavy cream to my caramel mixture.
  • Vanilla Extract: Vanilla is used to add rich, delicious flavor. Pure vanilla extract works best!

How to Make Homemade Caramel Apples

Making caramel apples at home is really quite simple! Like making other candies at home, it just requires a bit of patience and preparation. The end result is beyond worth it, I promise!

  1. Prepare Apples: First, wash the apples in warm water and then dry each one. This will remove the waxy coating on the apple and help the caramel stick. Using a folded dish towel, insert the sticks in the top of the apples, right where the stem is. Use the folded towel to push the stick as straight as you can down the entire center of the apple. Place prepped apples in the fridge.
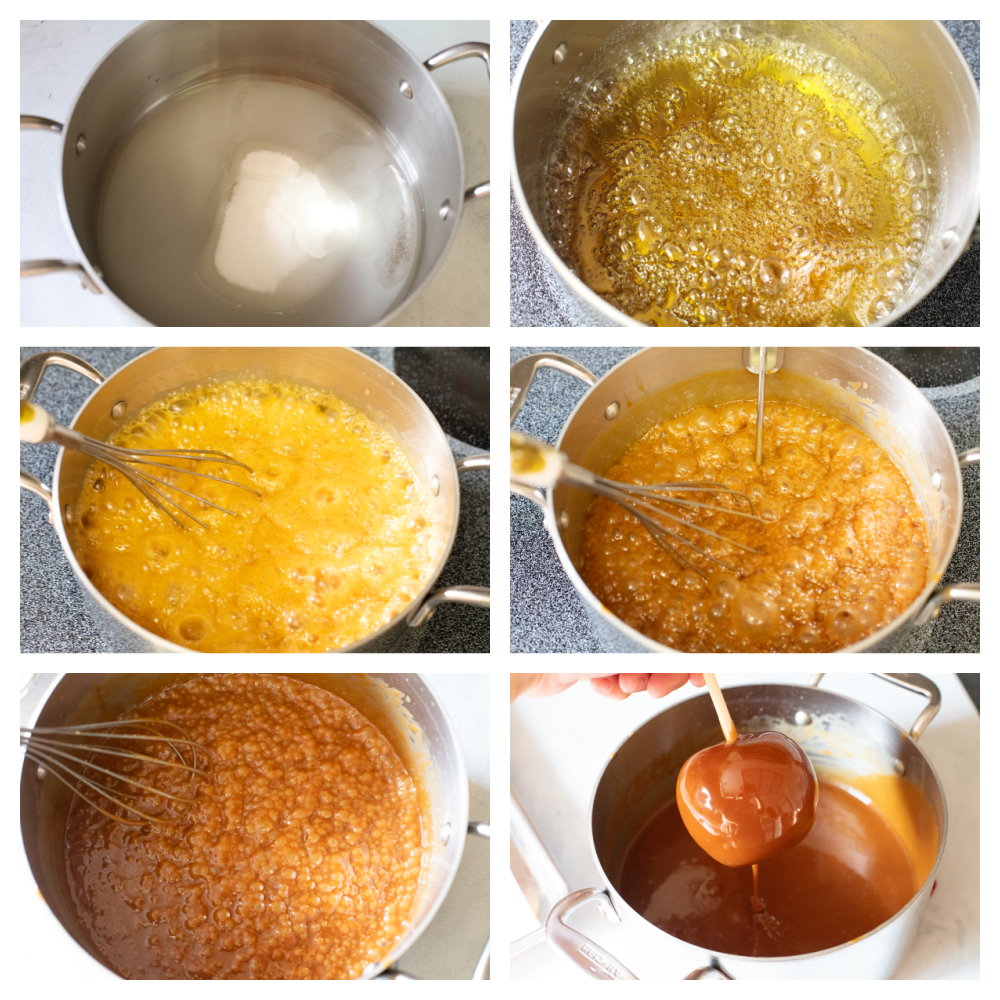
  2. Add Ingredients to Saucepan: In a medium sized (3-4 quarts) heavy bottomed saucepan with tall sides, add the water, sugar, corn syrup and salt. Turn the heat to medium high and stir constantly with a wooden spoon or heat proof spatula until the sugar is completely dissolved.
  3. Wait for Amber Coloring: Once the mixture is boiling, stop stirring and watch closely until it turns an amber color. It may take about 10 minutes, but the change will happen fairly quickly. If it appears to be turning darker in one area much faster than the rest, gently swirl the whole pot. DON’T STIR IT! Stirring will cause the caramel to crystalize and it will become unusable.
  4. Stir in Heavy Cream and Vanilla: Once it is a medium amber color, reduce the heat to medium-low and very carefully and slowly stir in the heavy cream. The mixture will bubble up and steam significantly. Continue stirring until the mixture reaches 246° and then remove from the heat. Stir in the vanilla.
  5. Coat Apples in Caramel: Dip the apples in the hot caramel, swirling to evenly coat each one. Let the excess caramel drip off and then set the dipped apple on a piece of parchment sprayed with cooking spray or on a silicone baking mat sprayed with cooking spray. Allow to cool completely, about 30 minutes.
  6. Add Toppings: Once the apples are completely cooled if desired you can proceed to dip them in chocolate and then in the toppings of your choice
Process shots of making caramel sauce.

Tips For Easy Caramel Apples

Caramel apples are one of the best fall treats and being able to make them at home with homemade caramel is the absolute best! Use these tips and tricks to ensure your batches turn out each and every time.

  • Don’t Stir The Pot: Caramel is a fickle thing. A single crystal of granulated sugar can ruin a whole batch of caramel and utensils are magnets for sugar crystals. If you stir your caramel with a utensil before it has the cream added you run the risk of introducing a sugar crystal into it and having to start all over. Instead carefully swirl the whole pot to stir your caramel around.
  • Corn Syrup: Adding a couple tablespoons of light corn syrup will help your caramel avoid crystalizing. It can’t protect it 100% from sugar crystals, but it makes the likelihood that your caramel will crystalize a lot lower.
  • Amber Color: Waiting for the deeper amber color is a game of patience, but it has a big pay off! If you add the cream too soon you will end up with a pale caramel that is lacking the deep caramel flavor it should have.
  • Dip While Hot: Be very careful, but dip your chilled apples when the caramel is right off the stove. It’s much easier to dip them when the caramel is very liquid. It will thicken a lot as it cools with each apple dipped, so work quickly.
  • Chocolate For Dipping: You can use melted chocolate chips, but I find candy chocolate or almond bark works best. Heat it in the microwave in 20 second intervals until completely melted.
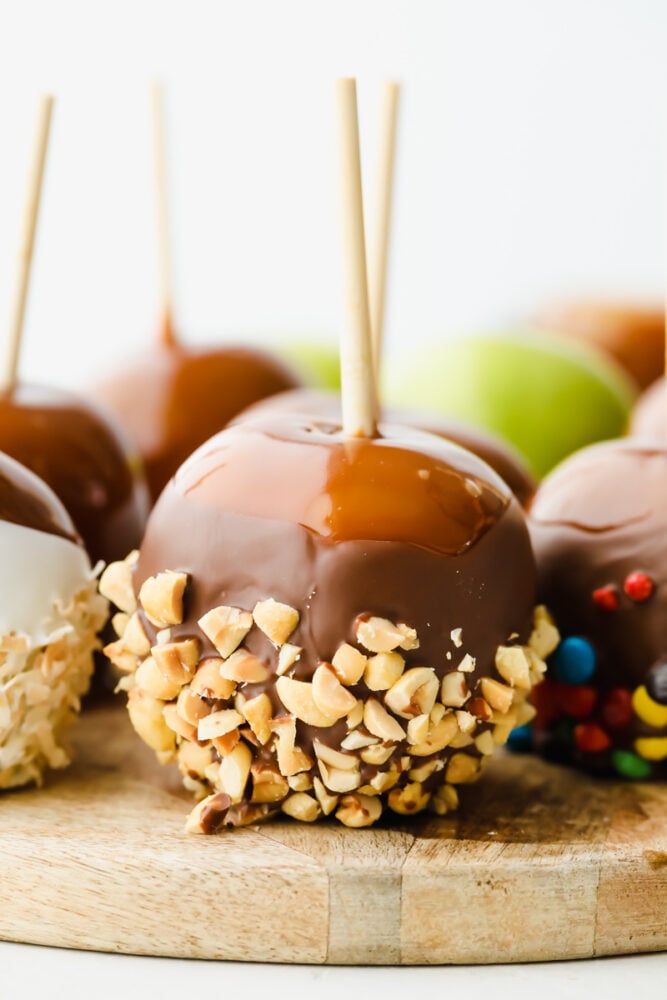
  • Toppings: Get creative! There are endless options for what to dip your caramel apple in. Nuts, candies, cinnamon sugar, crushed cookies…so many options! Make sure you have your toppings prepared before your start dipping the apples in chocolate.
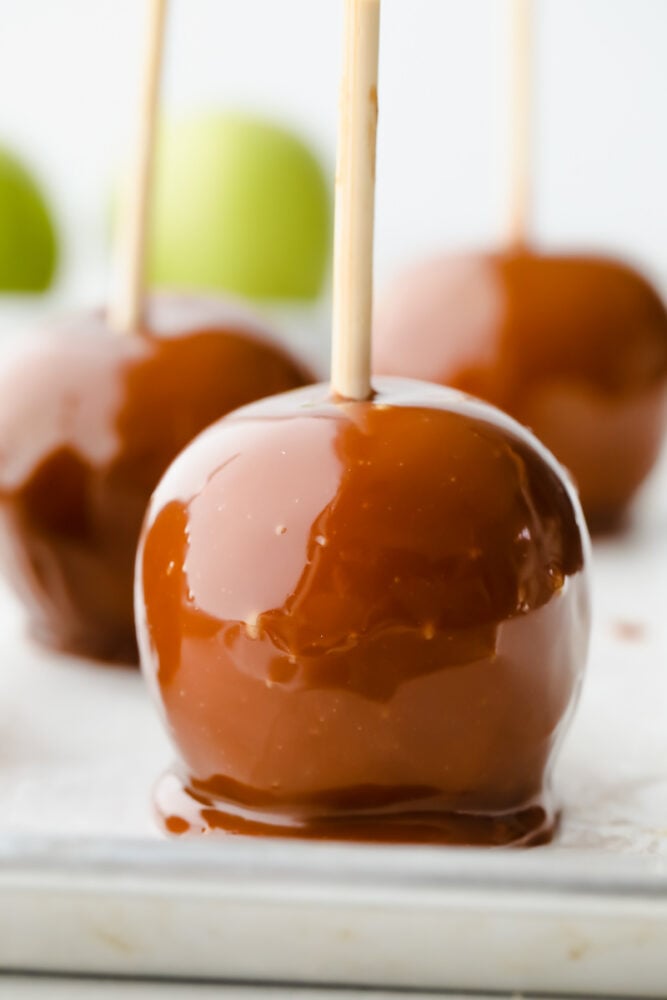
3 caramel apples on parchment paper.

Storing Homemade Caramel Apples

Homemade caramel apples are a delightful treat! Best enjoyed the same day they are dipped, but they will hold for 1-2 days at room temperature.

  • Room Temperature: With these caramel apples you can leave them uncovered on a parchment-lined baking sheet for 1-2 days. The longer they sit, the more the caramel will sweat off the apple and pool around the bottom. Do NOT put them in the fridge! The moisture will make the caramel melt off completely.
Caramel apples topped with nuts and candies.
Print

Homemade Caramel Apples

Celebrate fall by making these gourmet homemade caramel apples! They are the perfect blend of tart and sweet, topped with layers of indulgent caramel.
Course Dessert
Cuisine American
Keyword caramel apple recipe, caramel apples, homemade caramel apples
Prep Time 45 minutes
Cook Time 15 minutes
Total Time 1 hour
Servings 8 Apples
Calories 445kcal
Author Alyssa Rivers

Ingredients

  • 8 small apples chilled
  • Caramel apple sticks lollipop sticks or popsicle sticks work as well
  • 1 cup water
  • 1 1/2 cup granulated sugar
  • 2 Tablespoons light corn syrup
  • 1 teaspoons salt
  • 2 cups heavy cream chilled
  • 1 teaspoon vanilla extract

Instructions

  • Wash the apples in warm water and then dry each one. This will remove the waxy coating on the apple and help the caramel stick. Using a folded dish towel, insert the sticks in the top of the apples, right where the stem is. Use the folded towel to push the stick as straight as you can down the entire center of the apple. Place prepped apples in the fridge.
  • In a medium-sized (3-4 quarts) heavy-bottomed saucepan with tall sides, add the water, sugar, corn syrup, and salt. Turn the heat to medium-high and stir constantly with a wooden spoon or heat-proof spatula until the sugar is completely dissolved.
  • Once the mixture is boiling, stop stirring and watch closely until it turns an amber color. It may take about 10 minutes, but the change will happen fairly quickly. If it appears to be turning darker in one area much faster than the rest, gently swirl the whole pot. DON’T STIR IT! Stirring will cause the caramel to crystalize and it will become unusable.
  • Once it is a medium amber color, reduce the heat to medium-low and very carefully and slowly stir in the heavy cream. The mixture will bubble up and steam significantly. Continue stirring until the mixture reaches 246° and then remove from the heat. Stir in the vanilla.
  • Dip the apples in the hot caramel, swirling to evenly coat each one. Let the excess caramel drip off and then set the dipped apple on a piece of parchment sprayed with cooking spray or on a silicone baking mat sprayed with cooking spray. Allow cooling completely, about 30 minutes.
  • Once the apples are completely cooled if desired you can proceed to dip them in chocolate and then in the toppings of your choice

Nutrition

Calories: 445kcal | Carbohydrates: 64g | Protein: 2g | Fat: 22g | Saturated Fat: 14g | Polyunsaturated Fat: 1g | Monounsaturated Fat: 6g | Cholesterol: 82mg | Sodium: 320mg | Potassium: 206mg | Fiber: 4g | Sugar: 57g | Vitamin A: 955IU | Vitamin C: 7mg | Calcium: 50mg | Iron: 1mg


from The Recipe Critic https://ift.tt/3Di2wK1
https://ift.tt/3BfKQwv

गुरुवार, 26 अगस्त 2021

Cinnamon Sugar Rhubarb Cake

Cinnamon sugar rhubarb cake is a real crowd pleaser! The complementary ingredients of sweet and tart are incredible and are really going to knock your socks off!

I love a good combination of flavors and this slice of heaven most definitely checks that off the list! It’s a fantastic dessert that everyone will absolutely love. Cakes are my jam and if they are yours too, don’t miss out on Chantilly Berry Cake, Praline Apple Bundt Cake and Kentucky Butter Cake!!

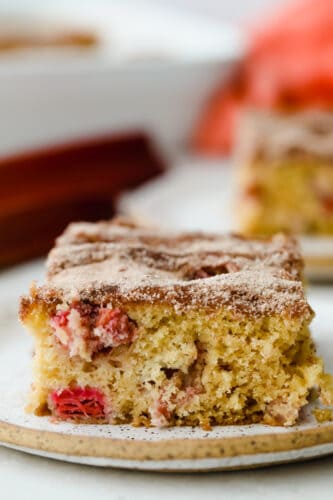
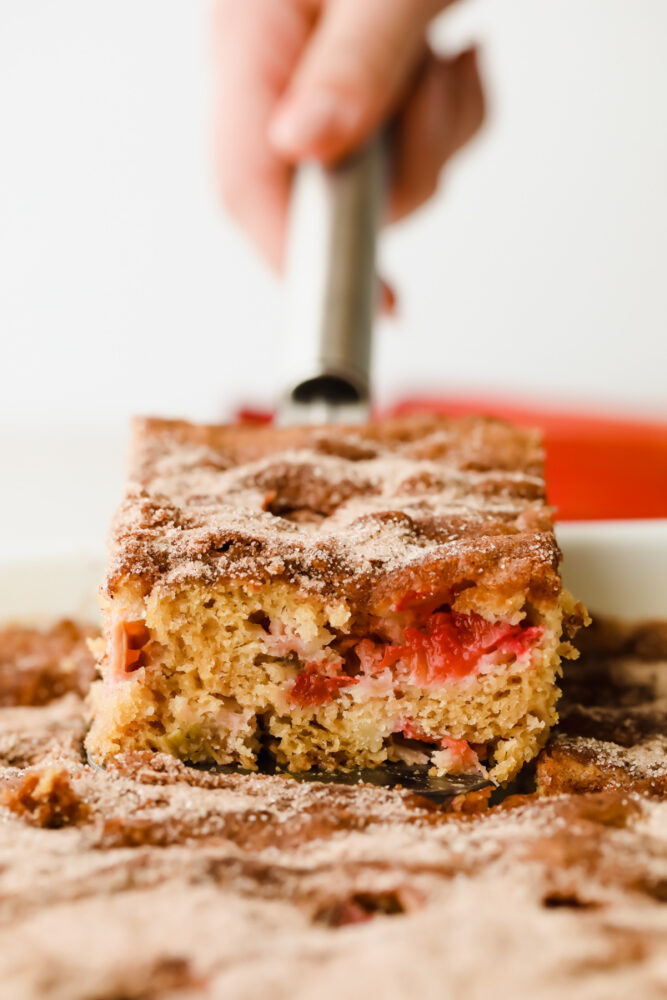
Rhubarb cake on a serving spoon.

What is Rhubarb?

Before I can convince you to make this delectable cake, I should probably explain what is in it! Rhubarb is a crispy, crunchy vegetable with a tartness that resembles that of green apples or grapes. Because of the somewhat tart taste, most people like to mix it with some sugar when baking! Which is why you see it mostly made into pies, muffins, and CAKES! In addition to all of this, rhubarb looks like celery stalks except it has a beautiful ruby red coloring that makes it look so appetizing!

This recipe combines the rhubarb with a sweet cinnamon-sugar mixture and the blend of the two flavors is completely delightful. It is an easy treat to enjoy at any time of the day and can not only be used as a dessert but would be fantastic at breakfast and brunch too! The cinnamon truly enriches the flavor and is what makes this cake stand out. Eat it warm, right out of the oven, and top it with some vanilla ice cream and you will for sure be back for seconds!

Ingredients for Cinnamon Sugar Rhubarb Cake

Of course, heaping amounts of rhubarb are going to be the main ingredient in this cake but everything else is super simple! You should have most of these ingredients on hand! See the recipe card below for a list of exact measurements.

  • Butter: Soften the butter to room temperature and make sure that it’s unsalted!
  • Sugar: This helps to create tender, softer texture in the cake!
  • Brown sugar: Adds sweetness to counteract the tart rhubarb.
  • Egg: Binds the dry ingredients together.
  • Vanilla: Brings out the sweet flavor of the other ingredients.
  • Lemon zest: Who doesn’t love what fresh lemon zest brings to a recipe??
  • Flour: All purpose flour is what I used for this recipe.
  • Baking soda: This is what will give you that moist, fluffy cake texture!
  • Salt: Brings out the natural flavor of all of the ingredients.
  • Buttermilk: If you don’t have any on hand, try making the delicious buttermilk instead!
  • Rhubarb: Of course you need rhubarb for rhubarb cake!! Heap those cups, no skimping!

Topping Ingredients

  • Granulated sugar and cinnamon: This topping will take this cake to the next level! Don’t skip on this!

How to Make Rhubarb Cake

You will love the fruits (vegetables?!) of your labors on this cake! Quick and simple, you will have a delicious, creative dessert in no time. You not only won’t be able to keep it on the table but you will definitely be asked more than once for the recipe!

  • Prep: Preheat the oven to 350°. Grease a 9×13 pan and set aside.
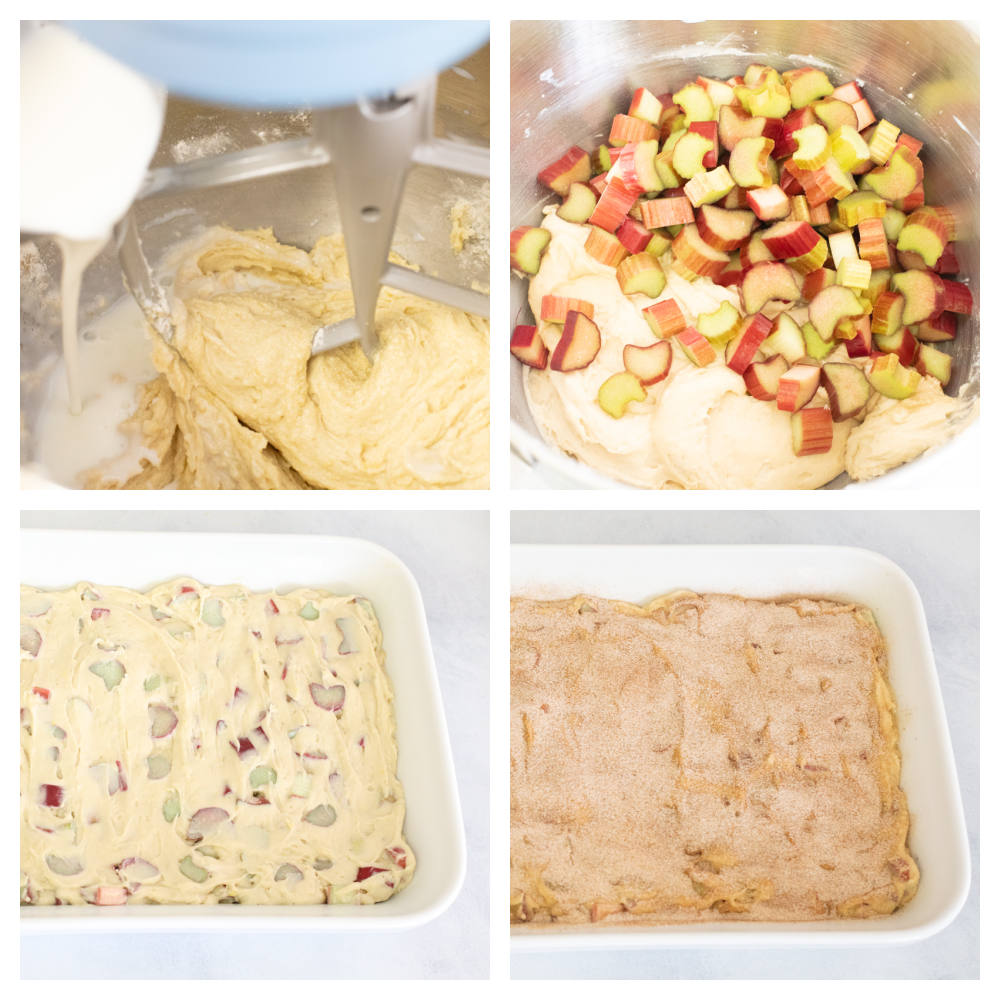
  • Mix: In the bowl of a mixer beat the butter, sugar and brown sugar on medium speed until light and fluffy. Add in the egg, vanilla and lemon zest and beat until incorporated.
  • Sift: In a medium bowl sift the flour, baking soda and salt together.
  • Combine and Pour: In 2-3 additions, alternate adding the buttermilk and dry ingredients to the wet ingredients in the mixer. Once well combined, mix in the chopped rhubarb by hand. Pour the batter in the pan and top with the cinnamon sugar topping.
  • Bake and Serve: Bake for 40-45 minutes, or until a knife comes out clean from the center. Serve warm.
4 images showing stepson how to mix and make cinnamon sugar rhubarb cake.

Tips for Cinnamon Sugar Rhubarb Cake

Cinnamon sugar rhubarb cake is quick and simple, but packs a huge punch of rhubarb flavor!

  • Brown Sugar and Granulated Sugar: Using both white and brown sugars gives this cake a nice depth of sweetness to balance out the tartness of the rhubarb. In a pinch, you could substitute either sugar for the other by just using all granulated or all brown sugar!
  • Heaping Cup of Rhubarb: Don’t skimp on the amount of rhubarb! Use the full three heaping cups of rhubarb for the full zingy flavor in this delicious cake.
  • Frozen Rhubarb: If fresh rhubarb isn’t available and you have frozen rhubarb, you can substitute for 4 cups of frozen rhubarb. Make sure you thaw it and drain any water from it before folding it into your cake batter.
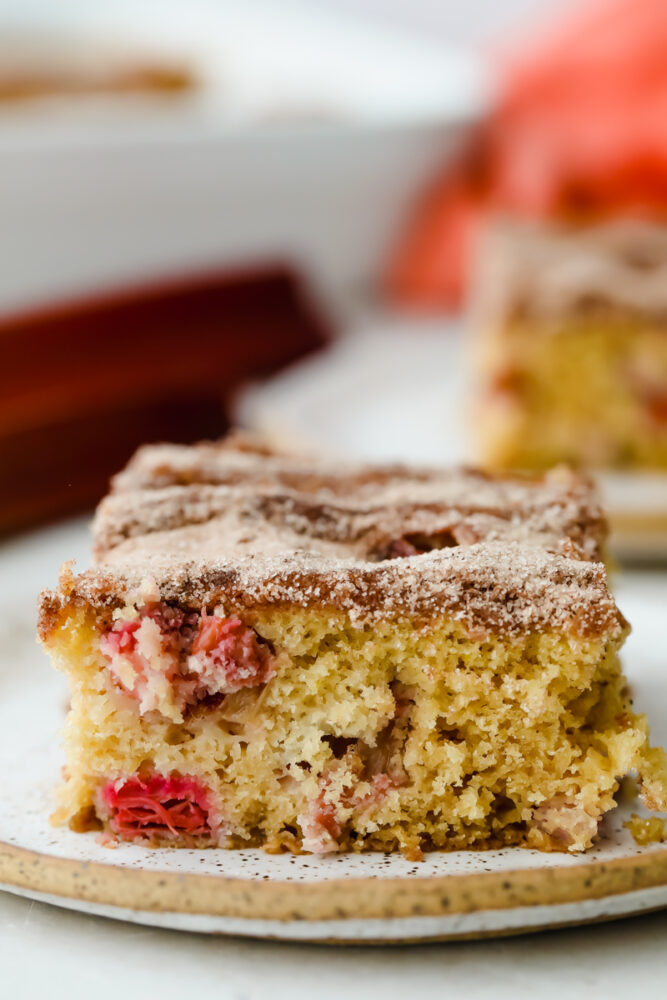
Rhubarb cake.

Storing Cinnamon Sugar Rhubarb Cake

The texture of this cake is heavenly! It is extremely moist because of how much rhubarb is in it, which helps it last for several days.

  • Room Temperature: Store this cake at room temp and cover it with plastic wrap for up to 5 days. It can be served room temperature or warmed gently in the microwave.
  • In the Refrigerator: Alternatively, this cake can also be stored in the fridge but it is not necessary. Chilling the cake will extend the shelf life to up to 7 days!
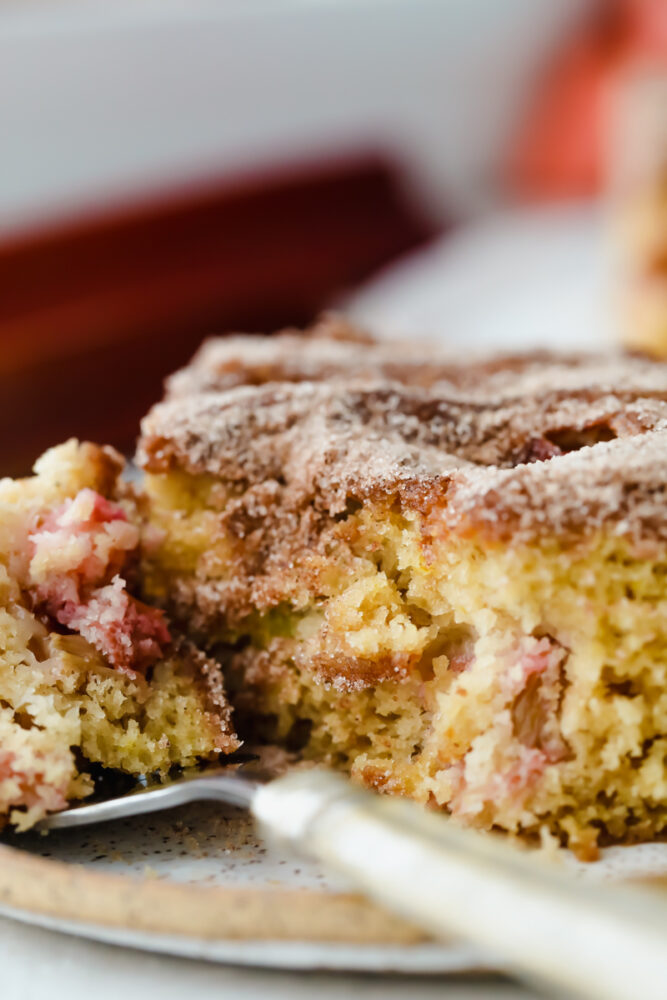
Cinnamon sugar rhubarb cake being served on a fork.
Print

Cinnamon Sugar Rhubarb Cake

Cinnamon sugar rhubarb cake is a real crowd pleaser! The complementary ingredients of sweet and tart are incredible and are really going to knock your socks off!
Course Dessert
Cuisine American
Keyword rhubarb cake, rhubarb cake recipe
Prep Time 30 minutes
Cook Time 40 minutes
Total Time 1 hour 10 minutes
Servings 12 People
Calories 286kcal
Author Alyssa Rivers

Ingredients

  • ½ cup unsalted butter softened
  • ¾ cup granulated sugar
  • ¾ cup brown sugar
  • 1 large egg
  • 1 teaspoon vanilla
  • 1 Tablespoon lemon zest
  • 2 cups all purpose flour
  • 1 teaspoon baking soda
  • ¼ teaspoon salt
  • 1 cup buttermilk
  • 3 heaping cups chopped rhubarb

Topping

  • 1/3 cup granulated sugar
  • 1 tsp cinnamon

Instructions

  • Preheat the oven to 350°. Grease a 9×13 pan and set it aside.
  • In the bowl of a mixer beat the butter, sugar, and brown sugar on medium speed until light and fluffy. Add in the egg, vanilla, and lemon zest and beat until incorporated.
  • In a medium bowl sift the flour, baking soda, and salt together.
  • In 2-3 additions, alternate adding the buttermilk and dry ingredients to the wet ingredients in the mixer. Once well combined, mix in the chopped rhubarb by hand. Pour the batter into the pan and top with the cinnamon-sugar topping.
  • Bake for 40-45 minutes, or until a knife comes out clean from the center. Serve warm.

Nutrition

Calories: 286kcal | Carbohydrates: 49g | Protein: 3g | Fat: 9g | Saturated Fat: 5g | Polyunsaturated Fat: 1g | Monounsaturated Fat: 2g | Trans Fat: 1g | Cholesterol: 38mg | Sodium: 172mg | Potassium: 78mg | Fiber: 1g | Sugar: 32g | Vitamin A: 293IU | Vitamin C: 1mg | Calcium: 45mg | Iron: 1mg


from The Recipe Critic https://ift.tt/3kvsTDB
https://ift.tt/3mFQ8O5