बुधवार, 29 सितंबर 2021

Delicious Apple Hand Pies

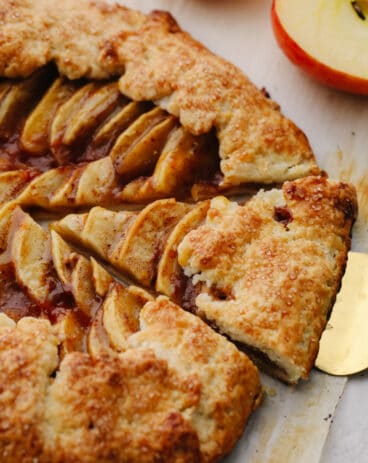
Apple hand pies are a classic dessert that your family will go crazy for! Delicious, flaky and ooey-gooey, these hand pies have the most amazing apple flavor that will have everyone asking for more than one!

This dessert is definitely one that I have made over and over! It’s simple and easy and can be eaten on the go! If you love pies like these, then try out Air Fryer Hand Pies, Blueberries and Cream, or this Cherry Pie! They are all SOO GOOD.
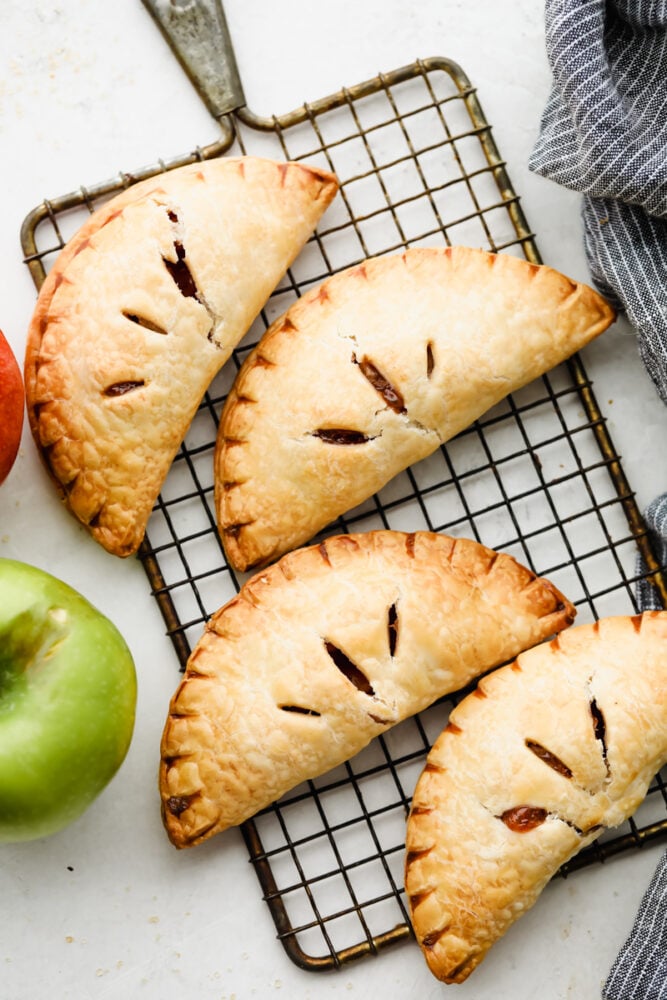
Hand pies on a cooling rack.

Apple Hand Pies

I love these apple hand pies! They are so cute and delicious. They remind me of my childhood when we would go on a road trip and each get to pick a treat out at the gas station to eat along the way. My dad would always pick out those little hand pies that came in a few different flavors! So when I made these, they totally took me back and made me want to make some of my own to bring on a family road trip! In fact, while you’re at it, go ahead and try making these Air Fryer Hand Pies, and these Blueberries and Cream Hand Pies… They are amazingly delicious as well!

The filling on these is absolutely divine! It is thick and has the more amazing apple cinnamon flavor. You know that I love the filling for a pie and this one is no exception. You know it’s that good when you just want to eat it plain with a spoon! And the crust on these is absolute perfection. It has just the right amount of sweetness and the flaky texture cannot be beaten! Go ahead and try these apple hand pies out! you will always want some on hand (see what I did there??) to eat whenever you want! Enjoy!

Ingredients in Apple Hand Pies

These are so simple to make! The ingredients are common and if you don’t have time, you could even just buy some store-bought pie crust to use. That will make the whole recipe very simple! See the recipe card below for a list of exact ingredient measurements.

  • Pie Crusts: You can either make your pie from scratch using this homemade pie crust recipe or they can be store-bought!
  • Tart apples : Dice up your apples to be small cubes that are all the same size.
  • Lemon juice: The lemon juice will keep your apples looking fresh.
  • Granulated sugar: This adds a sweet flavor to make it so the filling is overall sweet and not too tart.
  • Cornstarch: You use cornstarch to thicken up the filling.
  • Cinnamon: This adds that amazing flavoring to the apples!
  • Nutmeg: You absolutely have to have nutmeg in any apple recipe! It is what makes it so delicious!
  • Salt: The salt will enhance the flavors of the other ingredients.
  • Egg yolk: Using an egg yolk will help your pie crust to have that golden brown crust.
  • Water: This will be used as part of your egg wash!
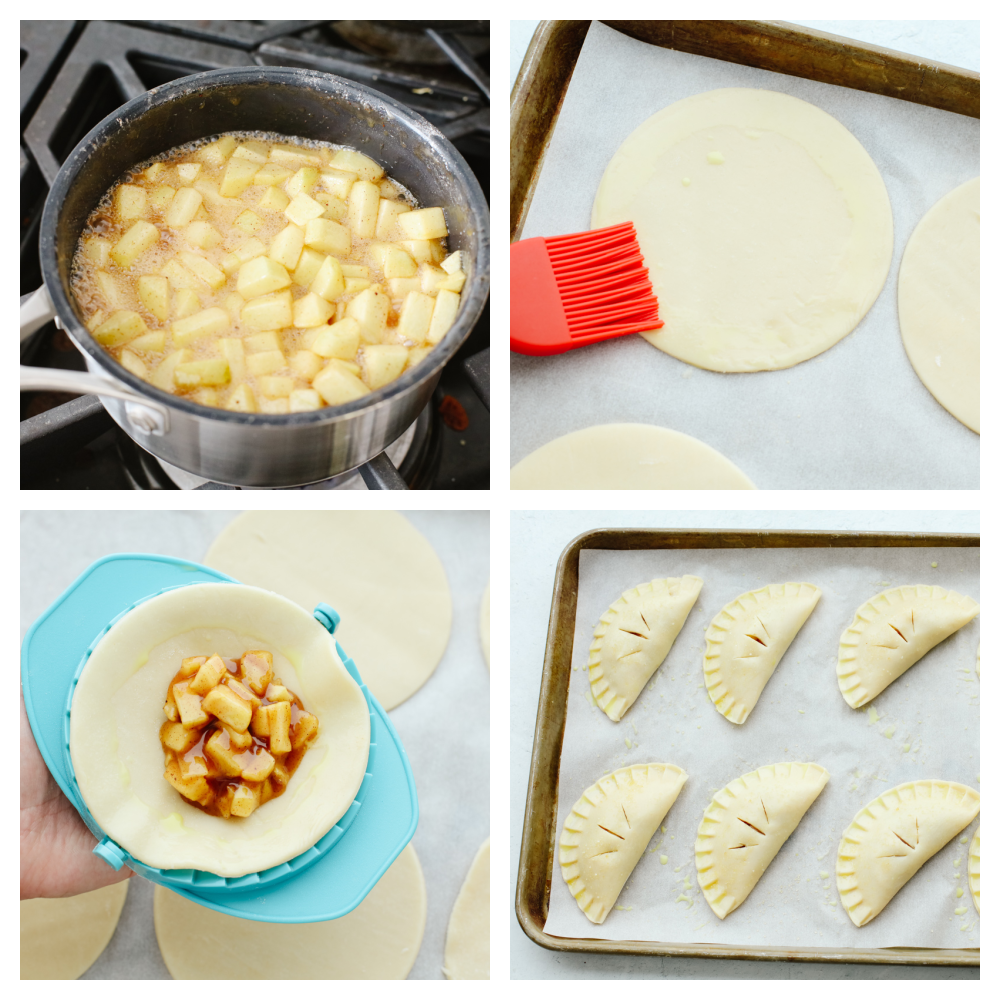
The process photos of apple pies.

Let’s Bake a Pie!

You will absolutely love these apple hand pies. They are so simple to make and you cannot beat a homemade dessert that you can eat on the go!

Filling

  1. Toss: In a medium sauce pan, toss the diced apples together with the lemon juice.
  2. Whisk: In a small bowl whisk together the granulated sugar, cornstarch, cinnamon, nutmeg, and salt. Pour over the apples and stir to combine.
  3. Simmer and cool: Heat the apple mixture over medium heat until the sugar is dissolved and bubbling. Turn the heat down to low and simmer for 2-3 minutes until it begins to thicken. Remove from the heat and let cool completely.

Dough

  1. Prep: Preheat the oven to 375° and line two baking sheets with parchment paper.
  2. Cut and chill dough: In two sections, roll the pie dough out until it’s between ¼ inch and ⅛ inch thick. Using a 3.5-4 inch round cookie cutter, cut out circles. Press the scraps together and roll out again and cut more circles. Chill the circles of dough in the fridge for at least 15 minutes before using.

Assembly

  1. Make egg wash: In a small bowl use a fork to combine the egg yolk and water for your egg wash.
  2. Brush on egg wash: Arrange discs of dough on the wo baking sheets. Going one disc at a time, brush the edges with egg wash. If you are using an empanada mold or a hand pie press, transfer the disc to the mold.
  3. Fill dough and seal: Place about 1-1.5 tablespoons of the apple filling in the center of the dough. Press the mold together, being sure the edges seal well. If you don’t have a hand pie press or empanada mold, fold the dough over and use a fork to crimp the edges together. Repeat with the remaining pies.
  4. Vent, sprinkle with sugar and chill: Use a sharp knife to cut a few slits on top of each pie to allow steam to vent. Brush the tops of each pie with egg wash and sprinkle with course sugar. Place in the fridge to chill for at least 15 minutes before baking.
  5. Bake, cool and serve: Remove from the fridge and bake immediately for 20-25 minutes, until the crust is nice and golden brown. Allow the apple hand pies to cool for at least 15 minutes before serving.

Tips For Apple Hand Pies

Hand Pies are rustic, homey, and delicious! They are fun and easy to make and to help you out, I’ve come up with a few tips that will help these turn out just right!

  • No homemade dough? No problem: If you want to skip the process of making your own pie dough, don’t sweat it. Skip it and press forward with the pre-made stuff. This recipe is quick and easy with store bought pie dough!
  • COLD dough: Pie dough can be intimidating, but one of the best ways to work with it is to make sure it stays nice and cold. If you feel like the dough is getting too pliable or too soft, set it in the fridge for 10-15 minutes so that it can chill.
  • Choosing apples for a recipe: There are several different types of apples that hold up well to baking. Granny Smith apples are nice and tart and hold their shape, while Honeycrisp are sweeter, larger and hold their shape just as well. Braeburn or Pink Lady apples are bursting with flavor and also a popular choice!
  • Less is more with the filling: Go easy on the filling in each pie and use only 2 tablespoons. This is just the right amount for the hand pies because then they don’t burst and make a mess all over.
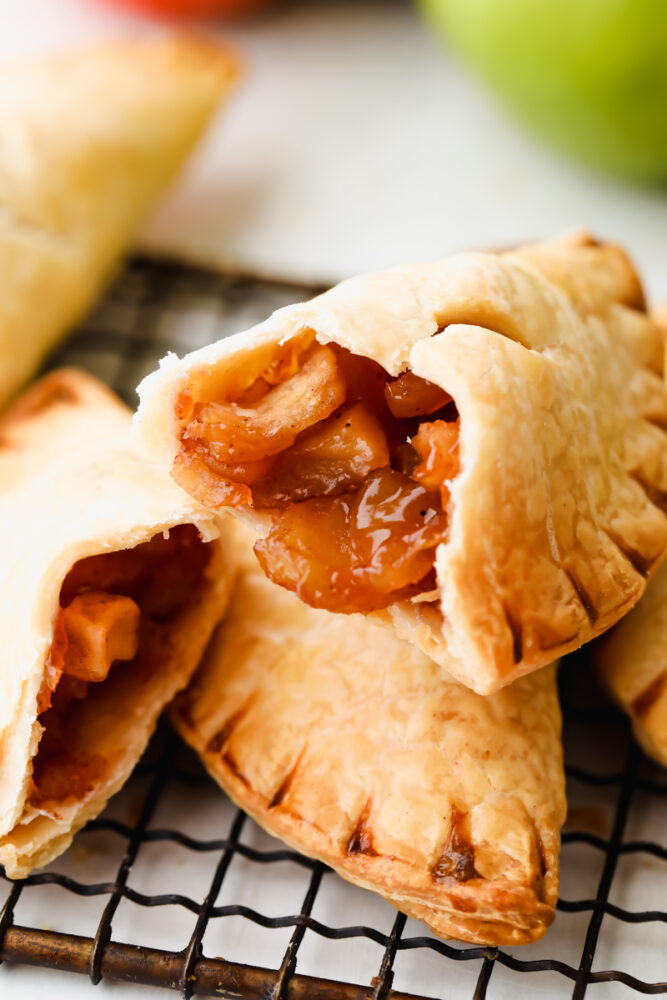
Apple pies cut in half.

How to Store Leftovers

These delightful apple hand pies are the perfect treat for serving kids and family! I especially love them because they travel well and can go with you wherever you go! They hold up well in either the fridge or at room temperature so they will work for a wide variety of events.

Room temperature: Store the hand pies in an airtight container on your counter. They will last like this for 4-5 days.

Refrigerator: Store in the refrigerator in an airtight container in your fridge. They can last in the refrigerator for up to 7 days.

Print

Apple Hand Pies

Apple hand pies are a classic dessert that your family will go crazy for! Delicious, flaky and ooey-gooey, these hand pies have the most amazing apple flavor that will have everyone asking for more than one!
Course Dessert
Cuisine American
Keyword apple hand pies
Prep Time 35 minutes
Cook Time 25 minutes
Chill 15 minutes
Total Time 1 hour 15 minutes
Servings 8 Pies
Calories 270kcal
Author Alyssa Rivers

Ingredients

  • 2 Pie Crusts (Homemade or store-bought)
  • 2 Cups Tart Apples diced (about 2-3 apples)
  • 1 Teaspoon Lemon Juice
  • ½ Cup Granulated Sugar
  • 1 Tablespoon Cornstarch
  • ½ Teaspoon Cinnamon
  • A good sized pinch Nutmeg (about ⅛ teaspoon)
  • Dash of Salt
  • 1 Egg Yolk
  • 2 Tablespoons water

Instructions

Filling

  • In a medium saucepan, toss the diced apples together with the lemon juice.
  • In a small bowl whisk together the granulated sugar, cornstarch, cinnamon, nutmeg, and salt. Pour over the apples and stir to combine.
  • Heat the apple mixture over medium heat until the sugar is dissolved and bubbling. Turn the heat down to low and simmer for 2-3 minutes until it begins to thicken. Remove from the heat and let cool completely.

Dough

  • Preheat the oven to 375° and line two baking sheets with parchment paper.
  • In two sections, roll the pie dough out until it’s between ¼ inch and ⅛ inch thick. Using a 3.5-4 inch round cookie cutter, cut out circles. Press the scraps together and roll them out again and cut more circles. Chill the circles of dough in the fridge for at least 15 minutes before using.

Assembly

  • In a small bowl use a fork to combine the egg yolk and water for your egg wash.
  • Arrange discs of dough on the two baking sheets. Going one disc at a time, brush the edges with egg wash. If you are using an empanada mold or a hand pie press, transfer the disc to the mold.
  • Place about 1-1.5 tablespoons of the apple filling in the center of the dough. Press the mold together, being sure the edges seal well. If you don’t have a hand pie press or empanada mold, fold the dough over and use a fork to crimp the edges together. Repeat with the remaining pies.
  • Use a sharp knife to cut a few slits on top of each pie to allow steam to vent. Brush the tops of each pie with egg wash and sprinkle with coarse sugar. Place in the fridge to chill for at least 15 minutes before baking.
  • Remove from the fridge and bake immediately for 20-25 minutes, until the crust is nice and golden brown. Allow the pies to cool for at least 15 minutes before serving.

Nutrition

Calories: 270kcal | Carbohydrates: 39g | Protein: 3g | Fat: 12g | Saturated Fat: 4g | Polyunsaturated Fat: 1g | Monounsaturated Fat: 5g | Cholesterol: 24mg | Sodium: 176mg | Potassium: 79mg | Fiber: 2g | Sugar: 16g | Vitamin A: 50IU | Vitamin C: 2mg | Calcium: 14mg | Iron: 1mg


from The Recipe Critic https://ift.tt/2Y0mIAl
https://ift.tt/3m6vEfd
मंगलवार, 28 सितंबर 2021

Homemade Dog Treats

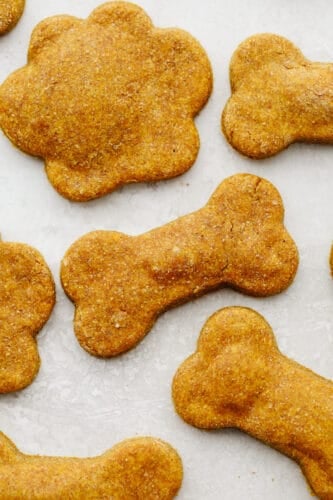
These homemade dog treats are going to be your pup’s new obsession. They’re super easy to throw together and full of healthy ingredients!
Recipes like this are the perfect activity for the family. Have bored kids at home? Try making ice cream in a bag, fruit leathers, or caramel apples!

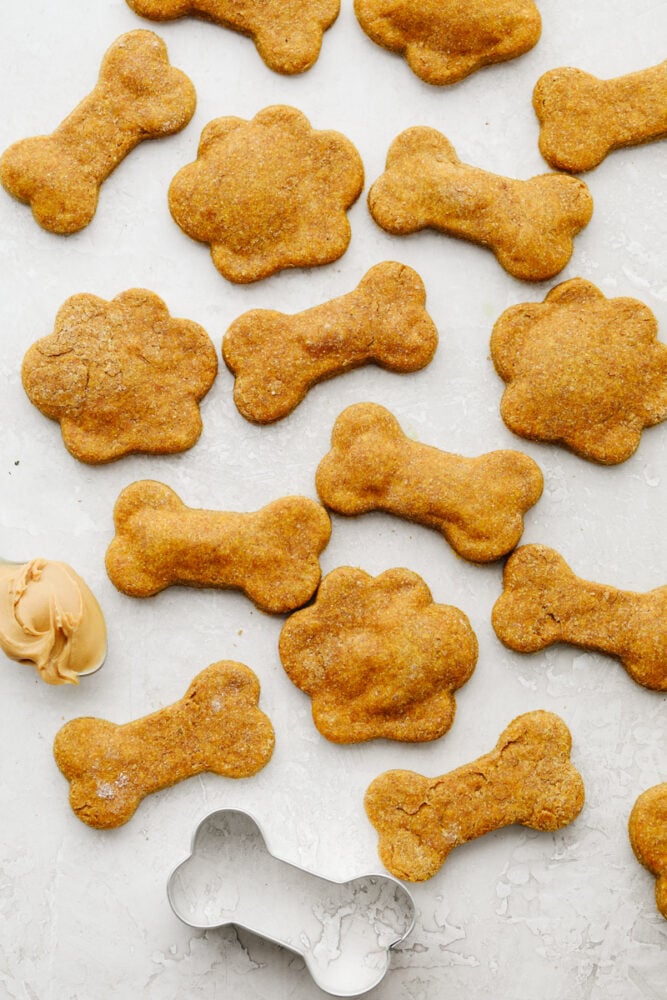
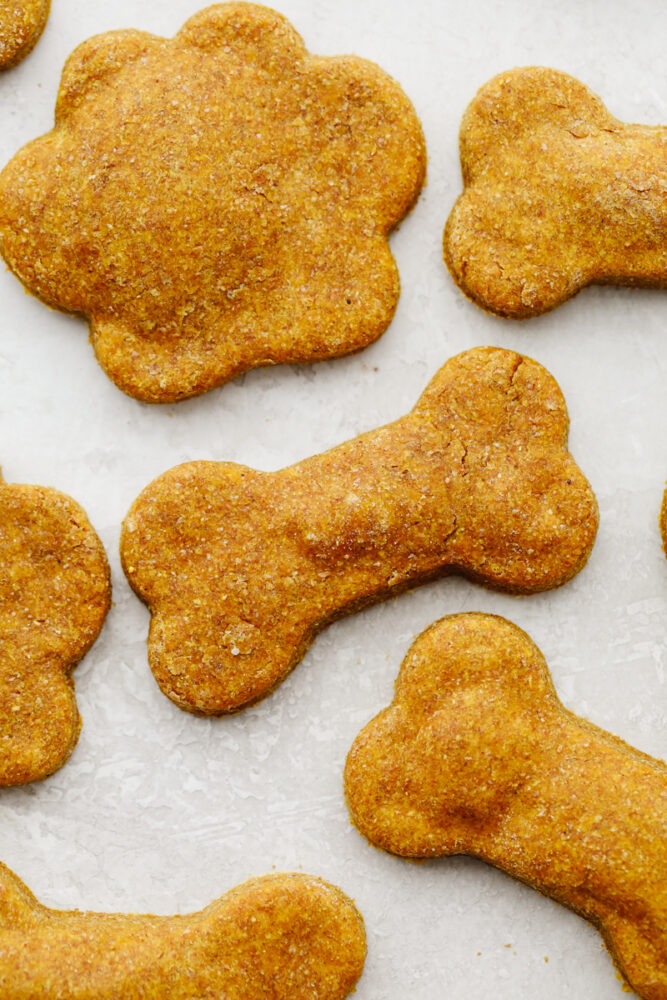
Various dog treats and a bone-shaped cookie cutter.

Pumpkin Peanut Butter Dog Treat Recipe

I am so excited for the first dog-friendly recipe to be up on the blog! We humans get so many tasty baked goods, it’s time that our pups do, too! It’s hard to know what dog treats are healthy or not. Unfortunately, so many prepackaged treats are loaded with fillers and preservatives. Today, we’re making dog treats with just a few simple ingredients. Pumpkin purée, peanut butter, eggs, whole-wheat flour, and cinnamon are all you need! Honestly, it’s a relief knowing what exactly goes into these dog treats so we don’t have to worry! My girls are obsessed with making these. It’s a fun activity for all of us! And most importantly, our Portuguese Water Dog, Leia, gives them a 10/10.

The foundation of these treats is a mix of peanut butter and pumpkin purée. Peanut butter, in moderation, is a great source of healthy fats and protein for your dog! Similarly, a pumpkin is great for regulating your dog’s digestive system. It’s full of fiber! Eggs, whole-wheat flour, and cinnamon are all completely healthy for dogs to consume, and create the cookie-like texture of the treat once baked. Heads up: these are also safe for humans to consume. I’m not going to judge if you munch on a couple! They are essentially a pumpkin spice biscuit.

Homemade Dog Treat Ingredients

Only 5 human-grade ingredients are needed for these cute little treats! All are easy on your dog’s stomach. I tested these treats on a few of our family’s dogs with flying colors. Yours will love them, too!

  • Pumpkin Purée: Adding pumpkin purée helps these treats to be easily digestible!
  • Peanut Butter: What dog doesn’t like peanut butter? It is full of proteins and healthy fats for your pup. Just make sure there isn’t any xylitol in the brand you choose. Xylitol is an artificial sweetener that is toxic to dogs.
  • Eggs: Used as a binding agent to give these treats their cookie-like form!
  • Whole-Wheat Flour: I like to use whole-wheat flour for its health benefits. If your dog has a gluten intolerance, opt for a gluten-free flour!
  • Cinnamon: In small quantities, cinnamon is a perfectly safe ingredient for dog treats. It will add extra flavor!
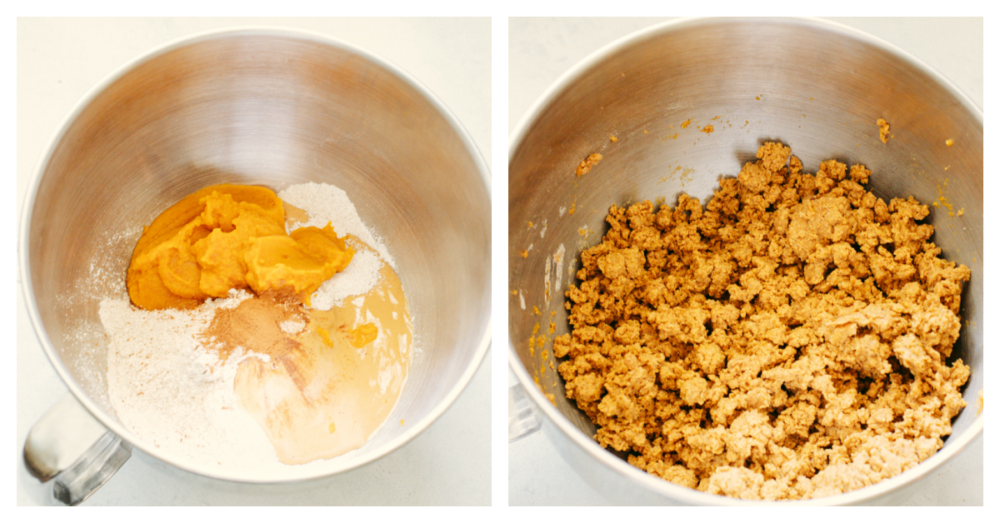
Process shots of mixing up treat batter.

How to Make Dog Treats at Home

Making treats for your dogs at home is a cinch. It’s fun, too! You can use any shape of cookie cutter you like! With Halloween coming up, some spooky dog treats would make an awesome gift for your loved ones with furry friends!

  1. Preheat Oven, Prep Baking Sheet: To start, preheat the oven to 350° and line a baking sheet with parchment paper.
  2. Mix Wet Ingredients: In the bowl of a mixer, use the paddle attachment to combine the pumpkin, peanut butter and eggs on medium high speed.
  3. Add Flour and Cinnamon: Next, add in the flour and cinnamon and mix until a stiff dough has formed.
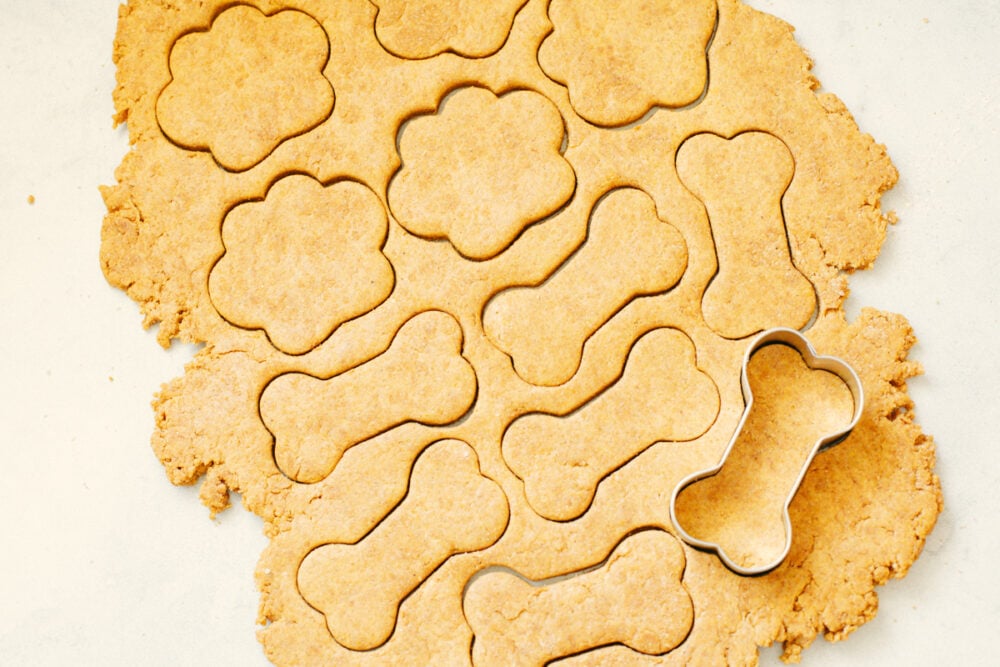
  4. Roll Out Dough and Cut: Turn the dough out on a lightly floured surface and roll out to ¼ inch thick. Then, use cookie cutters to cut your desired shapes!
  5. Bake: Bake for about 20-25 minutes, until the edges begin to turn golden brown. Allow to cool completely.
  6. Serve: Your treats are ready for your favorite pups!
Cutting rolled dough into various shapes.

Tips for Successful Dog Treats

Homemade dog treats have to be made with the right ingredients to avoid feeding your furry friend something that could potentially make them sick. This recipe is pretty simple, but there are a few tips to help you make these perfectly canine-friendly!

  • Natural Peanut Butter: Quite a few peanut butters contain xylitol as a sugar substitute. It’s perfectly fine for human consumption, but it’s very poisonous for dogs! Be sure to check the ingredients on your peanut butter before using it in this recipe. I prefer an all natural peanut butter that doesn’t contain any sweetener at all.
  • Whole-Wheat Flour: Whole wheat has more nutrients in it and is more beneficial for your dog, but if you don’t have whole wheat flour you can substitute all-purpose flour instead.
  • NO Nutmeg: If you want to get creative and add a few spices to the recipe, be sure not to add nutmeg. Nutmeg is toxic to dogs and should not be included in this recipe. This includes any sort of pumpkin pie spice since it almost always has nutmeg in it.
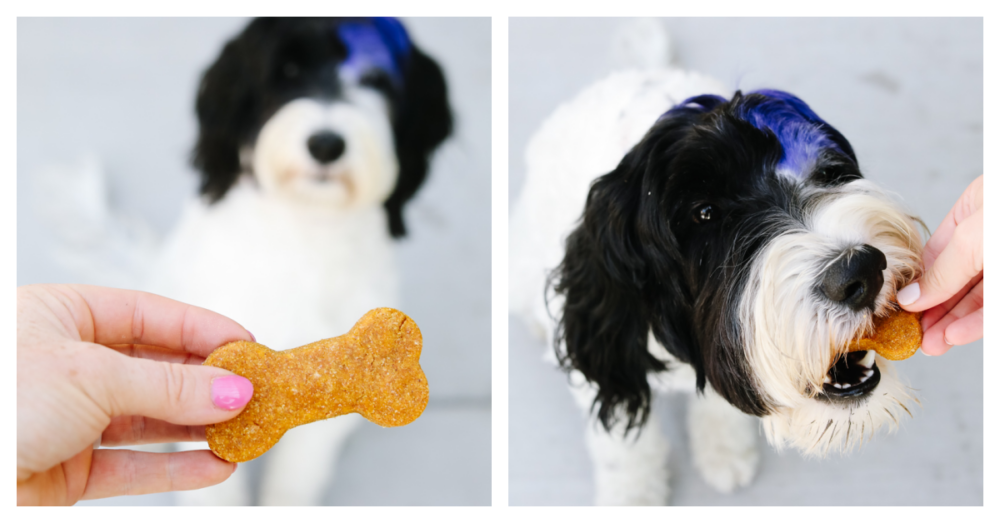
Black and white dog eating a treat.

Storing Homemade Dog Treats

Homemade dog treats are free of all the preservatives you find in store-bought dog treats. The only downside to them is their shelf-life being shorter than typical treats. By storing them in the fridge or freezer instead of at room temperature, you can extend their shelf life!

  • At Room Temperature: Store in an airtight container or ziplock bag at room temperature for up to 7 days.
  • In the Refrigerator: Your dog treats will keep in the fridge for up to 3 weeks. Store in an airtight container or ziplock bag for best results!
  • In the Freezer: When stored in a resealable freezer bag, your treats will last 3 months. Allow to thaw before serving to your pup.
Closeup of dog treats.
Print

Homemade Dog Treats

These homemade dog treats are going to be your pup's new obsession. They're super easy to throw together and full of healthy ingredients!
Course Snack
Cuisine American
Keyword dog treats, homemade dog treats
Prep Time 15 minutes
Cook Time 20 minutes
Total Time 35 minutes
Servings 24 Treats
Calories 73kcal
Author Alyssa Rivers

Ingredients

  • 1 Cup Pumpkin Puree
  • 1/3 Cup Peanut Butter No Xylitol
  • 2 large Eggs
  • 2 1/2 Cups Whole Wheat Flour
  • ¾ Teaspoon Cinnamon

Instructions

  • Preheat the oven to 350° and line a baking sheet with parchment paper.
  • In the bowl of a mixer use the paddle attachment to combine the pumpkin, peanut butter, and eggs at medium-high speed.
  • Add in the flour and cinnamon and mix until a stiff dough has formed.
  • Turn the dough out on a lightly floured surface and roll out to ¼ inch thick. Use cookie cutters to cut your desired shapes.
  • Bake for about 20-25 minutes, until the edges begin to turn golden brown. Allow cooling completely.

Nutrition

Calories: 73kcal | Carbohydrates: 11g | Protein: 3g | Fat: 3g | Saturated Fat: 1g | Polyunsaturated Fat: 1g | Monounsaturated Fat: 1g | Trans Fat: 1g | Cholesterol: 16mg | Sodium: 23mg | Potassium: 96mg | Fiber: 2g | Sugar: 1g | Vitamin A: 1613IU | Vitamin C: 1mg | Calcium: 11mg | Iron: 1mg


from The Recipe Critic https://ift.tt/3EZiLwg
https://ift.tt/3CPQwOE

How to Make the Best Quiche

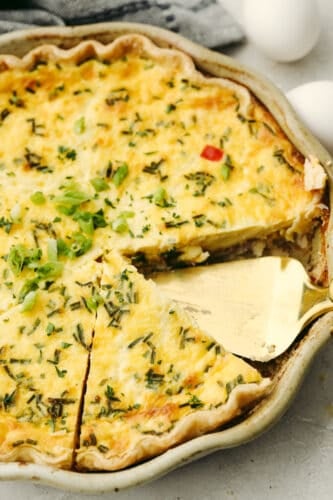
Creamy and custard-like, the best quiche starts with a basic recipe and has endless options for adding meat, vegetables, and herbs. This delicious staple recipe is perfect for breakfast, lunch, or dinner.

Quiche is so light and delicious! It’s perfect for switching up breakfast. Try delicious ham and cheese, ham and broccoli, or even a sausage egg frittata for more warm, eggy goodness!

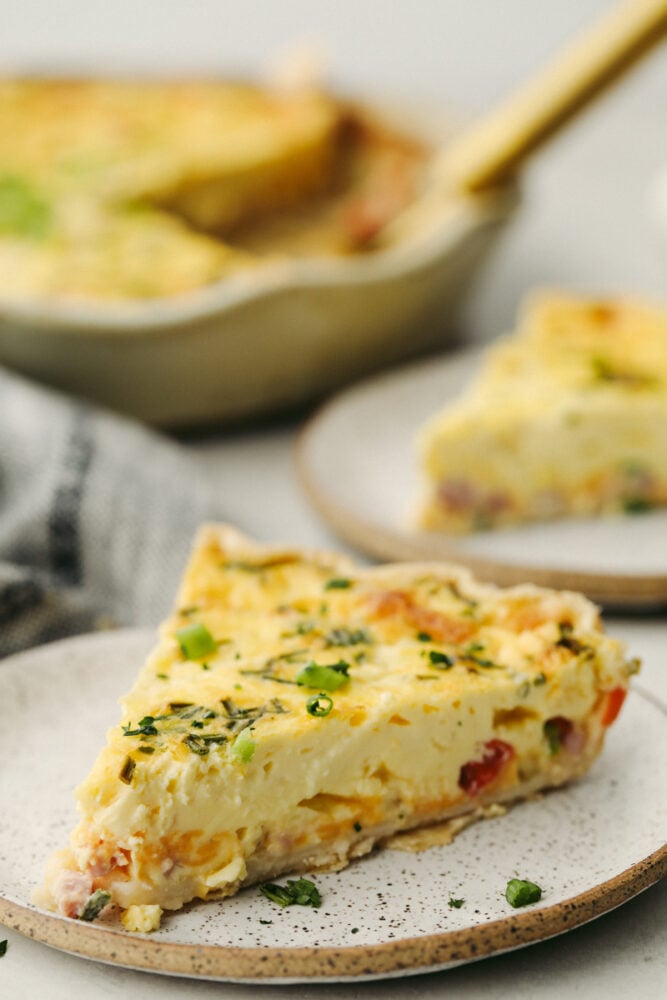
A slice taken out of quiche.

Easy Fluffy Quiche Recipe

This is the breakfast recipe you’re going to have on repeat. You can recreate amazing French flavors with just 5 simple ingredients! The result is flaky, golden, flavorful, with a creamy custard-like filling. The flavor combinations are endless and this dish makes a perfect meal for any time of day. The best part of it all is that it is insanely easy to make. Even the homemade crust! This quiche looks so beautiful coming out of the oven. It’s an impressive breakfast with minimal effort needed to put it together!

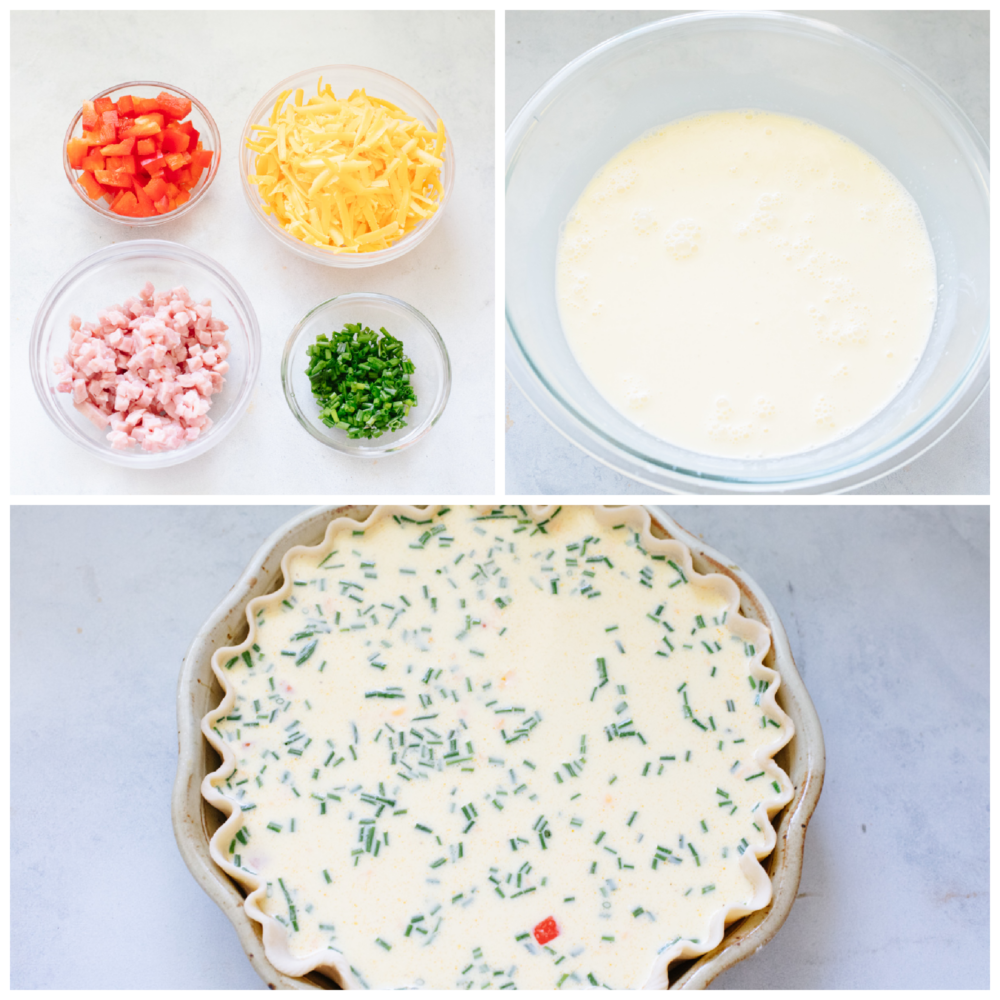
In this recipe, I’m using chopped tomatoes, grated cheddar cheese, diced ham, and chives. What you choose to add to it is completely up to you! I have put together a guide below of different combinations. No matter what you choose, you will love the way your toppings taste in a bed of light, fluffy egg! This always gets recommended for breakfast and for good reason! This quiche is divinely smooth and melt-in-your-mouth.

Quiche Recipe Ingredients

Really, quiche is just milk and egg. It doesn’t get any more basic than that! You get to pick all of your add-ins. And whether or not you make your pie crust from scratch or buy it at the store is completely up to you! This quiche recipe is the perfect blank canvas. You can find all measurements in the recipe card below!

  • Pie Crust: Use a homemade pie crust to achieve a homemade quiche full of flavor and buttery flakiness. Short on time? A store-bought version will work just as well. Don’t wan’t a crust at all? Sure! Line your pie tin with finely sliced potatoes for a tasty crustless quiche.
  • Eggs: The eggs are the base of the recipe that hold everything together! They are also responsible for the irresistible custard-like texture.
  • Heavy Cream: The heavy cream creates a thick filling that adds creaminess to the dish and balances the milk out.
  • Milk: To create a quiche that is slightly dense but still fluffy, use a blend of heavy cream and milk. I prefer using whole milk versus a lighter skim version. The extra fat content is important for achieving the best texture.
  • Herbs and Seasoning: The most basic quiches have only salt and pepper. If you desire, however, adding fresh herbs and spices will elevate the flavor and make it richer in taste.

How Do I Make the Best Quiche?

While this quiche is super easy to make, it’s a little more tricky to master. Patience is key here! You want to cook your quiche low and slow to keep the light fluffy texture. Too high of heat will cause the egg to curdle. See more tips and tricks below.

  1. Preheat Oven: To begin, preheat your oven to 350 degrees Fahrenheit.
  2. Prepare Crust: Next, prepare your pie crust according to recipe directions. Similarly, you can also line a pie dish with a store-bought pie crust.
  3. Create Quiche Base: Whisk the eggs, heavy cream, milk, salt and pepper together in a large bowl.
  4. Precook Add-ins: If adding any meats or vegetables, make sure to brown or sauté them in a skillet before adding them to the egg mixture.
  5. Bake: Next up, pour the egg mixture into the pie crust and bake for 45 to 55 minutes until the center is set. If the crust edges begin to brown, use a pie shield or foil wrapped around the edge.
  6. Rest: Let the quiche sit for at least 15 minutes before slicing.
Process shots of preparing quiche and add-ins.

Tips and Tricks for Making Quiche

Use these great tips to create a quiche that rivals your favorite brunch restaurants! You can master this recipe and have amazing results every time.

  • Bake it Slow: Again, super important to making a quiche that tastes like quiche and not scrambled eggs! The longer baking time is necessary for achieving that tasty custard texture. You run the risk of scrambling your eggs if you cook it on too high of a heat.
  • Precook Any Toppings/Add-ins: To lower the risk of getting a soggy crust, make sure any add-ins have been browned or sautéed before adding into your egg mixture. Meats and vegetables retain a lot of water and will release it all into your quiche once baked. Sautéing helps to remove excess moisture.
  • Egg to Milk Ratios: In order to keep the perfect custardy texture, for every egg you use, you need half a cup of milk. (This ratio also goes for heavy cream.) It has worked perfectly for me! It’s super important to follow because if you don’t use enough milk, your quiche will be dry. Too much milk, and your quiche will be soggy.
  • Soggy Crust: There are a couple solutions for avoiding a soggy crust. First, you can add breadcrumbs to the bottom of your pie crust to help soak up any excess moisture. You can also blind bake your crust! Cover with parchment paper and pop it into the oven for 15 minutes at 400 degrees Fahrenheit. It’s best to add some pie weights into the bottom to retain its shape.
  • Don’t Overload Your Quiche: While it may be tempting to fill your quiche with all the add-ins, one of the best parts of quiche is its natural texture! Overloading your quiche can make it too dense.

Storing Leftover Quiche

Here are my tips for storing and reheating! You’ll be able to enjoy this flaky delight even days after you make it!

  • In the Refrigerator: You can either tightly wrap your entire quiche with plastic wrap or put individual slices in resealable plastic bags. Either way, your quiche will last in the fridge for up to 4 days.
  • In the Freezer: Wrap your quiche in plastic wrap and then place in an airtight container. You can freeze your quiche for up to 1 month before it starts to lose flavor and texture.
  • Reheating: Using an oven to reheat is the best way to retain a tasty, flaky crust. Allow your quiche to thaw/come to room temperature before baking. Pop your quiche in the oven at 350 degrees Fahrenheit for 15-20 minutes or until warmed through. You can use a pie shield or tin foil over your crust to keep it from overcooking.
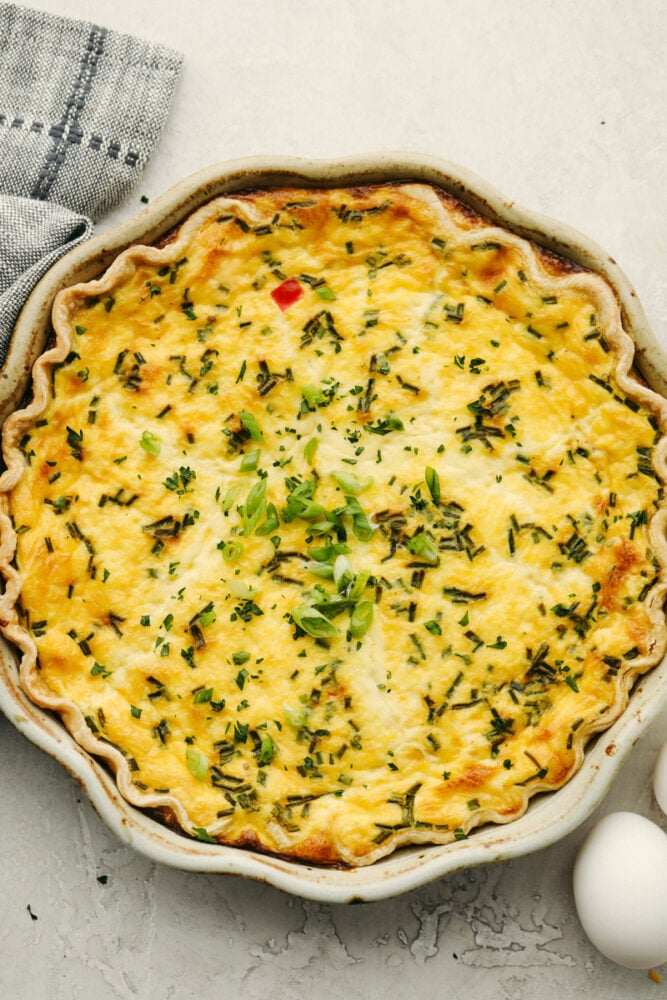
A full quiche in a pie tin.

Ideas for Tasty Add-ins

You can get creative with your ingredient combinations whether it’s a vegetable quiche or a meat-lovers version! Below are some topping ideas to help you make the tastiest quiche possible! I usually like to mix and match 3 different ingredients to keep my quiche from becoming overloaded.

  • Cheese: Flavorful cheeses work best! Swiss, parmesan, gruyere, pepper jack, sharp cheddar, and goat cheese are some of my favorites.
  • Vegetables: Sauteed mushrooms, onions, asparagus, peppers, chives, or broccoli will enhance any quiche!
  • Meat and Fish: Try bacon, diced ham, sausage or lox!
  • Toppings and Garnish: Fresh herbs, extra grated cheese, hollandaise sauce, cheese sauce, or just a little extra salt and pepper.

Complete Your Brunch

Making this incredible quiche is the perfect opportunity to break out your favorite brunch recipes. Bread, biscuits, potatoes, a beef hash, fruit, and pastries are just a few tasty recommendations that pair amazingly with this recipe!

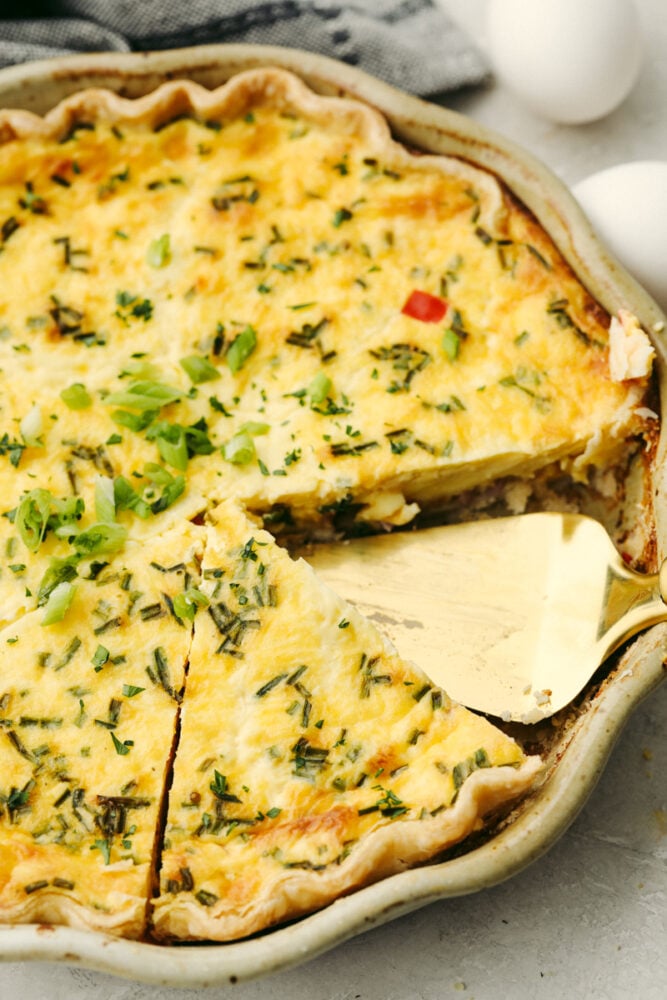
A quiche slice on a stoneware dish.

A Reader’s Review

“Creamy and delicious! I added sauteed mushrooms, caramelized onions and chopped bacon, and 1% milk in place of whole milk. Only negative was that I couldn’t even fit half of the egg mixture in my pie dish (I used a 9” glass pan). Next time I will half it. Thank you for the recipe!”
Emily
Print

The Best Quiche

Creamy and custard-like, the best quiche starts with a basic recipe and has endless options for adding meat, vegetables, and herbs. This delicious staple recipe is perfect for breakfast, lunch, or dinner.
Course Breakfast
Cuisine American
Keyword quiche
Prep Time 10 minutes
Cook Time 55 minutes
Resting Time 15 minutes
Total Time 1 hour 20 minutes
Servings 10 Slices
Calories 306kcal
Author Alyssa Rivers

Ingredients

  • 1 Pie Crust homemade or store-bought
  • 6 large Eggs
  • 2 cups Heavy Cream
  • 1 cup Whole Milk
  • teaspoons Salt
  • 1 teaspoon Ground Pepper

Instructions

  • Preheat the oven to 350℉.
  • Prepare your pie crust according to recipe directions or line a pie dish with a store-bought pie crust.
  • Whisk the eggs, heavy cream, milk, salt and pepper together in a large bowl.
  • (If adding any meats or vegetables make sure to brown or saute them in a skillet before adding them to the egg mixture).
  • Pour the egg mixture into the pie crust and bake for 45 to 55 minutes until the center is set. If the crust edges begin to brown use a pie shield or foil wrapped around the edge. Let the quiche sit for 15 minutes before slicing.

Notes

Updated on September 27, 2021
Originally Posted on December 6, 2019

Nutrition

Serving: 1slice | Calories: 306kcal | Carbohydrates: 11g | Protein: 7g | Fat: 26g | Saturated Fat: 14g | Cholesterol: 194mg | Sodium: 495mg | Potassium: 131mg | Fiber: 1g | Sugar: 1g | Vitamin A: 923IU | Vitamin C: 1mg | Calcium: 81mg | Iron: 1mg


from The Recipe Critic https://ift.tt/2OTOeI4
https://ift.tt/2ZHmhvf

सोमवार, 27 सितंबर 2021

Simple and Delicious Baked Bananas

Baked bananas are deliciously sweet with a touch of cinnamon and honey! They are baked to perfection and I love nothing more than a dessert that’s easy AND made with fruit!

These bananas are the perfect dessert, breakfast, or even an after-school snack. For more ways to try out some ripe bananas, some of my favorites tried and true recipes are these Cupcakes, Brownies, and these yummy Banana Muffins! You MUST try them all!

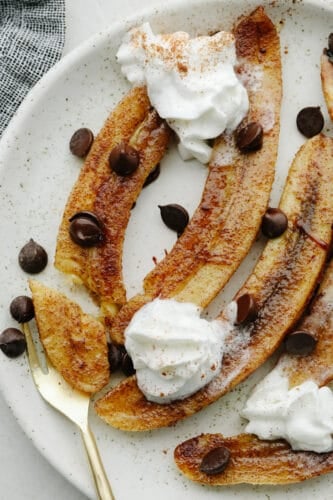
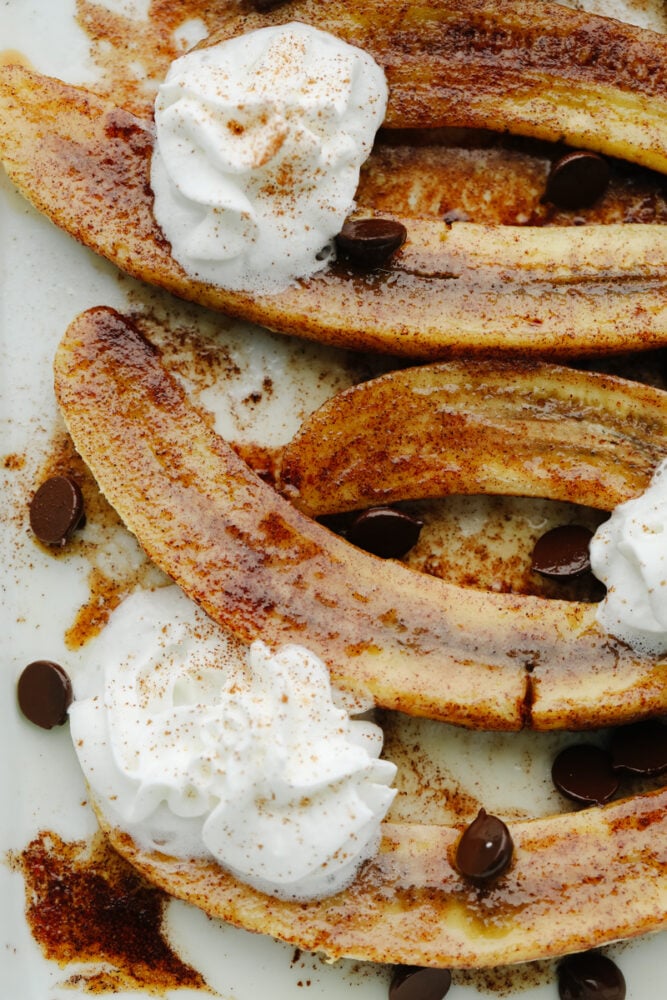
Baked bananas topped with cinnamon and whipped cream.

MUST Try Baked Bananas

I love recipes with bananas in them. Once they ripen and get extra sweet, there are SO many options on what to do with them! And this one is literally the easiest of them all. And hands down one of the best! Baked bananas are so sweet and creamy! They come out of the oven all warm and delicious. And then I top them with whipped cream that melts immediately and… well… You’ve got yourself a mouthwatering snack that just melts away in your mouth!

Because bananas are naturally sweet, you don’t need to add a lot to them to make them taste delicious. Plus, bananas are a great source of potassium so you can eat something tasty AND get a health benefit from it! It’s a win-win. These bananas are delicious on their own but add them to some ice cream or brownies and these will be next-level delicious! They are a MUST try!

What’s in Baked Bananas?

Yummy baked bananas only have 4 ingredients! Then, you can make them totally your own by changing up the toppings or adding them to another dessert! See the recipe card below for a list of exact measurements!

  • Bananas: When using your bananas for this recipe, make sure they are ripe. The peel should be yellow with a few brown spots!
  • Butter: Melt your butter befrehand so that it can be drizzled across the bananas!
  • Honey: The honey adds in a bit of healthy natural sweetness.
  • Cinnamon: The cinnamon adds just the right touch of flavoring that complement the banana flavor!
  • Chocolate chips and whipping cream: These toppings are completely optional. In fact, change these up and you will have your own unique recipe!

How to Bake Bananas

This recipe takes about 20 minutes from start to finish! And that includes 15 minutes of baking time! This is why this is such a great snack to make when you want something delicious but you don’t have a lot of time.

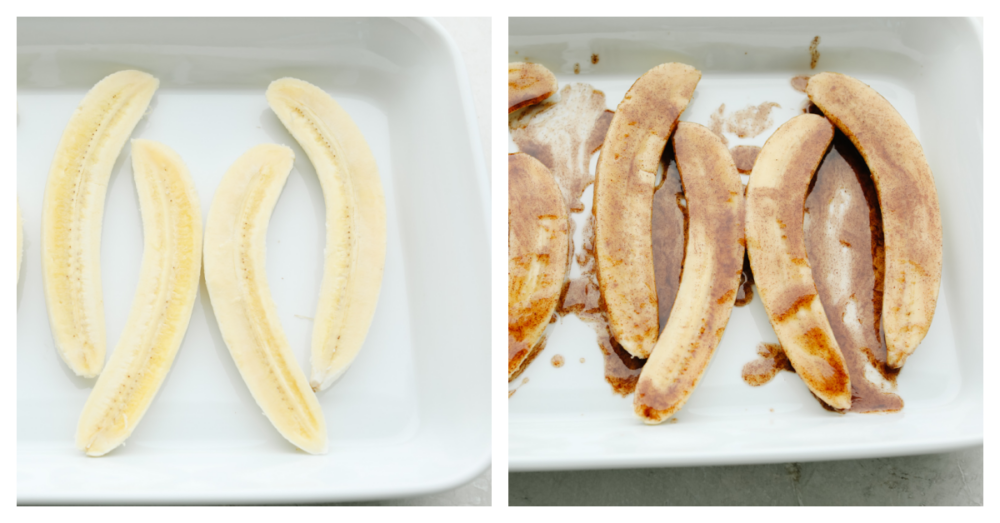
  1. Prep and cut: Preheat the oven to 350 degrees. Cut the banana in half and lay in a 9×13 inch baking dish.
  2. Combine and spread: Combine melted butter, honey and cinnamon and evenly spread onto the tops of the bananas.
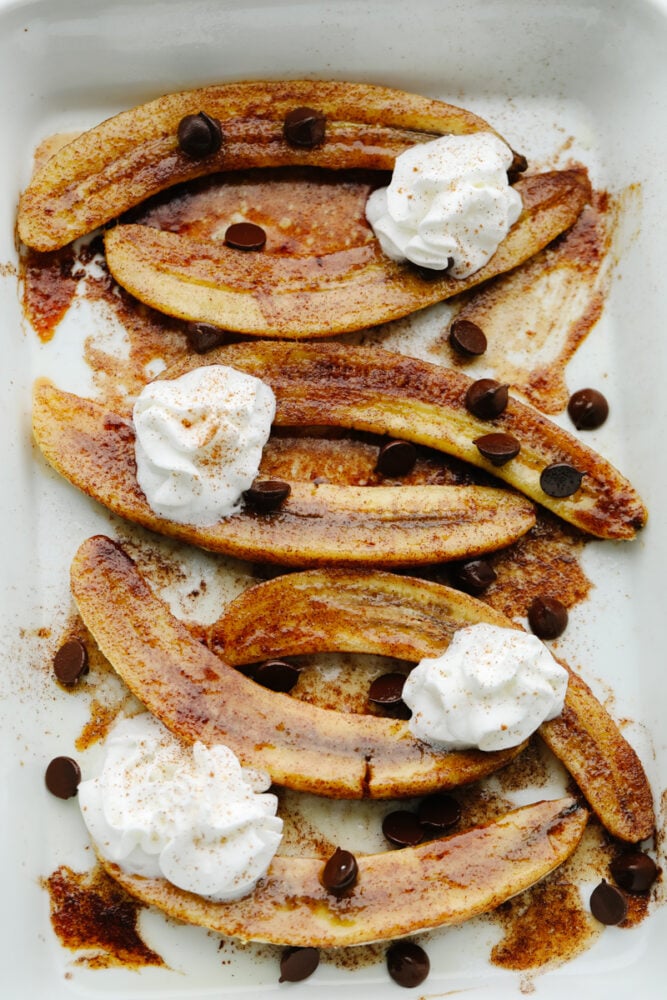
  3. Bake and serve: Bake for 15 minutes until they are as soft as you would like them. Serve with optional toppings.
2 pictures showing how to slice and flavor bananas.

Stages of a Banana

Bananas have a few different tastes depending on when you eat them in the ripening process! Here are a few tips to understand bananas that will help you know what to use in this baked banana recipe.

  • Green bananas: Green bananas are firm and not sweet. Put these on your counter and wait for them to ripen.
  • Yellow bananas: These are perfect for eating on their own. They are firm but getting sweeter by the day.
  • Yellow and bananas with some brown spots: These will be your baking bananas! They are very sweet but not too mushy.
  • Brown Bananas: These work great in smoothies or in a recipe that calls for mashed bananas. (Like banana bread)
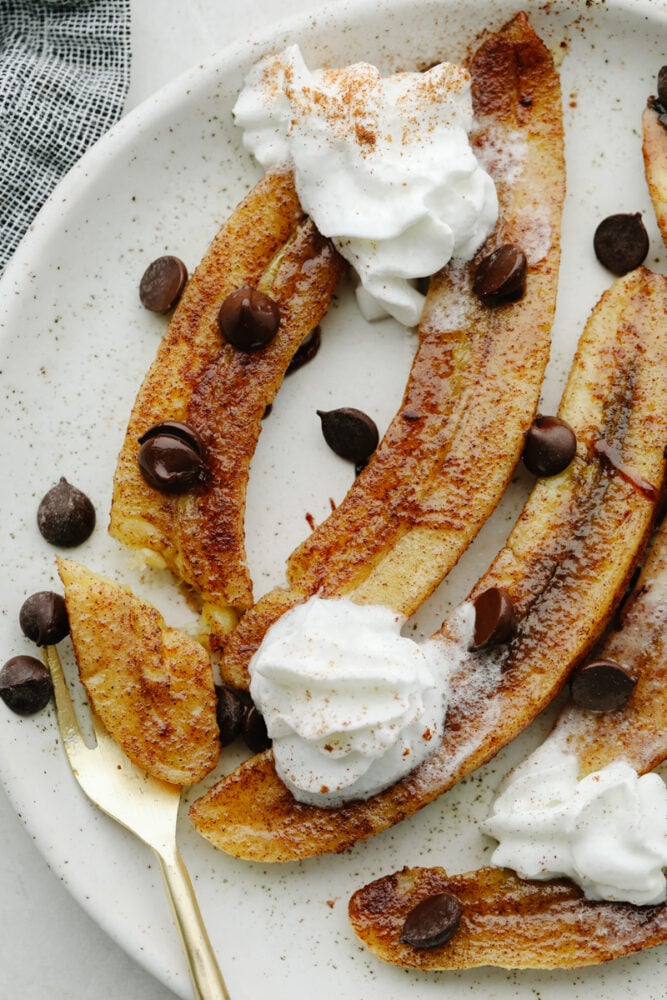
Sliced, baked bananas with toppings.

Adding Toppings

You can easily change up this recipe, just by changing up the toppings! Here is a list of a few favorites to put on these baked bananas after you pull them out of the oven!

  • Nuts: I love adding sliced almonds or walnuts to these to add a little bit of a crunch.
  • Sprinkles: My kids love it when I add anything colorful to a meal. So rainbow sprinkles really make this fun for them to eat!
  • Ice Cream: Add some ice cream on top of these baked bananas and it will be the best banana split that you’ve ever had!
  • Brownies: Bake some brownies beforehand and have them ready to be topped with these baked bananas. You cant go wrong with a chocolately banana taste!
  • Toffee bits: Once you’ve added the chocolate chips and whipped cream, then sprinkle on some bits of toffee! My mouth waters just thinking of this!
  • Crepes: While these are baking in the oven, then you can be making some crepes! Then, when these are finished you can add them into the crepe and top them with the whipped cream and chocolate chips. In fact, this is so yummy that you can use it as a breakfast meal!
Zoomed in picture of sliced, baked bananas.

Freezing Bananas

These baked bananas are best to be baked fresh. However, you can freeze the bananas that you have on hand and make this recipe later!

  1. Slice: Slice the bananas in half, lengthwise.
  2. Fast freeze: Line your bananas up on a baking tray that is lined with parchment paper and freeze them for 2-3 hours or until they are frozen solid. This step will make it so they don’t turn brown when you are freezing them!
  3. Airtight container: Take your bananas out and then put them in a ziplock bag but don’t everlap them! Seal it up tight!
  4. Label and freeze: Label the bag with the date lay them flat in your freezer. They can last up to 3 months frozen.
  5. Thaw and bake: When you are ready to use them, place them on a plate in your fridge to thaw. Then use them to bake!
Print

Simple and Delicious Baked Bananas

Baked bananas are deliciously sweet with a touch of cinnamon and honey! They are baked to perfection and I love nothing more than a dessert that's easy AND made with fruit!

Ingredients

  • 3 bananas
  • 1 Tablespoon butter melted
  • 1 Tablespoon honey
  • 1 teaspoon cinnamon
  • Optional toppings:
  • Chocolate Chips
  • whipping cream

Instructions

  • Preheat the oven to 350 degrees. Cut the banana in half and lay in a 9×13 inch baking dish.
  • Combine melted butter, honey and cinnamon and evenly spread onto the tops of the bananas.
  • Bake for 15 minutes until they are as soft as you would like them. Serve with optional toppings.


from The Recipe Critic https://ift.tt/3uhlQD5
https://ift.tt/3kIaLYd