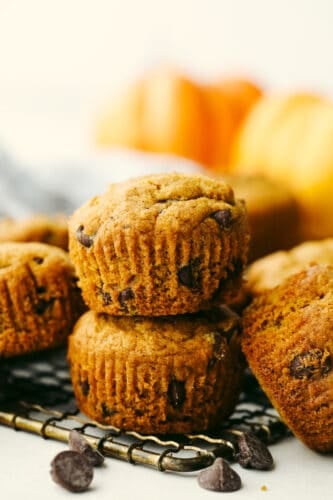
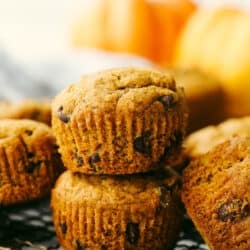
Pumpkin chocolate chip muffins are moist, chocolatey, and topped off with a sprinkling of sugar! The spices and pumpkin puree flavors make these perfect for cooler weather!
Fall is here and I’m all about the pumpkin and chocolate! If you love pumpkin as much as I do try then go ahead and try some of my favorite recipes like these Cookies, Muffins, or these amazing Pancakes.

Pumpkin Chocolate Chip Muffins
Pumpkin is so delicious and I want to load it into every possible recipe once fall rolls around because there’s just something so festive about it! I love decorating with them and even more, baking with them! In fact, these pumpkin chocolate chip muffins are one of my favorite tried and true, fall recipes! They are so easy to make and are a twist on your classic chocolate chip muffins. It’s an easy and delicious addition and a recipe that you will be wanting to make each fall! Or if you’re like me then it will creep into your baking ALL year long!
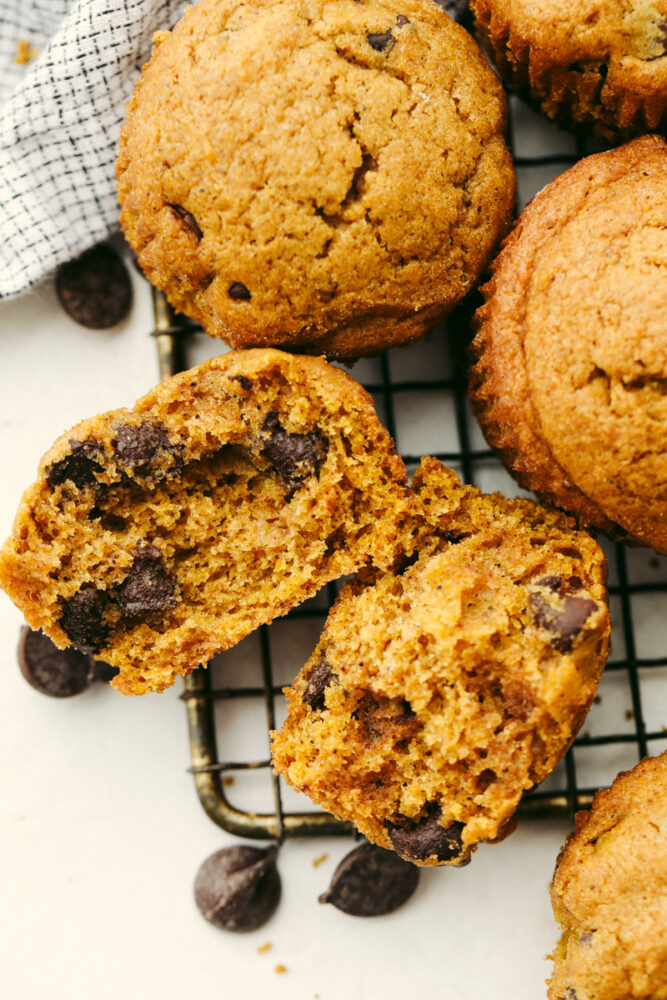
When you add pumpkin puree to a recipe, it adds such an amazing texture! It is what makes these muffins super soft and moist! So not only does the flavor taste delicious but it actually helps out in the baking process as well! Pumpkin puree can go fast at the stores. Because people are using it so often, it’s a good idea to stock up on a few cans at the beginning of the season. That way, you will have some on hand for whenever the craving hits! You will need it to make these yummy pumpkin cream cheese truffles and also this incredible pumpkin cake!
Ingredients for Pumpkin Chocolate Chip Muffins
These muffins are so delicious. They are just the right mixture of sweet with the taste of pumpkin flavor. Everyone loves these and I’m sure that you will too! See the recipe card below for exact measurements.
- Butter: Use unsalted butter at room temperature that you can cut easily into small pieces!
- Flour: I used all purpose flour in this recipe!
- Granulated sugar: Sugar adds in that sweetness.
- Brown sugar: Brown sugar is on of my favorite sweeteners!
- Baking soda and baking powder: These help the muffins to rise and be fluffy!
- Salt: The sale will help enhance the flavors of all of the other ingredients!
- Pumpkin Pie Spice: I highly recommend making your own homemade pumpkin pie spice from scratch! You will love it!
- Ground cinnamon: Cinnamon is a classic fall flavor!
- Large eggs: Use eggs that are at room temperature to mix better into the batter.
- Vanilla extract: This adds flavor to the sweetness!
- Milk: Milk will help to bring in that rich and creamy taste.
- Semisweet chocolate chips: I used semisweet chocolate chips but you can use whatever ones that you have on hand.
- Coarse sugar: This is to garnish on top after the muffins have baked!

Let’s Make Some Muffins!
These pumpkin chocolate chip muffins are simple and come together quickly! I love making this recipe with my kids!
- Preheat oven and prepare muffin tin: Preheat oven to 350 degrees and line a 12 count muffin tin with paper liners and then set it aside.
- Warm your butter: Place your butter pieces in a large, microwave-safe bowl and microwave until melted and then set it aside. Let the butter cool down to room temperature. Butter that’s too hot could cook your eggs or melt your sugar! Don’t let the butter ruin your muffins!
- Whisk together dry ingredients: In a large bowl combine flour, sugars, baking powder, baking soda, salt, pumpkin spice, and cinnamon and whisk them until well-combined. Then, set them aside.
- Stir together: Return to your bowl with the melted butter and make sure it has cooled down. Add eggs and vanilla, stir well.
- Mix together: Add pumpkin puree and milk and stir until completely combined.
- Mix the dry and wet ingredients together: Gradually stir your dry ingredients into your wet until completely combined. I like to go slow so that I don’t over mix the batter.
- Add chocolate chips: Gently fold in 1 cup of the chocolate chips.
- Pour batter into muffin tins: Evenly divide muffin batter into prepared muffin tins (filling each ¾ full). Sprinkle tops of muffins with remaining ⅓ cup of chocolate chips and then sprinkle tops generously with sugar.
- Bake in the oven: Bake on 350 for 20-22 minutes (toothpick inserted in center should come out mostly clean with only few crumbs).
- Cool completely: Allow muffins to cool and then serve and enjoy!

Variations
There are a few different ways to make these pumpkin chocolate chip muffins perfect for you! Here’s a couple of ideas for you to try and enjoy!
- Make mini muffins: You can make these into mini muffins and take them on the go! Just follow the instructions for this recipe to make them. Then, line a 24 mini cupcake muffin tin with liners (or spray it). Cook them for 12-15 minutes at 350 degrees. Let them cool and then you can gobble them right up!
- Turbinado sugar: This sugar is a mouthful to say but its absolutely delicious! Instead of using regular sugar to sprinkle on the top, try this instead! This sugar becomes nice and crisp on top of your muffins. It looks beautiful and tastes so sweet!
- Add-ins: If you want to try something new, add in some white chocolate chips or even some walnuts to the batter! I have also used some shredded coconut to give it a unique taste! Adding different things to the batter will change up the taste so that you can make them different every time!
How to Store Muffins
These pumpkin chocolate chip muffins are soft, springy, and I love them best when they’re served warm out of the oven. I love that melty chocolate! If you can’t eat them right away, follow these instructions so that you can store them and enjoy them later!
- Making the batter ahead of time: Make the batter and place it in a sealed, airtight container. Put it in the fridge for up to one day before use.
- Room temperature: Once your muffins have cooled, place them in an airtight container or ziplock bag. Store them on your counter for 2 to 3 days.
- Refrigerator: Stored in an airtight container, these muffins can last in the fridge for 4 to 5 days.
- Freezer: I place your muffins on a baking sheet (try not to have them touch) and place them in the freezer. after a couple of hours, they should be frozen. This helps them not to stick to one another! Take them out and store them in a ziplock bag or an airtight container. They will last for about a month like this in the freezer.
- Reheating: Take them out of the refrigerator or freezer. Let the muffins sit at room temperature to thaw. Use the microwave for a quick warm up or place them in the oven for a few minutes until they are warmed through.
*NOTE: I like to add a paper towel on top of the muffin tops to help lock in moisture and keep the muffins from sticking to each other and the bag when I am storing them. You can also stack your muffins on top of one another using the paper towel in between the layers.
More Pumpkin Recipes to Love

Desserts
Pumpkin Cheesecake Snickerdoodles

Desserts
Pumpkin Spice Sheet Cake
Desserts
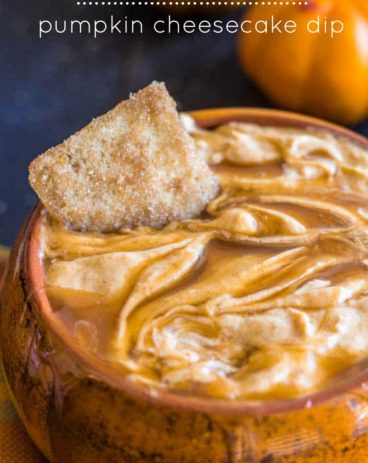
Caramel Pumpkin Cheesecake Dip
Dinner
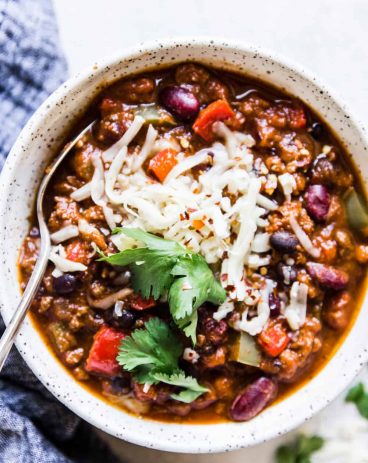
Slow Cooker Pumpkin Chili
Chocolate Chip Pumpkin Muffins
Ingredients
- 3/4 cup unsalted butter cut into pieces
- 1 1/4 cups all-purpose flour
- 1/2 cup granulated sugar
- 1/4 cup brown sugar
- 3/4 teaspoons baking soda
- 3/4 teaspoons baking powder
- 1/2 teaspoon salt
- 2 teaspoons pumpkin spice
- 1/2 teaspoon ground cinnamon
- 2 large eggs lightly beaten room temperature preferred
- 1 1/2 teaspoon vanilla extract
- 1 cup pumpkin puree
- 2 Tablespoons milk
- 1 ⅓ cup semisweet chocolate chips divided.
- coarse sugar for sprinkling optional
Instructions
-
Preheat oven to 350F and line a 12 count muffin tin with paper liners. Set aside.
-
Place your butter pieces in a large, microwave-safe bowl and microwave until melted. Set aside (you want the butter to cool down to room temperature so it's not too hot before you add the eggs — butter that is too hot could cook your eggs or melt your sugar and ruin your muffins)
-
Return to your bowl with the melted butter and ensure that it is not hot to the touch. Add eggs and vanilla, stir well.
-
Add pumpkin puree and milk and stir until completely combined.
-
Gradually stir your dry ingredients into your wet until completely combined, taking care to not overmix the batter.
-
Gently fold in 1 cup of the chocolate chips.
-
Evenly divide muffin batter into prepared muffin tins (filling each ¾ full). Sprinkle tops of muffins with the remaining ⅓ cup of chocolate chips and then sprinkle tops generously with sugar.
-
Bake on 350 for 20-22 minutes (toothpick inserted in the center should come out mostly clean with only a few crumbs).
-
Allow muffins to cool before enjoying.
Notes
Nutrition
from The Recipe Critic https://ift.tt/2ni2jEw
https://ift.tt/3kOP6xO