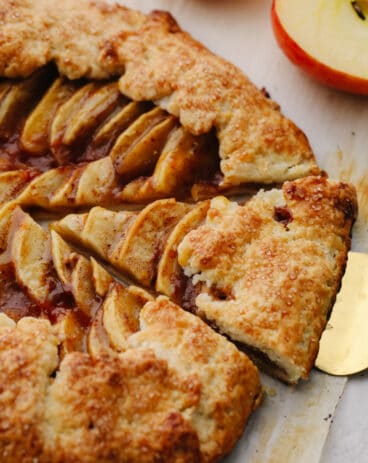
Apple hand pies are a classic dessert that your family will go crazy for! Delicious, flaky and ooey-gooey, these hand pies have the most amazing apple flavor that will have everyone asking for more than one!
This dessert is definitely one that I have made over and over! It’s simple and easy and can be eaten on the go! If you love pies like these, then try out Air Fryer Hand Pies, Blueberries and Cream, or this Cherry Pie! They are all SOO GOOD.

Apple Hand Pies
I love these apple hand pies! They are so cute and delicious. They remind me of my childhood when we would go on a road trip and each get to pick a treat out at the gas station to eat along the way. My dad would always pick out those little hand pies that came in a few different flavors! So when I made these, they totally took me back and made me want to make some of my own to bring on a family road trip! In fact, while you’re at it, go ahead and try making these Air Fryer Hand Pies, and these Blueberries and Cream Hand Pies… They are amazingly delicious as well!
The filling on these is absolutely divine! It is thick and has the more amazing apple cinnamon flavor. You know that I love the filling for a pie and this one is no exception. You know it’s that good when you just want to eat it plain with a spoon! And the crust on these is absolute perfection. It has just the right amount of sweetness and the flaky texture cannot be beaten! Go ahead and try these apple hand pies out! you will always want some on hand (see what I did there??) to eat whenever you want! Enjoy!
Ingredients in Apple Hand Pies
These are so simple to make! The ingredients are common and if you don’t have time, you could even just buy some store-bought pie crust to use. That will make the whole recipe very simple! See the recipe card below for a list of exact ingredient measurements.
- Pie Crusts: You can either make your pie from scratch using this homemade pie crust recipe or they can be store-bought!
- Tart apples : Dice up your apples to be small cubes that are all the same size.
- Lemon juice: The lemon juice will keep your apples looking fresh.
- Granulated sugar: This adds a sweet flavor to make it so the filling is overall sweet and not too tart.
- Cornstarch: You use cornstarch to thicken up the filling.
- Cinnamon: This adds that amazing flavoring to the apples!
- Nutmeg: You absolutely have to have nutmeg in any apple recipe! It is what makes it so delicious!
- Salt: The salt will enhance the flavors of the other ingredients.
- Egg yolk: Using an egg yolk will help your pie crust to have that golden brown crust.
- Water: This will be used as part of your egg wash!

Let’s Bake a Pie!
You will absolutely love these apple hand pies. They are so simple to make and you cannot beat a homemade dessert that you can eat on the go!
Filling
- Toss: In a medium sauce pan, toss the diced apples together with the lemon juice.
- Whisk: In a small bowl whisk together the granulated sugar, cornstarch, cinnamon, nutmeg, and salt. Pour over the apples and stir to combine.
- Simmer and cool: Heat the apple mixture over medium heat until the sugar is dissolved and bubbling. Turn the heat down to low and simmer for 2-3 minutes until it begins to thicken. Remove from the heat and let cool completely.
Dough
- Prep: Preheat the oven to 375° and line two baking sheets with parchment paper.
- Cut and chill dough: In two sections, roll the pie dough out until it’s between ¼ inch and ⅛ inch thick. Using a 3.5-4 inch round cookie cutter, cut out circles. Press the scraps together and roll out again and cut more circles. Chill the circles of dough in the fridge for at least 15 minutes before using.
Assembly
- Make egg wash: In a small bowl use a fork to combine the egg yolk and water for your egg wash.
- Brush on egg wash: Arrange discs of dough on the wo baking sheets. Going one disc at a time, brush the edges with egg wash. If you are using an empanada mold or a hand pie press, transfer the disc to the mold.
- Fill dough and seal: Place about 1-1.5 tablespoons of the apple filling in the center of the dough. Press the mold together, being sure the edges seal well. If you don’t have a hand pie press or empanada mold, fold the dough over and use a fork to crimp the edges together. Repeat with the remaining pies.
- Vent, sprinkle with sugar and chill: Use a sharp knife to cut a few slits on top of each pie to allow steam to vent. Brush the tops of each pie with egg wash and sprinkle with course sugar. Place in the fridge to chill for at least 15 minutes before baking.
- Bake, cool and serve: Remove from the fridge and bake immediately for 20-25 minutes, until the crust is nice and golden brown. Allow the apple hand pies to cool for at least 15 minutes before serving.
Tips For Apple Hand Pies
Hand Pies are rustic, homey, and delicious! They are fun and easy to make and to help you out, I’ve come up with a few tips that will help these turn out just right!
- No homemade dough? No problem: If you want to skip the process of making your own pie dough, don’t sweat it. Skip it and press forward with the pre-made stuff. This recipe is quick and easy with store bought pie dough!
- COLD dough: Pie dough can be intimidating, but one of the best ways to work with it is to make sure it stays nice and cold. If you feel like the dough is getting too pliable or too soft, set it in the fridge for 10-15 minutes so that it can chill.
- Choosing apples for a recipe: There are several different types of apples that hold up well to baking. Granny Smith apples are nice and tart and hold their shape, while Honeycrisp are sweeter, larger and hold their shape just as well. Braeburn or Pink Lady apples are bursting with flavor and also a popular choice!
- Less is more with the filling: Go easy on the filling in each pie and use only 2 tablespoons. This is just the right amount for the hand pies because then they don’t burst and make a mess all over.

How to Store Leftovers
These delightful apple hand pies are the perfect treat for serving kids and family! I especially love them because they travel well and can go with you wherever you go! They hold up well in either the fridge or at room temperature so they will work for a wide variety of events.
Room temperature: Store the hand pies in an airtight container on your counter. They will last like this for 4-5 days.
Refrigerator: Store in the refrigerator in an airtight container in your fridge. They can last in the refrigerator for up to 7 days.
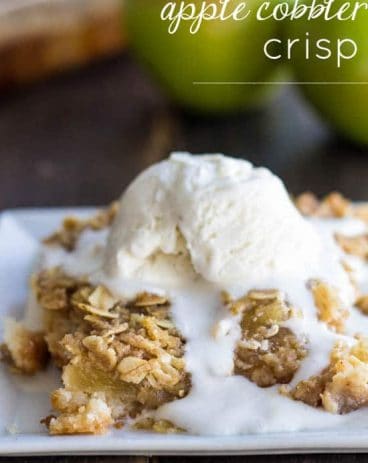
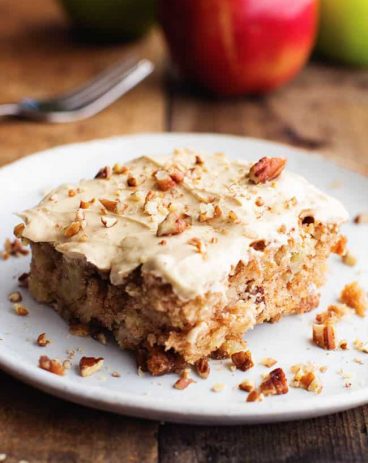
More Apple Desserts to Try


Apple Hand Pies
Ingredients
- 2 Pie Crusts (Homemade or store-bought)
- 2 Cups Tart Apples diced (about 2-3 apples)
- 1 Teaspoon Lemon Juice
- ½ Cup Granulated Sugar
- 1 Tablespoon Cornstarch
- ½ Teaspoon Cinnamon
- A good sized pinch Nutmeg (about ⅛ teaspoon)
- Dash of Salt
- 1 Egg Yolk
- 2 Tablespoons water
Instructions
Filling
-
In a medium saucepan, toss the diced apples together with the lemon juice.
-
In a small bowl whisk together the granulated sugar, cornstarch, cinnamon, nutmeg, and salt. Pour over the apples and stir to combine.
-
Heat the apple mixture over medium heat until the sugar is dissolved and bubbling. Turn the heat down to low and simmer for 2-3 minutes until it begins to thicken. Remove from the heat and let cool completely.
Dough
-
Preheat the oven to 375° and line two baking sheets with parchment paper.
-
In two sections, roll the pie dough out until it’s between ¼ inch and ⅛ inch thick. Using a 3.5-4 inch round cookie cutter, cut out circles. Press the scraps together and roll them out again and cut more circles. Chill the circles of dough in the fridge for at least 15 minutes before using.
Assembly
-
In a small bowl use a fork to combine the egg yolk and water for your egg wash.
-
Arrange discs of dough on the two baking sheets. Going one disc at a time, brush the edges with egg wash. If you are using an empanada mold or a hand pie press, transfer the disc to the mold.
-
Place about 1-1.5 tablespoons of the apple filling in the center of the dough. Press the mold together, being sure the edges seal well. If you don’t have a hand pie press or empanada mold, fold the dough over and use a fork to crimp the edges together. Repeat with the remaining pies.
-
Use a sharp knife to cut a few slits on top of each pie to allow steam to vent. Brush the tops of each pie with egg wash and sprinkle with coarse sugar. Place in the fridge to chill for at least 15 minutes before baking.
-
Remove from the fridge and bake immediately for 20-25 minutes, until the crust is nice and golden brown. Allow the pies to cool for at least 15 minutes before serving.
Nutrition
from The Recipe Critic https://ift.tt/2Y0mIAl
https://ift.tt/3m6vEfd