शुक्रवार, 1 अक्तूबर 2021

The Perfect Pumpkin Scones

Pumpkin scones are absolutely mouthwatering and delicious! Filled with pumpkin flavor and drizzled with cinnamon icing, this is a breakfast option that you won’t be able to pass up!

These scones are SO GOOD and are a great option to kick off all of your fall recipes! In fact, host a fall brunch and try these delicious Pancakes, these yummy Cream Cheese Muffins, and these Pumpkin Muffins. They are the perfect combo and you will love them all!
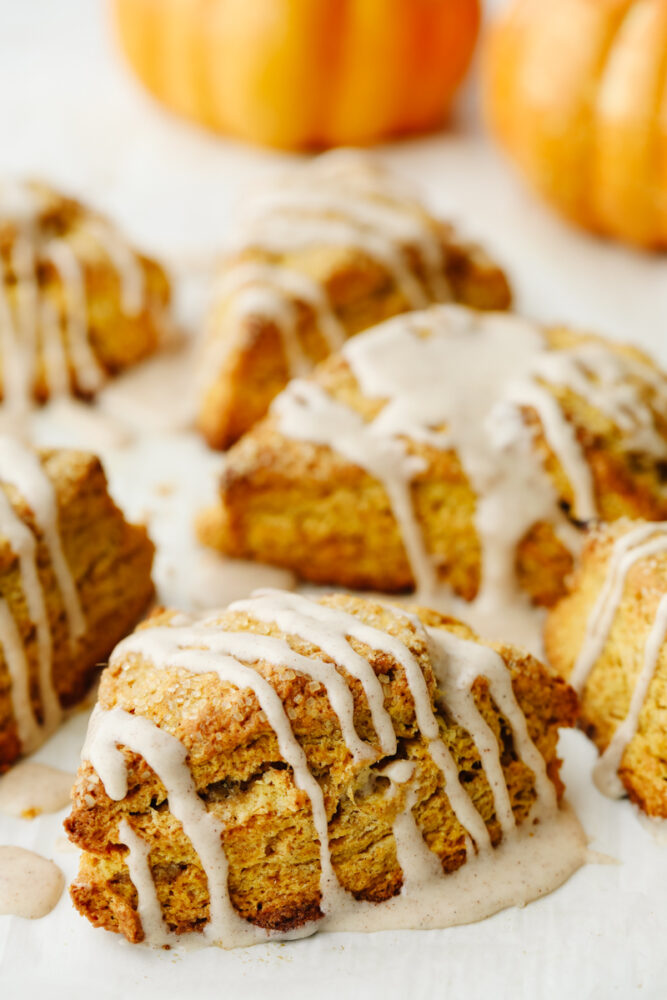
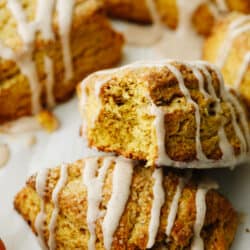
A close up of a pumpkin scone.

Pumpkin Scones are the Perfect Fall Breakfast

I don’t know that you can find a better breakfast option out there for fall than pumpkin scones. The texture is soft and flaky and it just crumbles in your mouth! And once you get a taste of that icing… well, it’s game over! You will be hooked. In fact, these are so good that you may even want to double the recipe. They will fly off your counter so fast that you will be glad you had some extra! These are rich and delightful and I bet you won’t be able to stop at just one!

The pumpkin flavor in these scones is just right. It’s not too overpowering but it’s just enough to make you taste the flavor and enjoy it. It mixes well with the creamy, cinnamon icing on top and it makes a lovely combination. You can eat these when they are warm or they also taste delightful at room temperature. I have a long list of all of the pumpkin recipes that I love and I’m not sure if I love these pumpkin scones, this Pumpkin Bread Pudding, or these Pumpkin Cream Cheese Truffles the best! You should try them all and decide for yourself. It’s a tough call!

What’s IN Pumpkin Scones?

Packed with some delicious fall flavors, these pumpkin scones are absolutely divine! These will be so good that once you are done you’ll be tempted to make them again right away! See the recipe card below for a list of exact ingredient measurements.

  • Flour: I used all purpose flour for these scones!
  • Brown sugar: This is my favorite way to sweeten a recipe! The flavor is deep and delicious!
  • Baking powder: Baking powder is used to help the pumpkin scones rise. It help makes them soft and fluffy!
  • Salt: Salt will enhance the flavors of the other ingedients.
  • Cinnamon: You will use this in the scones and the icing, then they complement each other nicely!
  • Nutmeg: There is not better holiday spice than nutmeg! Its so rich and earthy.
  • Ground ginger: Make sure that you get the ground ginger and then it will dissolve better.
  • Ground cloves: This will mix with the other spices and finish off that perfect fall taste.
  • Butter: I used unsalted butter that was chilled!
  • Heavy cream: I took this straight out of the fridge to use it. Chilled will work the best!
  • Pumpkin puree: Don’t confuse this with pumpkin pie filling when you buy it at the store! They are different!
  • Egg: I used a large egg for this recipe.
  • Vanilla extract: This adds a simple flavor to the sweetness.
  • Sugar crystals: These will be used as a topping! If you don’t have any sugar crystals, you can use coarse sugar instead!

Icing

  • Powdered sugar: This is used instead of granulated sugar because it dissolves faster and creates that smooth texture!
  • Heavy cream: The heavy cream combines all of the ingredients and makes it creamy and thick.
  • Vanilla extract: This adds a simple flavor to the sweetness.
  • Cinnamon: The cinnamon complements the cinnamon in the scones!

Let’s Bake Some Scones!

Once you mix everything together, these pumpkin scones come together so quickly! Soon, you will be enjoying the most delicious breakfast food that is perfect for fall!

  1. Prep: Preheat the oven to 400° and line a baking sheet with parchment paper then set it aside.
  2. Whisk dry ingredients: In a large bowl whisk the flour, sugar, baking powder, salt, cinnamon, nutmeg, ground ginger, and ground cloves together.
  3. Grate and mix butter and flour: Use a box grater to grate the cold butter into the dry ingredients. Use your hands to lightly mix the butter into the flour.
  4. Combine together: In a medium bowl, combine the cream, pumpkin puree, egg and vanilla extract. Pour over the butter and dry ingredients and mix until just combined. Try to work the dough as little as possible. Turn it out onto a lightly floured surface and work into a ball then flatten into an 8-9 inch disc. If desired, sprinkle with sugar crystals or course sugar. Use a sharp knife to cut into 8 equal pieces.
  5. Bake, cool and add icing: Arrange the pieces on the prepared baking sheet, leaving about 2 inches between each one. Bake for 20-22 minutes, or until nice and golden brown. Allow to cool for at least 5-10 minutes before drizzling the icing over the top.

Easy Icing

  1. Whisk ingredients: In a small bowl whisk together the powdered sugar, heavy cream, vanilla and cinnamon. If it seems too thick, add 1 more tablespoon of heavy cream.
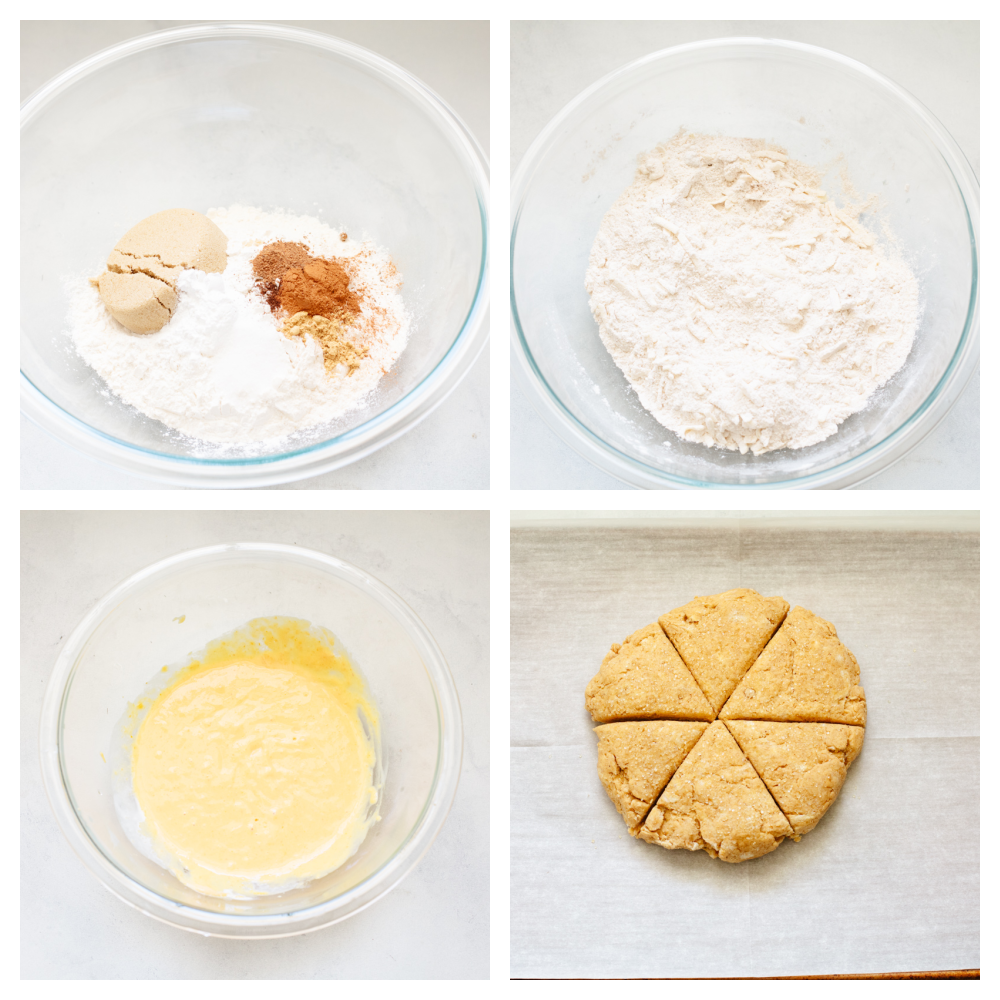
4 pictures showing how to make pumpkin scone dough.

Baking Tips

Pumpkin scones are so easy to make! They don’t take long and they look gorgeous when they are drizzled with icing. I’ve come up with a few helpful tips that will make them turn out just right!

  • Cold butter: I know this is different than normal but you are going to grate your butter! Use a box grater to shred frozen butter. This helps your butter incorporate into the flour more evenly and results in a tender, crumbly scone.
  • Don’t overmix: Scone dough should be handled as little as possible. You want to mix until just barely combined and formed into a circle. This will keep the butter from melting and make sure your scones turn out nice and soft.
  • Remove moisture from pumpkin: If the canned pumpkin you have seems to be a little watery you can use cheesecloth to squeeze out some of that excess moisture from it. Without the extra water your scone texture won’t be so dense and cake like.
  • Maple Icing: Try substituting the vanilla extract in the glaze for maple extract to give your scones a nice maple kick!
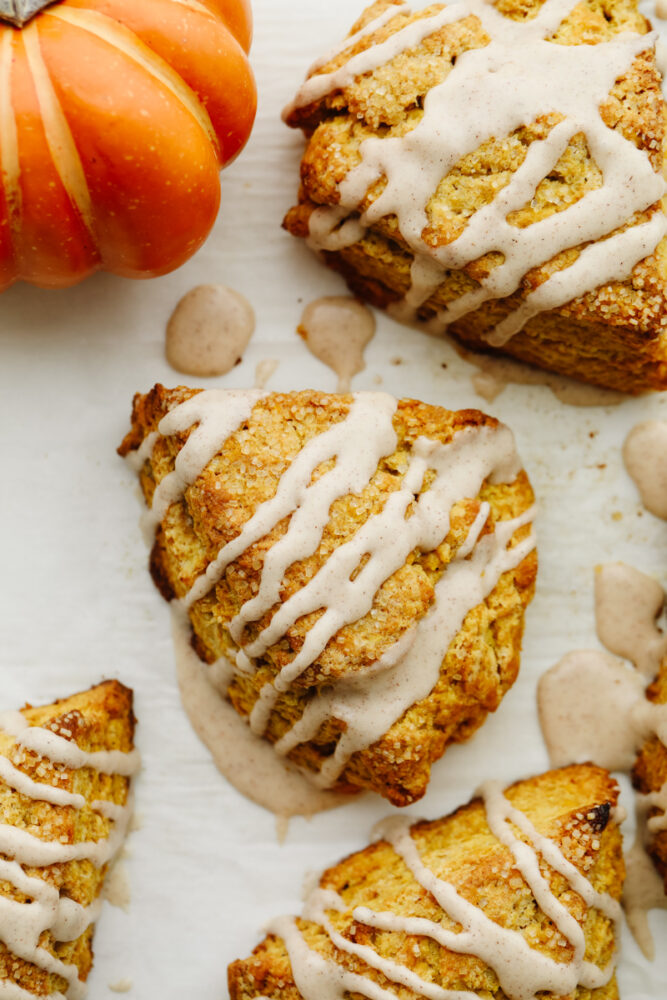
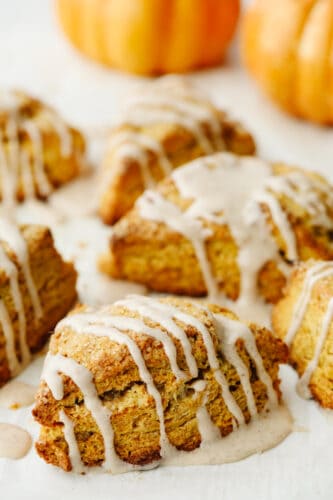
The top view of a pumpkin scone.

How to Store Leftovers

These pumpkin scones are so delicious and will fly off of your table! But, if you are lucky enough to have a few of these leftovers, then here is how you can store them for later!

  • At room temperature: Store your scones in an airtight container on your counter for up to 3 days.
  • Refrigerator: You can store your pumpkin scones in the fridge in an airtight container for up to 6 days. Allow them to come to room temp before serving.
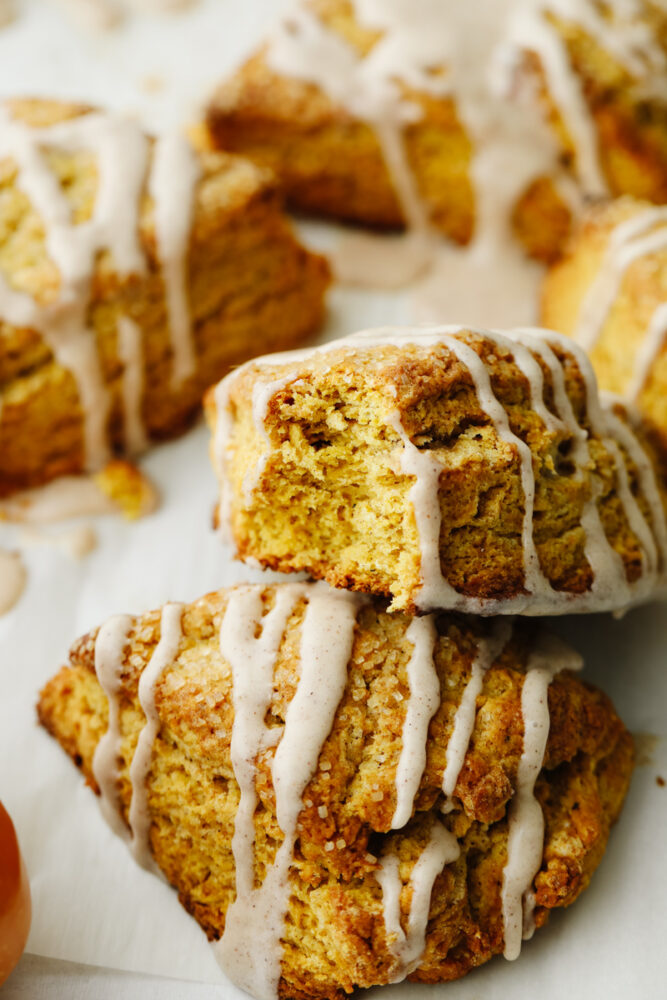
A scone with a bite taken out of it.
Print

The Perfect Pumpkin Scones

Pumpkin scones are absolutely mouthwatering and delicious! Filled with pumpkin flavor and drizzled with cinnamon icing, this is a breakfast option that you won't be able to pass up! 
Course Breakfast, Dessert
Cuisine American
Keyword pumpkin scone recipe, pumpkin scones
Prep Time 20 minutes
Cook Time 20 minutes
Total Time 40 minutes
Servings 12 scones
Calories 256kcal
Author Alyssa Rivers

Ingredients

  • 2 cups all purpose flour
  • ½ cup brown sugar
  • 2 teaspoons baking powder
  • ½ teaspoon salt
  • 1 teaspoon cinnamon
  • ¼ teaspoon nutmeg
  • ¼ teaspoon ground ginger
  • 1 pinch ground cloves
  • ½ cup unsalted butter chilled
  • ¼ Cup heavy cream chilled
  • ½ Cup Pumpkin Puree
  • 1 large egg large
  • 1 teaspoon vanilla extract
  • Sugar crystals for topping Or coarse sugar

Icing

  • 1 cup powdered sugar
  • 2 Tablespoons heavy cream
  • ½ teaspoon vanilla extract
  • ¼ teaspoon cinnamon

Instructions

  • Preheat the oven to 400° and line a baking sheet with parchment paper. Set aside.
  • In a large bowl whisk the flour, sugar, baking powder, salt, cinnamon, nutmeg, ground ginger, and ground cloves together.
  • Use a box grater to grate the cold butter into the dry ingredients. Use your hands to lightly mix the butter into the flour.
  • In a medium bowl, combine the cream, pumpkin puree, egg, and vanilla extract. Pour over the butter and dry ingredients and mix until just combined. Try to work the dough as little as possible, turn it out onto a lightly floured surface, and work into a ball. Flatten into an 8-9 inch disc. If desired, sprinkle with sugar crystals or coarse sugar. Use a sharp knife to cut into 8 equal pieces.
  • Arrange the pieces on the prepared baking sheet, leaving about 2 inches between each one. Bake for 20-22 minutes, or until nice and golden brown. Allow cooling for at least 5-10 minutes before drizzling the icing over the top.

Icing

  • In a small bowl whisk together the powdered sugar, heavy cream, vanilla, and cinnamon. If it seems too thick, add 1 more tablespoon of heavy cream.

Nutrition

Calories: 256kcal | Carbohydrates: 37g | Protein: 3g | Fat: 11g | Saturated Fat: 7g | Polyunsaturated Fat: 1g | Monounsaturated Fat: 3g | Trans Fat: 1g | Cholesterol: 46mg | Sodium: 111mg | Potassium: 139mg | Fiber: 1g | Sugar: 19g | Vitamin A: 1958IU | Vitamin C: 1mg | Calcium: 54mg | Iron: 1mg


from The Recipe Critic https://ift.tt/3BeNGm9
https://ift.tt/3oq1aYE
गुरुवार, 30 सितंबर 2021

Mummy Cookie Bites

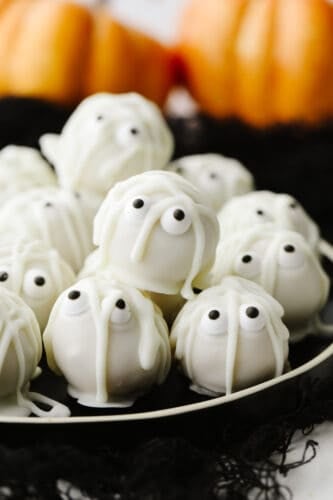
Mummy cookie bites are a ghoulish and festive treat for the Halloween season! Amazingly delicious, the white chocolate mixed with the oreo truffle is the perfect combination!

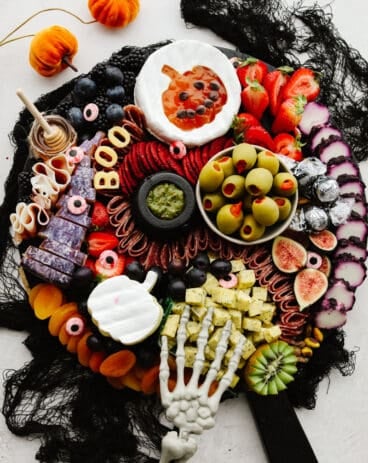
These mummy cookie bites are such a fun treat to make! They are yummy and your kids will go crazy over them! If you want to try out a few more festive holiday treats, try this Halloween Charcuterie Board, these Mummy Hot Dogs, or these Mummy Mini Pizzas. They are all fun and delicious!

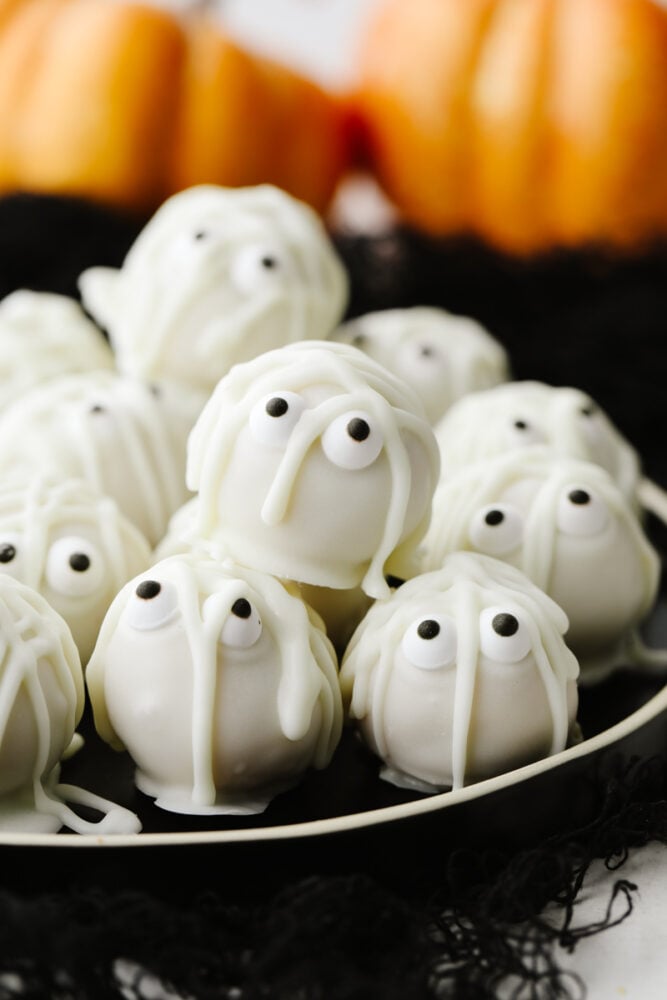
A stack of mummy cookie bites.

These mummy cookie bites are amazing! Crushed up Oreos, mixed with cream cheese creating a soft, truffle-like inside. Then, you coat that with melted white chocolate and chill them in the fridge. They are so easy and absolutely delicious! My kids love that they can be decorated and changed depending on the holiday. Because of that, we have these ALL the time!

These are such a fun treat to make with your kiddos! They are simple and easy and the kids love rolling them up into balls and decorating them. I love that they are small, individual serving sizes so you can enjoy them as much or as little as you want! This makes them perfect for a dessert at a party. In fact, make some Pumpkin Cream Cheese Truffles and Thin Mint Truffles to go with them! They can feed a lot of people and the rich, Oreo taste is just too irresistible for anyone to stop after just one. Go ahead and give them a try because I know that you are going to LOVE them!

What Ingredients Do I Need?

This is the amazing part… you only need 3 ingredients to make these mummy cookie bites! It doesn’t get much simpler than that. See the recipe card below for a list of exact measurements.

  • Cream cheese: I made sure that this was softened at room temperature before I mixed it. This helps make it smooth with no clumps! 
  • Golden oreo cookies: I love the vanilla flavor of these! You can also try using chocolate oreos for a different taste! 
  • Bakers white chocolate: This white chocolate gives this recipe the perfect outside coating!
  • Decorations (optional): I used candy eyes to make them mummy-like for the Halloween season! But depending on when you make these, you could switch all of that up! 

These mummy cookie bites are so quick and easy to make! They take about 15 minutes to make. In fact, the hardest part is waiting for them to chill for a few hours in your fridge! But that is what makes these a great “make-ahead” dessert!

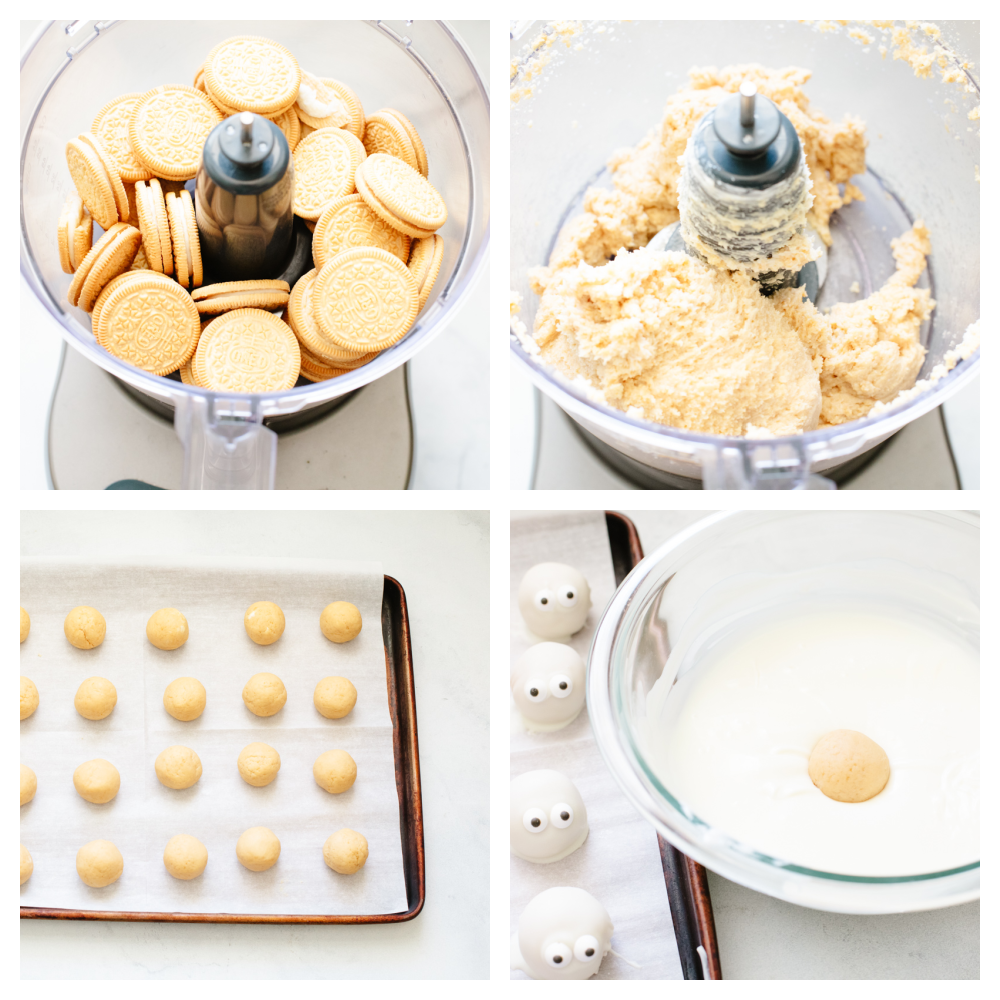
  1. Mix and make into balls: Mix cream cheese and cookie crumbs until blended then shape into 1 inch balls. 
  2. Freeze balls, melt chocolate and dip: Freeze for 10 minutes. Meanwhile, melt the Baker’s chocolate as directed. DIP balls in melted chocolate and place in single layer on waxed paper-covered rimmed baking sheet. (Re-freeze balls if they become too soft to dip.) 
  3. Chill: Refrigerate 1 hour or until firm. 
  4. Melt chocolate for topping: MELT remaining chocolate as directed on package; spoon into small resealable plastic bag. Then, press out excess air from bag and seal the bag. Cut 1/8-inch piece from one bottom corner of bag.
  5. Drizzle and decorate: Squeeze bag to pipe chocolate onto each ball for the mummy’s eyes. Immediately add desired decorations for the eyeballs. Then, pipe the remaining chocolate onto balls to resemble gauze strips. 
  6. Chill (again): Refrigerate until firm.
4 step by step pictures showing how to mix up the oreo truffles and dip them.

Varitations to Try

These mummy cookie bites that are made like this are the perfect Halloween treat! But, if you change up only a couple of things then you can make them for ANY occasion or holiday! Here are a few ideas to try!

  • Oreos: If you want, you can make these with regular, chocolate oreos instead! This changes up the taste completely and makes them rich and delicious in a whole new way!
  • Change the colors: You can use candy melts in different colors! Try using red or green for a Christmas party. Or, red, white, and blue for the 4th of July! If you want to use food coloring then you can but make sure that it is OIL based and not water based. Water based food coloring will make your chocolate seize!
  • Chocolate: Instead of using white chocolate for the outside shell, go ahead and use regular chocolate! Change up the taste a little!
  • Toppings and decorations: You can top these with just about anything! My favorite is to use different color sprinkles. On top of the white chocolate, it looks so cute! You can also top them with cinnamon sugar ot shredded coconut. Just make sure that you pu all toppings on just after dipping them. Then, they will stick and stay!

How to Store Leftovers

If you have leftovers of these amazing mummy cookie bites then just be sure to store them correctly so that they save well for later! Store them in an airtight container and put them in your refrigerator. These can last 3-4 days in your fridge!

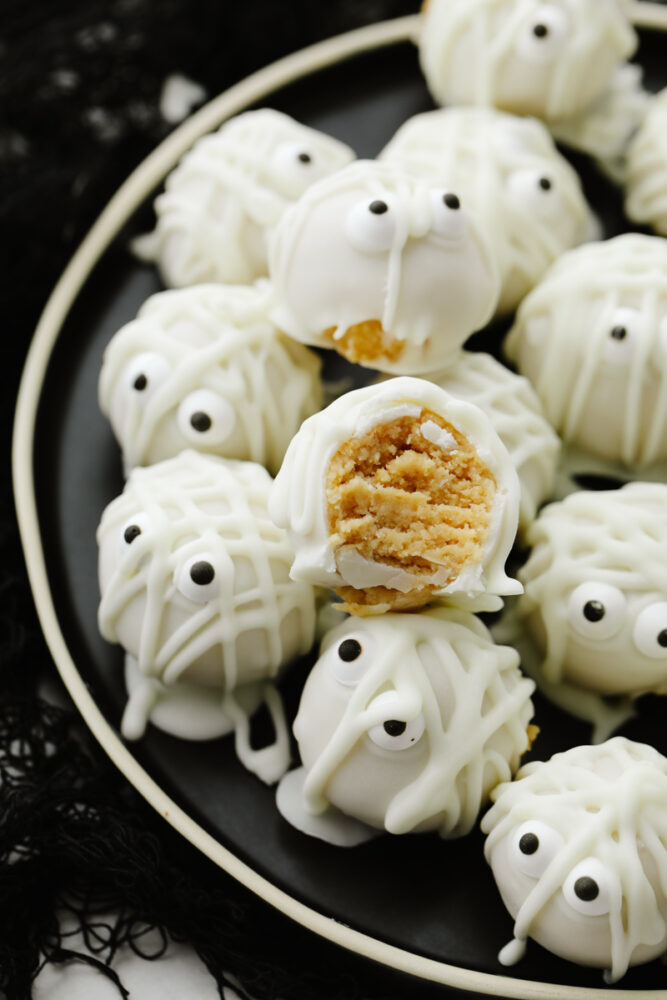
A mummy cookie bite with a bite taken out of it.
Print

Mummy Cookie Bites

Mummy cookie bites are a ghoulish and festive treat for the Halloween season! Amazingly delicious, the white chocolate mixed with the oreo truffle is the perfect combination! 
Course Dessert, Snack
Cuisine American
Keyword mummy cookie bites, mummy cookies
Prep Time 15 minutes
Refrigerate Until Firm 2 hours
Total Time 2 hours 15 minutes
Servings 24 Bites
Calories 180kcal
Author Alyssa Rivers

Ingredients

  • 1 package (8 ounces) Cream Cheese (softened)
  • 36 finely crushed golden oreo cookies
  • 14 ounces Bakers white chocolate
  • Decorations: candy eyes

Instructions

  • Mix cream cheese and cookie crumbs until blended. Shape into 1 inch balls.
  • Freeze for 10 minutes. Meanwhile, melt the Baker's chocolate as directed. DIP balls in melted chocolate; place in a single layer on waxed paper-covered rimmed baking sheet. (Re-freeze balls if they become too soft to dip.)
  • Refrigerate 1 hour or until firm.
  • MELT remaining chocolate as directed on package; spoon into small resealable plastic bag. Press out excess air from bag; seal bag. Cut 1/8-inch piece from one bottom corner of bag.
  • Squeeze bag to pipe chocolate onto each ball for the mummy's eyes; immediately add desired decorations for the eyeballs. Pipe remaining chocolate onto balls to resemble gauze strips.
  • Refrigerate until firm.

Notes

Updated on September 30, 2021
Originally Posted on October 17, 2012

Nutrition

Calories: 180kcal | Carbohydrates: 24g | Protein: 2g | Fat: 9g | Saturated Fat: 4g | Cholesterol: 3mg | Sodium: 78mg | Potassium: 66mg | Fiber: 1g | Sugar: 17g | Vitamin A: 5IU | Vitamin C: 1mg | Calcium: 38mg | Iron: 1mg


from The Recipe Critic https://ift.tt/3AY5Bgv
https://ift.tt/3kSmIec

बुधवार, 29 सितंबर 2021

Pumpkin Chocolate Chip Muffins

Pumpkin chocolate chip muffins are moist, chocolatey, and topped off with a sprinkling of sugar! The spices and pumpkin puree flavors make these perfect for cooler weather!

Fall is here and I’m all about the pumpkin and chocolate! If you love pumpkin as much as I do try then go ahead and try some of my favorite recipes like these Cookies, Muffins, or these amazing Pancakes.

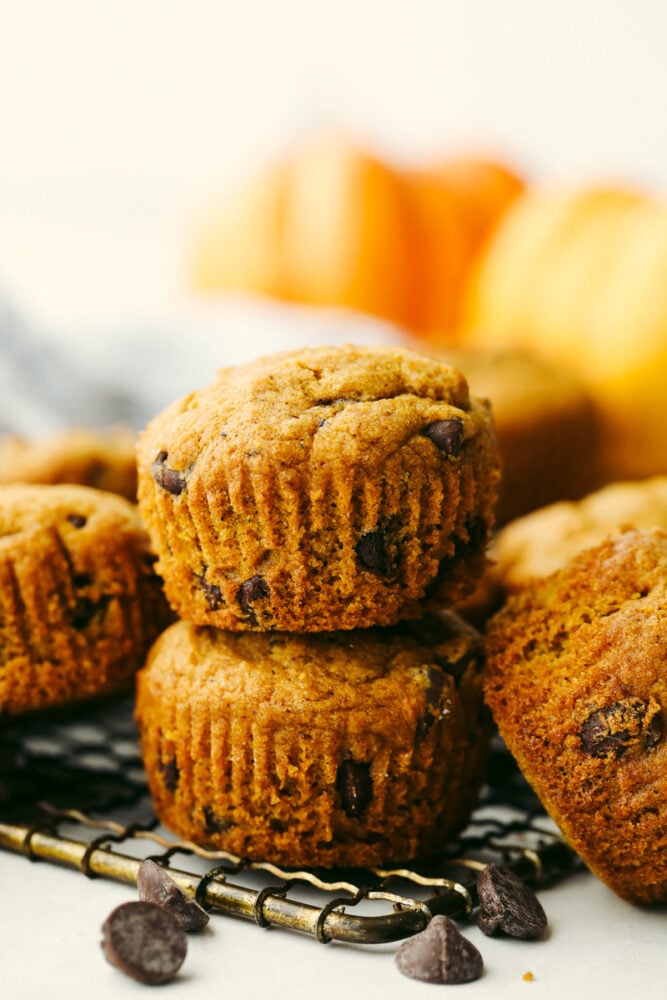
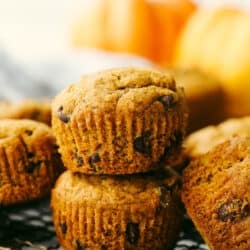
Pumpkin chocolate chip muffins stacked on top of each other.

Pumpkin Chocolate Chip Muffins

Pumpkin is so delicious and I want to load it into every possible recipe once fall rolls around because there’s just something so festive about it! I love decorating with them and even more, baking with them! In fact, these pumpkin chocolate chip muffins are one of my favorite tried and true, fall recipes! They are so easy to make and are a twist on your classic chocolate chip muffins. It’s an easy and delicious addition and a recipe that you will be wanting to make each fall! Or if you’re like me then it will creep into your baking ALL year long!

When you add pumpkin puree to a recipe, it adds such an amazing texture! It is what makes these muffins super soft and moist! So not only does the flavor taste delicious but it actually helps out in the baking process as well! Pumpkin puree can go fast at the stores. Because people are using it so often, it’s a good idea to stock up on a few cans at the beginning of the season. That way, you will have some on hand for whenever the craving hits! You will need it to make these yummy pumpkin cream cheese truffles and also this incredible pumpkin cake!

Ingredients for Pumpkin Chocolate Chip Muffins

These muffins are so delicious. They are just the right mixture of sweet with the taste of pumpkin flavor. Everyone loves these and I’m sure that you will too! See the recipe card below for exact measurements.

  • Butter: Use unsalted butter at room temperature that you can cut easily into small pieces!
  • Flour: I used all purpose flour in this recipe!
  • Granulated sugar: Sugar adds in that sweetness.
  • Brown sugar: Brown sugar is on of my favorite sweeteners!
  • Baking soda and baking powder: These help the muffins to rise and be fluffy!
  • Salt: The sale will help enhance the flavors of all of the other ingredients!
  • Pumpkin Pie Spice: I highly recommend making your own homemade pumpkin pie spice from scratch! You will love it!
  • Ground cinnamon: Cinnamon is a classic fall flavor!
  • Large eggs: Use eggs that are at room temperature to mix better into the batter.
  • Vanilla extract: This adds flavor to the sweetness!
  • Milk: Milk will help to bring in that rich and creamy taste.
  • Semisweet chocolate chips: I used semisweet chocolate chips but you can use whatever ones that you have on hand.
  • Coarse sugar: This is to garnish on top after the muffins have baked!
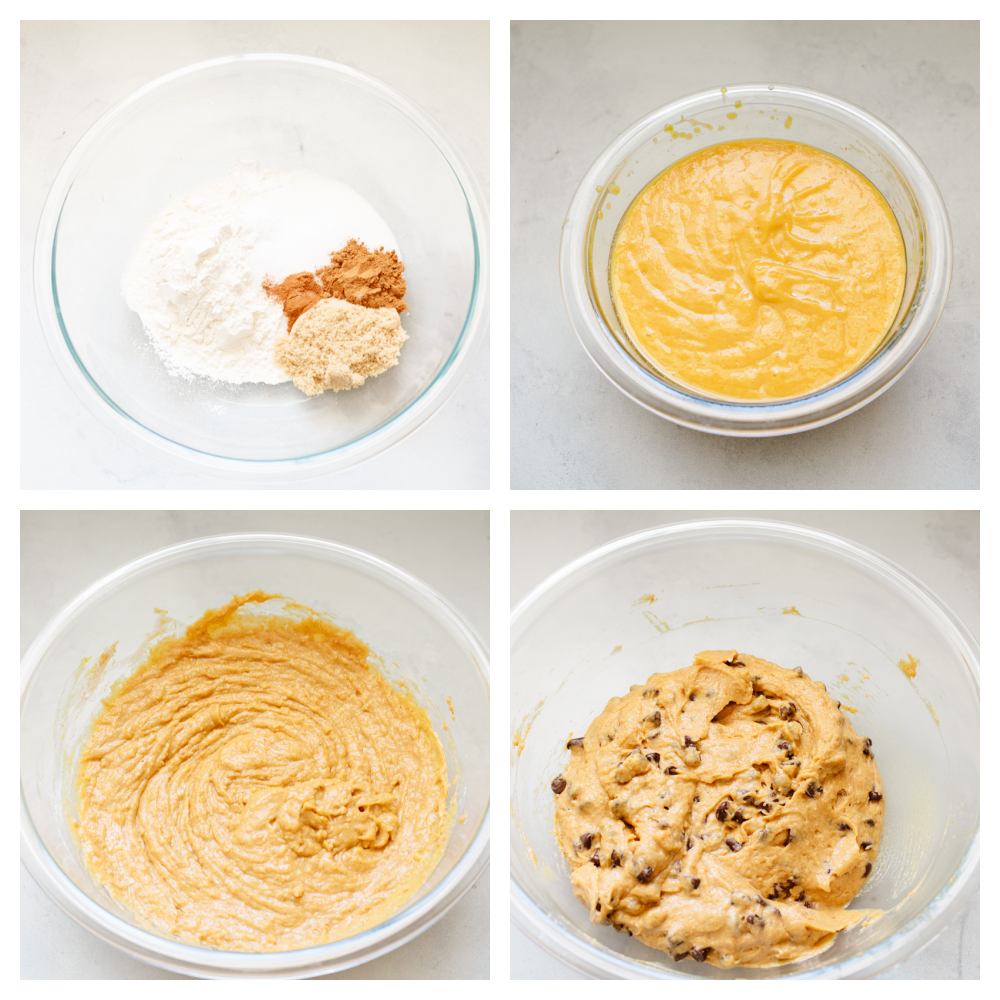
The process shots of how to make pumpkin chocolate chip muffins.

Let’s Make Some Muffins!

These pumpkin chocolate chip muffins are simple and come together quickly! I love making this recipe with my kids!

  • Preheat oven and prepare muffin tin: Preheat oven to 350 degrees and line a 12 count muffin tin with paper liners and then set it aside.
  • Warm your butter: Place your butter pieces in a large, microwave-safe bowl and microwave until melted and then set it aside. Let the butter cool down to room temperature. Butter that’s too hot could cook your eggs or melt your sugar! Don’t let the butter ruin your muffins!
  • Whisk together dry ingredients: In a large bowl combine flour, sugars, baking powder, baking soda, salt, pumpkin spice, and cinnamon and whisk them until well-combined. Then, set them aside.
  • Stir together: Return to your bowl with the melted butter and make sure it has cooled down. Add eggs and vanilla, stir well.
  • Mix together: Add pumpkin puree and milk and stir until completely combined.
  • Mix the dry and wet ingredients together: Gradually stir your dry ingredients into your wet until completely combined. I like to go slow so that I don’t over mix the batter.
  • Add chocolate chips: Gently fold in 1 cup of the chocolate chips.
  • Pour batter into muffin tins: Evenly divide muffin batter into prepared muffin tins (filling each ¾ full). Sprinkle tops of muffins with remaining ⅓ cup of chocolate chips and then sprinkle tops generously with sugar.
  • Bake in the oven: Bake on 350 for 20-22 minutes (toothpick inserted in center should come out mostly clean with only few crumbs).
  • Cool completely: Allow muffins to cool and then serve and enjoy!
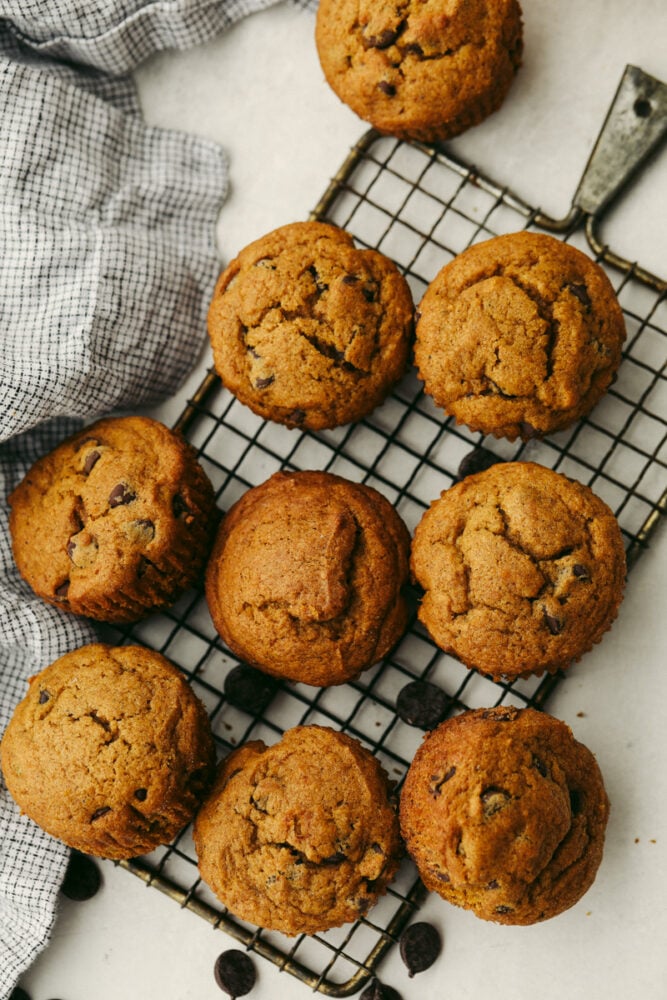
Muffins on a cooling rack.

Variations

There are a few different ways to make these pumpkin chocolate chip muffins perfect for you! Here’s a couple of ideas for you to try and enjoy!

  • Make mini muffins: You can make these into mini muffins and take them on the go! Just follow the instructions for this recipe to make them. Then, line a 24 mini cupcake muffin tin with liners (or spray it). Cook them for 12-15 minutes at 350 degrees. Let them cool and then you can gobble them right up!
  • Turbinado sugar: This sugar is a mouthful to say but its absolutely delicious! Instead of using regular sugar to sprinkle on the top, try this instead! This sugar becomes nice and crisp on top of your muffins. It looks beautiful and tastes so sweet!
  • Add-ins: If you want to try something new, add in some white chocolate chips or even some walnuts to the batter! I have also used some shredded coconut to give it a unique taste! Adding different things to the batter will change up the taste so that you can make them different every time!

How to Store Muffins

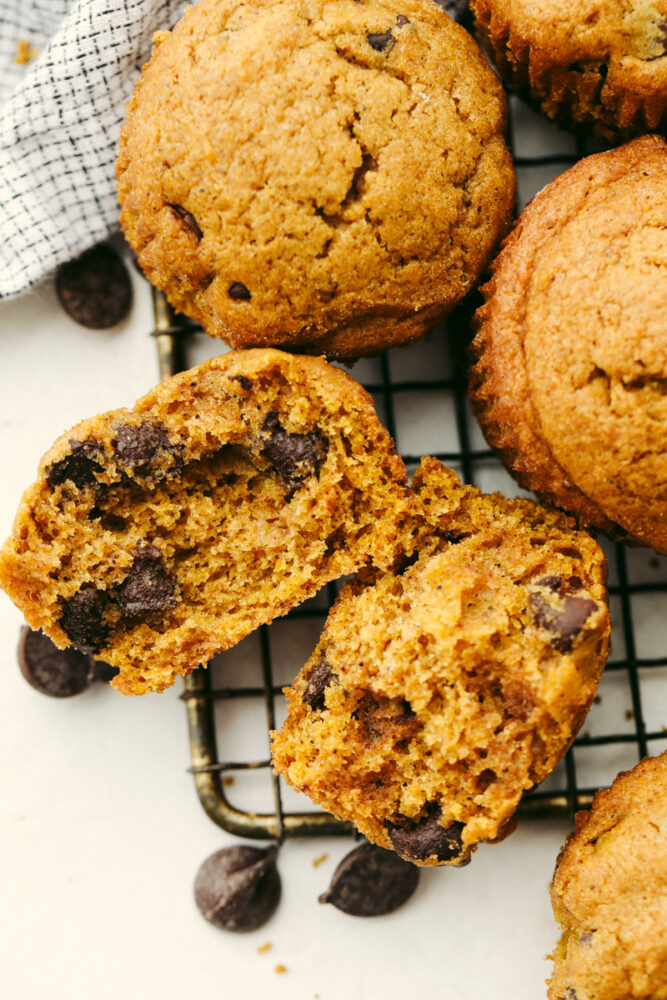
These pumpkin chocolate chip muffins are soft, springy, and I love them best when they’re served warm out of the oven. I love that melty chocolate! If you can’t eat them right away, follow these instructions so that you can store them and enjoy them later!

  • Making the batter ahead of time: Make the batter and place it in a sealed, airtight container. Put it in the fridge for up to one day before use.
  • Room temperature: Once your muffins have cooled, place them in an airtight container or ziplock bag. Store them on your counter for 2 to 3 days.
  • Refrigerator: Stored in an airtight container, these muffins can last in the fridge for 4 to 5 days.
  • Freezer: I place your muffins on a baking sheet (try not to have them touch) and place them in the freezer. after a couple of hours, they should be frozen. This helps them not to stick to one another! Take them out and store them in a ziplock bag or an airtight container. They will last for about a month like this in the freezer.
  • Reheating: Take them out of the refrigerator or freezer. Let the muffins sit at room temperature to thaw. Use the microwave for a quick warm up or place them in the oven for a few minutes until they are warmed through.

*NOTE: I like to add a paper towel on top of the muffin tops to help lock in moisture and keep the muffins from sticking to each other and the bag when I am storing them. You can also stack your muffins on top of one another using the paper towel in between the layers.

Print

Chocolate Chip Pumpkin Muffins

Pumpkin chocolate chip muffins are moist, chocolatey and topped off with a sprinkling of sugar! The spices and pumpkin puree flavors make these perfect for cooler weather!
Course Appetizer, Breakfast, Dessert, Main Course, Side Dish, Snack
Cuisine American
Keyword pumpkin chocolate chip muffins, pumpkin muffins
Prep Time 20 minutes
Cook Time 20 minutes
Total Time 40 minutes
Servings 12 muffins
Calories 224kcal
Author Alyssa Rivers

Ingredients

  • 3/4 cup unsalted butter cut into pieces
  • 1 1/4 cups all-purpose flour
  • 1/2 cup granulated sugar
  • 1/4 cup brown sugar
  • 3/4 teaspoons baking soda
  • 3/4 teaspoons baking powder
  • 1/2 teaspoon salt
  • 2 teaspoons pumpkin spice
  • 1/2 teaspoon ground cinnamon
  • 2 large eggs lightly beaten room temperature preferred
  • 1 1/2 teaspoon vanilla extract
  • 1 cup pumpkin puree
  • 2 Tablespoons milk
  • 1 ⅓ cup semisweet chocolate chips divided.
  • coarse sugar for sprinkling optional

Instructions

  • Preheat oven to 350F and line a 12 count muffin tin with paper liners. Set aside.
  • Place your butter pieces in a large, microwave-safe bowl and microwave until melted. Set aside (you want the butter to cool down to room temperature so it's not too hot before you add the eggs — butter that is too hot could cook your eggs or melt your sugar and ruin your muffins)
  • In a large bowl combine flour, sugars, baking powder, baking soda, salt, pumpkin spice, and cinnamon. Whisk until well-combined. Set aside.
  • Return to your bowl with the melted butter and ensure that it is not hot to the touch. Add eggs and vanilla, stir well.
  • Add pumpkin puree and milk and stir until completely combined.
  • Gradually stir your dry ingredients into your wet until completely combined, taking care to not overmix the batter.
  • Gently fold in 1 cup of the chocolate chips.
  • Evenly divide muffin batter into prepared muffin tins (filling each ¾ full). Sprinkle tops of muffins with the remaining ⅓ cup of chocolate chips and then sprinkle tops generously with sugar.
  • Bake on 350 for 20-22 minutes (toothpick inserted in the center should come out mostly clean with only a few crumbs).
  • Allow muffins to cool before enjoying.

Notes

Updated on September 29, 2021
Original Post on September 27, 2017

Nutrition

Calories: 224kcal | Carbohydrates: 35g | Protein: 3g | Fat: 8g | Saturated Fat: 5g | Cholesterol: 1mg | Sodium: 171mg | Potassium: 204mg | Fiber: 3g | Sugar: 21g | Vitamin A: 3185IU | Vitamin C: 0.9mg | Calcium: 39mg | Iron: 2.3mg


from The Recipe Critic https://ift.tt/2ni2jEw
https://ift.tt/3kOP6xO