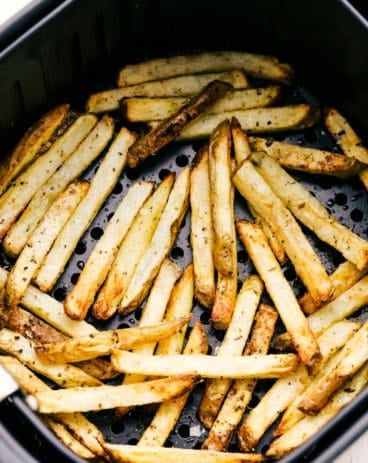
Cajun fries are baked to absolute perfection! With a delicious, spicy taste and crispy texture, I don’t think that they get much better than this!
If you love french fries, then these will definitely hit the spot. I love anything with a spicy kick to it so that makes these fries the perfect snack or side! Cook up some Shrimp Boil Foil Packets, Angel Biscuits and end the night with some Mississippi Mud Cake. It will be a southern meal for the books!

What Do Cajun Fries Taste Like?
Cajun fries are seriously one of my favorite ways to cook up some french fries! They have the perfect amount of seasoning and flavor. This makes them able to stand out on their own or be mixed in as a side to basically any meal. Cajun seasoning that you use to flavor these fries with, it spicy but the heat isn’t too much. The Cajun flavor hails from Louisiana which is why you will see this spice used in jambalaya, shrimp, and even lobster tails!
Cajun fries take that spicy (but not too heat-filled) flavor and add it to everyone’s favorite and classic side. French fries! Once you combine that delicious and crispy french fry with this amazing Cajun flavoring, you won’t ever go back to plain, salted fried again. It takes french fries to a whole new level. Make sure that you double this recipe if you are feeding a large crowd because these will fly off of your table so fast! They are finger-licking good and definitely a recipe that you should bookmark!
Ingredients You Need to Make Cajun Fries
The best part about this recipe is that it is restaurant-quality french fries with only FOUR ingredients! And ones that you probably already have at home! See the recipe card below for a list of exact measurements.
- Russet Potatoes: When you slice up your potatoes, make sure to keep them all about the same size. I make sure to watch this carefully because this will affect how evenly your fries cook. They will cook better if they are all about the same size.
- Olive Oil: I like to use olive oil because it is healthier but you can use vegetable oil if that’s all that you have on hand.
- Cajun Seasoning: If you can, try to make this homemade cajun seasoning beforehand. I think it’s worth the amazing taste! But… if you only have time for store-bought then that will work too!
- Salt: The salt just enhances the seasoning flavor!
Let’s Cook Up Some Fries!
French fries are one of my favorite and easy recipes to cook up. They deliver on amazing taste and texture and these Cajun fries do just that!
- Preheat oven: Preheat the oven to 425°.
- Clean and cut the potatoes: Scrub the potatoes clean. If you would like to peel them go ahead, but I chose to leave the skins on. Either press the potatoes through a large fry cutter or cut into ½ inch square sticks.
- Soak and rinse: Add your cut potatoes to a large bowl of cold water and soak for at least 30 minutes to release the excess potato starch. After 30 minutes is up, drain and rinse potatoes.
- Dry the potatoes and coat with seasoning: Dry the potatoes very well and lay them out on a large baking sheet. Add the olive oil, cajun seasoning and salt to the potatoes and toss together until evenly coated. You can do this in a bowl instead, but I like to do it right on the baking sheet to save myself from having to wash another dish.
- Bake, flip and dip: Bake for 20 minutes. Remove from the oven and flip the fries over and bake for another 20 minutes before enjoying with your favorite dipping sauce.

What Can I Dip These Fries In?
Let’s be honest, these Cajun fries are SOO GOOD all by themselves. BUT… If you want some suggestions on what will take them to the next level then here are a few ideas for dips!
- Ranch dip: Doesn’t everything taste better with ranch? This creamy ranch dip is to die for and the flavor with these fries is amazing!
- Ketchup: You can’t go wrong with ketchup and these fries are no exception!
- Fry sauce: If you don’t know what fry sauce is, then you are about to try the best sauce ever! Fry sauce is a mixture of ketchup and mayonaise that is an amazing dipping sauce for fries!

How to Store and Reheat Leftovers
If you want to make an extra batch of these Cajun fries so that you have some ready to eat for later, I think that’s a great idea! Here is how you can store them!
- Refrigerator: Once you have let the fries cool then place them in an airtight container. They can last in your fridge for 3-5 days.
- Reheat: Reheating french fries has to be done a certain way because how you reheat them will make them or break them! I like to reheat mine in the oven so that they have that crispy texture. It will make them taste fresh again! Preheat your oven to 450 degrees. Place the fries on a baking sheet in a single layer and roast them for 3-5 minutes. Remove them and enjoy!

More French Fries to Try
Appetizers
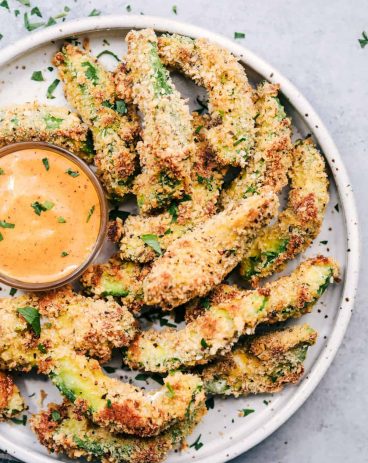
Crispy Garlic Avocado Fries (Baked)
Side Dishes
Amazing Air Fryer French Fries


Side Dishes
Crispy Garlic Sweet Potato Fries Recipe

Amazing Cajun Fries
Ingredients
- 4-5 large Russet Potatoes
- 2 Tablespoons Olive Oil
- 2 Tablespoons Cajun Seasoning
- ½ Teaspoon Salt
Instructions
-
Preheat the oven to 425°.
-
Scrub the potatoes clean. If you would like to peel them go ahead, but I chose to leave the skins on. Either press the potatoes through a large fry cutter or cut into ½ inch square sticks.
-
Add your cut potatoes to a large bowl of cold water and soak for at least 30 minutes to release the excess potato starch. After 30 minutes is up, drain and rinse potatoes.
-
Dry the potatoes very well and lay them out on a large baking sheet. Add the olive oil, cajun seasoning, and salt to the potatoes and toss together until evenly coated. You can do this in a bowl instead, but I like to do it right on the baking sheet to save myself from having to wash another dish.
-
Bake for 20 minutes. Remove from the oven and flip the fries over and bake for another 20 minutes before enjoying with your favorite dipping sauce.
Nutrition
from The Recipe Critic https://ift.tt/3FdswXB
https://ift.tt/3l1DM1p