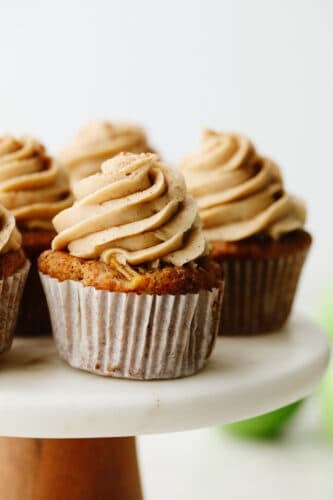
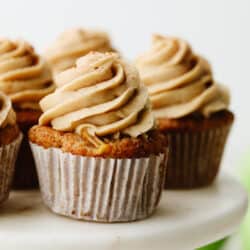
Apple pie cupcakes are a twist on a classic dessert! They are moist, delicious and with fresh apple pie filling in the middle, they give you JUST the right amount of texture!
I love a good cupcake and one that is based on my favorite, apple pie… Well… That means it’s going straight to the top of the list! If you love a good cupcake as I do, then try these Banana, Chocolate, and these delicious Angel Food Cupcakes. They are SOO GOOD!

Soft and Moist Apple Pie Cupcakes
If you were to combine the best things about an apple pie and a cupcake, this is exactly what it would taste like! These cupcakes even have apple pie filling! Which, I know that some people love the crust but if I’m being honest, the filling is always my favorite part of the pie. Then, you have the delicious fluffy cupcake that is swirled with cinnamon sugar frosting… It’s like it’s begging me to have more than one! They are so delicious and really hit the spot!
The filling in the middle is a bit of a surprise because I think most people would just expect the batter to have an apple pie flavor. This takes this cupcake to the next level and really gives it an added texture that is amazing! Cupcakes are one of the most versatile desserts because there are SO many flavors! I recently made these Angel Food Cupcakes and also these Carrot Cake Cupcakes and they really knocked my socks off. Like this one, they are both based on a classic dessert! Try these apple pie cupcakes and you will definitely get a “WOW” from your family and friends!
Ingredients in Apple Pie Cupcakes
Even though there are a lot of things that go into these apple pie cupcakes, they actually aren’t too hard to make! Give them a try, I think you will be pleasantly surprised! See the recipe card below for a list of exact measurements.
Cupcakes
- Flour: I used all purpose flour for this recipe.
- Granulated Sugar: This, of course, adds the sweet taste to your cupcake batter.
- Salt: The salt enhances the flavors of the other ingredients.
- Baking Powder AND Baking Soda: These will help your cupcake rise and be soft and moist.
- Cinnamon: This is a classic taste in an apple pie.
- Nutmeg: Same as the cinnamon, this is necessary to getting that amazing, deep flavor!
- Sour Cream: This ingredient will make the cake tender and soft.
- Vegetable Oil: The oil in this recipe brings in that moist texture for the cupcakes!
- Egg: I used a large egg that was at room temperature.
- Vanilla extract: This adds some flavor to the sweetness of the cupcake.
Apple Filling
- Apples: Dice up your apples to all the same size. Then they will cook evenly.
- Lemon Juice: This keeps the apples fresh.
- Granulated sugar: You need some sweetness to balance out any tart.
- Cornstarch: This is used to thicken the filling.
- Cinnamon: The cinnamon flavor will be used in every part of this cupcake!
- Nutmeg: A pinch of nutmeg will do! (That’s usually about ⅛ tsp)
- Salt: Don’t use too much! just one quick dash will do the trick!
Frosting
- Butter: I used unsalted butter that was softened.
- Powdered sugar: You use this instead of granulated sugar because it dissolves faster and creates a smooth frosting for these apple pie cupcakes!
- Brown sugar: this is the best sweetener! Its really depends the flavor of the sweet taste.
- Vanilla: Adds some flavoring to the sugar.
- Cinnamon: The cinnamon complements the cinnamon in the cake and filling!
- Heavy Cream: This thickens up the frosting!
Let’s Bake Some Cupcakes!
These apple pie cupcakes will take you about 40 minutes from start to finish. And that includes baking time! They are so delicious that the hardest part will be just waiting to eat them!
Cupcakes
- Prep: Preheat the oven to 350° and line a muffin tin with cupcake lines and then set it aside.
- Mix the dry ingredients: In a medium mixing bowl sift together the flour, sugar, salt, baking powder, baking soda, cinnamon and nutmeg. Set aside.
- Mix the wet ingredients then combine with the dry ingredients: In a large bowl combine the sour cream, vegetable oil, egg and vanilla until smooth. Add the dry ingredients into the wet and mix gently until just barely combined.
- Scoop and add filling: Use a cupcake scoop to fill the cupcake liners 2/3 of the way full. Add a tablespoon of the apple filling to the center of each cupcake.
- Bake and cool: Bake in the middle rack in the oven for 16-18 minutes until a toothpick inserted in the middle of the cupcakes comes out clean and the tops of the cupcakes spring back when pressed on gently. Allow the cupcakes to cool completely.
Apple Filling
- Combine: Combine the apples, lemon juice, granulated sugar, cornstarch, cinnamon and nutmeg in a medium saucepan over medium heat.
- Simmer: Bring to a simmer and lower the heat to medium low. Then, allow to simmer for 4-5 minutes, until the liquid is thickening and the apples begin to get soft. Cool: Remove from the heat and allow to cool completely.
Frosting
- Beat: In the bowl of a stand mixer use the paddle attachment to beat the butter for 2-3 minutes on medium high until light and fluffy.
- Combine and Mix: Add the powdered sugar, brown sugar and vanilla. Beat on low for a minute or two, until most of the powdered sugar is absorbed by the butter. Then, increase the speed to medium high. Beat for 3 Minutes.
- Add in the rest of the ingredients: Add the cinnamon and 3 tablespoons of heavy cream and mix on medium high until combined. If you would like a softer consistency, add the remaining 2 tablespoons of heavy cream and beat for 2 minutes on medium high.
- Pipe, swirl and dust: Use a piping bag to pipe the frosting onto the cooled cupcakes. Dust lightly with cinnamon and enjoy!

Tips For Apple Pie Cupcakes
Apple pie cupcakes combine the best part of a cupcake and an apple pie. They are absolutely delicious! So, go ahead and use these tips to make the most of this tasty autumn treat.
- Room temperature ingredients: Make sure that before you start baking, that you set your ingredients out to come to room temperature. This will help them blend together more smoothly for a better textured cake.
- Prepare ahead: If you would like to prep the apple filling ahead of time, then go ahead and get it ready a day or two in advance! When you are done making it, just be sure to keep in in an airtight container in the refrigerator until you’re ready to use it!
- How to pick which apple to use: I prefer Granny Smith apples for my baked apple treats, but some other great choices would be Honeycrisp, Pink Lady, Jonagold or Braeburn. You can even mix them up a bit!
- Don’t overfill cupcake liners: Only fill the cupcake liners 2/3 full. If you fill them more than that, then they will spill over and stick to the pan and not have the nice domed top they ought to have.

How to Store Leftovers
These apple pie cupcakes are so good that I like to double this recipe! Then, I can have a few extra of these on hand through the week! If you end up having leftovers or decide to make extra, here is how you can store them for later!
- Room temperature: Store in an airtight container on your counter for up to 4 days.
- Refrigerator: Store in an airtight container in your fridge for up to 7 days. Allow them to come to room temperature before serving.

More Apple Recipes to Try
Desserts
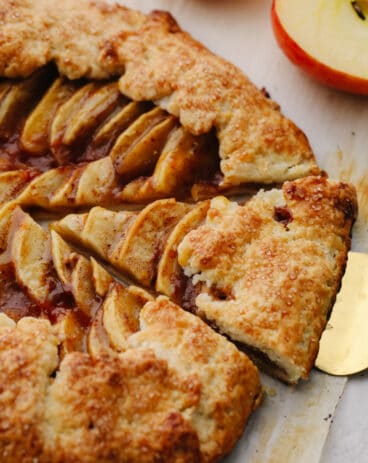
Apple Galette
Salads
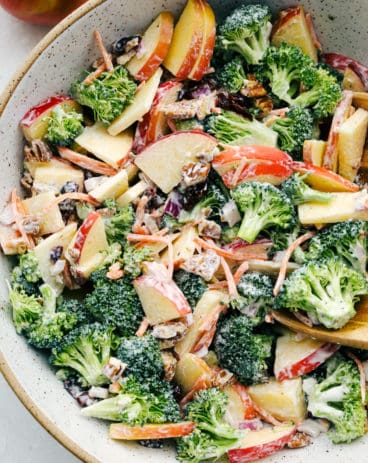
Broccoli Apple Salad
Breakfast
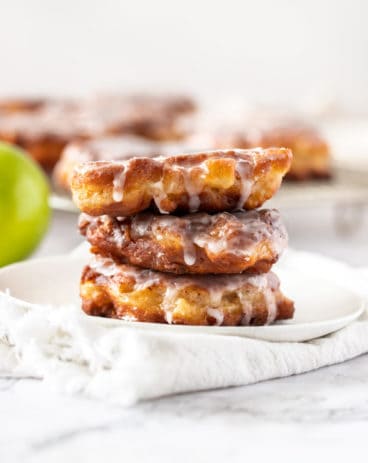
Homemade Apple Fritters
Desserts
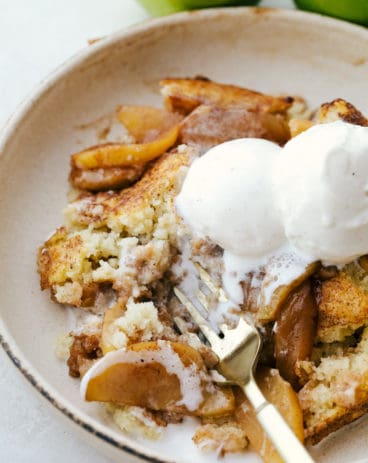
Old Fashioned Apple Cobbler
Apple Pie Cupcakes
Ingredients
Cupcakes
- 1 ½ Cup All Purpose Flour
- ¾ Cup Granulated Sugar
- ¼ Teaspoon Salt
- 1 Teaspoon Baking Powder
- ½ Teaspoon Baking Soda
- 1 Teaspoon Cinnamon
- ¼ Teaspoon Nutmeg
- ¾ Cup Sour Cream
- ½ Cup Vegetable Oil
- 1 Large Egg Room Temperature
- 2 Teaspoons Vanilla Extract
Apple Filling
- 1 ½ Cups Apples diced (about 2 apples)
- 1 Teaspoon Lemon Juice
- 1/3 Cup Granulated Sugar
- 2 Teaspoons Cornstarch
- ½ Teaspoon Cinnamon
- A good sized pinch Nutmeg about ⅛ teaspoon
- Dash of Salt
Frosting
- 1 Cup Unsalted Butter Softened
- 4 Cups Powdered Sugar
- ½ Cup Brown Sugar
- 1 Tablespoon Vanilla
- 1 Teaspoon Cinnamon
- 4-5 Tablespoons Heavy Cream
Instructions
Cupcakes
-
Preheat the oven to 350° and line a muffin tin with cupcake lines. Set aside.
-
In a medium mixing bowl sift together the flour, sugar, salt, baking powder, baking soda, cinnamon and nutmeg. Set aside.
-
In a large bowl combine the sour cream, vegetable oil, egg and vanilla until smooth. Add the dry ingredients into the wet and mix gently until just barely combined.
-
Use a cupcake scoop to fill the cupcake liners 2/3 of the way full. Add a tablespoon of the apple filling to the center of each cupcake.
-
Bake in the middle rack in the oven for 16-18 minutes until a toothpick inserted in the middle of the cupcakes comes out clean and the tops of the cupcakes spring back when pressed on gently. Allow the cupcakes to cool completely.
Apple Filling
-
Combine the apples, lemon juice, granulated sugar, cornstarch, cinnamon and nutmeg in a medium saucepan over medium heat.
-
Bring to a simmer and lower the heat to medium low. Allow to simmer for 4-5 minutes, until the liquid is thickening and the apples begin to get soft. Remove from the heat and allow to cool completely.
Frosting
-
In the bowl of a stand mixer use the paddle attachment to beat the butter for 2-3 minutes on medium high until light and fluffy.
-
Add the powdered sugar, brown sugar and vanilla. Beat on low for a minute or two, until most of the powdered sugar is absorbed by the butter and then increase the speed to medium high. Beat for 3 Minutes.
-
Add the cinnamon and 3 tablespoons of heavy cream and mix on medium high until combined. If you would like a softer consistency, add the remaining 2 tablespoons of heavy cream and beat for 2 minutes on medium high.
-
Use a piping bag to pipe the frosting onto the cooled cupcakes. Dust lightly with cinnamon and enjoy!
from The Recipe Critic https://ift.tt/3B45399
https://ift.tt/3oG9nIn