रविवार, 3 अक्तूबर 2021

Amazing Cajun Fries

Cajun fries are baked to absolute perfection! With a delicious, spicy taste and crispy texture, I don’t think that they get much better than this!

If you love french fries, then these will definitely hit the spot. I love anything with a spicy kick to it so that makes these fries the perfect snack or side! Cook up some Shrimp Boil Foil Packets, Angel Biscuits and end the night with some Mississippi Mud Cake. It will be a southern meal for the books!
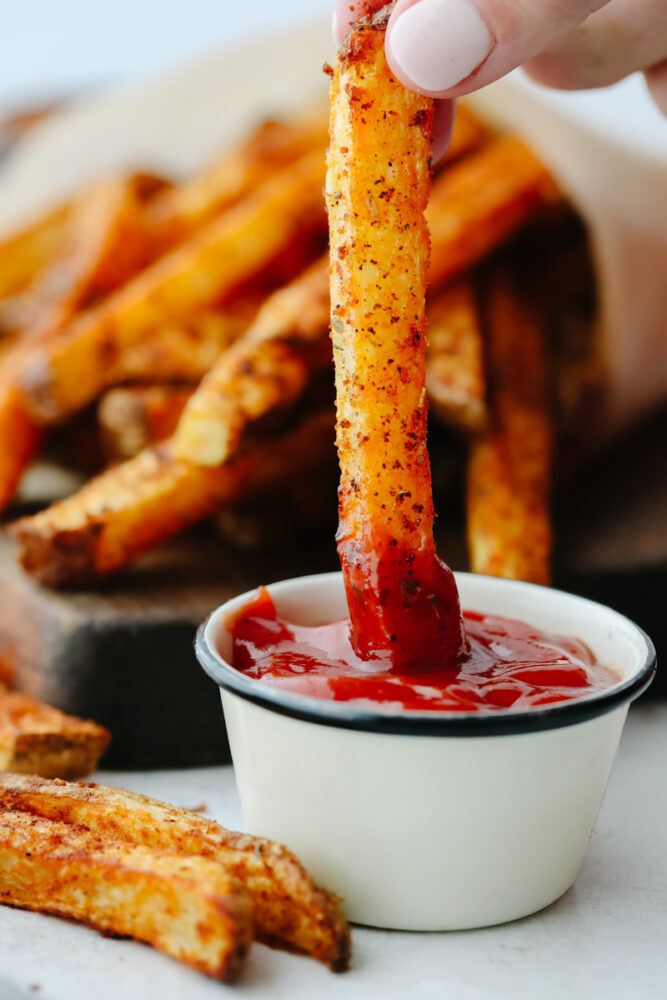
A cajun fry being dipped in ketchup.

What Do Cajun Fries Taste Like?

Cajun fries are seriously one of my favorite ways to cook up some french fries! They have the perfect amount of seasoning and flavor. This makes them able to stand out on their own or be mixed in as a side to basically any meal. Cajun seasoning that you use to flavor these fries with, it spicy but the heat isn’t too much. The Cajun flavor hails from Louisiana which is why you will see this spice used in jambalaya, shrimp, and even lobster tails!

Cajun fries take that spicy (but not too heat-filled) flavor and add it to everyone’s favorite and classic side. French fries! Once you combine that delicious and crispy french fry with this amazing Cajun flavoring, you won’t ever go back to plain, salted fried again. It takes french fries to a whole new level. Make sure that you double this recipe if you are feeding a large crowd because these will fly off of your table so fast! They are finger-licking good and definitely a recipe that you should bookmark!

Ingredients You Need to Make Cajun Fries

The best part about this recipe is that it is restaurant-quality french fries with only FOUR ingredients! And ones that you probably already have at home! See the recipe card below for a list of exact measurements.

  • Russet Potatoes: When you slice up your potatoes, make sure to keep them all about the same size. I make sure to watch this carefully because this will affect how evenly your fries cook. They will cook better if they are all about the same size.
  • Olive Oil: I like to use olive oil because it is healthier but you can use vegetable oil if that’s all that you have on hand.
  • Cajun Seasoning: If you can, try to make this homemade cajun seasoning beforehand. I think it’s worth the amazing taste! But… if you only have time for store-bought then that will work too!
  • Salt: The salt just enhances the seasoning flavor!

Let’s Cook Up Some Fries!

French fries are one of my favorite and easy recipes to cook up. They deliver on amazing taste and texture and these Cajun fries do just that!

  1. Preheat oven: Preheat the oven to 425°.
  2. Clean and cut the potatoes: Scrub the potatoes clean. If you would like to peel them go ahead, but I chose to leave the skins on. Either press the potatoes through a large fry cutter or cut into ½ inch square sticks.
  3. Soak and rinse: Add your cut potatoes to a large bowl of cold water and soak for at least 30 minutes to release the excess potato starch. After 30 minutes is up, drain and rinse potatoes.
  4. Dry the potatoes and coat with seasoning: Dry the potatoes very well and lay them out on a large baking sheet. Add the olive oil, cajun seasoning and salt to the potatoes and toss together until evenly coated. You can do this in a bowl instead, but I like to do it right on the baking sheet to save myself from having to wash another dish.
  5. Bake, flip and dip: Bake for 20 minutes. Remove from the oven and flip the fries over and bake for another 20 minutes before enjoying with your favorite dipping sauce.
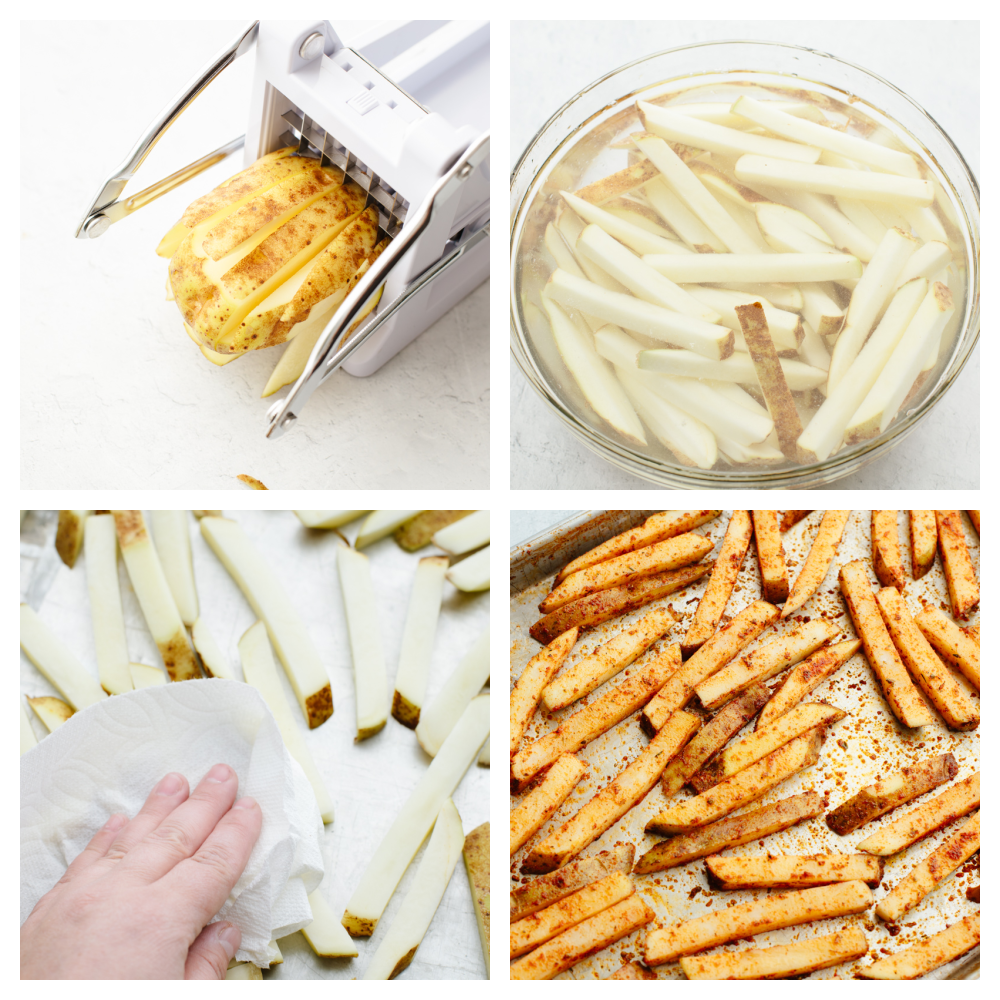
4 pictures showing potatoes being sliced, soaked and seasoned.

What Can I Dip These Fries In?

Let’s be honest, these Cajun fries are SOO GOOD all by themselves. BUT… If you want some suggestions on what will take them to the next level then here are a few ideas for dips!

  • Ranch dip: Doesn’t everything taste better with ranch? This creamy ranch dip is to die for and the flavor with these fries is amazing!
  • Ketchup: You can’t go wrong with ketchup and these fries are no exception!
  • Fry sauce: If you don’t know what fry sauce is, then you are about to try the best sauce ever! Fry sauce is a mixture of ketchup and mayonaise that is an amazing dipping sauce for fries!
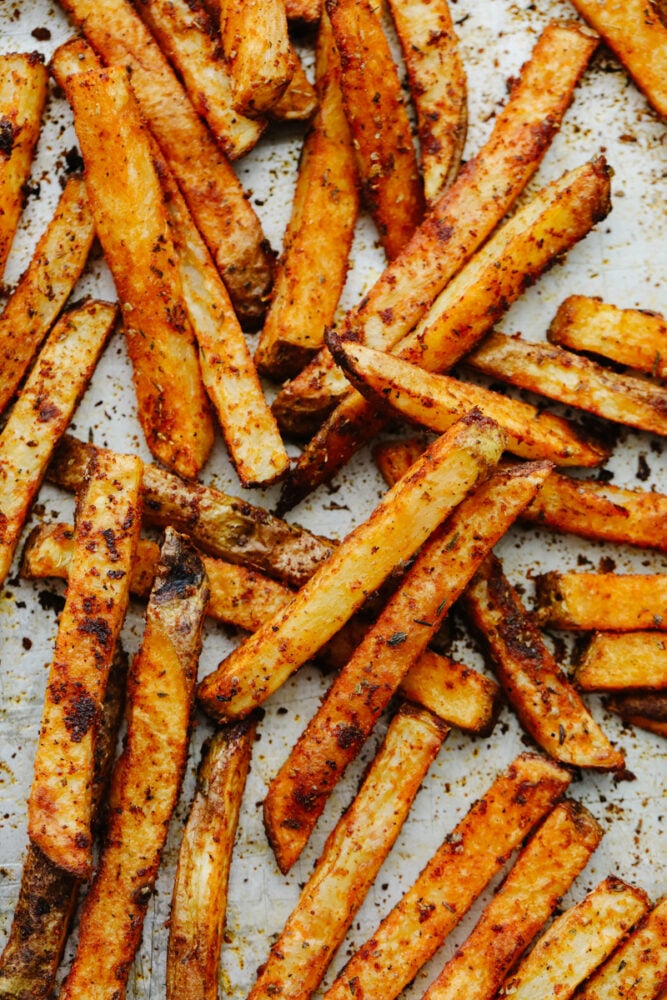
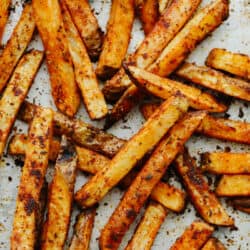
Cajun fries cooked on a baking sheet.

How to Store and Reheat Leftovers

If you want to make an extra batch of these Cajun fries so that you have some ready to eat for later, I think that’s a great idea! Here is how you can store them!

  • Refrigerator: Once you have let the fries cool then place them in an airtight container. They can last in your fridge for 3-5 days.
  • Reheat: Reheating french fries has to be done a certain way because how you reheat them will make them or break them! I like to reheat mine in the oven so that they have that crispy texture. It will make them taste fresh again! Preheat your oven to 450 degrees. Place the fries on a baking sheet in a single layer and roast them for 3-5 minutes. Remove them and enjoy!
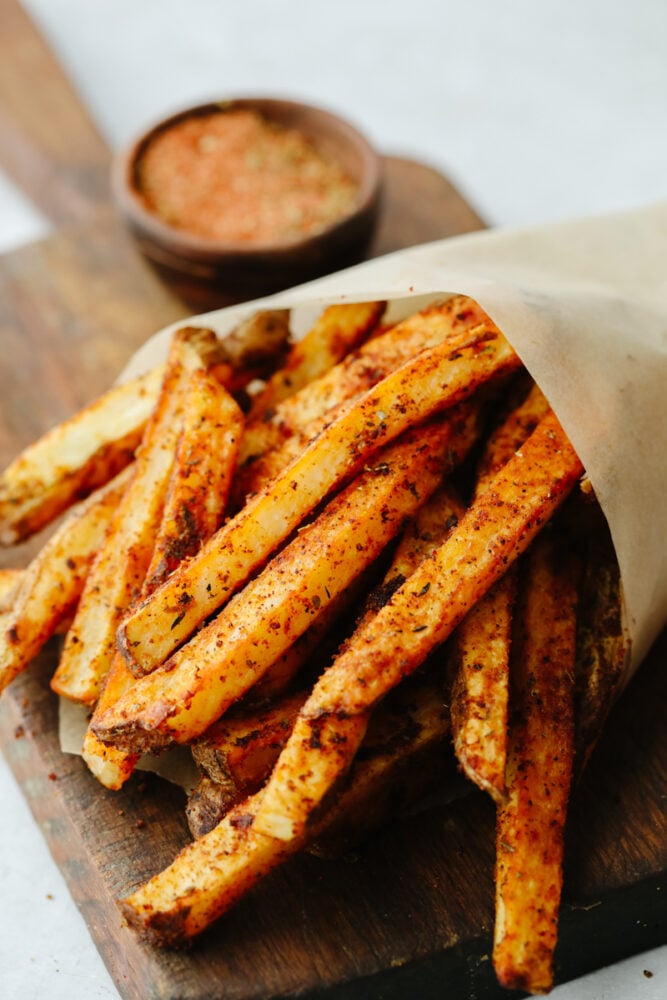
Cajun fries wrapped up in parchment paper in a cone.
Print

Amazing Cajun Fries

Cajun fries are baked to absolute perfection! With a delicious, spicy taste and crispy texture, I don't think that they get much better than this! 
Course Side Dish
Cuisine American
Keyword cajun fries
Prep Time 40 minutes
Cook Time 40 minutes
Total Time 1 hour 20 minutes
Servings 4 People
Calories 363kcal
Author Alyssa Rivers

Ingredients

  • 4-5 large Russet Potatoes
  • 2 Tablespoons Olive Oil
  • 2 Tablespoons Cajun Seasoning
  • ½ Teaspoon Salt

Instructions

  • Preheat the oven to 425°.
  • Scrub the potatoes clean. If you would like to peel them go ahead, but I chose to leave the skins on. Either press the potatoes through a large fry cutter or cut into ½ inch square sticks.
  • Add your cut potatoes to a large bowl of cold water and soak for at least 30 minutes to release the excess potato starch. After 30 minutes is up, drain and rinse potatoes.
  • Dry the potatoes very well and lay them out on a large baking sheet. Add the olive oil, cajun seasoning, and salt to the potatoes and toss together until evenly coated. You can do this in a bowl instead, but I like to do it right on the baking sheet to save myself from having to wash another dish.
  • Bake for 20 minutes. Remove from the oven and flip the fries over and bake for another 20 minutes before enjoying with your favorite dipping sauce.

Nutrition

Calories: 363kcal | Carbohydrates: 69g | Protein: 8g | Fat: 8g | Saturated Fat: 1g | Polyunsaturated Fat: 1g | Monounsaturated Fat: 5g | Sodium: 312mg | Potassium: 1619mg | Fiber: 6g | Sugar: 3g | Vitamin A: 1728IU | Vitamin C: 21mg | Calcium: 56mg | Iron: 4mg


from The Recipe Critic https://ift.tt/3FdswXB
https://ift.tt/3l1DM1p
शनिवार, 2 अक्तूबर 2021

Apple Pie Cupcakes

Apple pie cupcakes are a twist on a classic dessert! They are moist, delicious and with fresh apple pie filling in the middle, they give you JUST the right amount of texture!

I love a good cupcake and one that is based on my favorite, apple pie… Well… That means it’s going straight to the top of the list! If you love a good cupcake as I do, then try these Banana, Chocolate, and these delicious Angel Food Cupcakes. They are SOO GOOD!

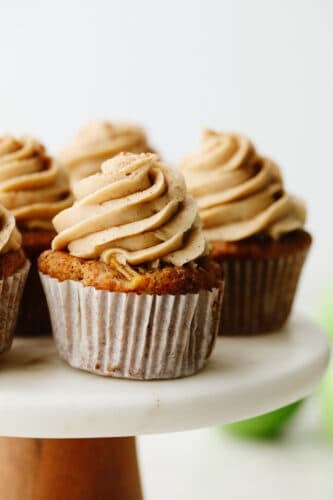
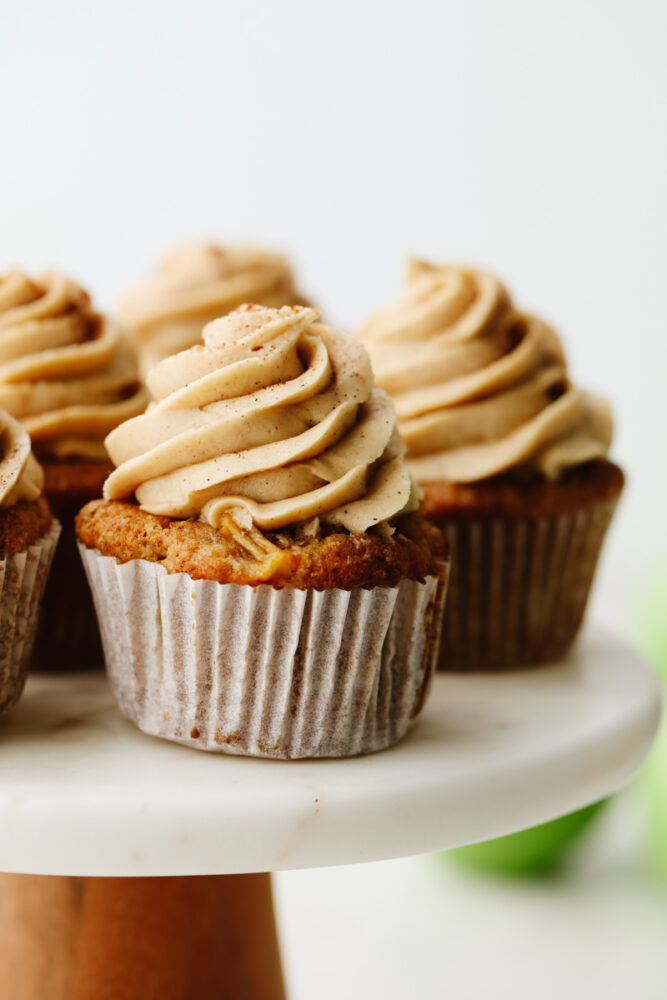
Close up of an apple pie cupcake on a cake stand.

Soft and Moist Apple Pie Cupcakes

If you were to combine the best things about an apple pie and a cupcake, this is exactly what it would taste like! These cupcakes even have apple pie filling! Which, I know that some people love the crust but if I’m being honest, the filling is always my favorite part of the pie. Then, you have the delicious fluffy cupcake that is swirled with cinnamon sugar frosting… It’s like it’s begging me to have more than one! They are so delicious and really hit the spot!

The filling in the middle is a bit of a surprise because I think most people would just expect the batter to have an apple pie flavor. This takes this cupcake to the next level and really gives it an added texture that is amazing! Cupcakes are one of the most versatile desserts because there are SO many flavors! I recently made these Angel Food Cupcakes and also these Carrot Cake Cupcakes and they really knocked my socks off. Like this one, they are both based on a classic dessert! Try these apple pie cupcakes and you will definitely get a “WOW” from your family and friends!

Ingredients in Apple Pie Cupcakes

Even though there are a lot of things that go into these apple pie cupcakes, they actually aren’t too hard to make! Give them a try, I think you will be pleasantly surprised! See the recipe card below for a list of exact measurements.

Cupcakes

  • Flour: I used all purpose flour for this recipe.
  • Granulated Sugar: This, of course, adds the sweet taste to your cupcake batter.
  • Salt: The salt enhances the flavors of the other ingredients.
  • Baking Powder AND Baking Soda: These will help your cupcake rise and be soft and moist.
  • Cinnamon: This is a classic taste in an apple pie.
  • Nutmeg: Same as the cinnamon, this is necessary to getting that amazing, deep flavor!
  • Sour Cream: This ingredient will make the cake tender and soft.
  • Vegetable Oil: The oil in this recipe brings in that moist texture for the cupcakes!
  • Egg: I used a large egg that was at room temperature.
  • Vanilla extract: This adds some flavor to the sweetness of the cupcake.

Apple Filling

  • Apples: Dice up your apples to all the same size. Then they will cook evenly.
  • Lemon Juice: This keeps the apples fresh.
  • Granulated sugar: You need some sweetness to balance out any tart.
  • Cornstarch: This is used to thicken the filling.
  • Cinnamon: The cinnamon flavor will be used in every part of this cupcake!
  • Nutmeg: A pinch of nutmeg will do! (That’s usually about ⅛ tsp)
  • Salt: Don’t use too much! just one quick dash will do the trick!

Frosting

  • Butter: I used unsalted butter that was softened.
  • Powdered sugar: You use this instead of granulated sugar because it dissolves faster and creates a smooth frosting for these apple pie cupcakes!
  • Brown sugar: this is the best sweetener! Its really depends the flavor of the sweet taste.
  • Vanilla: Adds some flavoring to the sugar.
  • Cinnamon: The cinnamon complements the cinnamon in the cake and filling!
  • Heavy Cream: This thickens up the frosting!

Let’s Bake Some Cupcakes!

These apple pie cupcakes will take you about 40 minutes from start to finish. And that includes baking time! They are so delicious that the hardest part will be just waiting to eat them!

Cupcakes

  1. Prep: Preheat the oven to 350° and line a muffin tin with cupcake lines and then set it aside.
  2. Mix the dry ingredients: In a medium mixing bowl sift together the flour, sugar, salt, baking powder, baking soda, cinnamon and nutmeg. Set aside.
  3. Mix the wet ingredients then combine with the dry ingredients: In a large bowl combine the sour cream, vegetable oil, egg and vanilla until smooth. Add the dry ingredients into the wet and mix gently until just barely combined.
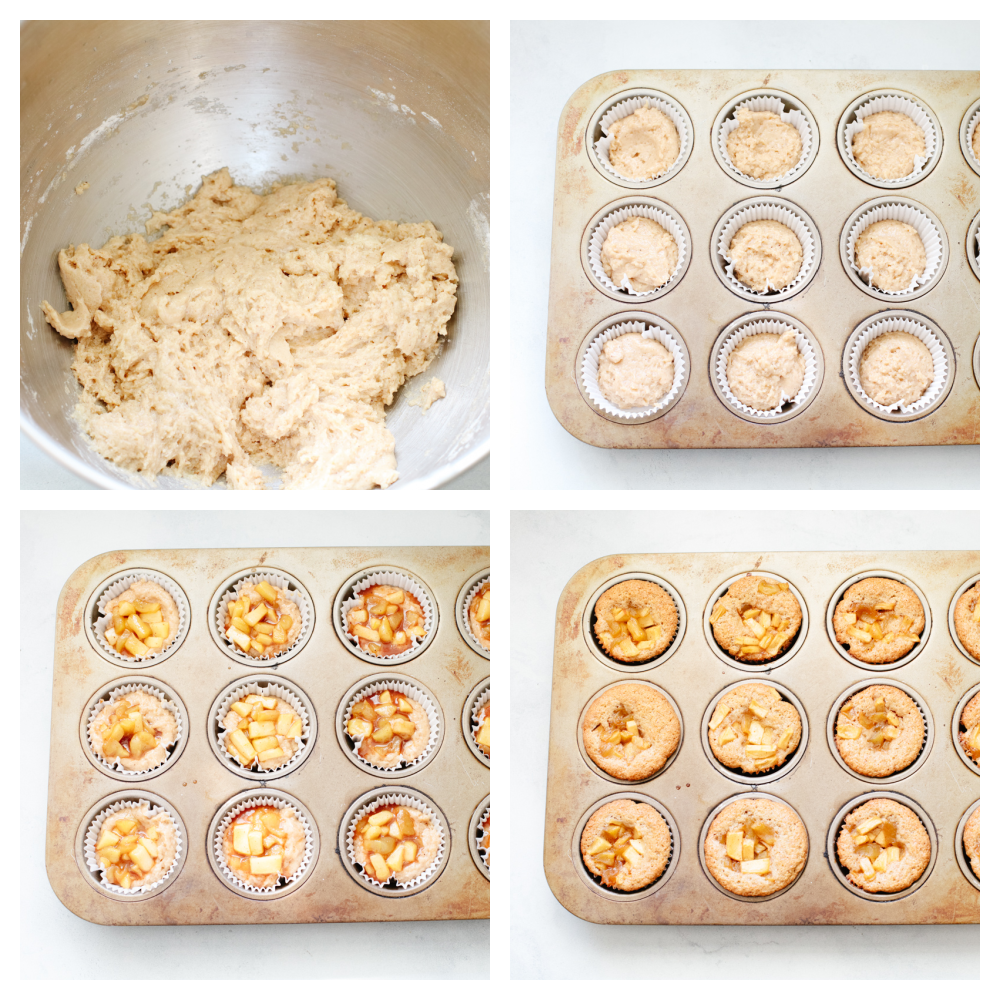
  4. Scoop and add filling: Use a cupcake scoop to fill the cupcake liners 2/3 of the way full. Add a tablespoon of the apple filling to the center of each cupcake.
  5. Bake and cool: Bake in the middle rack in the oven for 16-18 minutes until a toothpick inserted in the middle of the cupcakes comes out clean and the tops of the cupcakes spring back when pressed on gently. Allow the cupcakes to cool completely.

Apple Filling

  1. Combine: Combine the apples, lemon juice, granulated sugar, cornstarch, cinnamon and nutmeg in a medium saucepan over medium heat.
  2. Simmer: Bring to a simmer and lower the heat to medium low. Then, allow to simmer for 4-5 minutes, until the liquid is thickening and the apples begin to get soft. Cool: Remove from the heat and allow to cool completely.

Frosting

  1. Beat: In the bowl of a stand mixer use the paddle attachment to beat the butter for 2-3 minutes on medium high until light and fluffy.
  2. Combine and Mix: Add the powdered sugar, brown sugar and vanilla. Beat on low for a minute or two, until most of the powdered sugar is absorbed by the butter. Then, increase the speed to medium high. Beat for 3 Minutes.
  3. Add in the rest of the ingredients: Add the cinnamon and 3 tablespoons of heavy cream and mix on medium high until combined. If you would like a softer consistency, add the remaining 2 tablespoons of heavy cream and beat for 2 minutes on medium high.
  4. Pipe, swirl and dust: Use a piping bag to pipe the frosting onto the cooled cupcakes. Dust lightly with cinnamon and enjoy!
4 pictures showing how to make the cupcake batter and apple pie filling.

Tips For Apple Pie Cupcakes

Apple pie cupcakes combine the best part of a cupcake and an apple pie. They are absolutely delicious! So, go ahead and use these tips to make the most of this tasty autumn treat.

  • Room temperature ingredients: Make sure that before you start baking, that you set your ingredients out to come to room temperature. This will help them blend together more smoothly for a better textured cake.
  • Prepare ahead: If you would like to prep the apple filling ahead of time, then go ahead and get it ready a day or two in advance! When you are done making it, just be sure to keep in in an airtight container in the refrigerator until you’re ready to use it!
  • How to pick which apple to use: I prefer Granny Smith apples for my baked apple treats, but some other great choices would be Honeycrisp, Pink Lady, Jonagold or Braeburn. You can even mix them up a bit!
  • Don’t overfill cupcake liners: Only fill the cupcake liners 2/3 full. If you fill them more than that, then they will spill over and stick to the pan and not have the nice domed top they ought to have.
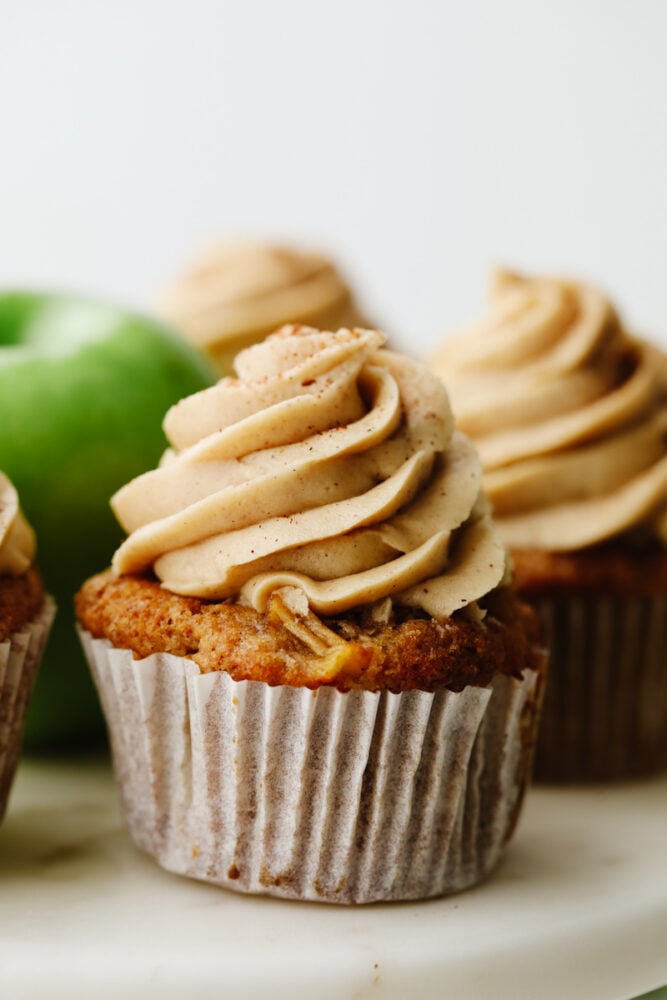
Close up of an apple pie cupcake.

How to Store Leftovers

These apple pie cupcakes are so good that I like to double this recipe! Then, I can have a few extra of these on hand through the week! If you end up having leftovers or decide to make extra, here is how you can store them for later!

  • Room temperature: Store in an airtight container on your counter for up to 4 days.
  • Refrigerator: Store in an airtight container in your fridge for up to 7 days. Allow them to come to room temperature before serving.
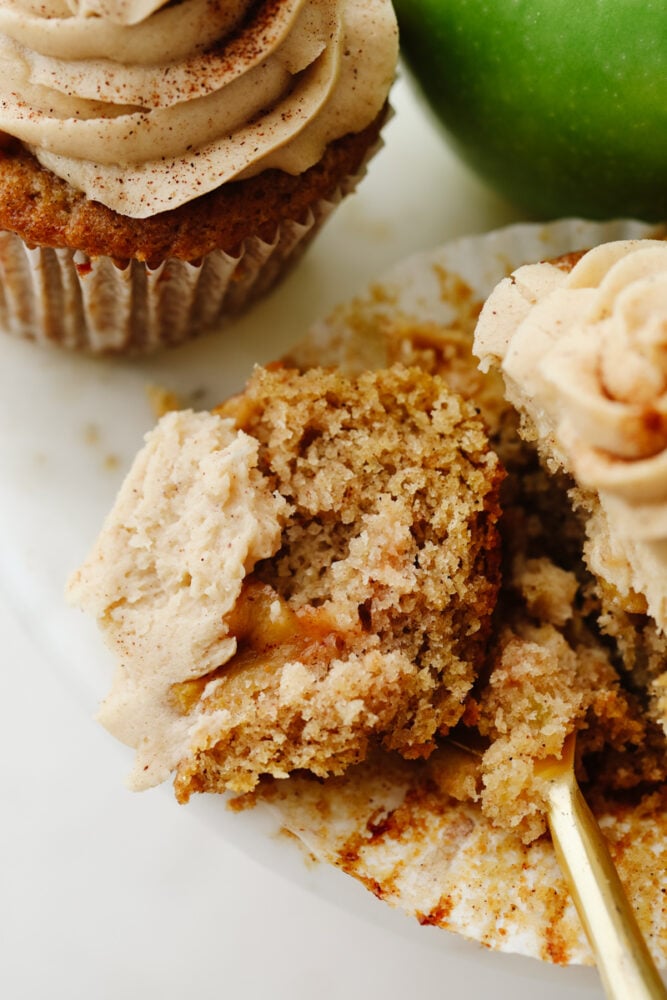
An apple pie cupcake being cut into with a fork.
Print

Apple Pie Cupcakes

Apple pie cupcakes are a twist on a classic dessert! They are moist, delicious and with fresh apple pie filling in the middle, they give you JUST the right amount of texture! 
Prep Time 30 minutes
Cook Time 18 minutes
Servings 12 Cupcakes

Ingredients

Cupcakes

  • 1 ½ Cup All Purpose Flour
  • ¾ Cup Granulated Sugar
  • ¼ Teaspoon Salt
  • 1 Teaspoon Baking Powder
  • ½ Teaspoon Baking Soda
  • 1 Teaspoon Cinnamon
  • ¼ Teaspoon Nutmeg
  • ¾ Cup Sour Cream
  • ½ Cup Vegetable Oil
  • 1 Large Egg Room Temperature
  • 2 Teaspoons Vanilla Extract

Apple Filling

  • 1 ½ Cups Apples diced (about 2 apples)
  • 1 Teaspoon Lemon Juice
  • 1/3 Cup Granulated Sugar
  • 2 Teaspoons Cornstarch
  • ½ Teaspoon Cinnamon
  • A good sized pinch Nutmeg about ⅛ teaspoon
  • Dash of Salt

Frosting

  • 1 Cup Unsalted Butter Softened
  • 4 Cups Powdered Sugar
  • ½ Cup Brown Sugar
  • 1 Tablespoon Vanilla
  • 1 Teaspoon Cinnamon
  • 4-5 Tablespoons Heavy Cream

Instructions

Cupcakes

  • Preheat the oven to 350° and line a muffin tin with cupcake lines. Set aside.
  • In a medium mixing bowl sift together the flour, sugar, salt, baking powder, baking soda, cinnamon and nutmeg. Set aside.
  • In a large bowl combine the sour cream, vegetable oil, egg and vanilla until smooth. Add the dry ingredients into the wet and mix gently until just barely combined.
  • Use a cupcake scoop to fill the cupcake liners 2/3 of the way full. Add a tablespoon of the apple filling to the center of each cupcake.
  • Bake in the middle rack in the oven for 16-18 minutes until a toothpick inserted in the middle of the cupcakes comes out clean and the tops of the cupcakes spring back when pressed on gently. Allow the cupcakes to cool completely.

Apple Filling

  • Combine the apples, lemon juice, granulated sugar, cornstarch, cinnamon and nutmeg in a medium saucepan over medium heat.
  • Bring to a simmer and lower the heat to medium low. Allow to simmer for 4-5 minutes, until the liquid is thickening and the apples begin to get soft. Remove from the heat and allow to cool completely.

Frosting

  • In the bowl of a stand mixer use the paddle attachment to beat the butter for 2-3 minutes on medium high until light and fluffy.
  • Add the powdered sugar, brown sugar and vanilla. Beat on low for a minute or two, until most of the powdered sugar is absorbed by the butter and then increase the speed to medium high. Beat for 3 Minutes.
  • Add the cinnamon and 3 tablespoons of heavy cream and mix on medium high until combined. If you would like a softer consistency, add the remaining 2 tablespoons of heavy cream and beat for 2 minutes on medium high.
  • Use a piping bag to pipe the frosting onto the cooled cupcakes. Dust lightly with cinnamon and enjoy!


from The Recipe Critic https://ift.tt/3B45399
https://ift.tt/3oG9nIn

Air Fryer Chicken Nuggets

Air fryer chicken nuggets are absolute perfection! They are crispy on the outside, tender on the inside, and are just waiting to be dipped in any of your favorite sauces! Your family will go crazy over them!

A good, delicious chicken nugget is hard to come by, which is why these are so amazing! They taste as if they are straight from a restaurant. Dip them in some homemade honey mustard, BBQ sauce, or this Yum Yum Sauce and you will see just how amazing they are!

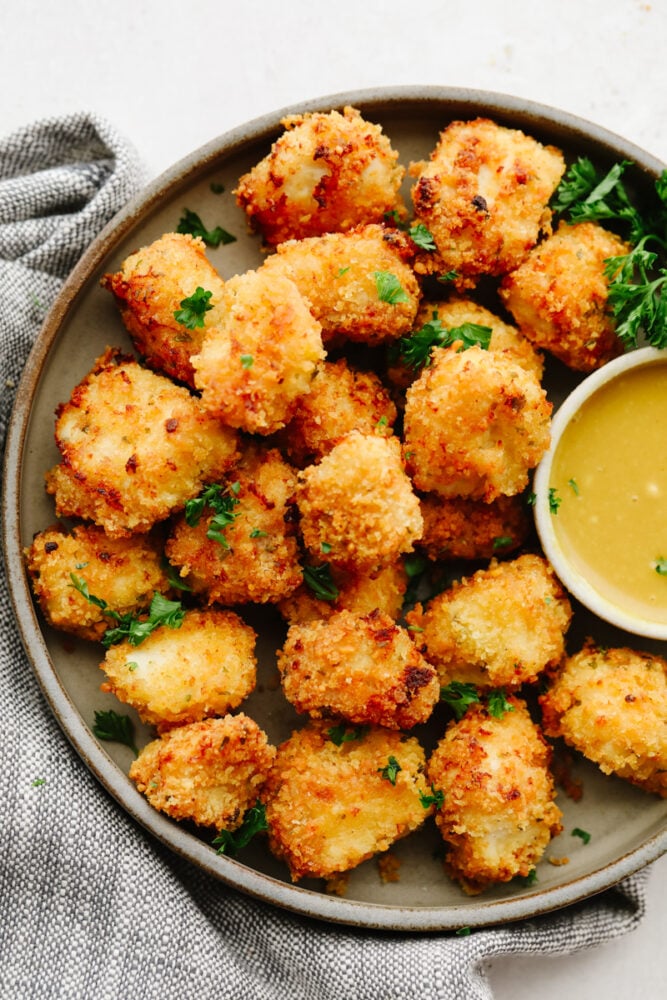
Chicken nuggets on a tray with honey mustard sauce.

Why Are Air Fryer Chicken Nuggets the BEST?

If you want that perfect texture with a crispy outside and tender inside nugget, then air frying them is the way to go! I tried these and could not believe how delicious they were and how the texture is exactly what I want in a nugget! And then to know that I did it without any oil splatters and mess… Well, that’s basically a miracle! These nuggets are so delicious and easy to make!

Not only did I eat these plain (because they are that good) but you can do SO many different things with them! Add them to a salad, dip them in some sauce or eat them with some french fries and lemonade and you will have yourself a meal! You can even cook up a bunch of these at once and eat them on the go. We have so many activities and places to be during the school year and are gone all the time! So these are great to make ahead and heat up to eat on the go! You will absolutely love these and your family will too!

What Do I Need to Make Air Fryer Chicken Nuggets?

These nuggets are made up of a bunch of ingredients that you probably already have in your pantry! Mix them up and then you’ll be ready to start! See the recipe card below for a list of exact measurements.

  • Chicken breast: Cut up the chicken breast into cmall cubes. Make them all about the same size so that they cook evenly.
  • Flour: I used all purpose flour for this recipe!
  • Salt and pepper: I used this right before baking to season the nuggets.
  • Olive oil: If you don’t have any olive oil the you can use melted butter instead!
  • Garlic: Mince up some fresh garlic cloves. If you don’t have any, you can use minced garlic from your fridge. ½ tsp equals about 1 clove of garlic!
  • Panko: The pank bread crumbs give these chicken nuggets the best crispy texture.
  • Parmesan: This adds to that crispy texture and tastes delicious.
  • Dried parsley: I like to used parsley to flavor it. It gives a similar taste to restaurant nuggets!
  • Paprika: Paprika is a sweet spice that I love to use in this coating.

How to Make Air Fryer Chicken Nuggets

These air fryer chicken nuggets are fast, easy, and can be made ahead of time! They taste delicious and I can’t believe that they are made to taste this good without being fried in oil!

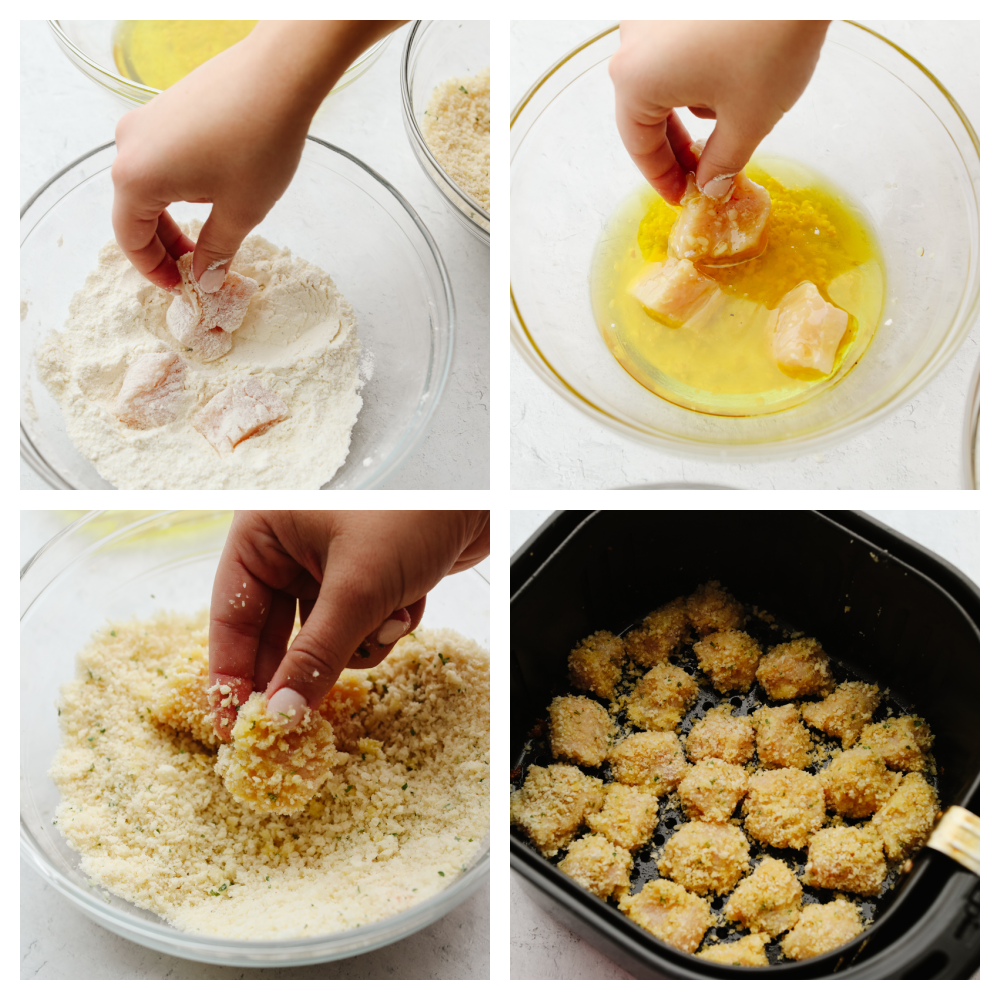
  • Whisk and combine: In a small bowl whisk together the flour, salt and pepper. In a separate small bowl whisk the oil and minced garlic. In another small bowl combine the Panko, parmesan, parsley, and paprika.
  • Dip and coat: Place the tenders in the flour mixture, then the oil, and lastly the panko. Make sure to evenly coat each one.
  • Place in air fryer: Spray the air fryer basket with oil and place the tenders inside.
  • Cook and flip: Cook the at 400 degrees for 7 minutes, then flip and cook another 7-10 minutes until crispy.
  • Enjoy: Serve warm with homemade honey mustard
4 pictures showing how to coat and cook chicken nuggets.

Air Fryer Tips

If you have never used an air fryer before or you have but want some tips, then this should help! I have come up with a few of my top air frying tips for you! It will make this so much easier!

  • Preheat: If you heat up the airfryer before you use it to cook with, then it will help your food be crispy on the outside and tender on the inside. Just turn your air fryer to the temperature of your recipe and leave it like that for at least 5 minutes before putting any food in it!
  • Don’t overlap: When I place things in the airfryer, I make sure that they are in a single layer and don’t overlap. This may take a few more batches of cooking but it will be worth it. If you stack your food then it sticks together and becomes mushy. Then it won’t cook poroperly and won’t be crispy!
  • Less oil: It seems like it would be the opposite but less oil is better. The less olive oil that you use on your food the crispier it will be!
  • Dont forget to flip: Make sure that halfway through cooking, you take the tray out of the air fryer and shake it and flip the nuggets. Then they get cooked evenly and they will be fully crisp!
  • Olive oil: Use regular oil instead of extra virgin olive oil. This is becaue the extra virgin olive oil will smoke a lot more!
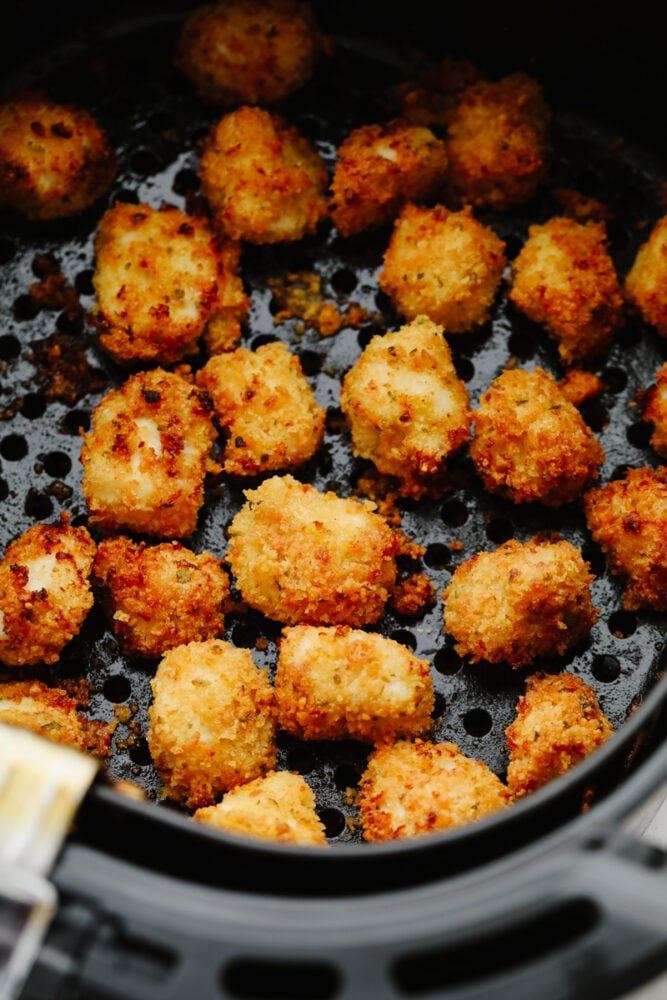
Chicken nuggets cooking in an air fryer.

Can I Make These Ahead of Time?

One of my first questions, when I am cooking for my family, is this! So anytime that I can cook a recipe ahead of time, it’s a winner in my book! You can cook these air fryer chicken nuggets and eat them later and here are the instructions on how to do it!

  • Cook: Put these together and cook according to the recipe card.
  • Refrigerator: Store in your fridge in a sealed, airtight container. These can last in your fridge for uo to 2 days.
  • Freezer: After your nuggets have cooled, place them in a ziplock bag or an airtight container. Label it with the date. These can last in your freezer for up to 2 months.
  • Reheat: To reheat your nuggets, take them directly out of the fridge or freezer and place them in a preheated air fryer. Then, cook them for 10-12 minutes at 400 degrees. Don’t forget to flip them halfway through!
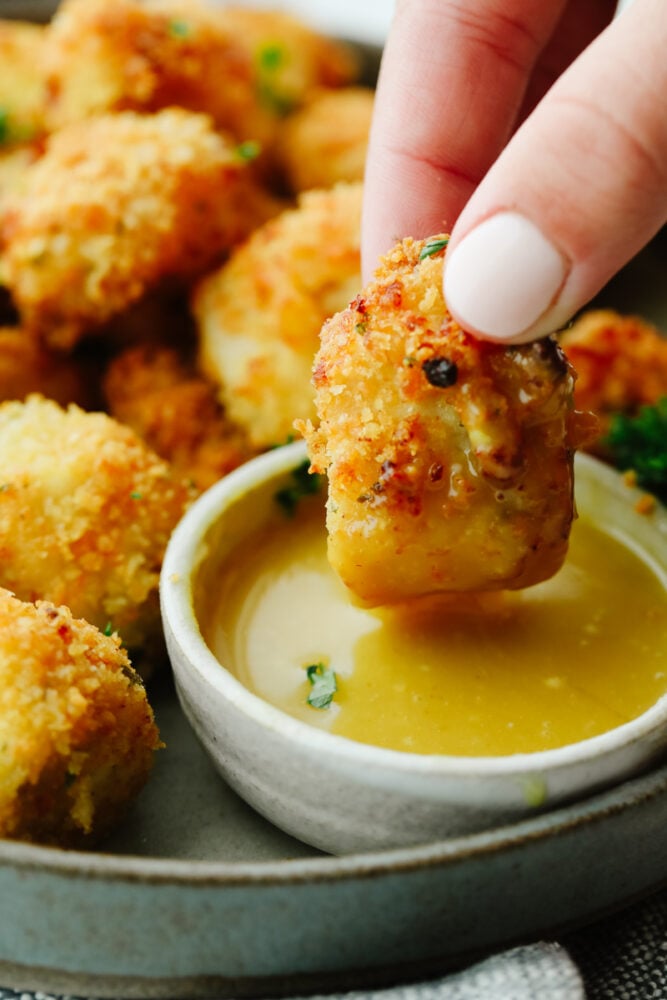
An air fried chicken nugget being dipped into honey mustard sauce.
Print

Air Fryer Chicken Nuggets

Air fryer chicken nuggets are absolute perfection! They are crispy on the outside, tender on the inside, and are just waiting to be dipped in any of your favorite sauces! Your family will go crazy over them! 
Course Dinner, Main Course
Cuisine American
Keyword air fryer chicken nuggets, chicken nuggets, chicken nuggets in air fryer
Prep Time 5 minutes
Cook Time 15 minutes
Total Time 20 minutes
Servings 4 people
Calories 321kcal
Author Alyssa Rivers

Ingredients

  • 1 pound chicken breast cubed
  • 1/2 cup flour
  • 1/2 teaspoon salt
  • 1/4 teaspoon pepper
  • 1/4 cup olive oil or melted butter
  • 3 cloves garlic minced
  • 1 cup Panko
  • 2/3 cup grated parmesan
  • 1 teaspoon dried parsley
  • 1/4 teaspoon paprika

Instructions

  • In a small bowl whisk together the flour, salt and pepper. In a separate small bowl whisk the oil and minced garlic. In another small bowl combine the Panko, parmesan, parsley, and paprika.
  • Place the tenders in the flour mixture, then the oil, and lastly the Panko. Make sure to evenly coat each one.
  • Spray the air fryer basket with oil and place the tenders inside.
  • Cook the at 400 degrees for 7 minutes, then flip and cook another 7-10 minutes until crispy.
  • Serve warm with homemade honey mustard

Nutrition

Calories: 321kcal | Carbohydrates: 24g | Protein: 34g | Fat: 9g | Saturated Fat: 4g | Polyunsaturated Fat: 1g | Monounsaturated Fat: 2g | Trans Fat: 1g | Cholesterol: 87mg | Sodium: 788mg | Potassium: 501mg | Fiber: 1g | Sugar: 1g | Vitamin A: 241IU | Vitamin C: 2mg | Calcium: 226mg | Iron: 2mg


from The Recipe Critic https://ift.tt/3oqgLal
https://ift.tt/3uyAMN3