रविवार, 17 अक्तूबर 2021

Homemade Pumpkin Puree

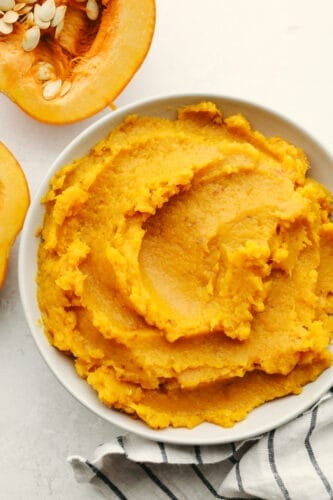
Pumpkin puree that is homemade cannot be beaten! With its fresh taste and amazing texture, once you have tried this you will never go back! It is perfect for all of your fall recipes!

I love all things homemade and this recipe is so fun to make! Go ahead and use it in these Mini Pumpkin Pies, this Pumpkin Spice Sheet Cake, and these amazing Pumpkin Scones. They are all SOO good!

Pumpkin puree in a bowl.

Pumpkin Puree

There is always some confusion between pumpkin puree and pumpkin pie filling! People think that you can use them in the same way. But let me tell you what the difference is! Pumpkin pie filling is a pre-made filling that is already mixed with spices and flavoring. You don’t want to use this in recipes because then you will be doubling up on those ingredients and it won’t taste right! Pumpkin puree is pure pumpkin. This is what you see in cans all over at fall time and most pumpkin recipes call for this ingredient!

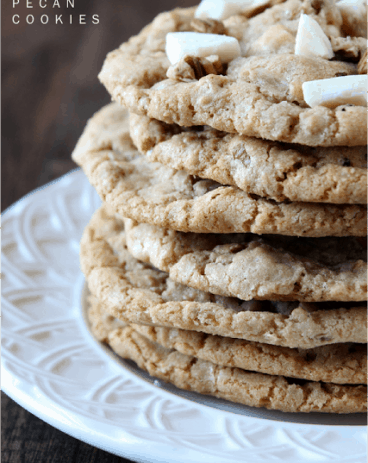
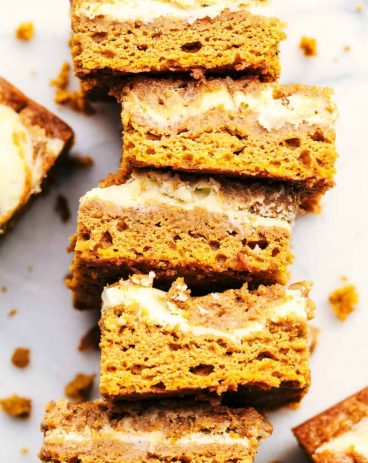
Do you know how all of the pumpkin recipes are so soft and moist when you eat them? That’s because pumpkin puree has a lot of water content so it helps everything retain that moisture! It is incredibly popular and can be hard to find at the store during the season. That’s why this homemade pumpkin puree recipe is perfect! All you need is a pumpkin. It doesn’t get much easier than that! Plus, your kids will love helping you clean out your pumpkin! Try out the puree in these Pumpkin Cream Cheese Muffins, Absolutely Perfect Pumpkin Bread, and of course, this classic tried and true Grandma’s Famous Pumpkin Pie.

What Do I Need to Make Homemade Pumpkin Puree?

You need one thing… A pumpkin! Try picking out one that is more flavorful and used for recipes. They will be called a “Sugar Pumpkin.” Just ask for these kinds at the store or pumpkin patch and they will be able to help you find just the right one!

Let’s Make Some Puree!

Making homemade pumpkin puree is not complicated and is actually kind of fun to do! You just need to make sure that you have set aside enough time to roast your pumpkin and you will be all set and ready to go!

  1. Preheat and prep: Preheat the oven to 400° and line a baking sheet with parchment paper.
  2. Roast: Cut your pumpkin in half and scoop out the seeds. (Head to this recipe here to find out how to roast your seeds!) Place cut side down on the baking sheet and roast for 45-60 minutes until it can be easily poked with a fork.. Remove from the oven and allow the pumpkin to cool completely.
  3. Scoop and blend: Use a spoon to remove the softened flesh from the inside of the pumpkin and discard the skin. Press through a potato ricer or use a food processor to blend it up. If you are using a potato ricer you may have to scrape any fibrous pumpkin off the bottom and top of the plate before pressing more through.
  4. Put it in the fridge: Refrigerate pureed pumpkin in an airtight container or freeze in a freezer bag.
6 pictures showing steps on how to roast a pumpkin and scoop out the inside.

Tips for Homemade Pumpkin Puree

Pumpkin puree is easy to make and the taste cannot be beaten by any canned pumpkin! It stores well, so it’s a great item to make from scratch and store in the freezer for the next time a pumpkin craving hits.

  • What kind of pumpkin should I buy to make puree? This part is easy! A pumpkin called a “sugar pumpkin” will work the best for making pumpkin puree! If you use one of these pumpkins then it will help you get a nice thick consistency for your puree. Plus sugar pumpkins have the best flavor!
  • Troubleshooting hard pumpkin: If your pumpkin is fork tender but is still kind of hard when you try to press it through the potato ricer then you can fix that! Try putting the pumpkin in a microwave safe bowl and microwave it on the potato setting before trying to press it through the ricer again.
  • Watery puree: If your puree is watery or you choose to use a pumpkin variety that has a higher water content then you can simmer it on the stovetop. Do this over medium heat so then some of that water evaporates and the puree thickens. 
A close up of pumpkin puree on a spoon.

How to Store Leftovers

You can make this pumpkin puree ahead of time and store it for later! Do this and then you will always have some on hand for all of your fall recipes!

Refrigerator: Store your pumpkin puree in an airtight container and place it in your fridge. It will last about a week.

Freezer: If you want to make extra of this and store it all season then you can freeze it! Go ahead and place it in an airtight container or a large ziplock bag and label it with the date. It can last for up to 3 months! When you are ready to use it then defrost it in your fridge for a day or two.
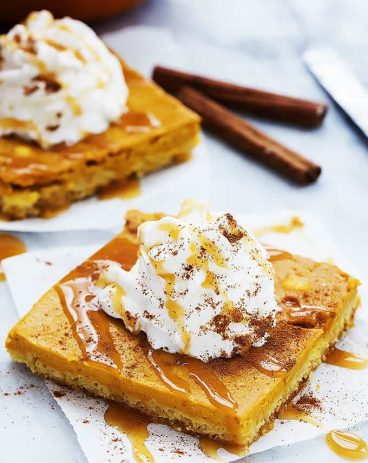
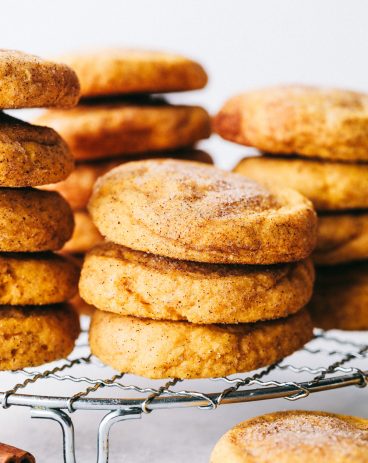
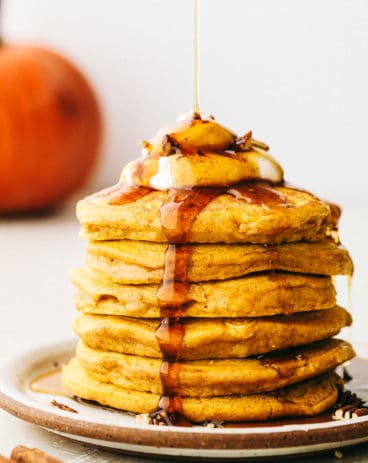
Print

Homemade Pumpkin Puree

Pumpkin puree that is homemade cannot be beat! With its fresh taste and amazing texture, once you have tried this you will never go back! It is perfect for all of your fall recipes! 
Course Side Dish
Cuisine American
Keyword pumpkin puree
Prep Time 8 minutes
Cook Time 45 minutes
Total Time 53 minutes
Servings 1 Will Vary Depending On The Size Of Your Pumpkin
Calories 354kcal
Author Alyssa Rivers

Ingredients

  • 1-2 Pie Pumpkins sometimes called sugar pumpkins

Instructions

  • Preheat the oven to 400° and line a baking sheet with parchment paper.
  • Cut your pumpkin in half and scoop out the seeds. (Head to this recipe here to find out how to roast your seeds!) Place cut side down on the baking sheet and roast for 45-60 minutes until it can be easily poked with a fork. Remove from the oven and allow the pumpkin to cool completely.
  • Use a spoon to remove the softened flesh from the inside of the pumpkin and discard the skin. Press through a potato ricer or use a food processor to blend it up. If you are using a potato ricer you may have to scrape any fibrous pumpkin off the bottom and top of the plate before pressing more through.
  • Refrigerate pureed pumpkin in an airtight container or freeze in a freezer bag.

Nutrition

Calories: 354kcal | Carbohydrates: 88g | Protein: 14g | Fat: 1g | Saturated Fat: 1g | Polyunsaturated Fat: 1g | Monounsaturated Fat: 1g | Sodium: 14mg | Potassium: 4624mg | Fiber: 7g | Sugar: 38g | Vitamin A: 115777IU | Vitamin C: 122mg | Calcium: 286mg | Iron: 11mg


from The Recipe Critic https://ift.tt/3DRO5Me
https://ift.tt/3APYHZR

Sprinkle Cookies

Sprinkle cookies are colorful, fun, AND delicious! Baked to perfection, these cookies will be a hit at any party with all of your family and friends! They are a favorite tried and true recipe and everyone will go crazy over them!

I love cookies and when you add in brightly colored sprinkles then I am in! Some of my favorite fun, cookie recipes are these Funfetti Cheesecake Pudding Cookies, Strawberry Cake Mix Cookies, and these yummy Gooey S’mores Cookies! Try them out, you will love them!

A stack of sprinkle cookies.

Fun and Delicious Sprinkle Cookies

I love a cookie that is fun and tasty. And so do my kids! these cookies are some of their very favorites. They not only have sprinkles on the outside but it’s a fun surprise when you bite into them on the inside as well! These sprinkle cookies are just right when it comes to their soft texture. In fact, they are baked to perfection so you will have a hard time stopping at just one!

Sprinkle cookies are great because you can change up the color of sprinkles for any occasion! Make them green and red for Christmas. Red, white, and blue for the 4th of July and pastel colors for Easter! They are so cute and colorful and on top of that, they are easy to make! Recruit your kids to help you make them. They will love picking out which sprinkles they get to use! Enjoy!

Ingredients You Need to Make Sprinkle Cookies

While you will have most of the ingredients that you need already in your kitchen, buy some extra sprinkles in different colors! Mix things up and make a few batches! See the recipe card below for a list of exact ingredient measurements.

  • Flour: I like to use all purpose flour in this recipe.
  • Baking powder: This will help your cookies rise and make them soft and chewy.
  • Salt: Salt brings out the other flavors used in the recipe.
  • Cornstarch: The cornstarch helps creat a crubly and tender texture!
  • Cream of tartar: This helps the sugar from crystalizing in the dough.
  • Butter: I like to use unsalted butter that is softened to room temperature.
  • Granulated sugar: This will sweeten up your cookies!
  • Egg: This helps to make the cookies moist.
  • Vanilla extract: This will also enhance that sweet flavor of the cookies.
  • Almond extract: The flavor that this brings to these sprinkle cookies is delicious!
  • Sprinkles: Use any colors that you want for this part! Get creative!

Let’s Bake Some Cookies!

Sprinkle cookies are fast and easy! They are SOO good and a fun and festive way to bring a treat to any party! You might want to double the batch. These will get fly off of the table!

  1. Preheat oven and line baking sheet: Preheat oven to 350°. Line two baking sheets with parchment paper and set aside.
  2. Whisk dry ingredients: In a large bowl whisk together the flour, baking powder, salt, cornstarch and cream of tartar. Set aside.
  3. Beat sugar and eggs, combine with extracts: In another bowl or in the bowl of a stand mixer beat the butter and sugar together until smooth. Add in the egg and extracts and mix until combined.
  4. Mix all ingredients together, make dough balls and add sprinkles: Add the dry ingredients to the sugar mixture and mix until combined. Then, mix in ⅓ cup of the sprinkles by hand. Use a cookie scoop to scoop the dough and press the tops of each ball of dough in the remaining sprinkles.
  5. Bake and cool: Place on a cookie sheet leaving 2 inches between cookies. Bake for 10-12 minutes.. The middle should still be gooey when removed from the oven. Allow them to cool on the tray and then they can finish cooking there. Store them in an airtight container.
4 pictures showing step by step how to make sprinkle cookie dough.

Tips For Sprinkle Cookies

Sprinkle cookies are soft cookies bursting with color and flavor that are sure to be a hit with children and adults alike! Here are some tips for making the best sprinkle cookies!

  • Room temperature ingredients: Prepare a couple hours before starting the recipe by setting your butter and eggs on the counter. Using room temperature ingredients will help everything blend together easier! This makes a nice, smooth batter.
  • No chilling needed: This cookie dough doesn’t need to be chilled! That means less time waiting for cookies and more time enjoying cookies! If you end up with leftover cookie dough or if you want to prep it ahead of time you can chill it in the fridge. Just make sure to bake it for an extra minute or two if it’s still cold when you bake them.
  • Underbake: Remove the cookies from the oven while they still look gooey in the center. They will continue to bake on the hot tray after they have been removed from the oven!
  • Variety of sprinkes: You can change up the sprinkles with the season to make these festive cookies for any holiday party! They would be great for Christmas, The Fourth of July or Valentine’s Day!
A sprinkle cookie.

Leftovers Callout Title

These cookies are fantastic to bake ahead and store for later! Once they are done cooling, just store them in an airtight container on your counter. They will last up to 7 days. That is… iff you don’t eat them all before then!

Sprinkle cookies on parchment paper.
Print

Sprinkle Cookies

Sprinkle cookies are colorful, fun, AND delicious! Baked to perfection, these cookies will be a hit at any party with all of your family and friends! They are a favorite tried and true recipe and everyone will go crazy over them! 
Course Dessert
Cuisine American
Keyword sprinkle cookies
Prep Time 15 minutes
Cook Time 12 minutes
Total Time 27 minutes
Servings 12 Cookies
Calories 210kcal
Author Alyssa Rivers

Ingredients

  • 1 ½ Cup All Purpose Flour
  • 1 ½ Teaspoon Baking Powder
  • ¼ Teaspoon Salt
  • ½ Teaspoon Cornstarch
  • ¾ Teaspoon Cream Of Tartar
  • ½ Cup Unsalted Butter softened
  • ¾ Cup Granulated Sugar
  • 1 large Egg
  • 1 Teaspoon Vanilla Extract
  • ¼ Teaspoon Almond Extract
  • 1/2 Cup Sprinkles

Instructions

  • Preheat oven to 350°. Line two baking sheets with parchment paper and set aside.
  • In a large bowl whisk together the flour, baking powder, salt, cornstarch, and cream of tartar. Set aside.
  • In another bowl or in the bowl of a stand mixer beat the butter and sugar together until smooth. Add in the egg and extracts and mix until combined.
  • Add the dry ingredients to the sugar mixture and mix until combined. Mix in ⅓ cup of the sprinkles by hand. Use a cookie scoop to scoop the dough and press the tops of each ball of dough in the remaining sprinkles.
  • Place on a cookie sheet leaving 2 inches between cookies. Bake for 10-12 minutes. The middle should still be gooey when removed from the oven. Allow them to cool on the tray. They will finish cooking there. Store in an airtight container.

Nutrition

Calories: 210kcal | Carbohydrates: 31g | Protein: 2g | Fat: 9g | Saturated Fat: 5g | Polyunsaturated Fat: 1g | Monounsaturated Fat: 2g | Trans Fat: 1g | Cholesterol: 36mg | Sodium: 56mg | Potassium: 107mg | Fiber: 1g | Sugar: 19g | Vitamin A: 259IU | Calcium: 29mg | Iron: 1mg


from The Recipe Critic https://ift.tt/3aJDIgH
https://ift.tt/3FW1S6f

शनिवार, 16 अक्तूबर 2021

Miracle No Knead Bread

This amazing artisan no-knead bread recipe will make you feel like a rock-star baker! It has a perfectly crispy crust with a soft and chewy texture on the inside. Plus, it couldn’t be easier to make from home!

Homemade bread really falls into its own category when it comes to the ultimate comfort food! Some of my favorite homemade bread recipes include The Best Homemade Garlic Bread and 30-minute Asiago Cheese Rolls and Cream Cheese Pumpkin Bread.

A loaf of bread.

No Knead Bread

All it takes is one time making this no-knead bread recipe and you will be completely hooked! It requires basically no effort at all, and it’s absolutely amazing! It has the best texture. It’s crispy on the outside and soft on the inside. And it’s also easy to add in different mix-in items like cheese, nuts, or seasonings to really take the flavor up a notch (see the tips below on how to do this!).

My kids love helping me make this no-knead bread, and I love that I always have what I need to make it! We stir the ingredients together the night before, and it’s ready to bake the next day. On the rare occasions that we don’t devour the warm loaf in one sitting, we enjoy the leftovers for days–it makes yummy grilled cheese sandwiches! Or you can try dipping it into this chicken alfredo dip or even spreading some of this delicious cinnamon honey butter on it. Then, your kids will eat it all up in one sitting!

Ingredients in No Knead Bread

This bread is super easy to make and only takes a few ingredients! This makes it easy to bake it whenever you want! See the recipe card below for a list of exact ingredient measurements.

  • Flour: This creates the base of your bread.
  • Sea salt: I liike to use coarse sea salt for it’s flavor and texture.
  • Dry yeast: Using active, dry yeast is what helps this dough to rise and create that soft, perfect texture.
  • Warm water: The warm water will activate the yeast and also bind all of the ingredients together.

Let’s Bake Some Bread!

The longest part about this no-knead bread recipe is waiting for it to rise. But you can just set it and forget it! You don’t have to do anything to this bread in the meantime! It’s easy so go ahead and try it out!

  1. Mix ingredients: In a large mixing bowl, combine flour, salt and yeast. Add warm water and stir with a wooden spoon until combined. The dough will be sticky.
  2. Cover and let it rise: Cover the bowl with plastic wrap and allow to rise on your counter, at room temperature, for 12 – 18 hours.
  3. Preheat the oven: Heat oven to 450 degrees F.
  4. Shape dough and cover: Pour dough out onto floured counter, shape into a ball and place on a piece of parchment paper. Cover the dough lightly with plastic wrap.
  5. Preheat pot: Place a cast iron pot, with the lid ON, into the preheated oven for 30 minutes.
  6. Bake the bread: Once the pot is hot, remove it from the oven. Remove the plastic wrap off of the dough ball and carefully lift the parchment paper with the dough ball on it, into the pot. Cover with lid and return pot to oven to bake for 30 minutes.
  7. Bake again, uncovered and then cool: After 30 minutes, remove lid from pot and continue baking, uncovered for 12-15 minutes. Remove from oven and allow bread to cool on a wire cooling rack.
  8. Store it for later: Store bread in an open paper bag, to ensure the crust stays crispy.
4 step by step pictures showing how to make bread dough.

Can You Freeze It?

Yes! You can freeze the no-knead bread dough. To freeze the bread dough, make the dough as instructed and let it rise. Once risen, form the dough into a ball, wrap it in plastic wrap, and then place in a freezer-friendly container. Freeze it for up to 3 months. When ready to bake, allow the dough to come to room temperature for 2-3 hours on the counter, or thaw overnight in the refrigerator, and then bake as directed.

A loaf of no knead bread.

Variations

If you are looking for a loaf of bread that is SO easy to have plain or change up, then you have come to the right place! In fact, I’ve come up with a few ideas on how you can easily do that to this no-knead bread. Go ahead and try them out. It will be like you are trying a new bread every time you make it!

  • Cheese: Try adding in some cheese to this bread. Work in about 1 cup of your favorite cheese just after you put together the dough. Work it in and cook according to the rest of the directions! It will be delicious!
  • Seasonings: Add in a tablespoon of italian seasoning or minced garlic (or both!) to the bread dough and mix it in at the same time that you mix the other ingredients. You can even try roesemary for an especially delicious flavor!
  • Other mix ins: I love adding in ¾ cup of my favorits nuts or dried fruit (like craisins!) to the dough when I am mixing it up. It bakes up so delicious and then you have this amazing taste and texture that you have added to the bread!
No knead bread cut into slices.

What if I Don’t Have a Cast Iron Pot?

No worries! You can totally bake this no-knead bread on a regular baking sheet instead. Go ahead and follow these instructions on how to do this instead and then you will have delicious bread to eat! In fact, you will want to make this all the time!

  1. Make dough: Make the dough and allow it to rise as directed. Shape it into a round or long loaf and place it on a greased baking sheet.
  2. Preheat oven and add water to baking dish: Preheat the oven to 450 degrees. Add one cup of water to a shallow baking dish and set it on the lower rack of your oven. The steam created will help make a crispy crust on the bread.
  3. Bake: Bake the bread on the middle oven rack for about 25-30 minutes, or until golden.
A knife spreading butter onto a slice of bread.
Print

Miracle No Knead Bread

This amazing artisan no-knead bread recipe will make you feel like a rock-star baker! It has a perfectly crispy crust with a soft and chewy texture on the inside. Plus, it couldn't be easier to make from home! 
Course Bread, Side Dish
Cuisine American
Keyword no knead bread
Prep Time 10 minutes
Cook Time 45 minutes
Total Time 55 minutes
Servings 12 slices
Calories 115kcal
Author Alyssa Rivers

Ingredients

  • 3 cups all-purpose flour
  • 1 3/4 teaspoons coarse sea salt*
  • 1/2 teaspoon active dry yeast
  • 1 and ½ cups warm water

Instructions

  • In a large mixing bowl, combine flour, salt, and yeast. Add warm water and stir with a wooden spoon until combined. The dough will be sticky.
  • Cover the bowl with plastic wrap and allow to rise on your counter, at room temperature, for 12 – 18 hours.
  • Heat oven to 450 degrees F.
  • Pour dough out onto the floured counter, shape into a ball, and place on a piece of parchment paper. Cover the dough lightly with plastic wrap.
  • Place a cast-iron pot, with the lid ON, into the preheated oven for 30 minutes.
  • Once the pot is hot, remove it from the oven. Remove the plastic wrap off of the dough ball and carefully lift the parchment paper with the dough ball on it, into the pot. Cover with lid and return pot to oven to bake for 30 minutes.
  • After 30 minutes, remove the lid from the pot and continue baking, uncovered for 12-15 minutes. Remove from oven and allow the bread to cool on a wire cooling rack.
  • Store bread in an open paper bag, to ensure the crust stays crispy.

Video

Notes

*You may substitute regular salt, I just like the added flavor of the sea salt.
Updated Post on October 16, 2021
Originally Posted on March 11, 2019

Nutrition

Calories: 115kcal | Carbohydrates: 24g | Protein: 3g | Fat: 1g | Saturated Fat: 1g | Polyunsaturated Fat: 1g | Monounsaturated Fat: 1g | Sodium: 340mg | Potassium: 38mg | Fiber: 1g | Sugar: 1g | Vitamin C: 1mg | Calcium: 5mg | Iron: 1mg


from The Recipe Critic https://ift.tt/2J57rWk
https://ift.tt/3lMbJTV