Alyssa Rivers October 16 लेबलों वाले संदेश दिखाए जा रहे हैं. सभी संदेश दिखाएं

शनिवार, 16 अक्तूबर 2021

Miracle No Knead Bread

This amazing artisan no-knead bread recipe will make you feel like a rock-star baker! It has a perfectly crispy crust with a soft and chewy texture on the inside. Plus, it couldn’t be easier to make from home!

Homemade bread really falls into its own category when it comes to the ultimate comfort food! Some of my favorite homemade bread recipes include The Best Homemade Garlic Bread and 30-minute Asiago Cheese Rolls and Cream Cheese Pumpkin Bread.

A loaf of bread.

No Knead Bread

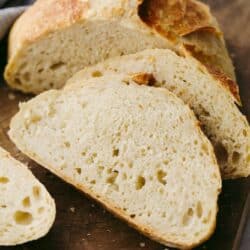
All it takes is one time making this no-knead bread recipe and you will be completely hooked! It requires basically no effort at all, and it’s absolutely amazing! It has the best texture. It’s crispy on the outside and soft on the inside. And it’s also easy to add in different mix-in items like cheese, nuts, or seasonings to really take the flavor up a notch (see the tips below on how to do this!).

My kids love helping me make this no-knead bread, and I love that I always have what I need to make it! We stir the ingredients together the night before, and it’s ready to bake the next day. On the rare occasions that we don’t devour the warm loaf in one sitting, we enjoy the leftovers for days–it makes yummy grilled cheese sandwiches! Or you can try dipping it into this chicken alfredo dip or even spreading some of this delicious cinnamon honey butter on it. Then, your kids will eat it all up in one sitting!

Ingredients in No Knead Bread

This bread is super easy to make and only takes a few ingredients! This makes it easy to bake it whenever you want! See the recipe card below for a list of exact ingredient measurements.

  • Flour: This creates the base of your bread.
  • Sea salt: I liike to use coarse sea salt for it’s flavor and texture.
  • Dry yeast: Using active, dry yeast is what helps this dough to rise and create that soft, perfect texture.
  • Warm water: The warm water will activate the yeast and also bind all of the ingredients together.

Let’s Bake Some Bread!

The longest part about this no-knead bread recipe is waiting for it to rise. But you can just set it and forget it! You don’t have to do anything to this bread in the meantime! It’s easy so go ahead and try it out!

  1. Mix ingredients: In a large mixing bowl, combine flour, salt and yeast. Add warm water and stir with a wooden spoon until combined. The dough will be sticky.
  2. Cover and let it rise: Cover the bowl with plastic wrap and allow to rise on your counter, at room temperature, for 12 – 18 hours.
  3. Preheat the oven: Heat oven to 450 degrees F.
  4. Shape dough and cover: Pour dough out onto floured counter, shape into a ball and place on a piece of parchment paper. Cover the dough lightly with plastic wrap.
  5. Preheat pot: Place a cast iron pot, with the lid ON, into the preheated oven for 30 minutes.
  6. Bake the bread: Once the pot is hot, remove it from the oven. Remove the plastic wrap off of the dough ball and carefully lift the parchment paper with the dough ball on it, into the pot. Cover with lid and return pot to oven to bake for 30 minutes.
  7. Bake again, uncovered and then cool: After 30 minutes, remove lid from pot and continue baking, uncovered for 12-15 minutes. Remove from oven and allow bread to cool on a wire cooling rack.
  8. Store it for later: Store bread in an open paper bag, to ensure the crust stays crispy.
4 step by step pictures showing how to make bread dough.

Can You Freeze It?

Yes! You can freeze the no-knead bread dough. To freeze the bread dough, make the dough as instructed and let it rise. Once risen, form the dough into a ball, wrap it in plastic wrap, and then place in a freezer-friendly container. Freeze it for up to 3 months. When ready to bake, allow the dough to come to room temperature for 2-3 hours on the counter, or thaw overnight in the refrigerator, and then bake as directed.

A loaf of no knead bread.

Variations

If you are looking for a loaf of bread that is SO easy to have plain or change up, then you have come to the right place! In fact, I’ve come up with a few ideas on how you can easily do that to this no-knead bread. Go ahead and try them out. It will be like you are trying a new bread every time you make it!

  • Cheese: Try adding in some cheese to this bread. Work in about 1 cup of your favorite cheese just after you put together the dough. Work it in and cook according to the rest of the directions! It will be delicious!
  • Seasonings: Add in a tablespoon of italian seasoning or minced garlic (or both!) to the bread dough and mix it in at the same time that you mix the other ingredients. You can even try roesemary for an especially delicious flavor!
  • Other mix ins: I love adding in ¾ cup of my favorits nuts or dried fruit (like craisins!) to the dough when I am mixing it up. It bakes up so delicious and then you have this amazing taste and texture that you have added to the bread!
No knead bread cut into slices.

What if I Don’t Have a Cast Iron Pot?

No worries! You can totally bake this no-knead bread on a regular baking sheet instead. Go ahead and follow these instructions on how to do this instead and then you will have delicious bread to eat! In fact, you will want to make this all the time!

  1. Make dough: Make the dough and allow it to rise as directed. Shape it into a round or long loaf and place it on a greased baking sheet.
  2. Preheat oven and add water to baking dish: Preheat the oven to 450 degrees. Add one cup of water to a shallow baking dish and set it on the lower rack of your oven. The steam created will help make a crispy crust on the bread.
  3. Bake: Bake the bread on the middle oven rack for about 25-30 minutes, or until golden.
A knife spreading butter onto a slice of bread.
Print

Miracle No Knead Bread

This amazing artisan no-knead bread recipe will make you feel like a rock-star baker! It has a perfectly crispy crust with a soft and chewy texture on the inside. Plus, it couldn't be easier to make from home! 
Course Bread, Side Dish
Cuisine American
Keyword no knead bread
Prep Time 10 minutes
Cook Time 45 minutes
Total Time 55 minutes
Servings 12 slices
Calories 115kcal
Author Alyssa Rivers

Ingredients

  • 3 cups all-purpose flour
  • 1 3/4 teaspoons coarse sea salt*
  • 1/2 teaspoon active dry yeast
  • 1 and ½ cups warm water

Instructions

  • In a large mixing bowl, combine flour, salt, and yeast. Add warm water and stir with a wooden spoon until combined. The dough will be sticky.
  • Cover the bowl with plastic wrap and allow to rise on your counter, at room temperature, for 12 – 18 hours.
  • Heat oven to 450 degrees F.
  • Pour dough out onto the floured counter, shape into a ball, and place on a piece of parchment paper. Cover the dough lightly with plastic wrap.
  • Place a cast-iron pot, with the lid ON, into the preheated oven for 30 minutes.
  • Once the pot is hot, remove it from the oven. Remove the plastic wrap off of the dough ball and carefully lift the parchment paper with the dough ball on it, into the pot. Cover with lid and return pot to oven to bake for 30 minutes.
  • After 30 minutes, remove the lid from the pot and continue baking, uncovered for 12-15 minutes. Remove from oven and allow the bread to cool on a wire cooling rack.
  • Store bread in an open paper bag, to ensure the crust stays crispy.

Video

Notes

*You may substitute regular salt, I just like the added flavor of the sea salt.
Updated Post on October 16, 2021
Originally Posted on March 11, 2019

Nutrition

Calories: 115kcal | Carbohydrates: 24g | Protein: 3g | Fat: 1g | Saturated Fat: 1g | Polyunsaturated Fat: 1g | Monounsaturated Fat: 1g | Sodium: 340mg | Potassium: 38mg | Fiber: 1g | Sugar: 1g | Vitamin C: 1mg | Calcium: 5mg | Iron: 1mg


from The Recipe Critic https://ift.tt/2J57rWk
https://ift.tt/3lMbJTV

Stuffed Pepper Soup

Stuffed pepper soup is delicious, hearty, and full of flavor! Filled with so many different ingredients, it’s insanely good and will definitely fill your belly!

As the weather turns colder, I love a good warm bowl of soup! Try out some of my other favorites like Creamy Zucchini Soup, Chicken Noodle Soup, and this Creamy Chicken Gnocchi Soup. They are all so delicious!

A bowl of stuffed pepper soup.

Stuffed Pepper Soup

This recipe has all of the same flavors as a stuffed pepper but this time they are packed into a delicious soup! This version of this yummy recipe is perfect for this time of year because it’s warm and cozy and makes me excited for the colder weather that’s coming! This soup has a delicious flavor to it. After you add in the beef and garlic and Italian seasonings then you put in some peppers and it really makes a unique and delicious taste!

This rich and homestyle flavor added with rice and beef has the perfect texture. In fact, this meal is a great option for those nights when you are super busy and on the go! Since it has rice, meat and veggies then you don’t even need to make any sides to go with it! But, if you decided that you did want to make it a meal with a few sides then try adding in these rolls and this salad. Either way, you can’t go wrong!

What’s in Stuffed Pepper Soup?

Using classic ingredients that you probably already have in your kitchen, this soup is SOO good. See the recipe card below for a list of exact ingredient measurements.

  • Olive oil: This is used to mix in with your vegetables as you cook them up and make them nice and soft!
  • Onion: I like to dice up my onion into small pieces.
  • Ground beef: I used lean ground beef in this recipe but you could use ground turkey instead!
  • Garlic cloves: Using fresh garlic cloves is what I did but if you don’t have any on hand then you can use minced garlic from your fridge. ½ tsp equals about 1 clove of garlic!
  • Red and green bell peppers: Depending on how much pepper you want in each bite, you could cute these up to be big or small.
  • Beef broth: I like to use this as the base of the soup instead of water so that it adds to the flavor!
  • Tomato sauce: I used one small can.
  • Diced tomatoes: Make sure that your diced tomatoes don’t have any extra flavoring to them and that they are just in tomato sauce.
  • Italian seasoning: You can use store bought italian seasoning. Or, if you really want to take this to the next level then take an extra 5 minutes to make this homemade Italian seasoning!
  • Salt and pepper: Use these to enhance all of the other flavors in the soup!
  • Rice: You will cook your rice before you put it in the soup in this recipe!

Let’s Make Some Soup!

This stuffed pepper soup only takes about 30 minutes from start to finish! It’s a simple and easy meal that gives a fantastic taste! It’s a win-win!

  1. Cook onion and ground beef and set aside: In a large pot over medium high heat add olive oil and onion. Saute for 2-3 minutes or until almost tender. Add in the ground beef and cook and crumble until to longer pink. Drain grease and set aside on a plate.
  2. Add in and cook peppers: Add the olive oil and peppers. Sauté for 3-4 minutes or until almost tender.
  3. Mix together meat and peppers, add other ingredients: Add the meat back into the peppers. Add in the beef broth, tomato sauce, diced tomatoes, Italian seasoning, salt and pepper.
  4. Add rice and simmer: Add in the rice and stir. Let simmer for about 3-4 minutes until heated throughout.
4 step by step pictures on how to mix ingredients into a pot to make soup.

Variations

There are a few things that you can do to change up this stuffed pepper soup! It’s so delicious as is or you can change it up to make it your own!

  • Meat: If you prefer ground turkey then go ahead and use that instead! Cook it up and use it just as the recipe calls for with the ground beef!
  • Add some heat: If you want to make this dish spicy, go ahead and add in some red pepper flakes!
  • Thicker or thinner: Depending on the consistency that you want, add in more rice or take some away.
A ladle in a pot of stuffed pepper soup.

How to Store Leftovers

This stuffed pepper soup tastes great the next day but here is a helpful hint for you! The rice will get mushy in the soup in the fridge. So if you know that you are cooking enough to have leftovers for lunch or dinner the next day then here is what you should do!

  1. Separate: Instead of putting all of the rice into the pot and mixing it together, I would add rice to each individual serving.
  2. Store seperately: Store the soup and the rice each in their own separate airtight containers in the fridge. It will last 2-3 days in the fridge!
  3. Mix together and reheat: When you go to eat your leftovers, add the rice into your bowl of soup. Reheat it on the stove or in the microwave until heated through
Zoomed in picture of a spoon scooping up some stuffed pepper soup.
Print

Stuffed Pepper Soup

Stuffed pepper soup is delicious, hearty, and full of flavor! Filled with so many different ingredients, it's insanely good and will definitely fill your belly! 
Course Dinner, Main Course, Soup
Cuisine American
Keyword stuffed pepper soup
Prep Time 15 minutes
Cook Time 30 minutes
Total Time 45 minutes
Servings 6 people
Calories 398kcal
Author Alyssa Rivers

Ingredients

  • 1 Tablespoon olive oil
  • 1 small onion diced
  • 1 pound lean ground beef
  • 3 cloves garlic minced
  • 1 Tablespoon olive oil
  • 1 red bell pepper diced
  • 1 green bell pepper diced
  • 3 cups beef broth
  • 1 (15 ounce can) tomato sauce
  • 1 (15 ounce can) diced tomatoes
  • 1 Tablespoon Italian seasoning
  • 1/2 teaspoon salt
  • 1/4 teaspoon pepper
  • 2 cups rice cooked

Instructions

  • In a large pot over medium-high heat add olive oil and onion. Saute for 2-3 minutes or until almost tender. Add in the ground beef and cook and crumble until to longer pink. Drain grease and set it aside on a plate.
  • Add the olive oil and peppers. Sauté for 3-4 minutes or until almost tender.
  • Add the meat back into the peppers. Add in the beef broth, tomato sauce, diced tomatoes, Italian seasoning, salt, and pepper.
  • Add in the rice and stir. Let simmer for about 3-4 minutes until heated throughout.

Nutrition

Calories: 398kcal | Carbohydrates: 54g | Protein: 23g | Fat: 9g | Saturated Fat: 3g | Polyunsaturated Fat: 1g | Monounsaturated Fat: 5g | Trans Fat: 1g | Cholesterol: 47mg | Sodium: 696mg | Potassium: 509mg | Fiber: 2g | Sugar: 2g | Vitamin A: 710IU | Vitamin C: 43mg | Calcium: 54mg | Iron: 3mg


from The Recipe Critic https://ift.tt/3BP0mA7
https://ift.tt/3FTL7bR

शुक्रवार, 16 अक्तूबर 2020

Chocolate Chip Pancakes

Warm, fluffy, and chocolatey, these Chocolate Chip Pancakes are worth waking up for! Super easy, fast and inexpensive, pancakes are a perfect way to start the morning.

Everyone loves pancakes especially classics like Grandma’s Perfect Fluffy Pancakes or The Best Buttermilk Pancakes. Adding chocolate to an already super yummy breakfast staple is a MUST!

Decadent, fluffy and rich chocolate chip pancakes.

Chocolate Chip Pancake Recipe

This combines the two best things that make mornings worth getting out of bed for. Carbs and chocolate. These stick to your ribs pancakes have just enough chocolate to make them a treat without being overpowering. It’s a win win. Kids will eat them up, (adults too) and parents don’t have to feel guilty about it. I like to pair with something a bit savory like bacon, eggs or sausage to balance the sweet.

Top these with your favorite toppings, we have some ideas listed below or just some butter. They are so good you don’t need too much. These will turn an ordinary day into a special occasion just because. Stirring the chocolate chips into the batter keeps them from burning yet allows them to get melty and sweet. You are going to love these!

Pancake Ingredients

Simple ingredients for a quick morning meal! Pantry staples that will help make these pancakes come together easily.

  • Egg: Use extra large eggs
  • Oil: Canola oil gives you the fat you need without the flavor other oils can add.
  • Milk: Feel free to substitute with buttermilk if you wish
  • Vanilla: Adds a touch sweetness
  • Flour: All purpose, unbleached are both good.
  • Salt: Balances the sweet.
  • Sugar: Adds just enough of sweetness but too much.
  • Baking Powder:This is your rising agent for fluffy pancakes.
  • Chocolate Chips: The star of the recipe

How to Make Chocolate Chip Pancakes

Mix it up and you are good to go! These are light and fluffy pancakes that are a family favorite!

  1. Wet: In a medium bowl whisk the egg, oil, milk, and vanilla together.
  2. Dry: In a separate bowl combine the flour, salt, sugar and baking powder.
  3. Mix: Fold the dry into the wet and mix just till combined. Gently mix in the chocolate chips
  4. Cook: Grease a skillet preheated on medium, spoon the batter into the skillet, once bubbles form on top, flip them and cook till golden brown.

Making fluffy pancakes with chocolate chips.

Tips and Variations For The Best Chocolate Chip Pancake

It’s hard to get much better than they already are but here are some ways.

  • Rest:  Let your mix rest for about 5 min before cooking. Preheat your skillet during this time to allow the mix to rest.
  • Chocolate: You can use any kind of chocolate for these. Try mini chocolate chips, milk, dark, or even white chocolate chips.
  • Flour: You can use whole wheat flour for these, use 3/4 cup of whole wheat flour for every 1 cup of reg flour and add 2 more tablespoons of liquid
  • Double: Need to cook for a small army or just hungry teenager. This is easy to double, or even triple.
  • Freeze: Double or triple the batch and cook all the extras. Once completely cooled store in a freezer safe ziploc bag for quick breakfasts in the morning. Take out your desired amount and heat in the microwave or toaster. A nice way to have pancakes on those busy mornings.
  • Syrup: Be sure to heat your syrup so it doesn’t cool off your pancakes.

Toppings for Homemade Pancakes

Besides just eating these plain with a pat of butter, you can really go wild with toppings.

  • Strawberries: Chocolate covered strawberries anyone?
  • Raspberries: Fresh is best but thawed frozen is still amazing.
  • Whip cream: Because everything is better with whip cream
  • Syrup: Real Maple Syrup is divine.
  • Peanut Butter: Haven’t tried it? It’s so good especially with maple syrup drizzled over the peanut butter.
  • Powdered Sugar: A kid favorite.
  • Coconut: Chocolate and coconut just go together.
  • Jam: Any flavor works.

Syrup pouring on top of chocolate chip panckaes.

More Pancake Love’n

Pancakes for breakfast, lunch and dinner, YES please!

Print

Chocolate Chip Pancakes

Warm, fluffy, and chocolatey, these Chocolate Chip Pancakes are worth waking up for! Super easy, fast and inexpensive, pancakes are a perfect way to start the morning. 
Course Breakfast
Cuisine American
Keyword chocolate chip pancake recipe, chocolate chip pancakes, pancakes
Prep Time 5 minutes
Cook Time 15 minutes
Total Time 20 minutes
Servings 6 People
Calories 209kcal
Author Alyssa Rivers

Ingredients

  • 1 large egg
  • 2 Tablespoons oil I used canola oil
  • 1 cup milk
  • 1 teaspoon vanilla
  • 1 cup flour
  • 1/4 teaspoon salt
  • 2 Tablespoons sugar
  • 2 Tablespoons baking powder
  • 1/2 cup chocolate chips

Instructions

  • In a medium sized bowl whisk together egg, oil, milk and vanilla. In a separate bowl combine flour, salt, sugar and baking powder. Add the dry ingredients into the wet ingredients and combine. Fold in chocolate chips.
  • Preheat a skillet over medium heat. Spray with cooking spray and drop about 1/3 cup of the batter onto the warm skillet. Once it forms bubbles then flip to the other side and cook until golden brown.

Nutrition

Calories: 209kcal | Carbohydrates: 34g | Protein: 5g | Fat: 6g | Saturated Fat: 3g | Cholesterol: 37mg | Sodium: 141mg | Potassium: 491mg | Fiber: 1g | Sugar: 16g | Vitamin A: 144IU | Calcium: 244mg | Iron: 2mg


from The Recipe Critic https://ift.tt/2T24c49
https://ift.tt/3lVq65s

How to Make Buttermilk

This Buttermilk is a simple recipe that will be a staple in your recipe book. Learn how to make buttermilk in two easy steps!

When you are in the middle of making The Best Buttermilk Pancakes, Homemade Cornbread or even a Red Velvet Cake, you can breathe easy. Buttermilk will always be there and handy!

Lemon juice pouring into milk for homemade buttermilk.

Easy Buttermilk Recipe

How to make buttermilk is so simple and so easy, it’s a total game changer. We have all been there, you’re in the middle of a recipe and you realize you don’t have enough of an ingredient. It can be so stressful. Well, when it comes to buttermilk, that will never happen again.

There are times as well when you don’t need much buttermilk and you don’t want to buy a whole carton. This is also perfect for that. You can make just the amount you need. It has a bit of tang taste to it that is ideal in so many recipes. The fact that you can make your own is such a life safer, if only it was this easy with every ingredient!

Only 2 Ingredients!

So simple you will never need to buy it again. Milk and lemon juice or white vinegar will be a MUST on your grocery list!

  • Milk: Dairy milk, do not use non-dairy milk.
  • Lemon Juice or White Vinegar: Fresh lemon juice and white vinegar are winners, but bottled and cider vinegar will work too.

Making Buttermilk from Scratch

It is all about balance! Make it just the way you love it!

  1. Ratio: Use 1 Cup of Milk to 1 teaspoon Lemon juice or vinegar.
  2. Sit: Let it sit 5-10 minutes after mixing to let thicken and create that tang flavor.

Measuring milk for homemade buttermilk.

What Does Buttermilk Do?

One of the main reasons we love buttermilk is its tart flavor and creamy thickness it adds to our favorite recipes. But it is actually essential to baking and cooking. Another important part is it has acid in it.  This acid reacts to baking soda or baking powder causing your muffins, pancakes, and breads to rise. It’s not an ingredient you can just substitute with just anything. That’s why adding lemon juice and vinegar which are acids, works.

Squeezing lemon juice for homemade buttermilk.

Variations

  • Yogurt: Mix 3/4 cup plain yogurt with 1/4 cup water or milk to thin.
  • Sour cream: Mix 3/4 cup sour cream with 1/4 cup plain water or milk to thin. Use as you would buttermilk.
  • Milk: Use whole, 2%, 1% milk according to your desire of fat content.

How to Store Homemade Buttermilk

  • Fridge: Homemade Buttermilk will keep as long as store bought would, about 7-10 days.
  • Freeze: Crazy as it seems Buttermilk does freeze well. Sealed well last for up to 3 months.

Homemade buttermilk made with milk and lemon juice.

Buttermilk Recipes to Love

Print

Buttermilk Recipe

This Buttermilk is a simple recipe that will be a staple in your recipe book. Learn how to make buttermilk in two easy steps! 
Cuisine American
Keyword buttermilk, buttermilk recipe, homemade buttermilk, How to make buttermilk
Prep Time 10 minutes
Total Time 10 minutes
Servings 16 Tablespoons
Calories 9kcal
Author Alyssa Rivers

Ingredients

  • 1 cup milk
  • 1 teaspoon lemon juice or white vinegar

Instructions

  • Stir together milk and lemon juice or vinegar.
  • Let it sit 5-10 minutes after mixing to let thicken and create that tang flavor.

Nutrition

Calories: 9kcal | Carbohydrates: 1g | Protein: 1g | Fat: 1g | Saturated Fat: 1g | Cholesterol: 2mg | Sodium: 7mg | Potassium: 20mg | Sugar: 1g | Vitamin A: 25IU | Vitamin C: 1mg | Calcium: 17mg


from The Recipe Critic https://ift.tt/3iWBtZe
https://ift.tt/2H9kPbH