सोमवार, 25 अक्तूबर 2021

The BEST White Cupcakes

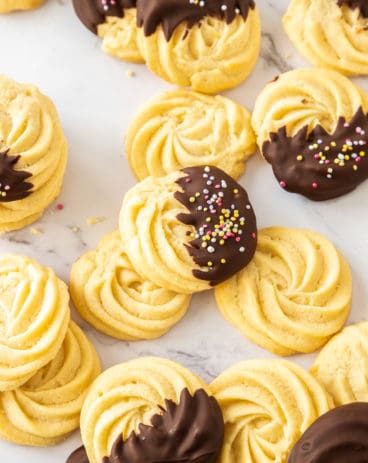
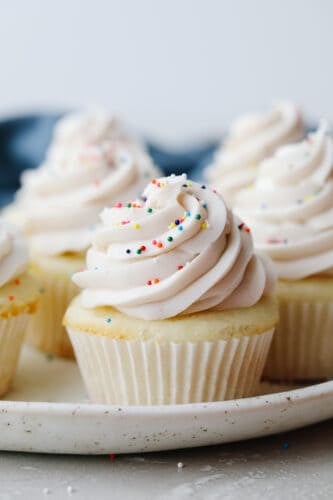
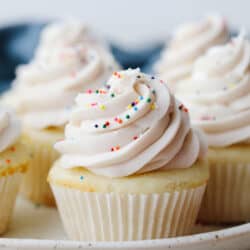
White cupcakes are light, fluffy, and perfectly moist! Swirled with delicious white frosting and topped with sprinkles, these cupcakes are to die for!

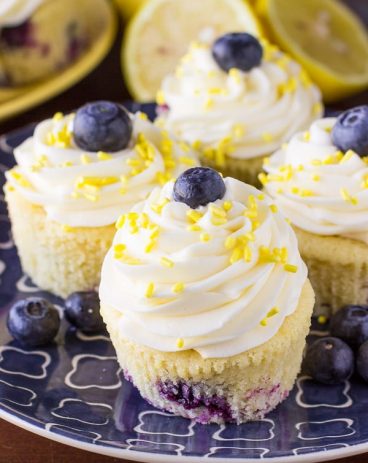
A good cupcake is irresistible and this one is no exception! If you love cupcakes as much as I do then you definitely want to try this Chocolate, Lemon, and these perfect Pineapple Upside-Down Cupcakes! They are all so delicious!

White cupcakes with frosting and sprinkles.

White Cupcakes

I absolutely LOVE cupcakes! There are so many different flavors, colors, and toppings. But in my opinion, you cannot beat the classic white cupcake. It not only looks elegant but the texture is absolute perfection! It’s moist and fluffy and melts in your mouth when you take a bite! Not only is the cupcake delicious but once you add on that swirled frosting then it really is perfect!

These cupcakes are so easy to make! Using ingredients that you have in your kitchen, you can make these cupcakes in less than 45 minutes. That’s including time to frost them! Once you are done baking these cupcakes, you can switch up the frosting to change things up! Try this Chocolate Cream Cheese Frosting, this yummy MUST Try Cream Cheese Frosting and this delicious Chocolate Buttercream Frosting. A white cupcake can be mixed and matched with so many different flavors! Go ahead and try them, I bet that you can’t just stop with just one batch!

Ingredients in White Cupcakes

The best part about these cupcakes is that anyone can make them! Simple but delicious ingredients are what make these cupcakes so classic! See the recipe card below for a list of exact ingredient measurements.

  • Flour: I used cake flour in this recipe.
  • Granulated sugar: The sugar is what makes these taste so sweet.
  • Baking powder: This makes your cupcakes light and airy!
  • Baking soda: This will make it so that you cupcake rises.
  • Salt: The salt enhances the flavors of all of the other ingredients.
  • Buttermilk: You can use store bought buttermilk you you can try making this homemade buttermilk! It’s perfect for this recipe!
  • Milk: You can use 1% or 2% milk for this recipe.
  • Clear vanilla: By using clear vanilla, you keep these cupcakes looking perfectly white!
  • Vegetable oil: This is what will make your cupcakes so moist.
  • Egg whites: By not using the yolks, the egg whites can combine all of the ingredients without adding any flavor to the cupcakes.

Frosting

  • Butter: Make sure that your unsalted butter is at room temperature when you go to mix it.  
  • Powdered sugar: Using this type of sugar helps the frosting be smooth.
  • Milk: You can use 1% or 2% milk for the frosting!
  • Pure vanilla extract: This creates the perfect flavor of frosting.
  • Salt: Salt enhances the flavor of the frosting!

Let’s Bake Some Cupcakes!

These white cupcakes only take 45 minutes from start to finish! This makes them the perfect dessert for any last-minute party or event!

  1. Preheat and prep: Preheat the oven to 350° and line two muffin tins with cupcake liners.
  2. Mix dry ingredients: In a medium bowl, whisk together the flour, sugar, baking powder, baking soda, and salt.
  3. Combine wet ingredients and dry ingredients and fold in egg whites: Add the buttermilk, milk, vanilla, and oil to the dry ingredients and beat with the paddle attachment of a stand mixer or a hand mixer just until fully combined. In a separate bowl whip the egg whites until you get medium stiff peaks and gently fold into the batter.
  4. Fill cupcake liners and bake: Scoop the batter into the cupcake liners until they are ⅔ of the way full. Bake for 20-22 minutes, until a toothpick comes out clean and the tops of the cupcakes bounce back when lightly pressed. Let the cupcakes cool.
  5. Frost and serve: Frost the cupcakes as desired and serve!

Frosting

  1. Combine ingredients and stir: Add butter, powdered sugar, milk, vanilla and salt to the stand mixer bowl. Stir to mix in all the ingredients! Then, turn the mixer on high speed and beat until the frosting is white and fluffy, about 10-15 minutes.
5 step by step pictures showing how to make cupcake batter.

Baking Tips

These white cupcakes are amazing! You will love how you can mix and match to make them different every time! Here are some quick tips on how to make them turn out just right!

  • Room temperature ingredients: It takes a little thought before you actually start but set out your ingredients a few hours before you start baking. Baking with room temperature ingredients helps things mix together and creates a smooth batter and frosting!
  • Don’t open the oven early: If you open the oven too soon, it releases too much hot air. This lowers the baking temperature around your cake and the cake will collapse. So, if you must open it to see then try to wait until at least 35 minutes into the baking time. Use the oven light while you wait.
  • Cake flour: The reason that I use cake flour instead of regular flour is because it makes the cake more tender! If you don’t have cake flour, don’t worry! You can make it from scratch!  For every 1 cup of all purpose flour, remove 2 tablespoons of the flour and replace with cornstarch. Then, you will sift it together. Once it’s been fully sifted, then measure out the amount of flour that you need for the recipe!
A white cupcake with the liner pulled off.

How to Store Leftovers

Cupcakes are fantastic the next day! Here is how you can store them so that they still taste fresh! Because these cupcakes have frosting, they should be stored in the refrigerator in an airtight container. Or if you are making them a day or two ahead of time, keep them refrigerated. Take them out of the fridge about 15 minutes before you plan to serve to let them come to room temperature! Enjoy!
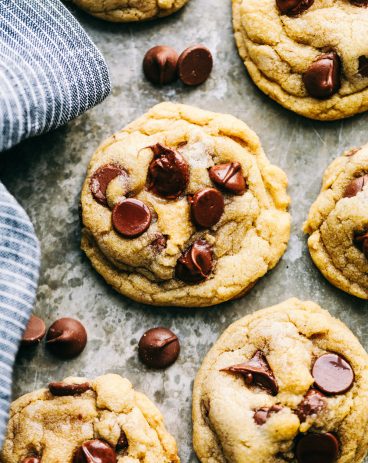
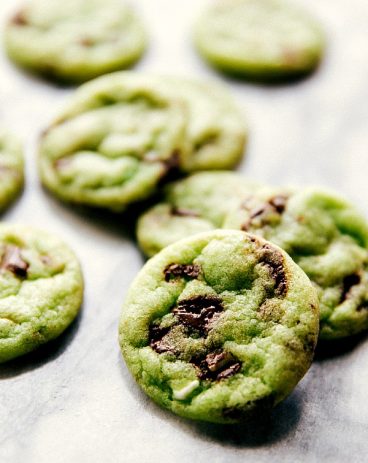
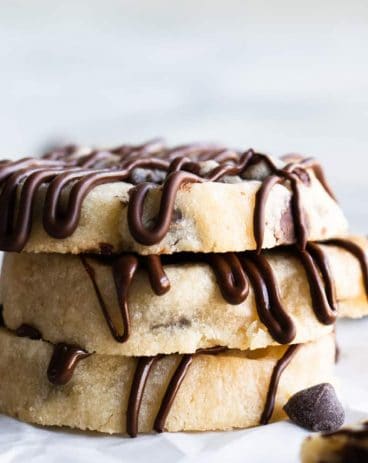
A white cupcake with a bite taken out of it.
Print

The BEST White Cupcakes

White cupcakes are fluffy, light and perfectly moist! Swirled with delicious white frosting and topped with sprinkles, these cupcakes are to die for! 
Course Dessert
Cuisine American
Keyword white cupcakes
Prep Time 20 minutes
Cook Time 22 minutes
Total Time 42 minutes
Servings 24 Cupcakes
Calories 228kcal
Author Alyssa Rivers

Ingredients

  • 2 ¼ Cups Cake Flour
  • 1 ½ Cups Granulated Sugar
  • 1 Tablespoon Baking Powder
  • ½ Teaspoon Baking Soda
  • ½ Teaspoon Salt
  • 1 Cup Buttermilk
  • ¼ Cup Milk
  • 2 Teaspoons Clear Vanilla
  • ½ Cup Vegetable Oil
  • 4 Egg Whites

Frosting

  • 16 Tablespoons unsalted butter two sticks room temperature
  • 3 cups powdered sugar
  • 2 tablespoons Milk
  • 1 ½ teaspoon pure vanilla extract
  • A big pinch of salt

Instructions

  • Preheat the oven to 350° and line two muffin tins with cupcake liners.
  • In a medium bowl, whisk together the flour, sugar, baking powder, baking soda, and salt.
  • Add the buttermilk, milk, vanilla, and oil to the dry ingredients and beat with the paddle attachment of a stand mixer or a hand mixer just until fully combined. In a separate bowl whip the egg whites until you get medium-stiff peaks and gently fold into the batter.
  • Scoop the batter into the cupcake liners until they are ⅔ of the way full. Bake for 20-22 minutes, until a toothpick, comes out clean and the tops of the cupcakes bounce back when lightly pressed. Let the cupcakes cool.
  • Frost the cupcakes as desired and serve!

Frosting

  • Add butter, powdered sugar, milk, vanilla, and salt to the stand mixer bowl. Stir to incorporate all the ingredients, then turn the mixer on high speed and beat until the frosting is white and fluffy about 10-15 minutes.

Nutrition

Calories: 228kcal | Carbohydrates: 37g | Protein: 2g | Fat: 8g | Saturated Fat: 5g | Polyunsaturated Fat: 1g | Monounsaturated Fat: 2g | Trans Fat: 1g | Cholesterol: 22mg | Sodium: 94mg | Potassium: 92mg | Fiber: 1g | Sugar: 28g | Vitamin A: 256IU | Calcium: 42mg | Iron: 1mg


from The Recipe Critic https://ift.tt/2Zj8zye
https://ift.tt/3pBWTSm

रविवार, 24 अक्तूबर 2021

Beef Brisket Tacos

Beef brisket tacos are full of delicious flavor and topped with perfectly tender and juicy meat. This is a meal that your entire family will go crazy over!

A taco with delicious veggies and tender meat is a winner in my book! Go ahead and eat these tacos with some Lemonade, this Corn Salad, and this delicious Salsa. Everyone will be coming back for more!

Beef brisket tacos with toppings in a tortilla.

Beef Brisket Tacos

These beef brisket tacos are chock full of delicious flavors. The beef brisket can be cooked beforehand making this meal SUPER quick and easy! I like to use smaller tortillas with these tacos. It’s easier to eat a few smaller ones rather than a huge one that just ends up falling apart! Plus, that makes it so that I also have room on my plate for more delicious sides like these Corn Fritters or this Mexican Rice!

The flavors in these tacos have some heat from the jalapeños. But you can totally change up the toppings to be what you like! Put whatever you want on them and make them your own! I especially love topping these tacos with cojita cheese. Not only does the texture just work perfectly but the taste is subtle yet compliments everything so well. You’ll be shocked at how quickly these disappear off of your table! I would double the recipe just in case… enjoy!

What’s in Beef Brisket Tacos?

All of these ingredients are simple and easy! Plus you can add or take away anything that you think will make these a better fit for you! See the recipe card below for a list of exact ingredient measurements.

  • Beef brisket: Before you start this recipe, cook up this slow cooker beef brisket!
  • Tortillas: I like to use these small flour tortillas
  • Red onion: Dice up your onion into small pieces.
  • Cilantro: Cilantro that is chopped up brings a fresh taste to these tacos.
  • Jalapeño: slice this up so that you can get this taste in every bite! Or leave it out if you don’t love heat!
  • Cotija cheese: This cheese adds the perfect texture to these tacos!

Let’s Make Some Tacos!

Once you have made your beef brisket then these tacos can be whipped up in no time! Chop everything up and then squeeze some fresh lime juice on top and you’ll be eating in no time!

  1. Prepare beef brisket: Prepare the slow cooker beef brisket according to recipe. Chop the meat.
  2. Put together the tacos: Lay a tortilla on a flat surface and add brisket, onion, cilantro, jalapeño and cheese.
  3. Add sauce and serve: Pour sauce from the slow cooker on top of the taco and enjoy!
Beef brisket on a tortilla with someone putting on toppings.

Variations

These beef brisket tacos are SOO GOOD. You can change them up and customize them in so many different ways! Here are a few ideas!

  • Tortillas: If flour tortillas aren’t your thing, go ahead and try these tacos with corn tortillas instead!
  • Toppings: You can totally change the taste of these tacos by just adding a few different toppings! I love using tomatoes, guacamole or avocado, shredded lettuce and different types of cheese. There is no right or wrong way to make these! And with this homemade beef brisket as your meat then you cannot go wrong!
  • Heat: If you like more heat to these tacos, add more jalapeños or different kinds of peppers! If you don’t like any heat at all then go ahead and take these out. Replace them with something else that you love!
A close up of a beef brisket taco folded in half being held in someone's hand.

How to Store Leftovers

You can totally store these beef brisket tacos to eat for lunch or dinner the next day! Go ahead and get a few different airtight containers. Place your tortillas in one, your meat in another, and all of your toppings in another one. Keeping things separate will make it so that nothing gets soggy. You can reheat the meat in the microwave and put the tacos together when you are ready to eat! These will last in the fridge for 3-4 days!

Print

Beef Brisket Tacos

Beef brisket tacos are full of delicious flavor and topped with perfectly tender and juicy meat. This is a meal that your entire family will go crazy over!
Course Dinner, Main Course
Cuisine Mexican
Keyword beef tacos, brisket tacos
Prep Time 15 minutes
Cook Time 8 hours
Total Time 8 hours 15 minutes
Servings 6 tacos
Author Alyssa Rivers

Ingredients

  • 1 slow cooker beef brisket
  • 6 small flour tortillas
  • 1/4 cup red onion diced
  • 1/4 cup cilantro chopped
  • 1 jalapeno sliced
  • 1/4 cup cotija cheese crumbled

Instructions

  • Prepare the slow cooker beef brisket according to recipe. Chop the meat.
  • Lay a tortilla on a flat surface and add brisket, onion, cilantro, jalapeño and cheese.
  • Pour sauce from the slow cooker on top of the taco and enjoy!


from The Recipe Critic https://ift.tt/3b33QDs
https://ift.tt/3jrSayP

Perfectly Sweet Cannoli Dip

Cannoli dip is amazingly rich and creamy! Dip some broken-up waffle cones into it and you have yourself a delightful dessert!

Dessert dips are SOOO GOOD. This one is fluffy and sweet and I can’t get enough! If you love them as much as I do then go ahead and try this 5 Minute Pumpkin Pie Dip, this amazing S’mores Dip, and this easy 2 Ingredient Cheesecake Dip!

A piece of a waffle cone being dipped into the cannoli dip.

What is Cannoli Dip?

Cannoli Dip is a sweet dip that is made up of two kinds of cheese (mascarpone and ricotta). You add in some vanilla and sugar and you have THE most amazingly delicious dip that you’ve ever had! Plus, this recipe has a secret ingredient of orange zest that brings a fresh taste to the recipe! I like to add in mini chocolate chips or crushed pistachios on top to take it to the next level. Serve it alongside some Oreo Fluff Dessert Salad, No-Bake Chocolate Eclair Dessert, and some delicious Cheesecake Dessert Cups and you can invite everyone for a party with a dessert bar!

This dip is so good that you could literally just eat it by the spoonful… and maybe I do! It’s also so nice because this is a dip that you can make ahead of time. It needs to chill in the fridge before serving it anyway so that works out perfectly! It makes it easier to host a party if I can make delicious recipes like this beforehand. While this dip is chilling in the fridge I can get things ready to dip in it! I like to use graham crackers, waffle cones, and even cannoli shells for this dip. It’s so sweet and definitely a crowd pleaser!

Ingredients You Need to Make Cannoli Dip

This dip uses only a few ingredients and then you are ready to make this insanely delicious dip! See the recipe card below for a list of exact measurements.

  • Ricotta: I like to use whole milk ricotta in this recipe.
  • Mascarpone cheese: This cheese is an Italian cream cheese! It has that same tangy taste that cream cheese has!
  • Powdered sugar: I use powdered surga because it is fine and creates that smooth texture!
  • Vanilla Extract: The vanilla adds a taste to the sweetness of the sugar.
  • Orange zest: I love when a recipe calls for a zest! It adds in a new level of freshness to the dip.
  • Mini chocolate chips: I like to use mini ones so that they don’t overpower the dip. Plus, they look cute!
  • Pistachios: These are optional! But you can chop them up small and put them in the dip for a different flavor and texure.

Let’s Make Some Dip!

This cannoli dip is super simple and only takes about 30 minutes to make! You can’t beat easy AND delicious!

  • Strain the ricotta: Be sure to strain the liquid from the ricotta using cheesecloth otherwise the dip can be runny. Place several layers of cheesecloth in a strainer and add the ricotta. Let drain for at least 20 minutes before squeezing by hand to remove the excess liquid. This can take a bit of time, but it’s worth it to get a better consistency!
  • Mix the ingredients: Add the strained ricotta, mascarpone, powdered sugar, vanilla extract and orange zest to a mixing bowl. Beat with a paddle until just combined.
  • Mix add-ins and chill: Mix in the chocolate chips and, if desired, the chopped pistachios. Transfer to a serving bowl and sprinkle a few more mini chocolate chips and pistachios on top. Chill until ready to serve.
  • Serve: Serve with cannoli shells or chips, waffle cones or graham crackers.

Helpful Tips

With just a few ingredients and a little patience, cannoli dip is a great dessert to serve at any gathering! It can be easily prepared ahead of time and served with a variety of different treats.

  • Straining the ricotta: Don’t skip this step! Ricotta cheese has a high water content and that can result in a very runny dip. It takes a bit more time to make sure the cheese has the excess liquid removed. But trust me, it’s very worth it to make sure it’s done. If you do it right then you gain a thicker, smoother consistency for your dip.
  • Orange zest: You don’t have to add the orange zest to this dip but… I like the complexity of flavor it adds to the dip. You can try substituting lemon zest or leave it out altogether.
  • What can I serve with it? Of course you can use cannoli shells or chips, waffle cones or graham crackers with the dip! But the options go on and on! Because it has a mild flavor it can pair well with any kind of cookie, really. Chocolate chip, chocolate, shortbread, ladyfingers or even butter cookies! Make the cannoli dip the center of a cookie spread and see which one you like best!
Cannoli dip with mini chocolate chips on a tray with broken up waffle cones and graham crackers.

How To Store Cannoli Dip

Make this ahead of time and make things easy on yourself! This dip needs to be chilled anyway so that makes it a win-win!

  • In The Refrigerator: Place your dip in an airtight container and put it in your fridge. It will last for up to 5 days! It is best chilled right until serving time.
Print

Perfectly Sweet Cannoli Dip

Cannoli dip is amazingly rich and creamy! Dip some broken-up waffle cones into it and you have yourself a delightful dessert!
Course Appetizer
Cuisine American
Keyword cannoli dip
Prep Time 30 minutes
Total Time 30 minutes
Servings 8 people
Calories 314kcal
Author Alyssa Rivers

Ingredients

  • 15 ounces Whole Milk Ricotta Strained
  • 1 Cup Mascarpone Cheese
  • 1 ½ Cup Powdered Sugar
  • 1/2 Teaspoon Vanilla Extract
  • 1 Teaspoon Orange Zest
  • 1/2 Cup Mini Chocolate Chips
  • 1/4 Cup Chopped Pistachios optional

Instructions

  • Be sure to strain the liquid from the ricotta using cheesecloth otherwise, the dip can be runny. Place several layers of cheesecloth in a strainer and add the ricotta. Let drain for at least 20 minutes before squeezing by hand to remove the excess liquid. This can take a bit of time, but it's worth it to get a better consistency!
  • Add the strained ricotta, mascarpone, powdered sugar, vanilla extract, and orange zest to a mixing bowl. Beat with a paddle until just combined.
  • Mix in the chocolate chips and, if desired, the chopped pistachios. Transfer to a serving bowl and sprinkle a few more mini chocolate chips and pistachios on top. Chill until ready to serve.
  • Serve with cannoli shells or chips, waffle cones, or graham crackers.

Nutrition

Calories: 314kcal | Carbohydrates: 35g | Protein: 7g | Fat: 15g | Saturated Fat: 10g | Trans Fat: 1g | Cholesterol: 38mg | Sodium: 79mg | Potassium: 1mg | Fiber: 1g | Sugar: 31g | Vitamin A: 420IU | Vitamin C: 1mg | Calcium: 138mg | Iron: 1mg


from The Recipe Critic https://ift.tt/3E9tP8H
https://ift.tt/3nnxIQL

शनिवार, 23 अक्तूबर 2021

Homemade Jerk Seasoning

Jerk seasoning is the most deliciously sweet and savory blend of spices! It’s simple to use and even more easy to make! You will have yourself a custom homemade seasoning in less than 5 minutes!

Homemade seasonings take every meal up a notch! If you love them as much as I do then try this Blackened Seasoning, Everything Bagel Seasoning, and my very favorite Lemon Pepper Seasoning. You can put them on so many things!

Jerk seasoning in a jar with wooden spoon.

What Does Jerk Seasoning Taste Like?

Hailing from the Caribbean, jerk seasoning takes on a savory flavor. I love how it combines the sweet taste of cinnamon and nutmeg with some spices like garlic powder, thyme, and ginger. It creates a unique taste that I absolutely love because you can put it on just about anything! There is a LOT of flavor in Jerk seasoning but you don’t need to worry about it taking on too much heat.

You can use jerk seasoning on chicken, shrimp, or even vegetables like corn on the cob! I especially love that when you make this at home, you can customize it to what you love! Take things out or add things in and make them perfect for you. A homemade seasoning is also fantastic because you can make it and always have some on hand. Once you try using homemade seasonings like this one then you will never go back!

What’s IN Jerk Seasoning?

This recipe uses a lot of spices that are super common. In fact, you probably already have most of them, if not all of them, on hand! See the recipe card below for a list of exact ingredient measurements.

  • Brown sugar: This creates a sweet base to mix everything in to!
  • Allspice: Allspice is a earthy, rich flavor.
  • Cinnamon: I love that cinnamon brings a sweeter touch to this seasoning.
  • Nutmeg: Nutmeg is such a distinct flavor and this recipe calls for the perfect amount to bring that flavor to life!
  • Dried thyme: This brings a slightly earthy and lemony flavor to the recipe!
  • Salt: You always want to add salt to seasonings because they enhance all of the other flavors!
  • Ginger: This brings a slightly peppery and sweet flavor. It’s not very strong when it is ground up so it’s perfect for this jerk seasoning!

Let’s Mix Up Some Seasoning!

Jerk seasoning is so easy and will take you less than 5 minutes to make! Once you are done, you will want to use this in everything!

  1. Combine ingredients: In a small bowl combine the brown sugar, allspice, cinnamon, nutmeg, garlic powder, thyme, salt and ginger.
  2. Store: Store in a air tight container and use as needed.
A bowl showing an array of spices ready to be mixed.

Variation Ideas

Making homemade jerk seasoning is the best because you can easily change it up! Here are a few ideas to change the heat and the flavor to get a slightly different taste. Try these or some things on your own and you will have a delicious custom seasoning on hand that is all yours!

  • Want heat? If you want to add in some heat to this recipe then try using ½ teaspoon of red pepper flakes. Or if you’re feeling adventurous and really want some heat then try using a tiny pinch of ghost pepper powder.
  • Add or take away ingredients: If you love garlic, add a tiny bit more! Aren’t crazy about cinnamon? Then take it out! Homemade seasonings are the best for this very reason!
  • What should I put it on? If you want to try out some jerk seasoning but aren’t sure what to put it on then I have some ideas for you! Try using it as a rub on some pork. You can take any Creole or Cajun recipes and substitute this seasoning instead! Use it to sprinkle on some sweet potato fries or some corn on the cob, just drizzle them with a bit of oil first so that it sticks! There are so many options, go crazy!
Jerk seasoning all mixed up in a glass bowl.

How to Store Jerk Seasoning

Make this homemade seasoning ahead of time and you can store it for later! Make sure that it is in a sealed, airtight container and store it in a cool, dry place. Label it with the date and it will keep for up to 6 months! You’ll use this so much that you might want to just double it from the get-go!

Jerk seasoning being scooped with a wooden spoon.
Print

Homemade Jerk Seasoning

Jerk seasoning is the most deliciously sweet and savory blend of spices! It's simple to use and even more easy to make! You will have yourself a custom homemade seasoning in less than 5 minutes!

Ingredients

  • 1/4 cup brown sugar
  • 1 tablespoon ground allspice
  • 1 teaspoon ground cinnamon
  • 1 teaspoon ground nutmeg
  • 1 tablespoon garlic powder
  • 2 teaspoons dried thyme
  • 1 teaspoon salt
  • 1 teaspoon ginger

Instructions

  • In a small bowl combine the brown sugar, allspice, cinnamon, nutmeg, garlic powder, thyme, salt and ginger.
  • Store in a air tight container and use as needed.


from The Recipe Critic https://ift.tt/3npSRtL
https://ift.tt/3vA4H8c