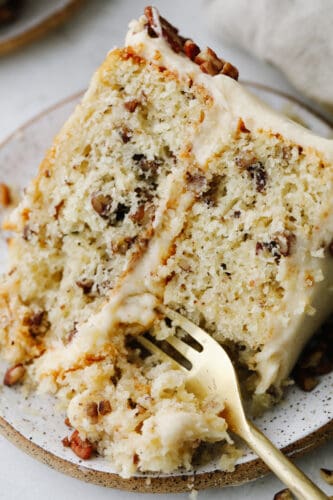
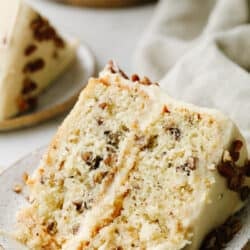
Soft, tender, and filled with nutty goodness, this butter pecan cake is perfect for fall! Browned butter cream cheese frosting and fresh chopped pecans make each bite a dream.
I’m a pecan fiend. They start showing up more and more in the fall, and I love it so much! Pecan tassies, butter pecan cookies, and pecan pie have been on repeat in my kitchen recently. You should definitely give them a try!

Moist and Delicious Butter Pecan Cake Recipe
What’s moist, nutty, and buttery all over? This butter pecan cake! I LOVE me some butter pecan. Whether it’s in ice cream or cookie form I’m all about it. I decided to try making a cake version and let me tell you- I was not disappointed at all! (Big surprise.) I started out with my tried and true yellow cake mix. After a few tweaks, I was left with this masterpiece. Warm, soft, cake topped in a rich browned butter frosting. Honestly, each bite is so decadent I came pretty close to finishing the whole cake by myself.
If you’re looking for a winning dessert this Thanksgiving season, give this butter pecan cake a try. I promise you, it won’t disappoint! Eat it as-is or with a little whipped cream or ice cream on top! It’s delicious no matter how you serve it. My family says this is one of the best cakes I’ve made, and I completely agree! It’s really hard to beat something with buttery chopped pecans in each bite. Creamy, sweet, luscious, buttery… I could go on and on. It’s time to stop talking about this mouthwatering cake and get to making it! You have GOT to try it yourself!
Ingredients for Butter Pecan Cake
Good news! To make this amazing butter pecan cake, all you need are basic ingredients! As long as you’ve got your cake staples and of course- pecans on hand, you’re good to go! These simple ingredients combine to make a cake that is truly magical. Your friends and family will go crazy over it! All measurements can be found in the recipe card below!
- Unsalted Butter: I like using unsalted butter for richness. Make sure this is at room temperature so everything mixes together smoothly!
- Chopped Pecans: The star of the show! I always get pre-cut pecans from the store, but you can chop them youself! This way, you get to choose how big or small the pieces are.
- Cake Flour: I love using cake flour for this butter pecan cake. It’s very fine and will give your cake a light crumb.
- Granulated Sugar: Sugar is a must! It sweetens up your cake and melts down to create a smooth, caramelized texture.
- Brown Sugar: I’ve added brown sugar to the cake mix for an extra rich, sweet flavor.
- Baking Powder and Baking Soda: You’ve got to add both of these for a cake that rises properly! Skip them, and you’ll be left with a cake that’s way too dense.
- Salt: Salt will enhance the overall flavor of the cake.
- Buttermilk: High fat content = a moist cake. Since buttermilk has a high fat content, it makes your cakes super moist and creamy! If you don’t have this on hand, it’s super easy to make at home!
- Milk: Use whole milk here if you can! Again, the higher fat content your cake has, the more moist and delicious it will be! Sorry waistline!
- Vanilla: Everything is better with vanilla. I like using pure vanilla extract for best results.
- Vegetable Oil: Vegetable oil adds moisture and binds fats together.
- Large Eggs: Needed to bind all the ingredients together.
For the Browned Butter Frosting
- Unsalted Butter: I like to use unsalted butter to keep things rich and sweet.
- Cream Cheese Softened: Softened cream cheese is the base of this frosting. It makes it rich and tangy! So delicious!
- Vanilla Extract: With a little vanilla, you add the best flavor to your frosting!
- Powdered Sugar: Powdered sugar will sweeten your frosting and also make the texture smooth.
- Toasted Pecans: Use for sprinkling on top!

Making Your Butter Pecan Cake
This golden, buttery dessert is as easy to make as a boxed cake! With the same amount of effort, you get something that tastes like it came straight from a bakery! You’re going to love how simple and delicious this cake is. It’s an instant classic!
- Preheat Oven, Prep Pans: To begin, preheat the oven to 350° Fahrenheit. Grease 2 8 inch round cake pans and set aside.
- Toast Pecans: Add 3 tablespoons of butter to a skillet and melt over medium high heat. Add the pecans and cook for about 3-4 minutes, until the nuts are toasted and fragrant. Remove from the heat and let cool completely.
- Whisk Dry Ingredients: In a large mixing bowl, whisk together the flour, granulated sugar, brown sugar, baking powder, baking soda, and salt.
- Mix in Wet Ingredients: Add the buttermilk, milk, vanilla, oil and eggs to the dry ingredients and beat with the paddle attachment of a stand mixer or a hand mixer just until fully combined. Fold in the toasted pecans.
- Bake: Separate the batter evenly into the two cake pans and bake for 35-40 minutes, or until the center of the cake springs back when pressed on. Let cool completely.
- Frost and Serve: Frost with the browned butter cream cheese frosting and decorate with toasted pecans.

Making the Best Browned Butter Cream Cheese Frosting
The flavor of this frosting brings the whole butter pecan cake together. It’s so rich and decadent with a hint of tang! With its full, buttery flavor, be prepared to go in for multiple test tries. Just make sure to leave enough for the actual cake!
- Brown Butter: First, brown the butter by heating it over medium high heat in a medium pan. As the butter melts, be sure to keep stirring it so it browns evenly. The butter will begin to foam as it cooks.
- Allow to Cool: After about 5 minutes of stirring and foaming, the milk solids will begin to brown and turn fragrant and the foam will subside. Once this happens and it is a rich golden brown, transfer the butter to a heat-proof bowl to cool. Get as many of the brown toasty bits from the bottom of the pan! Let cool completely and set up.
- Mix Cream Cheese and Butter: In the bowl of a mixer, beat the cream cheese until smooth. Add in the completely cooled and set browned butter, again being sure to get all the browned bits added in. Beat until the butter and cream cheese are fully combined.
- Add Powdered Sugar: Scrape down the bowl and add the powdered sugar slowly, mixing on low until the cream cheese mixture absorbs a good amount of it. Increase the speed slowly until the powdered sugar is completely combined with the cream cheese. Scrape down the bowl again and add the vanilla extract.
- Beat Until Fluffy: Beat on medium high for about 3 minutes, until very fluffy. Use immediately to frost cooled cakes.

Tips for Making Butter Pecan Cake
Use these tips to take your cake from good to great! They’re super simple fixes, but will enhance any cakes you make at home! Trust me, you’ll love how they turn out and never want a storebought cake again!
- Toast Bigger Pecan Pieces: If you plan on chopping the pecans yourself, be sure to toast them while they’re intact and then chop after. If you toast pieces that are too small, they can end up burning.
- Use High-Fat Ingredients: This may not be the most diet-friendly tip, but it sure is delicious! Fat content helps to tenderize and moisten your cake. So things like butter, buttermilk, whole-fat milk, and even sour cream are key to making your cake as moist and delicious as possible. These ingredients also enable browning, meaning the rich buttery flavor of your butter pecan cake will be enhanced!
- Use Room Temperature Ingredients: If you want your batter to be as smooth as possible with no lumps, make sure your wet ingredients are at room temperature before mixing.
- Measure Your Flour: This is one of the biggest mistakes I see when making cakes from scratch. Eyeballing flour is never a good idea- if you add too little or too much it can ruin your end result. You need just as much as specified for the proper cake structure.
- Don’t Overmix: If you want a light and fluffy cake, don’t overmix! Only mix your batter until smooth. Any more, and gluten will develop- resulting in dense and chewy cake.
- Toppings and Drizzle: Don’t skip adding a few pecans on top! Not only does it look amazing, but adds a little extra texture, too! And if I’m feeling really fancy, sometimes I’ll drizzle some homemade caramel sauce on top for extra decadence.

Storing Leftover Cake
Since this butter pecan cake uses cream cheese frosting, it needs to be kept in the fridge. Here’s how you can store your cake and enjoy it days later! With proper storage, it will taste just as delicious as the day you made it!
- In the Refrigerator: Keep your cake in an airtight container or wrap tightly with plastic wrap. Because of the cream cheese frosting, it will only last for up to 2 days. Allow to come to room temperature before serving.
Note: If your cake is unfrosted, it will last for 3 days in an airtight container in the fridge. It gives you a little more time if you plan on making this dessert in advance.

More Buttery Desserts
Desserts
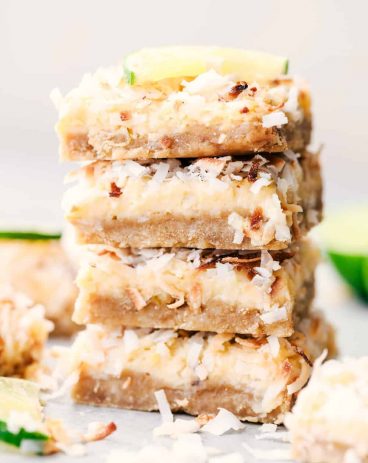
Coconut Lime Butter Bars
Desserts
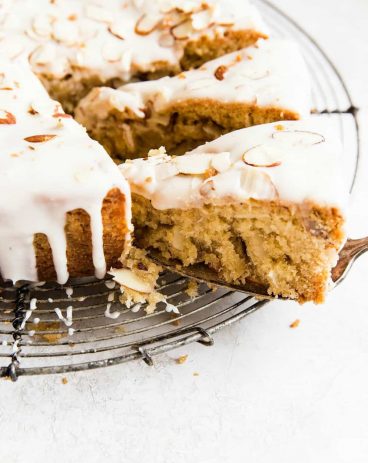
Easy Brown Butter Almond Cake
Desserts
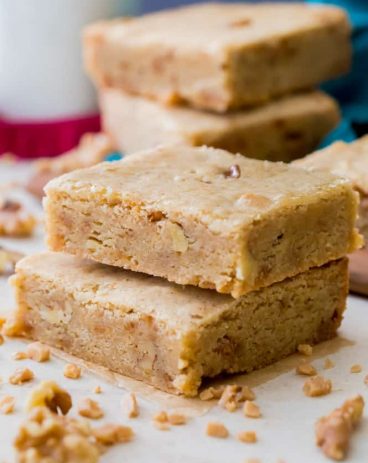
Chewy Brown Butter Blondies
Butter Pecan Cake
Ingredients
Cake
- 3 Tablespoons Unsalted Butter
- 1 ½ Cup Chopped Pecans
- 2 ¼ Cups Cake Flour
- 1 Cup Granulated Sugar
- ½ Cup Brown Sugar
- 1 Tablespoon Baking Powder
- ½ Teaspoon Baking Soda
- ½ Teaspoon Salt
Wet Ingredients
- 1 Cup Buttermilk
- ¼ Cup Milk
- 1 Teaspoon Vanilla
- ½ Cup Vegetable Oil
- 3 large Eggs
Browned Butter Cream Cheese Frosting
- 1 Cup Unsalted Butter
- 12 ounces Cream Cheese Softened
- 1 ½ Teaspoon Vanilla Extract
- 5 Cups Powdered Sugar
- Toasted pecans for decorating
Instructions
Cake
-
Preheat the oven to 350°. Grease 2 8 inch round cake pans and set them aside.
-
Add 3 tablespoons of butter to a skillet and melt over medium-high heat. Add the pecans and cook for about 3-4 minutes, until the nuts are toasted and fragrant. Remove from the heat and let cool completely.
-
In a large mixing bowl, whisk together the flour, granulated sugar, brown sugar, baking powder, baking soda, and salt.
-
Add the buttermilk, milk, vanilla, oil, and eggs to the dry ingredients and beat with the paddle attachment of a stand mixer or a hand mixer just until fully combined. Fold in the toasted pecans.
-
Separate the batter evenly into the two cake pans and bake for 35-40 minutes, or until the center of the cake springs back when pressed on. Let cool completely.
-
Frost with the browned butter cream cheese frosting and decorate with toasted pecans.
Browned Butter Cream Cheese Frosting
-
Brown the butter by heating it over medium-high heat in a medium pan. As the butter melts, be sure to keep stirring it so it browns evenly. The butter will begin to foam as it cooks.
-
After about 5 minutes of stirring and foaming, the milk solids will begin to brown and turn fragrant and the foam will subside. Once this happens and it is a rich golden brown, transfer the butter to a heat-proof bowl to cool. Get as many of the brown toasty bits from the bottom of the pan! Let cool completely and set up.
-
In the bowl of a mixer beat the cream cheese until smooth. Add in the completely cooled and set browned butter, again being sure to get all the browned bits added in. Beat until the butter and cream cheese are fully combined.
-
Scrape down the bowl and add the powdered sugar slowly, mixing on low until the cream cheese mixture absorbs a good amount of it. Increase the speed slowly until the powdered sugar is completely combined with the cream cheese. Scrape down the bowl again and add the vanilla extract.
-
Beat on medium-high for about 3 minutes, until very fluffy. Use immediately to frost cooled cakes.
Nutrition
from The Recipe Critic https://ift.tt/3Cl5z2T
https://ift.tt/3pHlncL