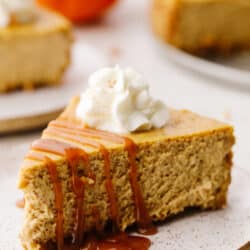
This pumpkin cheesecake that is drizzled with caramel sauce is the ultimate fall dessert. It’s rich, creamy, and spiced to perfection!
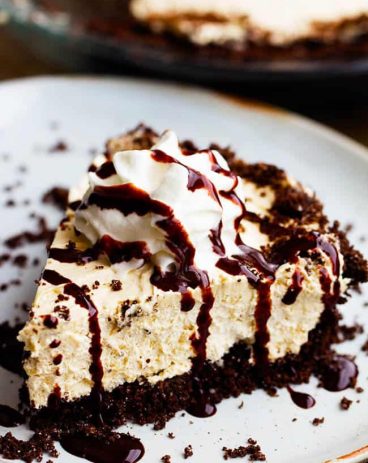
Having a homemade cheesecake for dessert is definitely a way to impress your guests. It doesn’t matter if you’re feeling key lime, chocolate, or mint oreo… there is a cheesecake for every craving!

Amazing Caramel Pumpkin Cheesecake Recipe
Pumpkin cheesecake is a rich and creamy dessert loaded with all of the classic fall spices! I love that it looks like a professional chef baked it up but it’s simple to make! If you have always wanted to try and bake cheesecake but thought it would be too hard then this recipe is for you. This cheesecake has a delicious gingersnap crust topped with a layer of silky pumpkin cheesecake. Then, put on some whipped cream and homemade caramel sauce and you have a dessert to remember. It’s so good that you will be wanting to have dessert before dinner!
This is recipe is a great take on a traditional pumpkin pie when it comes to taste and texture! Not only does it taste insanely delicious, but it looks like it came straight from a bakery! Because of that, pumpkin cheesecake has been my new go-to for Thanksgiving dessert! If you love having different options for for your holiday dessert then try these pumpkin pecan pie bars and pumpkin bread pudding! They are great ones that still bring in that delicious fall flavor but switch things up from traditional pies!
Pumpkin Cheesecake Ingredients
You are going to LOVE how amazing this cheesecake turns out! In fact, I bet you want to make it again soon after! See the recipe card below for a list of exact ingredient measurements.
- Gingersnap Crumbs: Make sure your gingersnap crumbs are finely ground. You can throw them in a food processor for best results. Gingerbread cookies can also be used in place of gingersnaps.
- Granulated Sugar: This adds sweetness to your crust and help all of your ingredients meld together when baked.
- Butter: I use unsalted butter that is melted.
Pumpkin Cheesecake
- Granulated Sugar: For sweetness. You can also use brown sugar for a richer flavor.
- Cream Cheese: This is the foundation of the cheesecake. Make sure it is at room temperature before adding to your mixture! It will help everything to mix together more smoothly.
- Vanilla Extract: This will add a richer flavor to your cheesecake. Use pure vanilla extract for best results!
- Canned Pumpkin: This is the star of the show! Opt for a high-quality pumpkin. If you really want to take this flavor to the next level then try making this homemade pumpkin puree. It’s so easy!
- Eggs: This is the binding agent for your cheesecake. Because of this, it will help everything set in place. Make sure your eggs are room temperature before adding them in.
- Cinnamon: A necessity for any fall flavor. Provides a delicious earthy spice.
- Ground Cloves: This adds an aromaic and slightly sweet flavor.
- Ground Ginger: Adds that bright, delicious gingerbread cookie flavor.
- Nutmeg: Added for a warm, nutty spice.
- Whipped Cream: Used for topping. You can make your own with heavy cream, but I prefer the ease of canned.
- Caramel Sauce: Decadent caramel brings everything together! I use this for topping. You can use pre-made caramel but I think homemade caramel sauce really levels up this whole recipe.
Let’s Bake a Cheesecake!
Making a pumpkin cheesecake at home doesn’t have to be complicated! Use these super easy steps to create a dessert that will make sure to get a “WOW!” from your guests!
- Prep Oven: Preheat oven to 350 degrees F.
- For Cookie Crumbs: Use a food processor to crush the cookies into fine crumbs. Then, measure out 2 cups of crumbs and pour them into a mixing bowl. Add ¼ cup sugar and melted butter and stir to combine.
- Prepare Pan: Next, cover the outside bottom of an 8-inch springform pan with foil, securing the foil partway up the outer sides of the pan.
- Press Into Pan: Press the crumb mixture into the bottom and about half way up the sides of the springform pan.
- Bake and Set Aside: Bake the crust for 5 minutes. Remove from oven and set aside while you make the cheesecake filling.
For the Pumpkin Cheesecake
- Mix cream cheese, sugar and vanilla: In a large mixing bowl combine the room temperature cream cheese, 1 cup of sugar, and vanilla. Mix with an electric mixer until smooth.
- Add in the rest of the ingredients: Add the pumpkin, eggs, cinnamon, cloves, ginger and nutmeg and mix until smooth, but don’t over mix. Pour the filling into the prepared pan.
- Prepare water bath: Grab a pan that’s larger than the cheesecake pan and fill it with about ½ inch of water, to make a water bath.
- Add in cheesecake pan: Place the cheesecake pan inside the dish with the water.
- Bake: Bake for 60-70 minutes, or until the sides of the cheesecake have just set and the center is just barely jiggly.
- Cool: Remove it from the oven (it will continue to bake as it cools). Remove the tinfoil and allow the cheesecake to cool completely on a wire cooling rack.
- Cover and refrigerate: Once cooled, cover the pan with plastic wrap and refrigerate for several hours, or overnight.
- Remove pan sides: When the cheesecake has chilled in the fridge, remove the pan sides (I like to gently run a dull butter knife along the inner edge of the pan before I release the springform pan sides).
- Serve: Serve with caramel sauce (homemade or store-bought) and whipped cream on top, if desired.

Tips & Tricks for Baking Cheesecake
These are some of my personal tips on ways to customize and perfect your pumpkin cheesecake! You will be baking like a pro with a delicious fall treat in front of you in no time!
- Crust substitutes: I like to bake pumpkin cheesecake with a gingersnap crust because I love that flavor combination! But, you could also use a graham cracker crust! It has a perfect sweet flavor that pairs well with pumpkin.
- Room temperature ingredients: It is important to make sure your eggs and cream cheese are at room temperature before adding them into your mixture. When ingredients are at room temperature they will make for a much smoother finish!
- Use full-fat ingredients: Although this isn’t the healthiest of recipes, it sure does taste delicious!! Creams and cheeses with high fat content will yield you the creamiest, most delicious cheesecake.
- Don’t overbake: Overbaking your cheesecake can lead to cracks and a dense texture. Keep an eye on it while it is in the oven to achieve the best creamy texture.
- Keep the oven closed: It is best to keep the oven door closed during the baking process. By opening the oven door, you let out heat! This can cause your cheesecake to bake unevenly. Use the oven light instead!
- Let it cool completely: I know it is beyond hard to wait for such a delicious dessert! But, it you don’t let your cheesecake cool completely before eating it then it will be mushy mess! This may take a few hours. In fact, I like to let mine chill overnight for the best results!
- Toppings: Besides a drizzle of tasty homemade caramel, there are many other toppings that taste great with this cheesecake. Try adding in some chopped nuts, fudge, marshmallow cream, or pumpkin spice!

Storing Leftover Pumpkin Cheesecake
Not only is this recipe delicious, but it stores really well! You can have a slice of rich and creamy goodness whenever. It will keep for days (even months, if stored properly in the freezer!) and tastes just as delicious as the day you made it.
- In the refrigerator: Store for up to 4 days in an airtight container.
- In the freezer: When kept in an airtight container or wrapped tightly in plastic wrap, pumpkin cheesecake will keep for up to 2 months. Thaw for one full day in the fridge before serving.

More of My Favorite Cheesecakes
Desserts
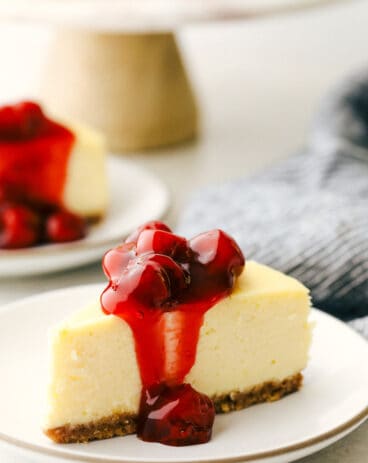
The Best New York Cheesecake Ever!
Cheesecake
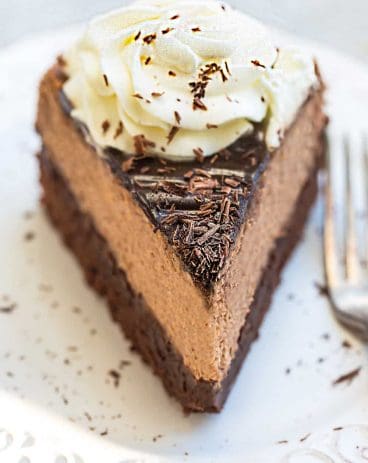
Chocolate Brownie Cheesecake

Desserts
No Bake Very Berry Cheesecake
A Reader’s Review
Pumpkin Cheesecake with Caramel Sauce
Ingredients
Gingersnap Crust
- 2 cups finely ground gingersnap crumbs about 10 ounces
- 1/4 cup granulated sugar
- 7 tablespoons unsalted butter melted
Pumpkin Cheesecake
- 1 cup granulated sugar
- 3 (8 ounce) packages cream cheese (room temperature!)
- 1 teaspoon vanilla extract
- 1 cup canned pumpkin or homemade pumpkin puree
- 3 large eggs room temperature
- 1 1/2 teaspoon cinnamon
- 1/4 teaspoon ground cloves
- ½ teaspoon ground ginger
- 1 1/4 teaspoons nutmeg
- whipped cream for topping
- caramel sauce for topping
Instructions
For the Gingersnap Crust
-
Preheat oven to 350 degrees F.
-
Use a food processor to crush the cookies into fine crumbs. Measure out 2 cups of crumbs and pour them into a mixing bowl. Add ¼ cup sugar and melted butter and stir to combine.
-
Cover the outside bottom of an 8-inch springform pan with foil, securing the foil partway up the outer sides of the pan.
-
Press the crumb mixture into the bottom and about halfway up the sides of the springform pan.
-
Bake the crust for 5 minutes. Remove from the oven and set aside while you make the cheesecake filling.
For the Pumpkin Cheesecake
-
In a large mixing bowl combine the room temperature cream cheese, 1 cup of sugar, and vanilla. Mix with an electric mixer until smooth.
-
Add the pumpkin, eggs, cinnamon, cloves, ginger, and nutmeg and mix until smooth, but don’t over mix. Pour the filling into the prepared pan.
-
Grab a pan that’s larger than the cheesecake pan and fill it with about ½ inch of water, to make a water bath.
-
Place the cheesecake pan inside the dish with the water.
-
Bake for 60-70 minutes, or until the sides of the cheesecake have just set and the center is just barely jiggly.
-
Remove it from the oven (it will continue to bake as it cools). Remove the tinfoil and allow the cheesecake to cool completely on a wire cooling rack.
-
Once cooled, cover the pan with plastic wrap and refrigerate for several hours, or overnight.
-
When the cheesecake has chilled in the fridge, remove the pan sides (I like to gently run a dull butter knife along the inner edge of the pan before I release the springform pan sides).
-
Serve with caramel sauce (homemade or store-bought) and whipped cream on top, if desired.
Notes
Nutrition
from The Recipe Critic https://ift.tt/3vLTq4M
https://ift.tt/3bfIBOV