This classic sausage herb stuffing is full of an amazing mixture of flavors! The spices used in this are the star of the show and it will be a side dish that everyone goes crazy over!
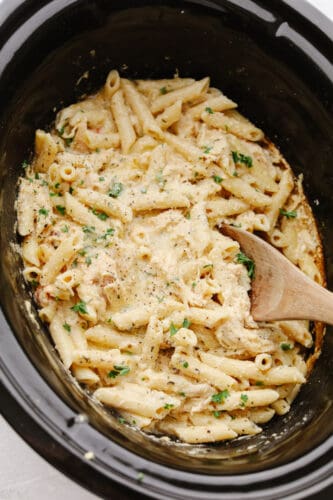
If you are looking for some more Thanksgiving ideas then I have a few that you should try first! This Casserole, this amazing Cranberry Sauce, and this delightful Pie should all be on your menu this year!

Sausage Herb Stuffing
I love everything about the food at Thanksgiving. The turkey, mashed potatoes, sweet potatoes, and one of my favorite parts is the stuffing! When you add the sausage, celery, carrots, onion, and fresh herbs, and spices you create an unforgettable stuffing. Something about making it in the slow cooker fuses all of the flavors together. The veggies cook up so soft and tender and the result is absolutely amazing. The edges get crispy and the stuffing is perfectly moist and full of flavor.
For many of us, Thanksgiving is a busy holiday of getting here or there. That is why this recipe is perfect for this holiday! Not only is it a classic dish that you see made at every Thanksgiving dinner but it can be made in your slow cooker! This makes it so easy to transport! Or, if you are hosting then this will free up your oven for all of the other food! It slow cooks to perfection adding crispy edges and will be the best stuffing that you will ever make!
What’s In Sausage Herb Stuffing?
I always love having herbs on hand in the pantry because they are great to add to any dish in a pinch. See the recipe card below for a list of exact ingredient measurements.
- French bread: You will want to cut this into 1 inch pieces
- Italian sausage: Using meat that already has added flavor really takes this stuffing up a notch!
- Onion: Chop up your oven into small pieces so that it can be in every bite!
- Carrots: When you chop up your carrots then just make sure that they are all about the same size so that they cook evenly.
- Celery: I like to slice up my celery into small pieces.
- Basil Leaves: Basil adds such a fresh taste to this stuffing.
- Rubbed Sage: When you use rubbed sage, you will notice a delicious earthy flavor!
- Thyme Leaves: Thyme is similar to sage but it also has a subtle hint of citrus and mint!
- Salt: This will enchance all of the flavors in this recipe.
- Pepper: The amount used in this recipe adds just enough flavors without adding in any heat.
- Butter: I used unsalted butter in this recipe.
- Chicken broth: When you use chicken broth instead of water, it really adds in a delicious flavor!
- Fresh parsley and cranberries: These are used as a garnish on top!
How to Make Sausage Herb Stuffing
When you use your slow cooker, it makes it so easy to show up to your destination with a delicious dish to share. It also keeps the food warm while you are enjoying your meal for when you go back for seconds… or thirds!
- Prepare bread crumbs: To prepare the bread crumbs, Cut into 1 inch pieces and stale them overnight. You can also toast them in the oven at 350 degrees for 10-12 minutes until they are lightly golden.
- Cook sausage: In a medium sized skillet, cook and crumble the italian sausage until no longer pink. Prepare your slow cooker by spraying it with non stick cooking spray.
- Combne ingredients and add to slow cooker: In a large bowl toss bread crumbs, sausage, onion, carrot, celery, basil, sage, salt, pepper, and butter until combined. Add to slow cooker and pour chicken broth on the top. Cook on low for 3-4 hours or until vegetables are tender.
- Garnish: Garnish with fresh parsley and dried cranberries if desired.

Tips for Making Homemade Stuffing
Sausage herb stuffing is one of my favorite side dishes for Thanksgiving! Here are a few tips that I have to make this recipe turn out perfectly!
- Bread crumbs: This recipe calls for you to make your own bread crumbs for the stuffing! I like to do this to add in some delicious and fresh artisan bread. But, if you don’t have time or want this to be faster then buying store bought ones works fantastic too!
- Type of bread: You can easily change up the type of bread that you use in this stuffing! Try out Brioche, sourdough, country bread or even cornbread!
- Add ins: You can add in a few more ingredients to make this your own! Try some walnuts, bacon, or some mushrooms!

How to Store Leftovers
Thanksgiving leftovers are the best of the best! Here is how you can store this sausage herb stuffing and eat it later. After all, Thanksgiving is just not Thanksgiving if you aren’t breaking out the food for round two the next day!
- Refrigerate: Once your stuffing has cooled then put it in an airtight container in your fridge. It will last for 3-4 days!
- Reheat: To reheat your stuffing, preheat your oven to 350 degrees. Place your stuffing in a baking dish and cover it with some foil. Bake for 30 minutes or until heated through!
More Thanksgiving Side Dishes to Try

Side Dishes
Instant Pot Mashed Potatoes
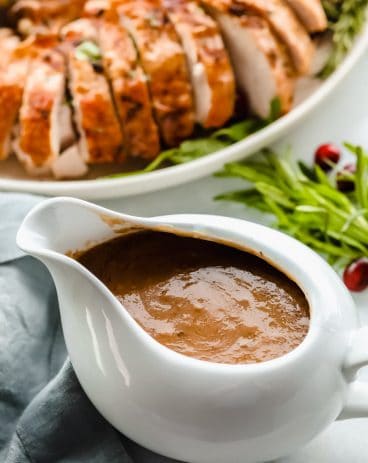
Dressings, Sauces, and Dips
Easy Turkey Gravy

Bread
Lion House Rolls


Slow Cooker Sausage Herb Stuffing
Ingredients
- 1 large crusty loaf of french bread cut into 1 inch pieces, (about 8 cups)
- 1 pound ground italian sausage
- 1 large onion chopped
- 3 medium carrots chopped
- 2 stalks celery sliced
- 1 Tablespoon Basil leaves
- 2 teaspoons Rubbed sage
- 1 teaspoon Thyme leaves
- 1/2 teaspoon salt
- 1/4 teaspoon pepper
- 8 tablespoons butter cut into ½ inch pieces
- 2 cups chicken broth
- Fresh Parsley chopped and dried cranberries for garnish
Instructions
-
To prepare the bread crumbs, Cut into 1-inch pieces and stale them overnight. You can also toast them in the oven at 350 degrees for 10-12 minutes until they are lightly golden.
-
In a medium-sized skillet, cook and crumble the Italian sausage until no longer pink. Prepare your slow cooker by spraying it with nonstick cooking spray.
-
In a large bowl toss bread crumbs, sausage, onion, carrot, celery, basil, sage, salt, pepper, and butter until combined. Add to slow cooker and pour the chicken broth on the top. Cook on low for 3-4 hours or until vegetables are tender.
-
Garnish with fresh parsley and dried cranberries if desired.
Notes
Nutrition
from The Recipe Critic https://ift.tt/3okBbAf
https://ift.tt/3GVhpDS