This crockpot Olive Garden chicken is to die for! The juicy and tender chicken cooked with some pasta is insanely delicious! Plus, it’s super easy which is a total win-win!
I love an easy and delicious crockpot meal! If you want to try more meals like this, you should start with Soup, this Beef and Broccoli, and this amazing Lasagna!

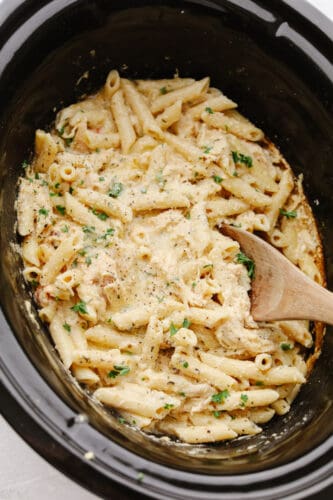
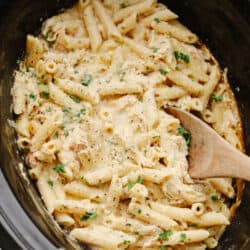
Crockpot Olive Garden Chicken (with Pasta!)
I love a recipe that I can whip up at the last minute and still have it taste delicious!! This Olive Garden crockpot chicken and pasta is the perfect meal! It only takes 5 minutes to put together! Then, it cooks all day and you don’t have to do a thing! Cook up some Broccoli, Asparagus, or this delicious salad and you have a meal to remember!
This recipe only uses 5 ingredients! And one is a bottle of Olive Garden salad dressing. The dressing is SO GOOD and when you mix it with the chicken and cheeses, it takes it to a whole new level! I also love that you just throw in some cooked pasta again and the meal is done! My kids go crazy over this and are so impatient that they want to just eat it straight out of the crockpot! Go ahead and try it! You are going to love it!
Ingredients for Crockpot Olive Garden Chicken
This recipe only uses 5 ingredients…. yes, 5! It’s so easy and delicious, you have to try it! See the recipe card below for a list of exact ingredient measurements.
- Chicken breasts: Use fresh boneless, skinless chicken breasts for this recipe.
- Olive Garden Italian dressing: This dressing is SO GOOD! Using the entre bottle will make it so you get all of that amazing flavor!
- Parmesan: I just used parmesan cheese from the can! It’s super easy and you probably already have it in your fridge.
- Cream cheese: This makes that sauce texture taste so creamy. And you can’t beat the tangy flavor of cream cheese!
- Pasta: Cook up the pasta right before the chicekn is done and all you have to do is throw it right in and mix it up!

Let’s Cook Some Chicken!
This meal is really a set it and forget it kind of meal! It only takes a few minutes to put it together and then you can enjoy it as soon as it’s done!
- Add chicken and dressing: Place the chicken breasts in a slow cooker laying flat. Pour the whole bottle or homemade olive garden dressing over top the chicken.
- Add cheeses and cook: Sprinkle parmesan over top the chicken and dressing. Place the block of cream cheese on top. Cover the slow cooker with the lid and cook for 6 hours on low or 4 hours on high.
- Cook pasta: Cook the pasta according to package directions. Drain and set aside.
- Shred the chicken, add pasta and serve: Using 2 forks or shredders, shred the chicken evenly. Use ¼ cup parmesan and sprinkle over top the chicken. Add in the pasta and stir until well combined. Serve while hot.

Tips for Cooking with a Crockpot
Using a crockpot is easy but try out these tips and it will make cooking with one even easier! You may never go back to cooking on your stove again! This crockpot Olive Garden chicken is the perfect place to start!
- Keep the lid ON: I know it’s tempting to want to take the lid off and check on your food! But a crockpot is designed to do its thing with the lid ON. Keep the lid on and don’t let out all of that heat that has been built up! Just look throught the glass and trust your recipe!
- Preheat your crockpot: A lot of people don’t do this and it really is a step that should always be taken. Turn your crockpot on to the correct setting about 20 minutes before you plan on putting your food it. You can just turn it on while you prep your food!
- Spray it: If you spray your slow cooker with cooking spray before you put your food in, then your cleanup will be so much easier! This helps so that your food doesn’t stick to the sides. Trust me, it’s an easy step that you will appreciate doing later!

How to Store Leftovers
If you have some leftovers with this dish then consider yourself lucky! This crockpot Olive Garden chicken and pasta is so delicious the next day! Once the food has cooled them store it in an airtight container in your fridge. It will last for 3-4 days! When you are ready to eat, you can heat it up in your microwave for 1-2 minutes or until heated through!
More Delicious Crockpot Recipes
Dinner
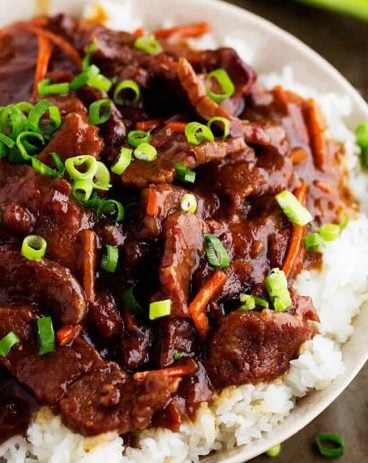
Slow Cooker Mongolian Beef
Dinner
Slow Cooker Beef Tips
Dinner
Slow Cooker Beef Bourguignon

Dinner
Slow Cooker Barbacoa Beef
Crockpot Olive Garden Chicken
Ingredients
- 1.5 pounds chicken breasts
- 1 (16 ounce bottle ) Olive Garden Italian dressing or homemade Olive Garden Italian Dressing
- ½ cup grated parmesan
- 8 ounces cream cheese
- 16 ounces cooked pasta
Instructions
-
Place the chicken breasts in a slow cooker laying flat. Pour the whole bottle or homemade olive garden dressing over top the chicken.
-
Sprinkle parmesan over top the chicken and dressing. Place the block of cream cheese on top. Cover the slow cooker with the lid and cook for 6 hours on low or 4 hours on high.
-
Cook the pasta according to package directions. Drain and set aside.
-
Using 2 forks or shredders, shred the chicken evenly. Use ¼ cup parmesan and sprinkle over top the chicken. Add in the pasta and stir until well combined. Serve while hot.
Nutrition
from The Recipe Critic https://ift.tt/3BZJYwh
https://ift.tt/3k8Y20l