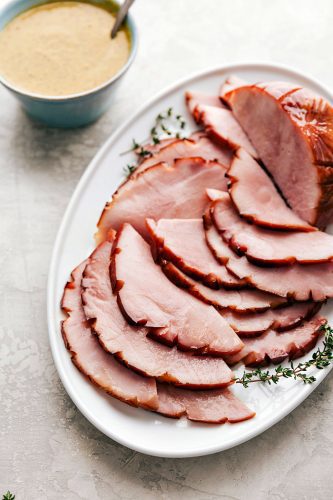
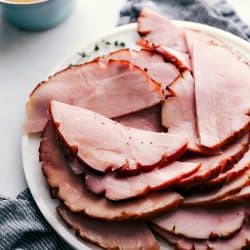
This honey-glazed ham is coated with a delicious brown sugar and sweet honey glaze! It is tender and juicy and goes with everything which makes it ideal for your holiday meal!
The holidays at our house always have meat that’s the star of the show! Try this Juicy Butter Herb Turkey Recipe, Garlic Butter Herb Prime Rib Recipe, or Best Ever Beef Wellington Recipe for more delicious recipes to enjoy for your holiday dinner.

Honey Baked Glazed Ham
Ham is one of my favorite ways to bring a delicious meal to a holiday meal. This honey-glazed ham is one of the most tender and juicy hams you will ever have. Sweet, and savory honey ham will be your show-stopping meal on Christmas Day. I also love how ham can go with every single side that I make to go with it! Oh, and did I mention that the leftovers of this are so good?! Use them for Ham and Cheddar Sliders, Ham and Cheese Quiche or even Southwest Baked Ham and Eggs Potato Hash!
A lot of people ask me questions on how to bake the perfect ham. It is pretty simple but there are a few tricks to get your ham to taste fantastic. My favorite glaze to use is a simple honey glaze and it gives the ham a perfectly sweet flavor. Once you have made it once then you will realize how simple and easy it is to make an impressive meal! It will be a staple for your holidays just like it is for mine!
Ingredients You Need for Honey Baked Glazed Ham
I love the smell of ham baking in the oven, it gets me so excited for the holidays! See the recipe card below for a list of exact ingredient measurements.
- Ham: You want to get a ham that is about 5 pounds and precooked.
- Honey: I use honey for the glaze because the sticky texture is perfect and sweet!
- Butter: This helps to combine all of the ingredients.
- Dark corn syrup: This is a great thickener and adds to that deliciously sweet taste.
- Brown sugar: The brown sugar turns into a caramel taste when melted with butter.
- Whole cloves: This is a strong and sweet with a little bitterness to it.
How to Cook a Precooked Ham
You can get a precooked ham at your local grocery store! If you choose a larger ham simply double the glaze mixture to have enough to cover over your ham.
- Let your ham rest: Take the ham out of the refrigerator and allow it to rest 30 minutes before cooking. Preheat the oven to 325 degrees.
- Cook glaze mixture: Prepare the glaze by heating honey, butter, dark corn syrup, and brown sugar in a medium saucepan on medium low heat.
- Prepare the ham: Line a 9×13 inch pan with aluminum foil. If scoring the ham, lightly score the top into diamond shapes and place the ham in the pan. If using whole cloves, put them in between the lines you scored, but remove before cutting and eating.
- Brush the glaze on and bake the ham: Brush the glaze on top and create a foil tent over the ham. Bake the ham according to how many pounds you have. Usually 15 minutes per pound. Brush the glaze over the ham every 15 minutes.
- Broil: Remove the foil tent once your ham is all cooked! Caramelize the top by turning the oven to broil and letting the ham get dark for about 3-5 minutes. Then, remove the ham from the oven and pour remaining glaze over the top.

How Do you Know When your Ham is Cooked?
Most hams are already precooked. Essentially you are warming up your ham in the oven. The thickest part of the ham needs to be cooked to at least 145 degrees Fahrenheit according to the proper food safety temperature.

Tips for Making the Best Honey Glazed Ham
Classic honey glazed ham is simple and easy to make with just a few ingredients. This sweet glaze is so good and tenderizes the ham while baking. These tips will help you make your holiday dinner what everyone is raving about!
- Picking your ham: Pre-cooked and bone in is one type of ham. Or, there is precooked without the bone. Either one will work for this recipe! With these choices the ham is already juicy and great for left overs.
- Scoring your ham: Before I cook my ham, I score the top in diamond shapes. This not only adds a beautiful presentation, but allows the glaze to seep into the ham. You can also put whole cloves into the cracks, but remove them before carving and eating.
- Cutting the Ham: Once your ham is fully cooked, it can be served at warm or cool temperatures but never straight out of the oven. Let the ham rest for about 10 minutes before cutting. And ham can be stored in the refrigerator for up to a week.’
- Baking the ham: Place your ham cut-side-down into your baking pan. This will help the meat stay juicy with the tinfoil over top.
- Use aluminum foil: Make sure to use aluminum foil or a cover over your honey glazed ham so it does not dry out.
- Condiments: Serve with yellow mustard or spicy brown mustard at the table. You can also add a tablespoon of spicy mustard or honey mustard to the glaze for a hint of sweet and spicy flavor.

Frequently Asked Questions
There are a few questions that always come up when cooking a ham. So, I thought I would put them all together so then you could have them answered all in one place!
- How much ham per person? Usually it is about ½ pound of ham per person. If you are wanting left overs at the end estimate 1 pound per person when buying your ham.
- How big of a ham should I buy? This is a great question for baking the ham. You may have several people coming but the important part is how big your pan is that will be baking it in. A 6 to 8 quart pot or 12 x 16 pan fits about a 6 to 7 pound ham.
- Will a ham cook overnight? Yes! This is a great idea when needing more time for other things during the day. Simply preheat the oven to a 275 degrees. Follow the instructions for preparing and baking the honey glazed ham. Bake uncovered for 6 to 7 hours. While baking continue to spread the glaze over the ham.
- Do you cover your ham? Yes, this is a great way to avoid your ham from over baking and becoming dry. At the end of baking the ham remove the aluminum foil and broil it for a crisp outer layer.
- Should I glaze the ham before cooking? Yes! Brush the glaze mixture over top and into the ham as much and best that you can. Continue to glaze the ham throughout the baking process every 15 to 20 minutes for best results. When the ham is finished cooking brush the remainder of the glaze mixture and broil the top and outside layer of the ham. This will leave a caramelized look and texture on your ham.

Variations for Honey Glazed Ham
This is a tried and true honey-glazed ham favorite that we make year after year in our family. This Spiced Rub Brown Sugar Pineapple Glazed Ham or this Slow Cooker Honey Garlic Mustard Glazed Ham are other great ways to enjoy a classic ham recipe this holiday season. I love the traditional honey glazed ham recipe but there are some variations that can be made.
- Sweetener: instead of honey try using maple syrup or add a little extra brown sugar.
- Syrup: if you do not have dark corn syrup on hand, molasses works great in replace of it.
- Spices: you can omit garlic clove if you would like. This is an optional ingredient and try cinnamon or nutmeg in replace of it.
- Extra flavoring: add pineapple juice or apple cider over top. Even orange juice or cranberry juice for a fruitier flavor.

How to Store Leftover Honey Glazed Ham
This honey-glazed ham is perfect for making ahead, storing for leftovers, and even freezing! Here are the best ways to store your honey glazed ham this holiday season:
- Making honey glazed ham ahead of time: Place in the oven over night and cook at a low temperature warming it up slowly.
- Refrigerate: Simply follow the instructions and bake your ham. Once it is cooled and rested, place in a ziplock bag or airtight container and store up to 1 week in the refrigerator.
- Can you freeze honey glazed ham? Yes! This is a great meal to freeze for later. After your ham is cooked then place your ham (either sliced or not sliced) in a ziplock bag and lay flat for up to 1 month.
- Warming up honey glazed ham: When you are ready to eat it then place your ham in the refrigerator and let it thaw. Reheat it in the microwave or oven until warmed through.

Make it a Meal!
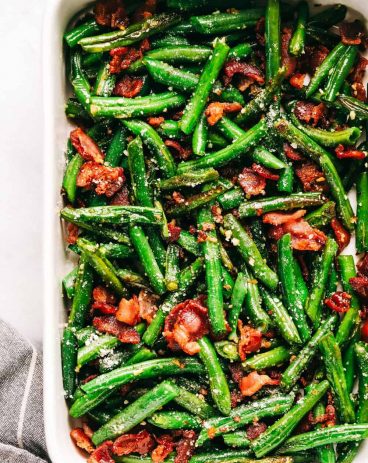
Side Dishes
Garlic Parmesan Green Beans with Bacon
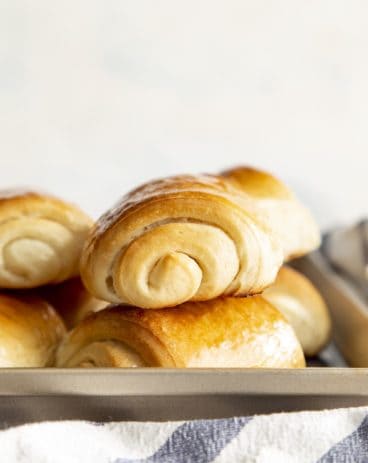
Bread
Lion House Rolls
Desserts
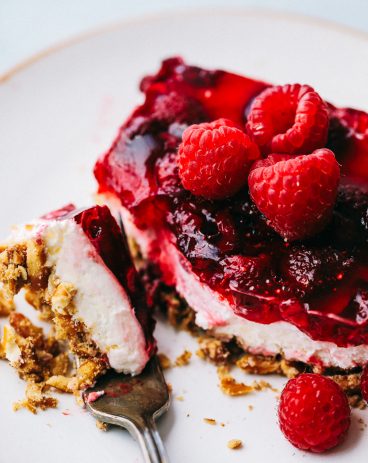
The Famous Raspberry Pretzel Salad
Dressings, Sauces, and Dips
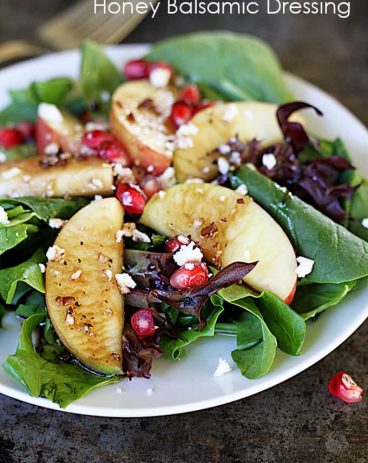
Apple Pomegranate Salad with Honey Balsamic Dressing
A Reader’s Review
Classic Honey Glazed Ham
Ingredients
- 1 (5 pound) ham
- 2 cup honey
- 2/3 cup butter
- 1/4 cup dark corn syrup
- 1 Tablespoon brown sugar
- whole cloves optional about ¼ cup
Instructions
-
Take ham out of the refrigerator and allow to rest at least 30 minutes before cooking. Preheat oven to 325.
-
Prepare the glaze by heating honey, butter, dark corn syrup, and brown sugar in a medium saucepan on medium-low heat.
-
Line a 9×13 in pan with aluminum foil. If scoring the ham, lightly score the top into diamond shapes and place the ham in the pan. If using whole cloves, put them in between the lines you scored, but remove them before cutting and eating. Brush the glaze on top and create a foil tent over the ham. Bake the ham according to how many pounds you have. Usually 15 minutes per pound. Brush the glaze over the ham every 15 minutes.
-
Once the ham is cooked, remove the foil tent and caramelize the top by turning the oven to broil and letting the ham get dark for about 3-5 minutes.
-
Remove the ham from the oven and pour the remaining glaze over the top. Cut into thin slices and enjoy!
Video
Notes
Nutrition
from The Recipe Critic https://ift.tt/2Br729V
https://ift.tt/2ClfUiO