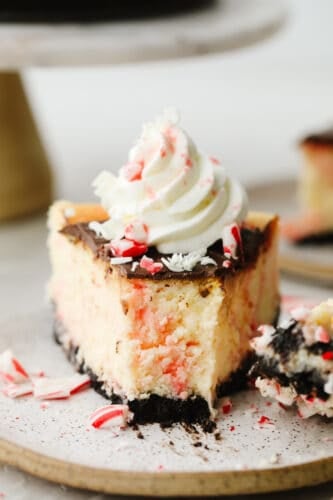
Peppermint cheesecake is creamy and delicious! It has the perfect oreo crust and is topped with crushed peppermint and whipped cream. This will definitely get a “WOW!” from all of your guests this holiday season!
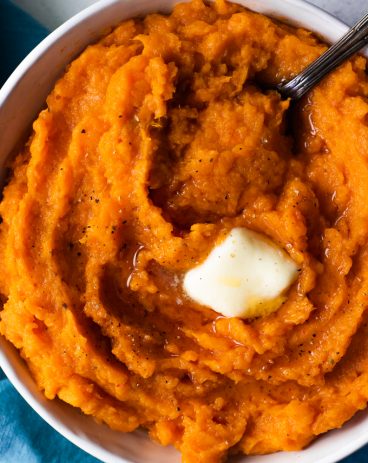
Holiday desserts are SOO GOOD. In fact, if you loved this dessert and want to try a few more, then you should totally try this toffee, this eggnog fudge, and these amazing cookies!

Peppermint Cheesecake
I love just about any holiday dessert and this peppermint cheesecake is a MUST TRY. I mean, you are adding in some of my very favorite flavors and mixing them all together! Oreo, peppermint, and cream cheese. It really doesn’t get much tastier than that! This time of year there are so many holiday parties and get-togethers that I love to try all of the new recipes that everyone brings! And once you make this cheesecake, people will be asking YOU for this recipe all night long!
Peppermint cheesecake sounds intimidating to make but if you closely follow the instructions, anyone can make it! And because this uses an oreo crust, it really takes it up a notch and makes it that much better! If you love peppermint flavors then you should also try these brownies and this peppermint bark. I mean this is the season of peppermint so why not go all out! Enjoy it while you can. Or, if you’re like me, you will taste this and want to bake it all year long!
What You Need to Make Peppermint Cheesecake
This recipe requires a lot of cream cheese and also some peppermint to give it that delicious flavor! The rest of the ingredients you probably already have on hand in your kitchen! See the recipe card below for a list of exact ingredient measurements.
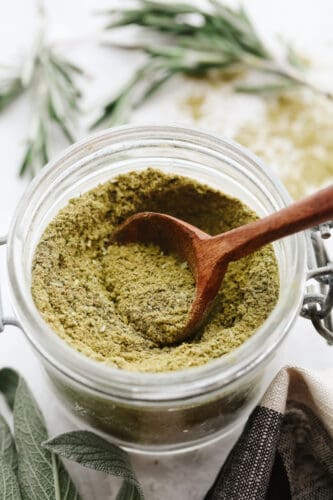
Crust
- Oreo cookies: I used regular oreos for this crust. But you can use different flavors if you want to change things up!
- Butter: Make sure that you use unsalted butter!
- Salt: A tiny pinch of salt is all that is needed for this recipe.
Cheesecake
- Cream cheese: Make sure to set out your cream cheese for a while on your counter before you plan on baking this. It will mix better if it’s been softened to room temperature!
- Sour cream: This helps to soften the texture and add in some moisture to the cheesecake!
- Granulated sugar: This adds some sweetness to balance out the tangy cream cheese flavor.
- Eggs: I used large eggs in this recipe!
- Vanilla extract: This adds a bit of base flavor to the cheesecake.
- Peppermint extract: You not only want the peppermint flavor as a topping but this will help you taste the flavor IN the cheesecake!
- Crushed peppermint candies: Any kind of peppermint candy will do since you are going to crush it up anyways!
- Chopped white chocolate: This will add not only a gorgeous look to the top but the taste is sweet and delicious as well.
Let’s Bake Some Cheesecake!
This peppermint cheesecake takes patience but anyone can do it! Give it a try, I think you will be so happy that you did!
The Crust
- Preheat oven: Preheat oven to 350°
- Pulse oreos and mix with butter and salt: Pulse the oreos in a food processor until the cookies have become a fine crumb. Pour in the melted butter and pinch of salt and blend until combined.
- Pour and press: Pour your crumb mixture into the prepared springform pan and press evenly into the bottom of the pan and up the sides of the pan. You can use the bottom of a flat glass or a flat measuring cup to really press it in well and get a nice, even crust.
- Bake: Bake for 10 minutes.
- Cool: Allow to cool completely.
Cheesecake
- Preheat oven: Preheat the oven to 350.
- Soften cream cheese in mixer: Add your softened cream cheese to the mixing bowl of your stand mixer and beat with a paddle at medium/high speed for about 1 minute. Scrape down the sides and bottom of the bowl and beat for a few seconds more. The goal is to make sure the cream cheese is as smooth as possible so your cheesecake doesn’t have ay lumps in it.
- Mix in sugar and sour cream: Add the sugar and sour cream and mix at medium-low speed until just combined. Scrape the bowl again and mix 10 seconds.
- Add eggs and beat: Add eggs and beat on low speed until combined, about 30 seconds-1 minute. Scrape the bowl again.
- Mix in extracts: Add vanilla and peppermint extract. Beat until just combined. At this point your batter should be smooth and fairly runny.
- Wrap springform pan with foil: Using 18 inch heavy duty aluminum foil, wrap the outside of your springform pan with 4 sheets of foil.
- Fold in peppermint and chocolate and add better to pan: Place your wrapped pan in a deep roasting pan. You can alternatively use a baking sheet, so long as the sides are about 2 inches deep. Right before adding the batter to the pan fold in the crushed peppermints and chopped white chocolate. Add the cheesecake batter to the springform pan.
- Add water to baking sheet (a water bath): Using very hot water, add water to the baking sheet until there is about 1 ½ inch of water around the springform pan. On a rack in the lower 3rd of the oven, carefully move your pan into the oven.
- Bake the cheesecake: Bake for 1-1 ½ hours. After about an hour of baking, check the cheesecake’s consistency. A slight jiggle of the pan (while still in the oven) should tell you if it’s ready or needs more time. The cheesecake should be jiggly, but not liquid. If it seems very liquidy still, give it 10-15 more minutes and check it again.
- Turn off the oven and cool the peppermint cheesecake IN THE OVEN. Then, chill in fridge: Once the cheesecake is firm, yet jiggly, turn the oven off but leave the cheesecake in the oven for another hour or so, until the oven has cooled down. Resist the temptation to open the oven during this time! The purpose of this step is to allow the cheesecake to cool slowly as the oven cools. Doing this will prevent it from cracking, as one of the biggest reasons cheesecakes crack is the drastic temperature change going from the hot oven into the much cooler kitchen. Once the oven and the cheesecake are cooled, remove from the oven and carefully remove the foil lining the pan. Chill in the fridge for at least 6 hours.
- Release from springform with knife, add toppings and serve: Before serving, run a knife around the edge of the pan to ensure an easy release when the springform is removed. Top with whipped cream, crushed peppermint, and chocolate drizzle or ganache.

How to Prevent Cheesecake from Cracking
Whenever you see a professional cheesecake, it is smooth with no cracks! Here is how you can get your peppermint cheesecake to do that!
- Let it cool IN THE OVEN: I can’t stress the importance of this enough! Once the cheesecake is done cooking then you turn the oven off and leave the cheesecake in the oven for another hour. Until the oven has completely cooled down! and while this is happening DON’T OPEN THE OVEN DOOR. The purpose of this step is to allow the cheesecake to cool slowly as the oven cools. Doing this will prevent it from cracking. One of the biggest reasons cheesecakes crack is the drastic temperature change going from the hot oven into the much cooler kitchen.

More Cheesecake Baking Tips
Because cheesecake takes a lot of time and patience, you want it to turn out just right on your first try! Here are a few ideas to make this peppermint cheesecake turn out perfectly!
- Room temperature ingredients: I know that this can take a bit of thought beforehandbut it really helps! Make sure to take all of your refrigerated ingredients out and put them on the counter a few hours before you plan on baking. Bringing your ingredients to room temperature really helps them mix nicely together and makes the dough really smooth!
- Don’t open the oven door: I know that it’s tempting to open the oven door while you are baking your cheesecake. After all, you just want to see how it’s doing! But when you open the door while you are baking, you let a lot of the heat out. This makes it so that your cheesecake will bake unevenly.
- Don’t overmix: When you over mix or set your mixer to mix on high then you add more air to your batter! This can cause the cheesecake to crack when those bubbles rise to the surface while cooking. So use room temperature ingredients so that you don’t have to mix so many lumps and do it on a lower speed!

How to Store Leftover Cheesecake
Leftover peppermint cheesecake tastes just as good the next day! This is how you can store it!
- Refrigerate: Because it has cream cheese in it, it needs to be stored in your fridge! Place it in an airtight container and it will last in your fridge for about a week.
- Freezer: If you want to freeze your cheesecake then you totally can! Wrap your cheesecake in plastic wrap and then foil. Label the foil with the date. It can last in your freezer for up to 1 month. Thaw it in your fridge before you want to serve it up!

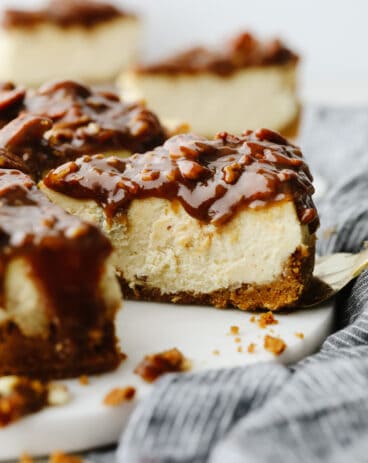
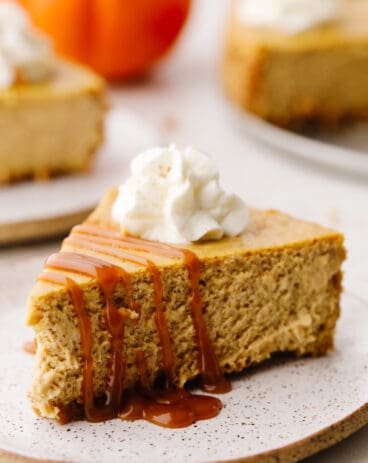
More Cheesecake Recipes to Try

Desserts
Death by Chocolate Cheesecake
Desserts
The Best New York Cheesecake Ever!
Desserts
Pecan Pie Cheesecake
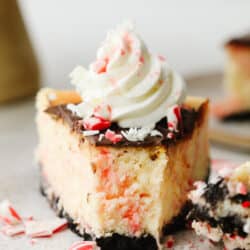
Peppermint Cheesecake
Ingredients
Crust
- 28 regular Oreo Cookies
- 4 tablespoons Unsalted Butter Melted
- 1 Pinch Salt
Cheesecake
- 2 Pounds cream cheese softened (Four 8 ounce packages)
- 8 Ounces sour cream
- 1 ½ cup Granulated Sugar
- 5 large eggs
- 1 Teaspoon Vanilla Extract
- 1 Teaspoon Peppermint Extract
- 3/4 Cup Crushed Peppermint Candies
- 3/4 Cup Chopped White Chocolate
Instructions
The Crust
-
Preheat oven to 350°
-
Pulse the Oreos in a food processor until the cookies have become a fine crumb. Pour in the melted butter and pinch of salt and blend until combined.
-
Pour your crumb mixture into the prepared springform pan and press evenly into the bottom of the pan and up the sides of the pan. You can use the bottom of a flat glass or a flat measuring cup to really press it in well and get a nice, even crust.
-
Bake for 10 minutes.
-
Allow to cool completely.
Cheesecake
-
Preheat the oven to 350.
-
Add your softened cream cheese to the mixing bowl of your stand mixer and beat with a paddle at medium/high speed for about 1 minute. Scrape down the sides and bottom of the bowl and beat for a few seconds more. The goal is to make sure the cream cheese is as smooth as possible so your cheesecake doesn’t have any lumps in it.
-
Add the sugar and sour cream and mix at medium-low speed until just combined. Scrape the bowl again and mix for 10 seconds.
-
Add eggs and beat on low speed until combined, about 30 seconds-1 minute. Scrape the bowl again.
-
Add vanilla and peppermint extract. Beat until just combined. At this point, your batter should be smooth and fairly runny.
-
Using 18-inch heavy-duty aluminum foil, wrap the outside of your springform pan with 4 sheets of foil.
-
Place your wrapped pan in a deep roasting pan. You can alternatively use a baking sheet, so long as the sides are about 2 inches deep. Right before adding the batter to the pan fold in the crushed peppermints and chopped white chocolate. Add the cheesecake batter to the springform pan.
-
Using very hot water, add water to the baking sheet until there is about 1 ½ inch of water around the springform pan. On a rack in the lower 3rd of the oven, carefully move your pan into the oven.
-
Bake for 1-1 ½ hours. After about an hour of baking, check the cheesecake’s consistency. A slight jiggle of the pan (while still in the oven) should tell you if it’s ready or needs more time. The cheesecake should be jiggly, but not liquid. If it seems very liquidy still, give it 10-15 more minutes and check it again.
-
Once the cheesecake is firm, yet jiggly, turn the oven off but leave the cheesecake in the oven for another hour or so, until the oven has cooled down. Resist the temptation to open the oven during this time! The purpose of this step is to allow the cheesecake to cool slowly as the oven cools. Doing this will prevent it from cracking, as one of the biggest reasons cheesecakes crack is the drastic temperature change going from the hot oven into the much cooler kitchen. Once the oven and the cheesecake are cooled, remove from the oven and carefully remove the foil lining the pan. Chill in the fridge for at least 6 hours.
-
Before serving, run a knife around the edge of the pan to ensure an easy release when the springform is removed. Top with whipped cream, crushed peppermint, and chocolate drizzle or ganache.
Nutrition
from The Recipe Critic https://ift.tt/3DvyaDn
https://ift.tt/3CztlaM


 and it's packed with white corn kernels. It makes the perfect side to any dish!")