बुधवार, 28 जुलाई 2021

Homemade Pasta Step by Step

Homemade pasta is a labor of love but it is totally worth the extra work! This pasta is simple and easy, it just takes a bit of time.

Pasta is favorite comfort food for many. Try these tried and true favorite pasta dishes, California Spaghetti, Creamy Chicken Florentine, and Easy Pasta Primavera.
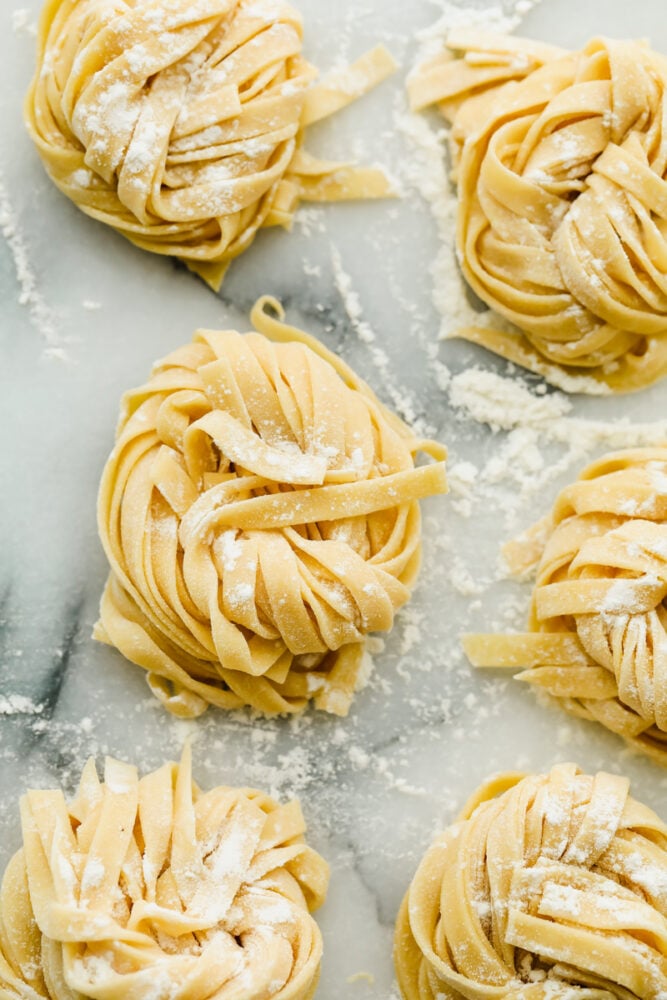
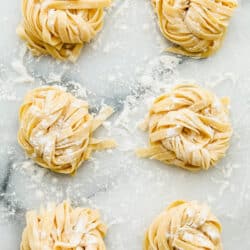
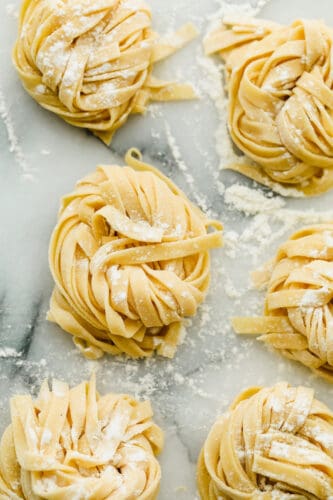
Homemade pasta in nests ready to cook.

Homemade Pasta Recipe

Homemade pasta is way better than boxed pasta, it has a good chew and texture that you can’t get from the store. With only 5 ingredients it really is easy to make. The hardest part is waiting for it to rest before you run it through your pasta maker. I always shied away from making homemade pasta thinking it was way too hard. I couldn’t have been more wrong. Using a pasta maker takes all the hard work of rolling it out. Although you can make this using a hand roller and I tell you how below. Seriously homemade pasta is one of the best things you will ever try this year!

There are many recipes out there and opinions on how to make pasta perfectly. This recipe is it! Pasta is very forgiving and there are many amazing ways to make it. This is a classic recipe that includes Olive oil for flavor and the much-needed salt for taste. Some recipes just add salt to the cooking water, but you are going to want to add it to the pasta dough for the best flavor. These are the best noodles you will ever make. Toss them with a bit of olive oil and cheese if you want or throw them in your favorite sauce for a dinner you won’t soon forget!

Pasta Dough Ingredients

Simple ingredients come together in a special way to make amazing pasta. With just 5 ingredients you probably already have everything you need on hand. So what are you waiting for? You have to try this easy recipe today!

  • Flour: All-purpose flour works perfectly or semola flour works too.
  • Eggs: Eggs should be at room temperature to mix in fully.
  • Olive Oil: This is used in Italian cooking regularly.
  • Salt: Gives the pasta flavor.
  • Water: Need to create the perfect mixture.

How to Make Homemade Pasta

Follow the instructions and you’ll have perfect pasta! Homemade pasta is very forgiving so do not fret too much about it. The most important thing you want to concentrate on is the consistency when you knead the dough and letting it rest. Those are very important for creating homemade pasta that is divine.

  1. Flour: On a clean surface, place the flour in a mound and use your hands to form a nest in the center. Add the eggs, olive oil, salt and water to the center of the nest.
  2. Add Eggs: Use a fork to gently break the yolks of the eggs and slowly stir the center of the nest incorporating a little of the flour walls at a time until a dough has formed. Use your hands to finish working all the flour in.
  3. Create Dough: Knead the dough for about 8-10 minutes. It’s a stiff, dry dough but it will come together into a smooth dough. Once the dough has all come together and is smooth, wrap in plastic wrap and set it in the fridge to rest for an hour. You can leave it overnight if you wish, but be sure to get it come to room temp before rolling out.

Creating the Pasta Dough

You want to keep the sections you are not using right away covered so that they do not dry out. If you do not have a pasta maker, see below for instructions on how to roll out pasta by hand.

  1. Cut and Roll: Cut the dough into four pieces and use your hands to shape the first section into a small flat oval. Wrap the remaining three sections in plastic wrap until you are ready to roll them out.
  2. Pasta Maker: Feed the oval piece of dough through the pasta maker on the number 1 setting. Fold the pasta into book folds, which is the two end folded in until they touch in the middle and then folded in half. Run through the pasta maker on setting 1 two or three more times before moving through the next settings on your pasta maker until the pasta is the desired thickness (I prefer setting 6 on my pasta maker.) If the dough is becoming tacky or sticky dust it with a little bit of flour. Additionally, if the dough is becoming much too long to handle you can cut it in half and work each half separately.
  3. Make Noodles: Run the dough through the pasta maker using the cutting attachment to cut the shape of noodles you would like. Dust the final noodles with flour and either hang on a pasta rack or make them into pasta nests and let them rest for about 30 minutes on a floured surface.
  4. Cook Noodles: Bring a large pot of salted water to a boil. Boil the pasta for 60-90 seconds. Toss with your favorite sauce and enjoy!
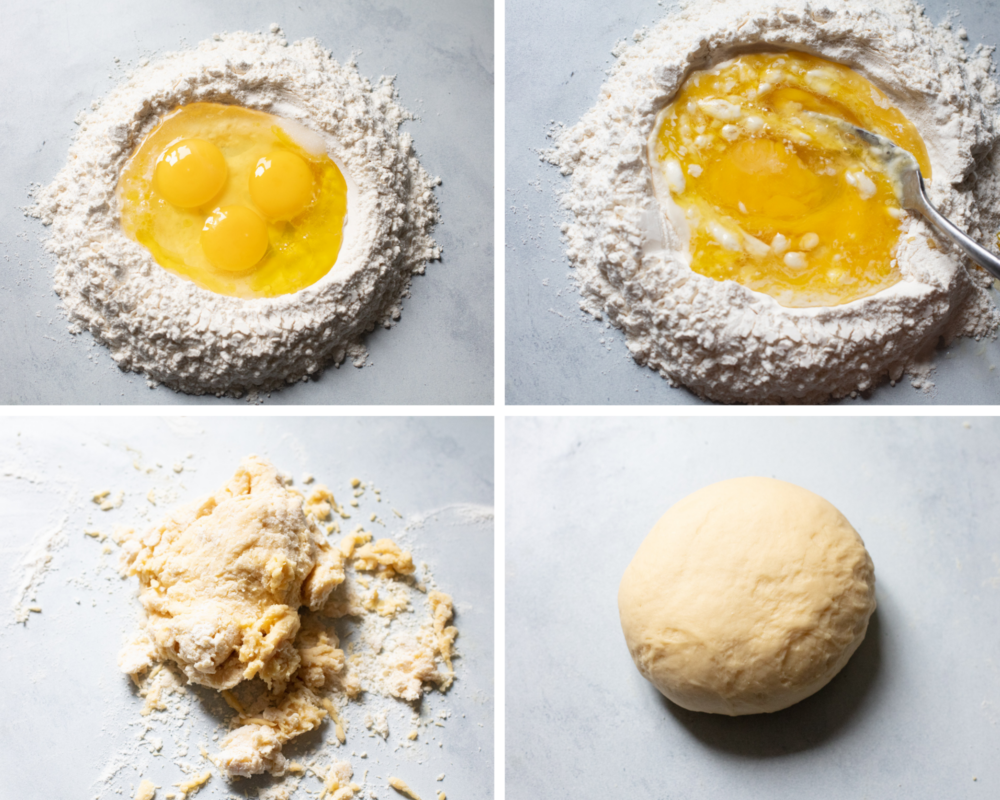
The flour in a nest, adding the eggs, and kneading the dough.

Preparing the Dough

I prefer to do this by hand, but you can make the dough in a stand mixer or food processor. If you make it in a food processor you will need to remove it and knead by hand. Once the dough comes together you can use a dough hook to knead the dough in a stand mixer.

  1. Large Nest: Make the well in the flour large enough to hold the eggs, water, oil and salt.
  2. Mix: Use a fork to mix the eggs thouroughly in the nest and then slowlly start bringing in the flour using the fork to start. Once a a bit of dough forms switch to your hands.
  3. Work it: Knead the dough till your dough is smooth and taunt. It takes a long time to work the dough into the right consistency so be patient and don’t give up. You really have to work the gluten in the dough. Do not leave it shaggy and sticky.
  4. Let it rest: This is one of the most important steps. Wrap the dough in plastic wrap and let it rest for at least 30 minutes. This relaxes the the protien so it will roll out and easily. If you do not let it rest you’ll be fighting it the whole time.
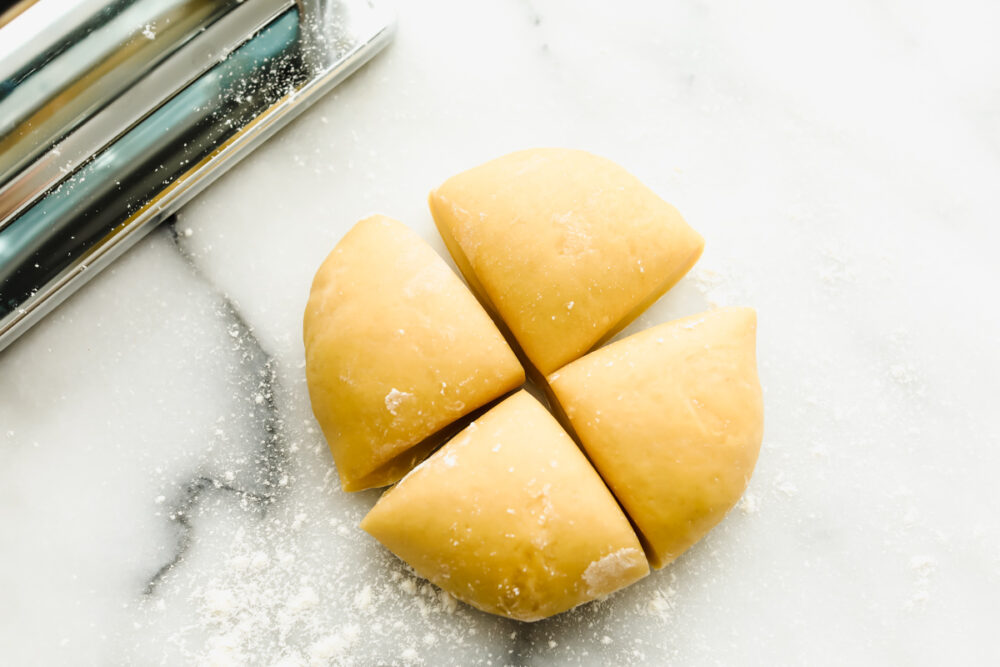
Cutting rested dough into quarters.

Run Dough Through Pasta Maker

Make sure you follow the directions on your pasta maker. Everyone is a bit different. Keep it floured to prevent sticking.

  1. Cut and roll: Cut the dough into 4 sections. Work only one section at a time, keeping the other sections covered in plastic wrap.
  2. Roll first: To make it easier to roll through your pasta roller I like to roll it a bit with a rolling pin into a nice oval shape.
  3. Flour: If at anytime you feel like the dough is sticking to the roller or surface, sprinkle with flour to keep it loose and easy to work with.
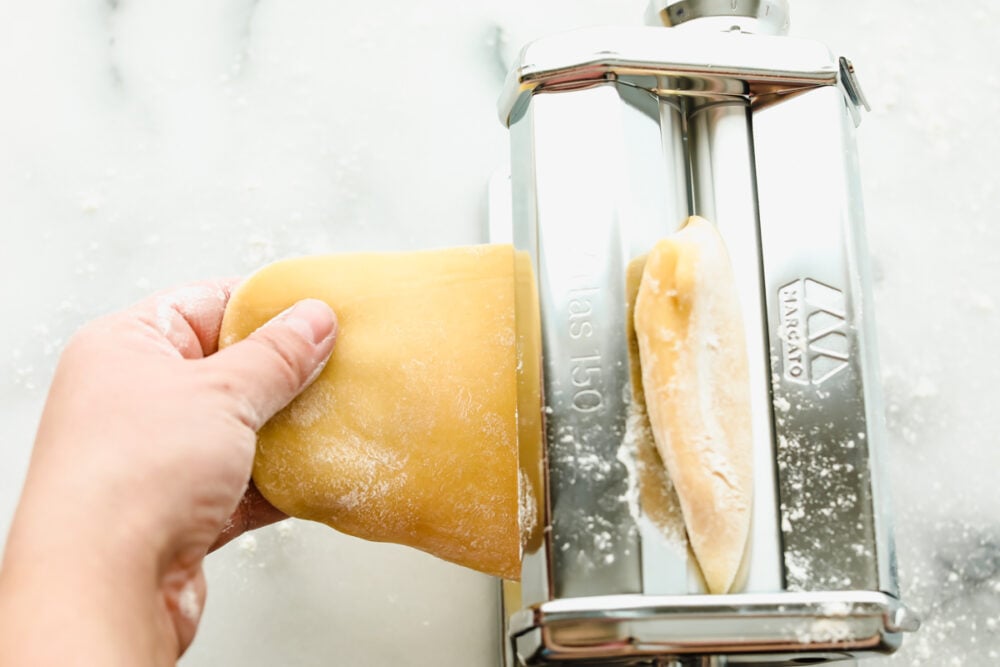
Feeding the dough into a pasta roller.

Fold the Dough

This is an essential step so don’t skip folding the dough in the beginning. It will give you the shape you want.

  1. Fold: After you have passed it through the pasta machine at least once or twice it’s time to start folding it. Folding the dough creates a rectangle and makes it easier to cut and keeps it even. Fold it a couple of times to get the right shape.
  2. How to Fold: Take each end of the dough and fold it into the center so that the ends meet in the middle. Fold the dough over itself, folding it in half. This will create a nice rectangle. You may need to fold it a couple of times as you pass it through the biggest setting to get it to the right shape.
  3. Too Long: If your dough starts to get too long to work with, cut it in half and work with a half, one at a time. Continue rolling till desired thickeness
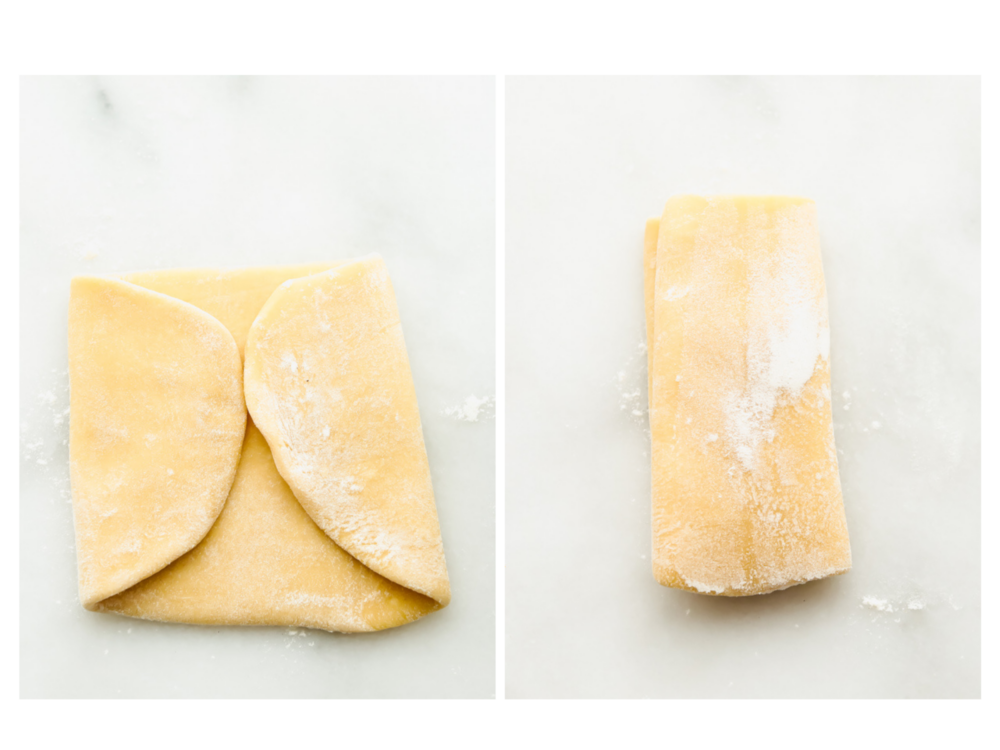
Folding the dough to get a good rectangle shape.

Using a Pasta Machine

Using a pasta roller is truly a fun thing to do. It is so satisfying to roll the dough and watch it get thinner and thinner. Handle the dough with care as you put it through the roller.

Running it through the Pasta Machine: Rolling the dough is a process. You have to start big and gradually move down a size till you get the desired thickness. Start with the biggest setting, run the dough through once or twice then adjust the settings to be thinner, and thinner until you have the perfect sheet of golden pasta.
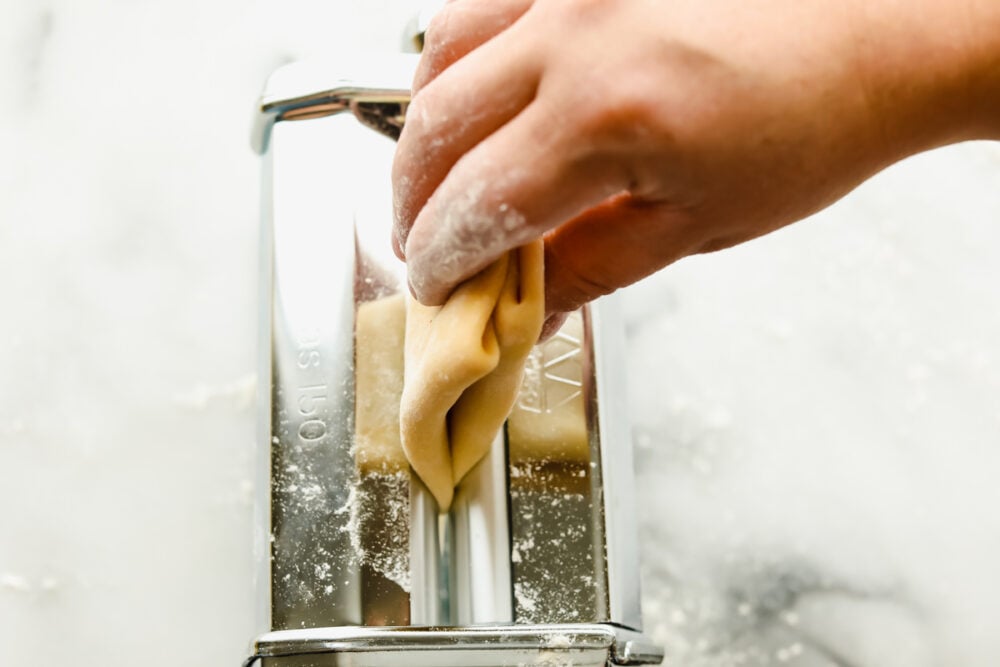
Feeding the folded pasta into the pasta maker.

Flatten the Pasta

There are different attachments for the kitchen aid which can cut your dough into different shapes. Most pasta makers will only cut your dough into long thin strips. But those can be used for recipes still that cause for small pasta like Baked Rigatoni or Creamy Tuscan Pasta.

  • Flatten: If you need to, remember you can fold the dough again to get the dough into a good shape.
  • Cut: Once the dough has reached the desired thickness, run the dough through the pasta cutter for the desired shape of your noodles. Make spaghetti sized noodles for recipes such as Cacio e Pepe, or Creamy Bacon Carbonara. Use a bigger cut for dishes such as Fettucini Alfredo or Pesto. Depending on your pasta maker you can make any shape you want with this dough. Again flour the dough as needed to keep it from sticking together as you run it through the cutter. You want to dust the dough, not work the flour into it.
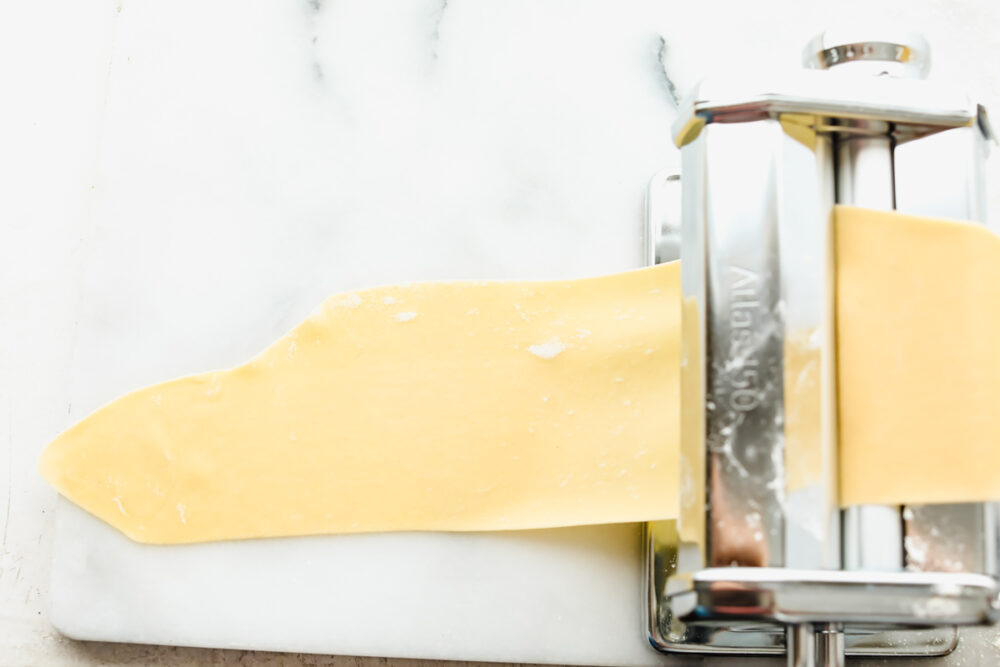
A long golden sheet of pasta getting thinner.

Making Homemade Pasta

Nesting your noodles will keep them from drying out too quickly and allow you to quickly grab them and place them in the boiling water. Salt your water for the best results.

  • Nest: Gather the noodles and nest them while you work with the next section of noodles. Dust with flour as needed to keep them from sticking together.
  • Boil: Bring a large pot of water and some salt to a rolling boil. Add the pasta and cook for 60-90 seconds. These homemade noodles will cooks so much faster than boxed dried pasta so keep an eye on it.
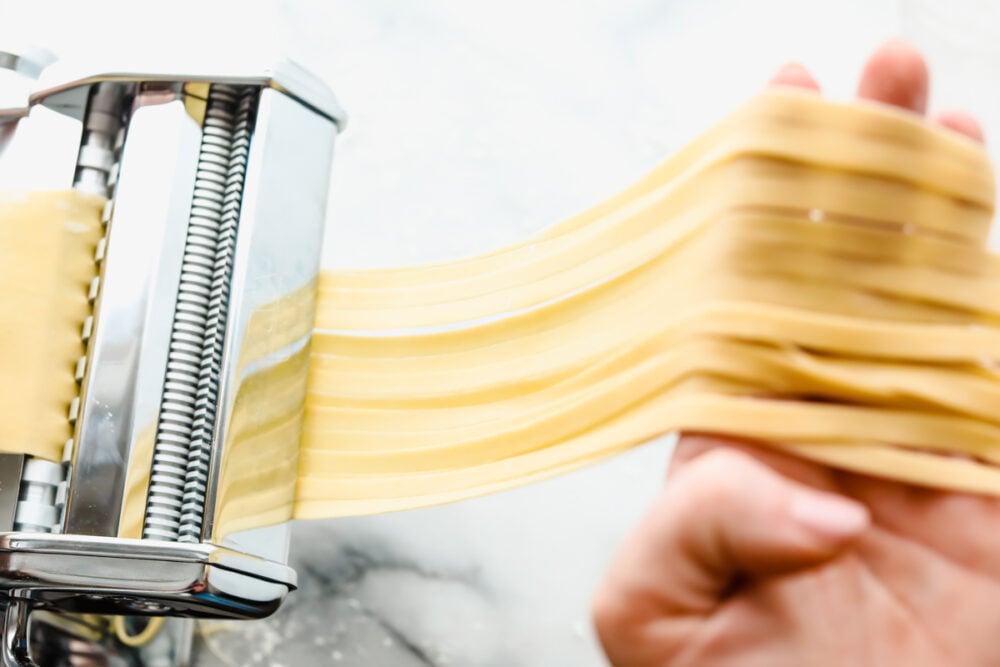
Cutting the dough into long strands for cooking.

Tips For The Best Homemade Pasta

Homemade pasta truly is easy, it just takes some time. Your family is going to love the taste and texture of homemade noodles. You may never buy boxed pasta again.

  • What Flour should you use: There are definite opinions out there on what makes the best noodles. You can get gorgeous, delicious noodles by using all-purpose flour. To get a more authentic texture you can use a combination of all-purpose and semolina flour. Some might say you need “00” flour but you do not have to go buy expensive flour to get wonderful noodles.
  • Mixing and Kneading: You can definitely knead it by hand, but you can also use stand mixer with a dough hook. Just knead it till the dough is smooth and elastic.
  • Flour and Nest: When forming nests of pasta noodles, be sure to flour the noodles well so they don’t stick together as they rest. You can shake the noodles loose before dropping them in the water, or you can place the whole nest in the water and break it up as it cooks.
  • Reserve Liquid: When your noodles are done cooking reserve some of the pasta water in a measuring cup. Fresh noodles tend to soak up more sauce than dried noodles, so adding a tablespoon of two of starchy pasta water can help invigorate your sauce and keep it from being soaked up too much by the noodles. 
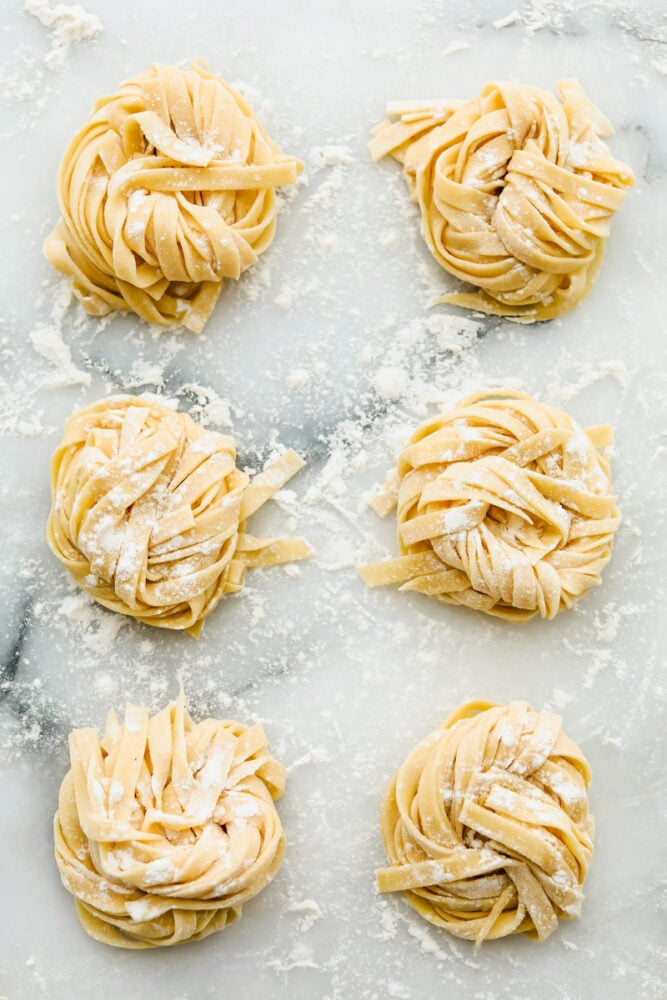
Long strands of noodles in nests ready to cook.

No Pasta Maker? No Problem!

If you do not have a pasta roller and cutter do not fret. You can still have amazing homemade noodles that will taste absolutely luscious in any dish. They just may be a bit puffier, but every bit is as good! You can add them to soups at the end of cooking right before serving. Try them in Chicken noodles, Tomato Basil, or Minestrone.

  • Divide: Once the dough has rested. Go ahead and cut the dough into quarters so it is easier to work with.
  • Roll: Roll a section at a time on a lightly floured surface. Coat the rolling pin with flour to keep it from sticking. Dust with flour as needed. Roll the dough till it is 1/8″ inch thick.
  • Cut: Using a pizza cutter or a sharp knife, cut the sheet into four sections. Lightly dust the dough. Roll the sectioned dough into a roll. Cut the roll using the knife or pizza cutter into the desired thickness. You can skip rolling it and just cut the dough as well, but I find it a bit easier and faster to roll it before cutting it.
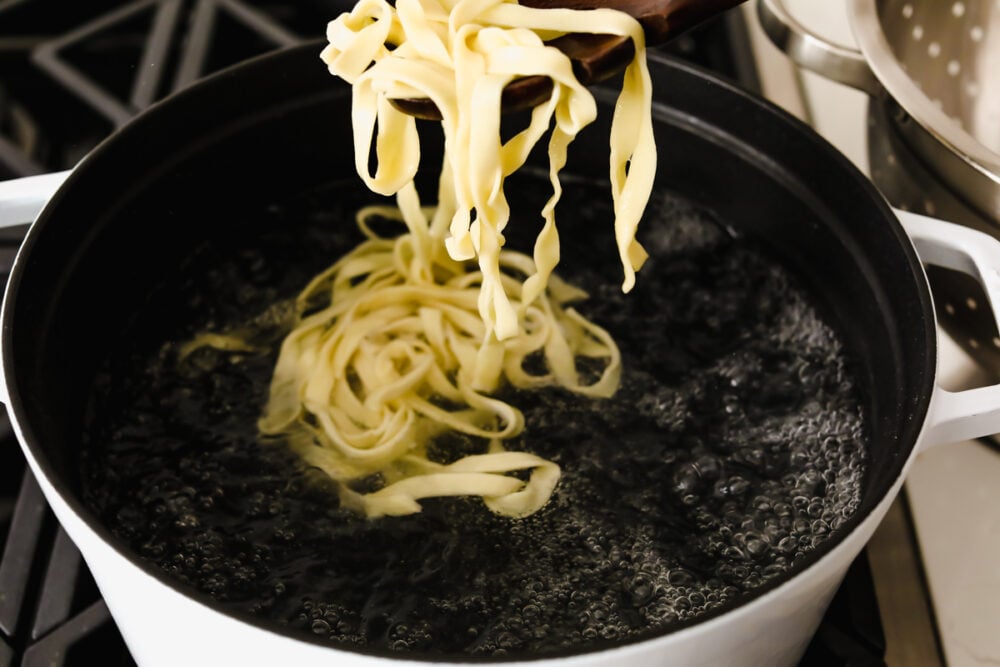
Cooking pasta in a pot of boiling water.

Drying and Storing Homemade Pasta

Homemade pasta is versatile and storable. I love making a double batch so we can have some now and some later. Perfect for a busy weekday or a lazy weekend. Cook up some Marinara and toss with your pasta for an easy dinner add meatballs for a bit of protein.

  • Dry: Use a pasta drying rack or clean hangers for drying pasta. Place cut pasta dusted with flour in a single layer over the rack or hangers and let them dry for 24 hours. Carefully remove pasta from drying rack and store in an airtight container or jar until ready to use. You can keep in the fridge if you desire. Dry pasta will hold for up to 1 month if stored in a cool, dry place.
  • Freeze: Arrange freshly made, uncooked pasta across a floured baking sheet. For long noodles arrange into nests. For short pastas keep in a single layer. Freeze for a couple of hours, and then transfer to double layer plastic bags. You can freeze for up to a couple of months. And you can cook straight from the freezer. No need to thaw, just dump the pasta into boiling salted water, and increase the cooking time a bit.
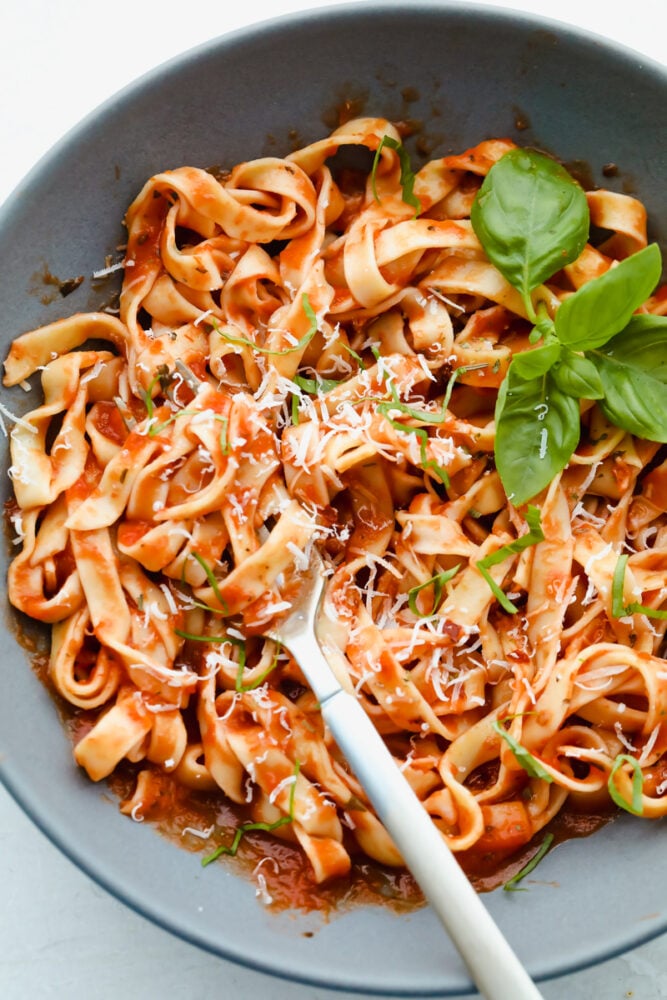
Homemade pasta tossed with marinara sauce.
Print

Homemade Pasta

Homemade pasta is a labor of love but it is totally worth the extra work! This pasta is simple and easy, it just takes a bit of time.
Course Dinner
Cuisine Italian American
Keyword homemade pasta
Prep Time 1 hour 30 minutes
Cook Time 5 minutes
Total Time 1 hour 35 minutes
Servings 6 people
Calories 208kcal
Author Alyssa Rivers

Ingredients

  • 2 cups all purpose flour
  • 3 large eggs
  • 1 Tablespoon olive oil
  • ¾ teaspoon salt
  • 1 Tablespoon water

Instructions

  • On a clean surface, place the flour in a mound and use your hands to form a next in the center. Add the eggs, olive oil, salt and water to the center of the nest.
  • Use a fork to gently break the yolks of the eggs and slowly stir the center of the nest incorporating a little of the flour walls at a time until a dough has formed. Use your hands to finish working all the flour in.
  • Knead the dough for about 8-10 minutes. It’s a stiff, dry dough but it will come together into a smooth dough. Once the dough has all come together and is smooth, wrap in plastic wrap and set it in the fridge to rest for an hour. You can leave it overnight if you wish, but be sure to get it come to room temp before rolling out.
  • Cut the dough into four pieces and use your hands to shape the first section into a small flat oval. Wrap the remaining three sections in plastic wrap until you are ready to roll them out.
  • Feed the oval piece of dough through the pasta maker on the number 1 setting. Fold the pasta into book folds, which is the two end folded in until they touch in the middle and then folded in half. Run through the pasta maker on setting 1 two or three more times before moving through the next settings on your pasta maker until the pasta is the desired thickness (I prefer setting 6 on my pasta maker.) If the dough is becoming tacky or sticky dust it with a little bit of flour. Additionally, if the dough is becoming much too long to handle you can cut it in half and work each half separately.
  • Run the dough through the pasta maker using the cutting attachment to cut the shape of noodles you would like. Dust the final noodles with flour and either hang on a pasta rack or make them into pasta nests and let them rest for about 30 minutes on a floured surface.
  • Bring a large pot of salted water to a boil. Boil the pasta for 60-90 seconds. Toss with your favorite sauce and enjoy!

Notes

When forming nests of pasta noodles, be sure to flour the noodles well so they don’t stick together as they rest. You can shake the noodles loose before dropping them in the water, or you can place the whole nest in the water and break it up as it cooks.
When your noodles are done cooking reserve some of the pasta water in a measuring cup. Fresh noodles tend to soak up more sauce than dried noodles, so adding a tablespoon of two of starchy pasta water can help invigorate your sauce and keep it from being soaked up too much by the noodles. 
 

Nutrition

Calories: 208kcal | Carbohydrates: 32g | Protein: 7g | Fat: 5g | Saturated Fat: 1g | Polyunsaturated Fat: 1g | Monounsaturated Fat: 3g | Trans Fat: 1g | Cholesterol: 93mg | Sodium: 327mg | Potassium: 79mg | Fiber: 1g | Sugar: 1g | Vitamin A: 135IU | Calcium: 21mg | Iron: 2mg


from The Recipe Critic https://ift.tt/3ycRfHE
https://ift.tt/3i7Hchu
मंगलवार, 27 जुलाई 2021

Zucchini Bars with Brown Butter Frosting

Zucchini Bars with Brown Butter Frosting is deliciously moist and absolutely heavenly. This is one of the best ways to use up those extra summer zucchini.

Browned butter is an easy trick to create incredible flavor. Try browned butter in these Cookies, on Shrimp and Carrots.

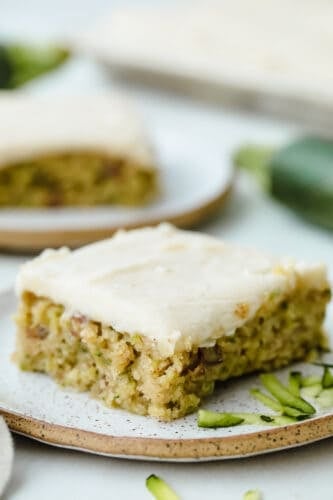
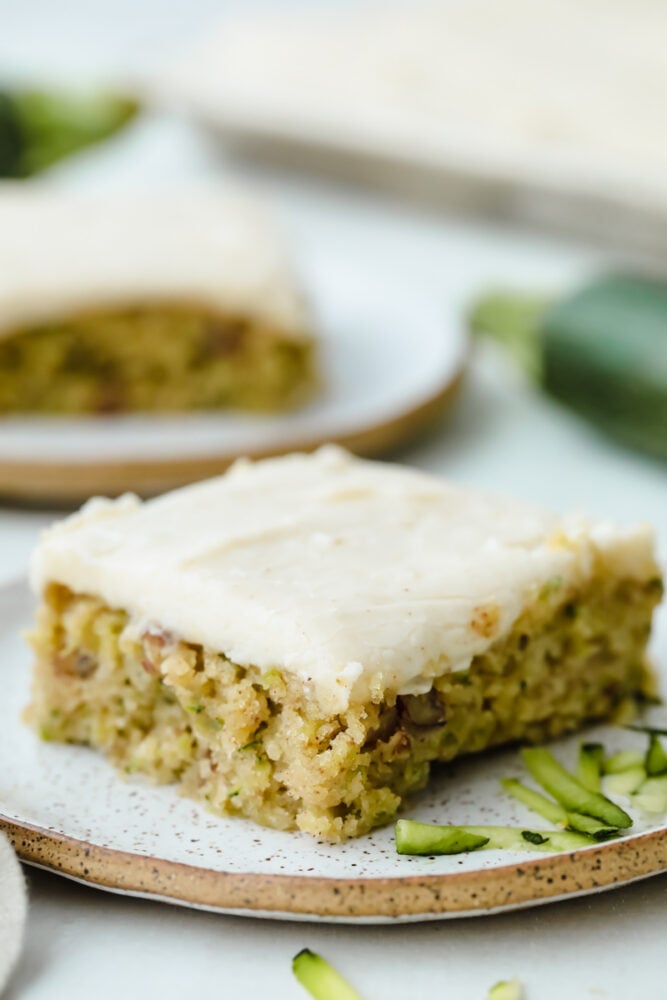
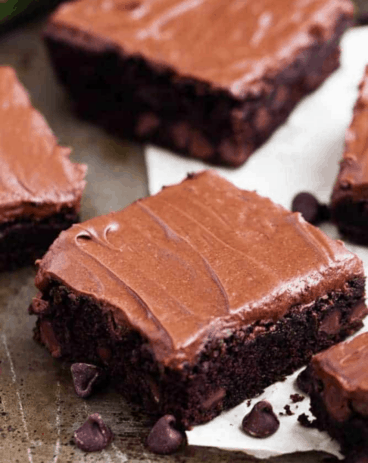
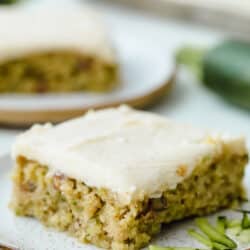
Zucchini bars cut into squares.

Zucchini Bars Recipe

Right about this time the gardens start to become taken over by zucchini. There are so many great recipes to make zucchini with. Zucchini is my favorite vegetable in the garden. I love them sautéed as a side, I love them in quick bread, and I especially loved them in these bars. If you don’t have a garden full of zucchini, go to the store right now and buy some. These zucchini bars are so worth it!

These zucchini bars were so moist and perfect. Packed with two whole cups of zucchini. The best part of these dessert bars was watching my picky eater who hates all foods devour them. It just puts a smile on my face to sneak veggies into recipes. These were hands-down THE best zucchini bars that I have had. But let me tell you about my very favorite part. The browned butter frosting. This zucchini bars recipe was originally inspired by these banana bread bars. Mostly for the browned butter frosting. Browning the butter is just one extra step that takes boring old frosting to mind-blowing. It gives it a nutty flavor and complements the bars perfectly.

Ingredients For Brown Butter Zucchini Bar

Zucchini bars are so simple to make with pantry staple ingredients! It all comes together quickly and easily with just a few steps. For complete ingredient listing and measurements, see the recipe card below.

  • Granulated sugar: Adds the sweetness to the zucchini.
  • Vegetable oil: Add moisture and lightness to the cake.
  • Eggs: Have the eggs at room temperature for better mixing.
  • All purpose flour: The flour provides structure for the bars.
  • Baking powder: This is the rising agent to help them be fluffy.
  • Salt: Salt balances the sweet.
  • Ground Cinnamon: Cinnamon is the perfect spice for zucchini.
  • Shredded zucchini about 3 medium: Even extra large zucchini will work for this recipe.
  • Pecans chopped: Give the zucchini bars texture and crunch.

Brown Butter Frosting

This brown butter frosting recipe is one of the best! It takes these zucchini bars to the next level. For all measurements see the recipe card below.

  • Butter: You have to use real unsalted butter for the flavor.
  • Powdered sugar: Gives the frosting its sweetness.
  • Vanilla: Adds flavor that goes with the zucchini bars.
  • Milk: Add more or less to thin it out to desired consistency.

How to Make Zucchini Bars with Browned Butter

In three simple steps, you will have the perfect combination of sweet and savory dessert. Use up your zucchini from your garden in this zucchini bar recipe. Feed a crowd with this summertime dessert!

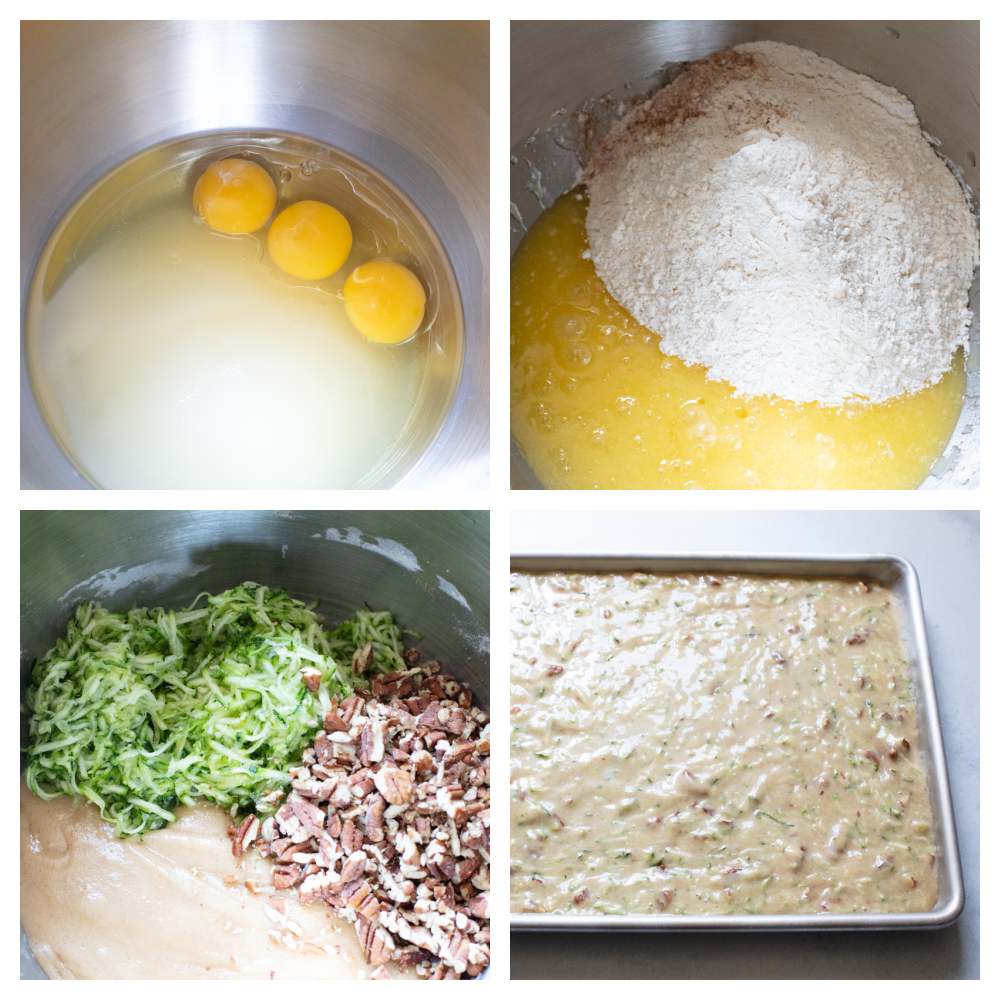
  1. Prep and mix: Preheat oven to 350 degrees and grease a 15x10x1 inch pan. In a medium mixing bowl, add flour, baking powder, salt, and cinnamon. Set aside.
  2. Wet ingredients: In a mixer, add sugar, oil and eggs and mix until smooth. Add the dry ingredients to the wet ingredients until incorporated.
  3. Bake: Stir in zucchini and chopped pecans. Spread evenly in prepared pan. Cook for 30-40 minutes or until toothpick inserted in center comes clean. Let bars cool completely.
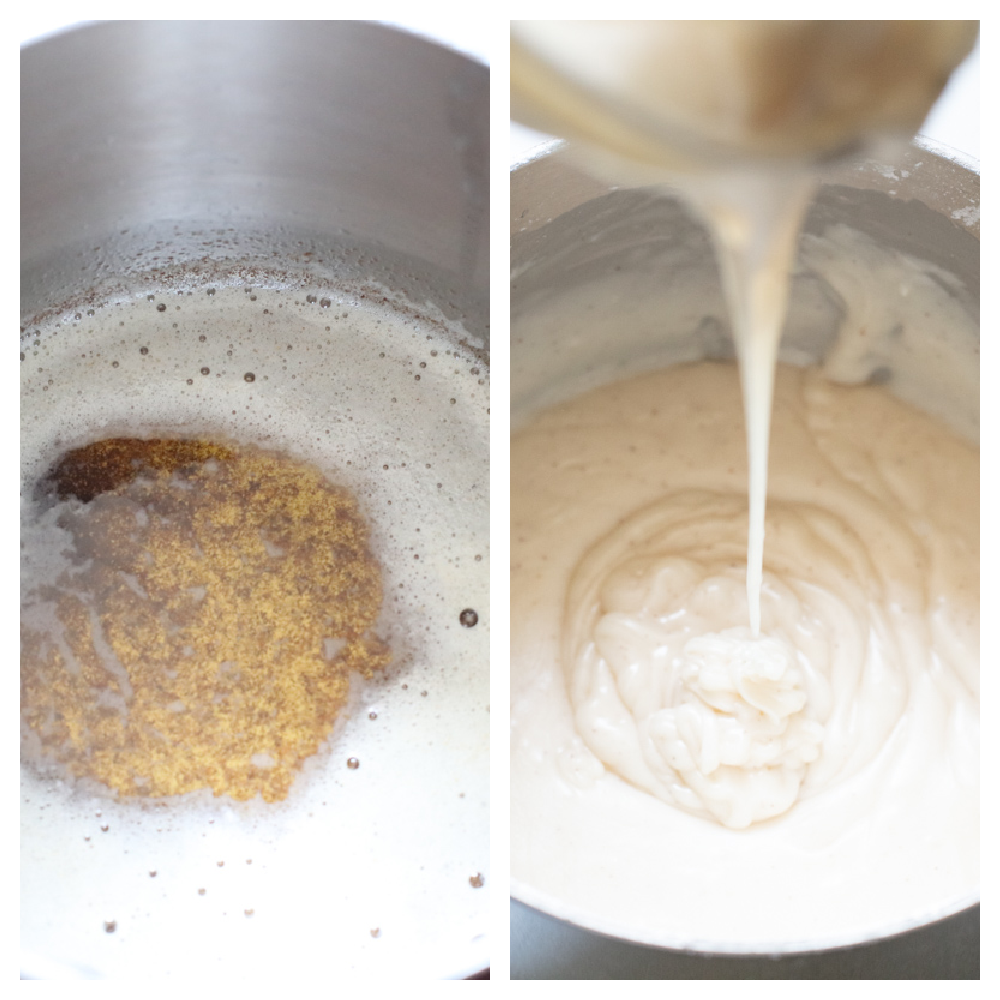
  4. Make Frosting: To make the brown butter frosting, heat a medium sized saucepan to medium heat. Add butter and whisk until it turns brown. Add in powdered sugar, vanilla and milk. Stir together until smooth. Spread over cooled bars.
The process of making zucchini bars.

The Best Zucchini Bars Tips

These are decadent, luscious, and easy-to-make dessert bars. Zucchini is so easy to shred and prepare for this simple zucchini bar recipe. Add in nuts or chocolate chips even to make it a variety of zucchini bars!

  • Zucchini: When shredding your zucchini do it finely, especially if you are worried about kids figuring out what’s hiding in their dessert. The smaller the easier it is to hide. You can also peel the zucchini, but it isn’t necessary. Do not to squeeze out any extra liquid. You want the moisture to create the best bars ever.
  • Pecans: If you do not like pecans you can leave them out or use walnuts.
Making the brown butter frosting.

How To Brown Butter

Don’t be scared by browning butter, it is super simple and foolproof if you follow these tips. To get the best-browned butter you really need to use unsalted butter. There are several reasons you want to use unsalted butter. First, unsalted butter is going to be fresher. Salt acts as a preservative so salted butter will have a longer shelf life, meaning unsalted will be fresher.  

  • Use a light colored pan:  You want to be able to see the brown bits form at the bottom of the pan. Using a dark colored pan will prevent you from seeing when the those have formed and this is a key clue to when your butter is done. Those dark specks are the toasted milk solids that bring the flavor, so don’t leave them behind.
  • Don’t Stop Stirring: This will make sure your butter cooks evenly and will help it from going from brown to burnt too fast, which can happen.
  • Cut the butter into pieces: Again you want it to cook evenly and cutting it will help it do so.
  • Remove from heat and pan: Once your butter has foamed, turned golden brown and the brown specks form, you want to remove it from the heat. Transfer the butter to a different pan as well or as in this case add something to the pan. This will help the butter stop cooking so it doesn’t go from browned to burnt.
  • Smell: It should have a buttery, nutty rich smell as well.
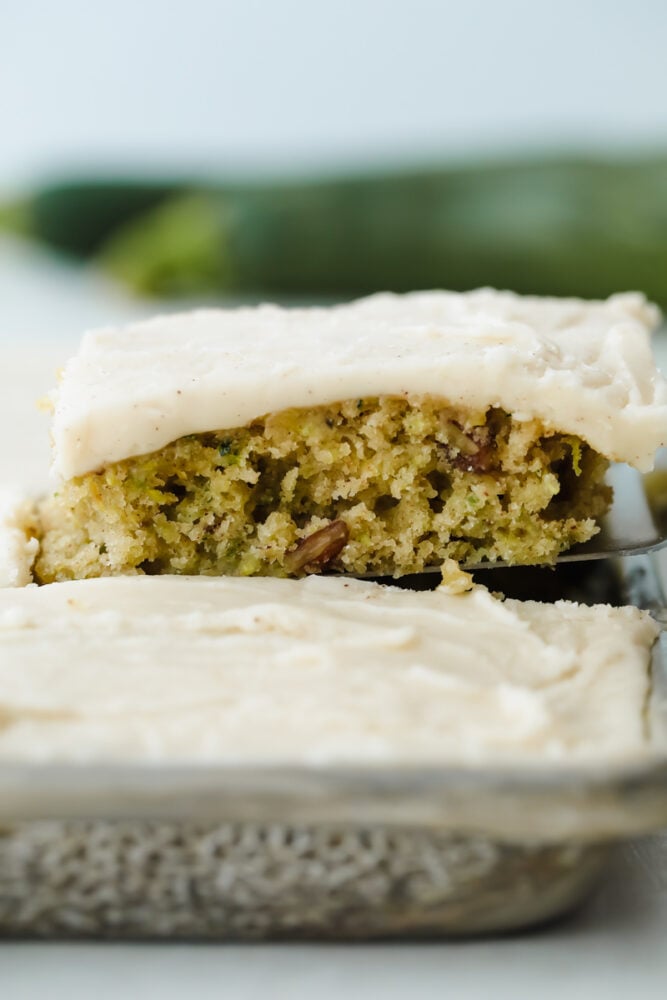
Taking a slice out of zucchini bars.

How to Store Zucchini Dessert Bars

Zucchini bars with butter frosting will keep at room temperature for up to 3 days. They will last even longer in the fridge up to 10 days. You can also freeze them. Refrigerate the bars first then cut into bars and place in freezer-safe bags.

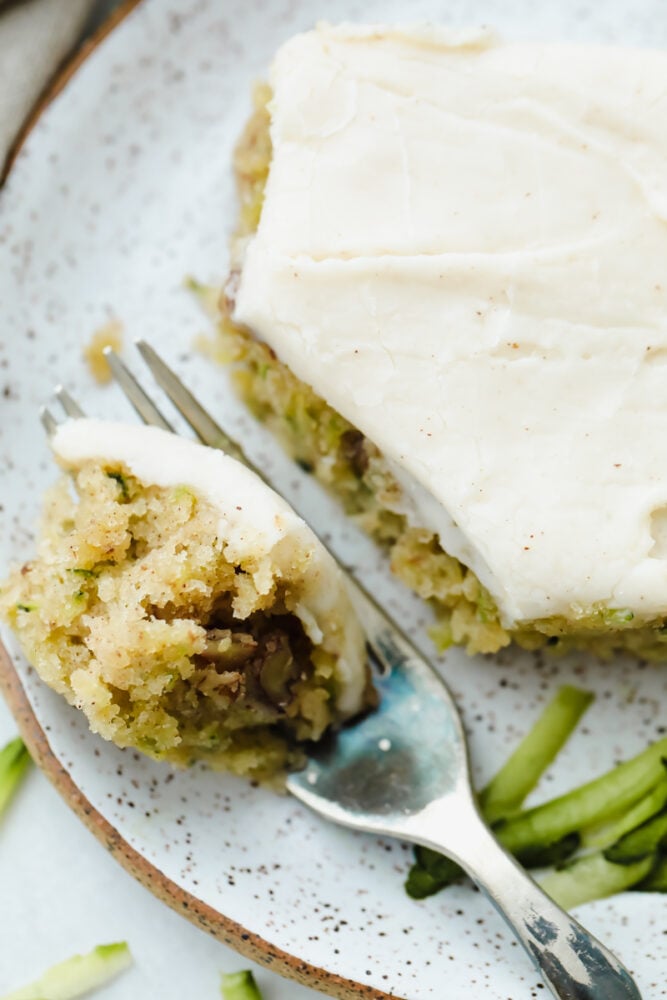
Using a fork to cut the zucchini bar.
Print

Zucchini Bars with Brown Butter Frosting

Zucchini Bars with Brown Butter Frosting is deliciously moist and absolutely heavenly. This is one of the best ways to use up those extra summer zucchini.
Course Dessert
Cuisine American
Keyword bar recipes, zucchini bars, zucchini recipes
Prep Time 20 minutes
Cook Time 30 minutes
Total Time 50 minutes
Servings 24 Bars
Calories 292kcal
Author Alyssa Rivers

Ingredients

  • 1 1/2 cups granulated sugar
  • 1 cup vegetable oil
  • 3 large eggs
  • 2 cups all purpose flour
  • 1 teaspoon baking powder
  • 1/2 teaspoon salt
  • 1 1/2 teaspoons ground cinnamon
  • 2 cups shredded zucchini about 3 medium
  • 1 1/2 cups pecans chopped

Brown Butter Frosting:

  • 6 tablespoons butter
  • 6 cups powdered sugar
  • 1 teaspoon vanilla
  • 8 to 10 tablespoons milk

Instructions

  • Preheat oven to 350 degrees and grease a 15x10x1 inch pan. In a medium mixing bowl, add flour, baking powder, salt, and cinnamon. Set aside.
  • In a mixer, add sugar, oil, and eggs and mix until smooth. Add the dry ingredients to the wet ingredients until incorporated.
  • Stir in zucchini and chopped pecans. Spread evenly in prepared pan. Cook for 30-40 minutes or until a toothpick inserted in the center comes clean. Let bars cool completely.

To make the Brown Butter Frosting

  • Heat a medium-sized saucepan to medium heat. Add butter and whisk until it turns brown. Add in powdered sugar, vanilla, and milk. Stir together until smooth. Spread over cooled bars.

Notes

Updated on July 27, 2021
Originally Posted on July 27, 2014

Nutrition

Calories: 292kcal | Carbohydrates: 52g | Protein: 3g | Fat: 9g | Saturated Fat: 3g | Cholesterol: 28mg | Sodium: 85mg | Potassium: 95mg | Fiber: 1g | Sugar: 43g | Vitamin A: 149IU | Vitamin C: 2mg | Calcium: 26mg | Iron: 1mg


from The Recipe Critic https://ift.tt/3f2aCMe
https://ift.tt/2USnNbG

सोमवार, 26 जुलाई 2021

Amish Friendship Bread

Amish Friendship Bread is the gift that keeps on giving! This simple starter yields sweet, delicious bread every time!

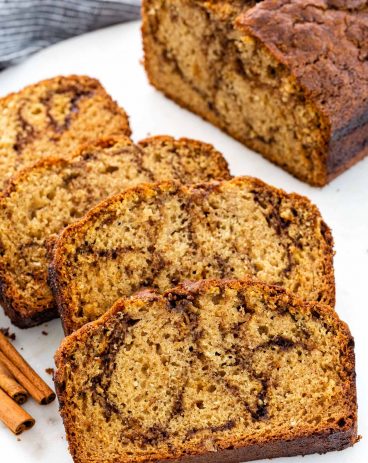
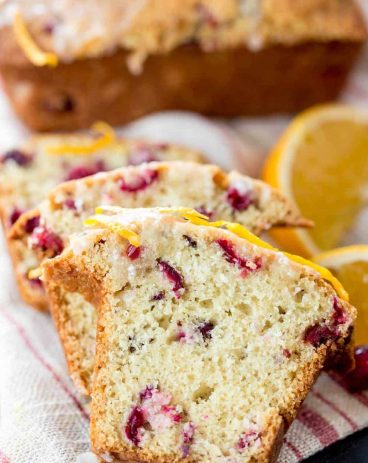
What is better than moist, sweet bread fresh out of the oven? Easy apple, zucchini, and lemon are more delicious sweet bread recipes for an anytime treat!

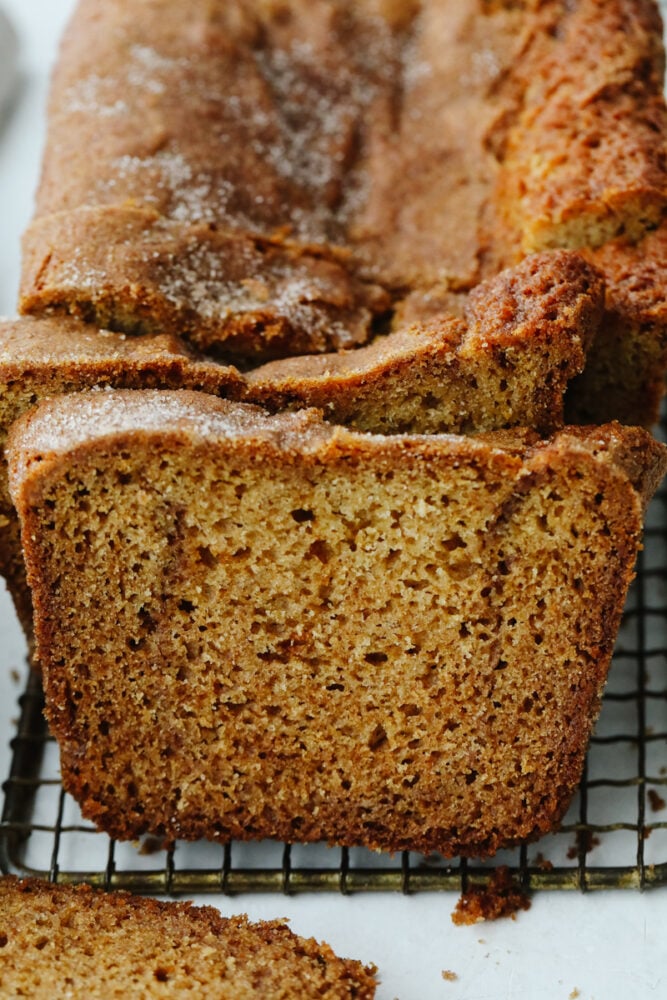
Close-up of Amish Friendship Bread, sliced.

Simple Amish Friendship Bread Recipe

Amish Friendship Bread begins as a starter that, once developed, can easily be shared with friends and family to build a sense of giving and community. Unlike a sourdough starter, which requires meticulous feeding and growing conditions, Amish Friendship Bread starts in a ziplock bag and only requires a daily mash to develop. At around day 10, your starter is ready for either baking or gifting! It is a delicious way to connect with others.

In my opinion, slowly-developed yeast always makes a better bread with a more defined flavor and texture. This, plus the sweet, cinnamon flavors added during the baking process make Amish Friendship Bread a winner! With just a few straightforward steps, I know that you will be able to develop a healthy starter and make delicious, sweet bread as well! The best part is you can share your amazing creation with neighbors, friends, and family to keep the delicious chain going!

Amish Friendship Bread and Starter Ingredients

Not only is this Amish friendship bread straightforward and simple to make, but it also utilizes a lot of basic ingredients! Here are the ingredients for the starter. For all measurement, amounts see the recipe card below.

  • Warm Water: Yeast activates better in warm conditions than cold, so we add warm water to the mixture.
  • Dry Yeast: I use active dry yeast in this recipe.
  • Flour: All-purpose flour works best in this recipe for a light, fluffy texture.
  • Granulated Sugar: Adds sweetness to the starter. Amish Friendship Bread starters are typically much sweeter than others.
  • Milk: You will want milk that is 2% or higher in fat.

Amish Friendship Bread Ingredients

Using your friendship bread starter you will create the best bread that is sweet and savory in every bite. For all ingredient listings, see the recipe card below for the printable recipe card.

  • Friendship Bread Starter: You can use half of your starter and either save or give away the other portion.
  • Vegetable Oil: Used to add moisture to your mix and bind fats together.
  • Granulated Sugar: To add extra sweetness to your bread.
  • Eggs: Binding agent that gives your bread structure
  • Vanilla: For flavor- I like using pure vanilla extract for the best flavor.
  • Baking Powder and Baking Soda: Used to keep your bread fluffy and light.
  • Salt: To enhance flavors.
  • Cinnamon: Adds a woody, nutty flavor that pairs perfectly with the sweetness of the bread.
  • All-Purpose Flour: All-purpose flour works best for a light texture. Flour with a high protein content can make your bread too dense.

How to Make Amish Friendship Bread and Starter

An important thing to keep in mind is that no two starters are the same. Don’t be alarmed if your starter looks or smells a little different than your neighbor’s. They may have used different flour, milk, or just have completely different conditions in their kitchen. As long as you are consistent with mashing your starter and feeding on day 6, you should have healthy yeast ready to make delicious Amish friendship bread!

  1. Add Yeast to Warm Water: Mix the packet of yeast into the warm water and let sit for about 5 minutes until frothy.
  2. Mix Flour and Sugar: In a glass bowl, mix the flour and sugar together. Mix in the milk and then the yeast mixture. Pour into a gallon ziplock bag and leave out on the counter top.
  3. Day 1-5: For the next 5 days, be sure to mash the ziplock bag around, encouraging the yeast to activate.
  4. Feed on Day 6: On the 6th day, add 1 cup of flour, 1 cup of sugar, and 1 cup of milk to the ziplock bag. Close and mash around until all combined.
  5. Days 7-9: Continue to mash around once a day for days 7-9. On the 10th day your starter is ready for baking or gifting. Reserve 1 cup for baking, 1 cup for gifting. If you would like to keep the starter going, add 1 cup flour, 1 cup sugar, and 1 cup milk to the remaining starter and mix around. This starts the cycle over again and day 10 becomes day 1.

How to Make Amish Bread from Scratch

  1. Preheat Oven and Prep Pans: Preheat oven to 325°. Grease two 9×5 loaf pans and set aside.
  2. Prepare Mixtures: In a glass bowl mix the starter, oil, granulated sugar, eggs and vanilla together. In another bowl mix the baking powder, baking soda, salt, cinnamon and flour together.
  3. Mix Wet and Dry Ingredients: Pour the liquid mixture over the dry ingredients and stir to combine.
  4. Fill Pans and Add Toppings: Fill the two prepared pans with ¼ of the batter, using half in total. Mix together the cinnamon and sugar and sprinkle half of it over the top of the batter in the pans. Split the remaining batter evenly between the two pans and sprinkle the remaining cinnamon sugar over the top.
  5. Bake: Bake for 40-50 minutes, or until a toothpick comes out clean. Allow to cool in the pan.
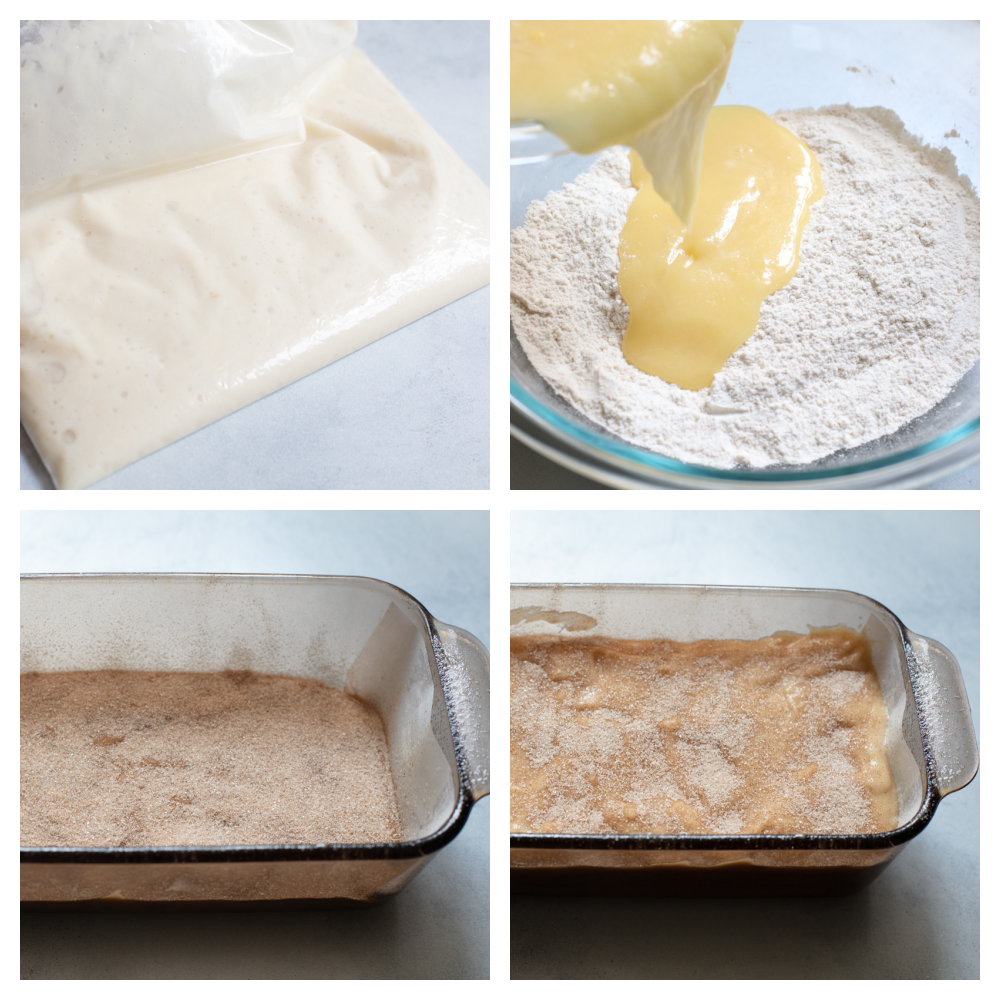
The process of making amish friendship bread.

Amish Friendship Bread Recipe Tips and Variations

Use these easy tips to get the best result out of your Amish friendship bread! This bread is so good and will be fun to make with all your friends and family!

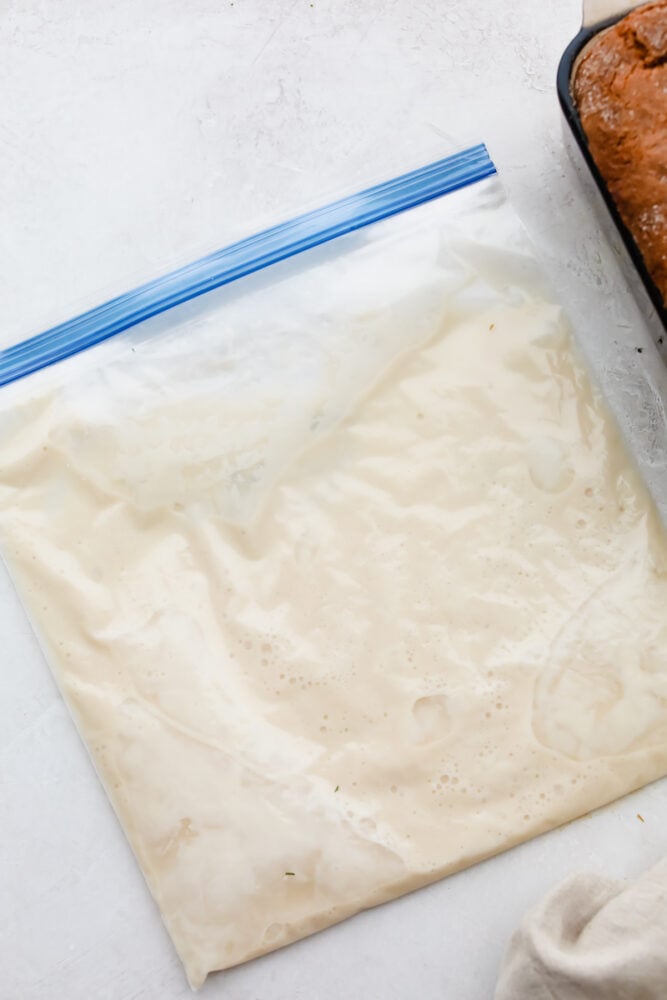
  • Appearance: A healthy starter should be light and milky with some bubbles present.
  • Smell: Don’t be alarmed if your starter smells like acetone or alcohol. This just means it needs to be fed. A starter that is ready for baking should smell yeasty and bread-like.
  • Mold: Mold usually develops if your starter is left in the fridge for too long without being fed. If you see any patches of pink, this means your starter is moldy and needs to be thrown away.
  • Activating Frozen Starters: The great thing about Amish friendship bread starters is that they can easily be frozen and just as easily be reactivated. Even after years! Allow your starter to thaw at room temperature and then treat it as if it is day 6 and feed. From there, follow the rest of the steps of the recipe until it is ready for baking again.
  • Using a Bowl Instead of a Bag: Instead of making your starter in a ziplock bag, you can make it in a bowl covered with plastic wrap. This works great if you are making larger quantities of starter.
  • Adding Additional Flavor: Once you are ready to bake, you can customize your bread by adding things like walnuts, pecans, or dried fruit. You can also add a box of pudding to your bread dough for more flavor and fat content, resulting in very moist bread.
A bag of healthy Amish Friendship Bread starter.

Storing Leftover Amish Friendship Bread and Starter

  • At Room Temperature: Baked Amish friendship bread keeps best at room temperature, wrapped in plastic wrap. It will stay good for up to 4 days.
  • In the Refrigerator: You can easily keep your starter in the fridge if you plan on baking with it in the near future. Keep in mind that while the colder temperatures slow yeast development, you still need to feed your starter every once in a while or it will develop mold.
  • In the Freezer: If you want to be completely hands-off, store your starter in the freezer. It can last for years. To reactivate, simply thaw and then start a feeding/mashing regimen again.
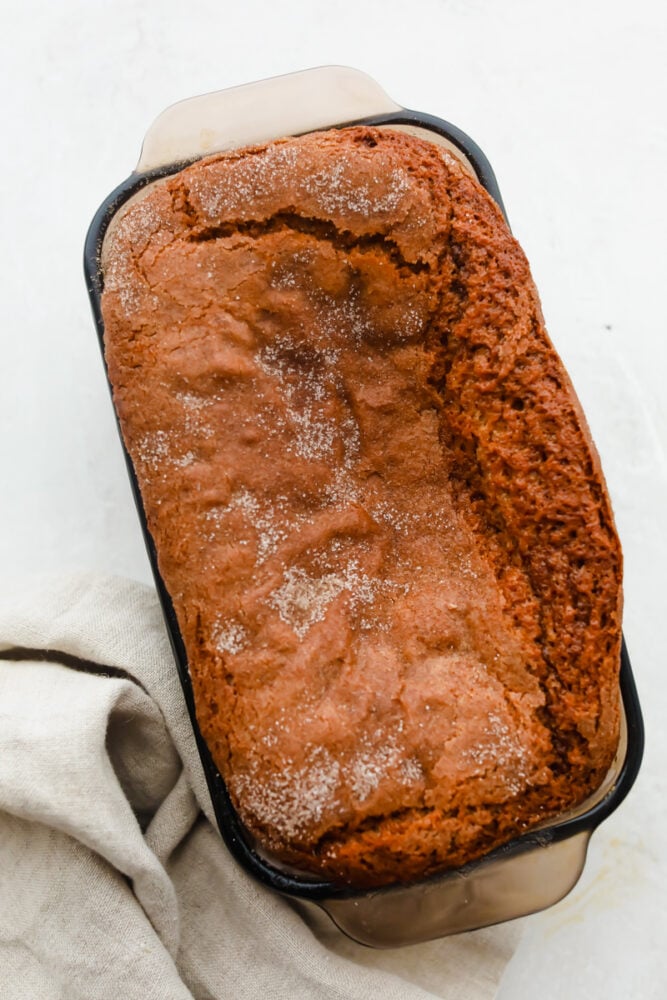
A loaf of Amish Friendship Bread, sprinkled with cinnamon sugar.
Print

Amish Friendship Bread

Amish Friendship Bread is the gift that keeps on giving! This simple starter yields sweet, delicious bread every time!
Course Bread, Side Dish
Cuisine Amish
Keyword amish friendship bread, amish friendship bread recipe
Prep Time 10 days 20 minutes
Cook Time 50 minutes
Total Time 10 days 1 hour 10 minutes
Servings 12 slices of bread
Calories 542kcal
Author Alyssa Rivers

Ingredients

Starter

  • 1/4 cup warm water
  • 1 packet active dry yeast
  • 2 cups all purpose flour divided
  • 2 cups granulated sugar divided
  • 2 cups milk 2% or higher in fat, divided

Bread

  • 1 cup friendship bread starter
  • ¾ cup vegetable oil
  • 1 cup granulated sugar
  • 3 large eggs
  • 1 teaspoon vanilla
  • 1 ½ teaspoon baking powder
  • 1 teaspoon baking soda
  • ½ teaspoon salt
  • 1 teaspoon cinnamon
  • 2 cups all purpose flour
  • 2 ½ teaspoon cinnamon
  • ½ cup granulated sugar

Instructions

Starter

  • Mix the packet of yeast into the warm water and let sit for about 5 minutes until frothy.
  • In a glass bowl, mix the flour and sugar together. Mix in the milk and then the yeast mixture. Pour into a gallon ziplock bag and leave it out on the countertop.
  • For the next 5 days, be sure to mash the ziplock bag around, encouraging the yeast to activate.
  • On the 6th day, add 1 cup of flour, 1 cup of sugar, and 1 cup of milk to the ziplock bag. Close and mash around until all are combined.
  • Continue to mash around once a day for days 7-9. On the 10th day, your starter is ready for baking or gifting. Reserve 1 cup for baking, 1 cup for gifting. If you would like to keep the starter going, add 1 cup flour, 1 cup sugar, and 1 cup milk to the remaining starter and mix around. This starts the cycle over again and day 10 becomes day 1.

Bread

  • Preheat oven to 325°. Grease two 9×5 loaf pans and set them aside.
  • In a glass bowl mix the starter, oil, granulated sugar, eggs, and vanilla together. In another bowl mix the baking powder, baking soda, salt, cinnamon, and flour together.
  • Pour the liquid mixture over the dry ingredients and stir to combine.
  • Fill the two prepared pans with ¼ of the batter, using half in total. Mix together the cinnamon and sugar and sprinkle half of it over the top of the batter in the pans. Split the remaining batter evenly between the two pans and sprinkle the remaining cinnamon sugar over the top.
  • Bake for 40-50 minutes, or until a toothpick comes out clean. Allow cooling in the pan.

Nutrition

Calories: 542kcal | Carbohydrates: 93g | Protein: 7g | Fat: 17g | Saturated Fat: 12g | Polyunsaturated Fat: 1g | Monounsaturated Fat: 2g | Trans Fat: 1g | Cholesterol: 51mg | Sodium: 226mg | Potassium: 176mg | Fiber: 2g | Sugar: 60g | Vitamin A: 135IU | Vitamin C: 1mg | Calcium: 88mg | Iron: 2mg


from The Recipe Critic https://ift.tt/370iJo3
https://ift.tt/3kUSxDB