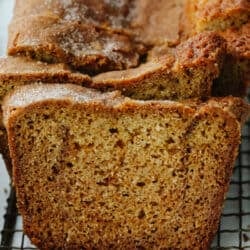
Amish Friendship Bread is the gift that keeps on giving! This simple starter yields sweet, delicious bread every time!
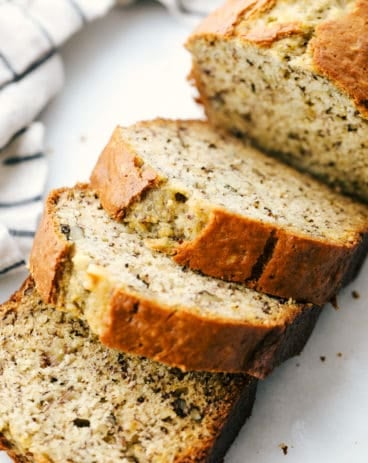
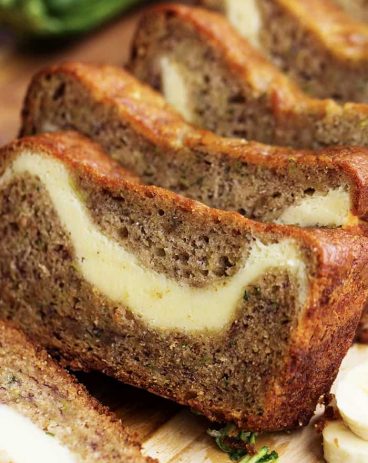
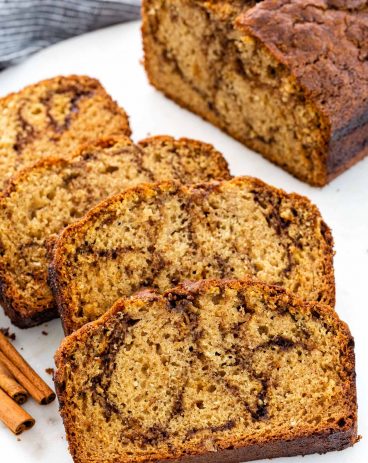
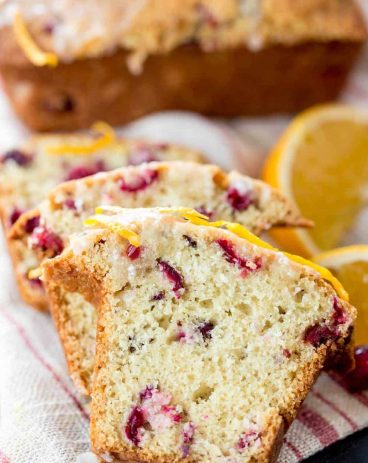
What is better than moist, sweet bread fresh out of the oven? Easy apple, zucchini, and lemon are more delicious sweet bread recipes for an anytime treat!

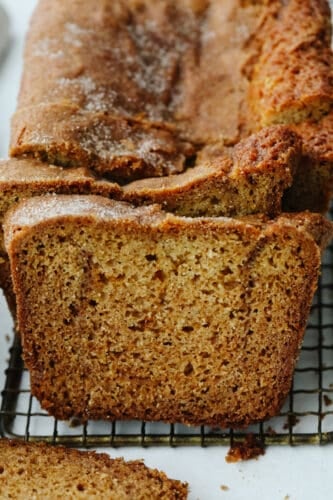
Simple Amish Friendship Bread Recipe
Amish Friendship Bread begins as a starter that, once developed, can easily be shared with friends and family to build a sense of giving and community. Unlike a sourdough starter, which requires meticulous feeding and growing conditions, Amish Friendship Bread starts in a ziplock bag and only requires a daily mash to develop. At around day 10, your starter is ready for either baking or gifting! It is a delicious way to connect with others.
In my opinion, slowly-developed yeast always makes a better bread with a more defined flavor and texture. This, plus the sweet, cinnamon flavors added during the baking process make Amish Friendship Bread a winner! With just a few straightforward steps, I know that you will be able to develop a healthy starter and make delicious, sweet bread as well! The best part is you can share your amazing creation with neighbors, friends, and family to keep the delicious chain going!
Amish Friendship Bread and Starter Ingredients
Not only is this Amish friendship bread straightforward and simple to make, but it also utilizes a lot of basic ingredients! Here are the ingredients for the starter. For all measurement, amounts see the recipe card below.
- Warm Water: Yeast activates better in warm conditions than cold, so we add warm water to the mixture.
- Dry Yeast: I use active dry yeast in this recipe.
- Flour: All-purpose flour works best in this recipe for a light, fluffy texture.
- Granulated Sugar: Adds sweetness to the starter. Amish Friendship Bread starters are typically much sweeter than others.
- Milk: You will want milk that is 2% or higher in fat.
Amish Friendship Bread Ingredients
Using your friendship bread starter you will create the best bread that is sweet and savory in every bite. For all ingredient listings, see the recipe card below for the printable recipe card.
- Friendship Bread Starter: You can use half of your starter and either save or give away the other portion.
- Vegetable Oil: Used to add moisture to your mix and bind fats together.
- Granulated Sugar: To add extra sweetness to your bread.
- Eggs: Binding agent that gives your bread structure
- Vanilla: For flavor- I like using pure vanilla extract for the best flavor.
- Baking Powder and Baking Soda: Used to keep your bread fluffy and light.
- Salt: To enhance flavors.
- Cinnamon: Adds a woody, nutty flavor that pairs perfectly with the sweetness of the bread.
- All-Purpose Flour: All-purpose flour works best for a light texture. Flour with a high protein content can make your bread too dense.
How to Make Amish Friendship Bread and Starter
An important thing to keep in mind is that no two starters are the same. Don’t be alarmed if your starter looks or smells a little different than your neighbor’s. They may have used different flour, milk, or just have completely different conditions in their kitchen. As long as you are consistent with mashing your starter and feeding on day 6, you should have healthy yeast ready to make delicious Amish friendship bread!
- Add Yeast to Warm Water: Mix the packet of yeast into the warm water and let sit for about 5 minutes until frothy.
- Mix Flour and Sugar: In a glass bowl, mix the flour and sugar together. Mix in the milk and then the yeast mixture. Pour into a gallon ziplock bag and leave out on the counter top.
- Day 1-5: For the next 5 days, be sure to mash the ziplock bag around, encouraging the yeast to activate.
- Feed on Day 6: On the 6th day, add 1 cup of flour, 1 cup of sugar, and 1 cup of milk to the ziplock bag. Close and mash around until all combined.
- Days 7-9: Continue to mash around once a day for days 7-9. On the 10th day your starter is ready for baking or gifting. Reserve 1 cup for baking, 1 cup for gifting. If you would like to keep the starter going, add 1 cup flour, 1 cup sugar, and 1 cup milk to the remaining starter and mix around. This starts the cycle over again and day 10 becomes day 1.
How to Make Amish Bread from Scratch
- Preheat Oven and Prep Pans: Preheat oven to 325°. Grease two 9×5 loaf pans and set aside.
- Prepare Mixtures: In a glass bowl mix the starter, oil, granulated sugar, eggs and vanilla together. In another bowl mix the baking powder, baking soda, salt, cinnamon and flour together.
- Mix Wet and Dry Ingredients: Pour the liquid mixture over the dry ingredients and stir to combine.
- Fill Pans and Add Toppings: Fill the two prepared pans with ¼ of the batter, using half in total. Mix together the cinnamon and sugar and sprinkle half of it over the top of the batter in the pans. Split the remaining batter evenly between the two pans and sprinkle the remaining cinnamon sugar over the top.
- Bake: Bake for 40-50 minutes, or until a toothpick comes out clean. Allow to cool in the pan.

Amish Friendship Bread Recipe Tips and Variations
Use these easy tips to get the best result out of your Amish friendship bread! This bread is so good and will be fun to make with all your friends and family!
- Appearance: A healthy starter should be light and milky with some bubbles present.
- Smell: Don’t be alarmed if your starter smells like acetone or alcohol. This just means it needs to be fed. A starter that is ready for baking should smell yeasty and bread-like.
- Mold: Mold usually develops if your starter is left in the fridge for too long without being fed. If you see any patches of pink, this means your starter is moldy and needs to be thrown away.
- Activating Frozen Starters: The great thing about Amish friendship bread starters is that they can easily be frozen and just as easily be reactivated. Even after years! Allow your starter to thaw at room temperature and then treat it as if it is day 6 and feed. From there, follow the rest of the steps of the recipe until it is ready for baking again.
- Using a Bowl Instead of a Bag: Instead of making your starter in a ziplock bag, you can make it in a bowl covered with plastic wrap. This works great if you are making larger quantities of starter.
- Adding Additional Flavor: Once you are ready to bake, you can customize your bread by adding things like walnuts, pecans, or dried fruit. You can also add a box of pudding to your bread dough for more flavor and fat content, resulting in very moist bread.

Storing Leftover Amish Friendship Bread and Starter
- At Room Temperature: Baked Amish friendship bread keeps best at room temperature, wrapped in plastic wrap. It will stay good for up to 4 days.
- In the Refrigerator: You can easily keep your starter in the fridge if you plan on baking with it in the near future. Keep in mind that while the colder temperatures slow yeast development, you still need to feed your starter every once in a while or it will develop mold.
- In the Freezer: If you want to be completely hands-off, store your starter in the freezer. It can last for years. To reactivate, simply thaw and then start a feeding/mashing regimen again.

More Delicious Sweet Breads
Amish Friendship Bread
Ingredients
Starter
- 1/4 cup warm water
- 1 packet active dry yeast
- 2 cups all purpose flour divided
- 2 cups granulated sugar divided
- 2 cups milk 2% or higher in fat, divided
Bread
- 1 cup friendship bread starter
- ¾ cup vegetable oil
- 1 cup granulated sugar
- 3 large eggs
- 1 teaspoon vanilla
- 1 ½ teaspoon baking powder
- 1 teaspoon baking soda
- ½ teaspoon salt
- 1 teaspoon cinnamon
- 2 cups all purpose flour
- 2 ½ teaspoon cinnamon
- ½ cup granulated sugar
Instructions
Starter
-
Mix the packet of yeast into the warm water and let sit for about 5 minutes until frothy.
-
In a glass bowl, mix the flour and sugar together. Mix in the milk and then the yeast mixture. Pour into a gallon ziplock bag and leave it out on the countertop.
-
For the next 5 days, be sure to mash the ziplock bag around, encouraging the yeast to activate.
-
On the 6th day, add 1 cup of flour, 1 cup of sugar, and 1 cup of milk to the ziplock bag. Close and mash around until all are combined.
-
Continue to mash around once a day for days 7-9. On the 10th day, your starter is ready for baking or gifting. Reserve 1 cup for baking, 1 cup for gifting. If you would like to keep the starter going, add 1 cup flour, 1 cup sugar, and 1 cup milk to the remaining starter and mix around. This starts the cycle over again and day 10 becomes day 1.
Bread
-
Preheat oven to 325°. Grease two 9×5 loaf pans and set them aside.
-
In a glass bowl mix the starter, oil, granulated sugar, eggs, and vanilla together. In another bowl mix the baking powder, baking soda, salt, cinnamon, and flour together.
-
Pour the liquid mixture over the dry ingredients and stir to combine.
-
Fill the two prepared pans with ¼ of the batter, using half in total. Mix together the cinnamon and sugar and sprinkle half of it over the top of the batter in the pans. Split the remaining batter evenly between the two pans and sprinkle the remaining cinnamon sugar over the top.
-
Bake for 40-50 minutes, or until a toothpick comes out clean. Allow cooling in the pan.
Nutrition
from The Recipe Critic https://ift.tt/370iJo3
https://ift.tt/3kUSxDB