रविवार, 12 दिसंबर 2021

Turkey Pot Pie

This turkey pot pie is a hearty and classic dinner! It has a flakey crust and a creamy, vegetable and turkey filling that your entire family will go crazy over!

If you love comforting dinners like this, then you must try out some of my favorite tried and true recipes like this Soup, Shepherds, and Chicken Pot Pie. They are all so delicious, I have a hard time choosing my favorite!
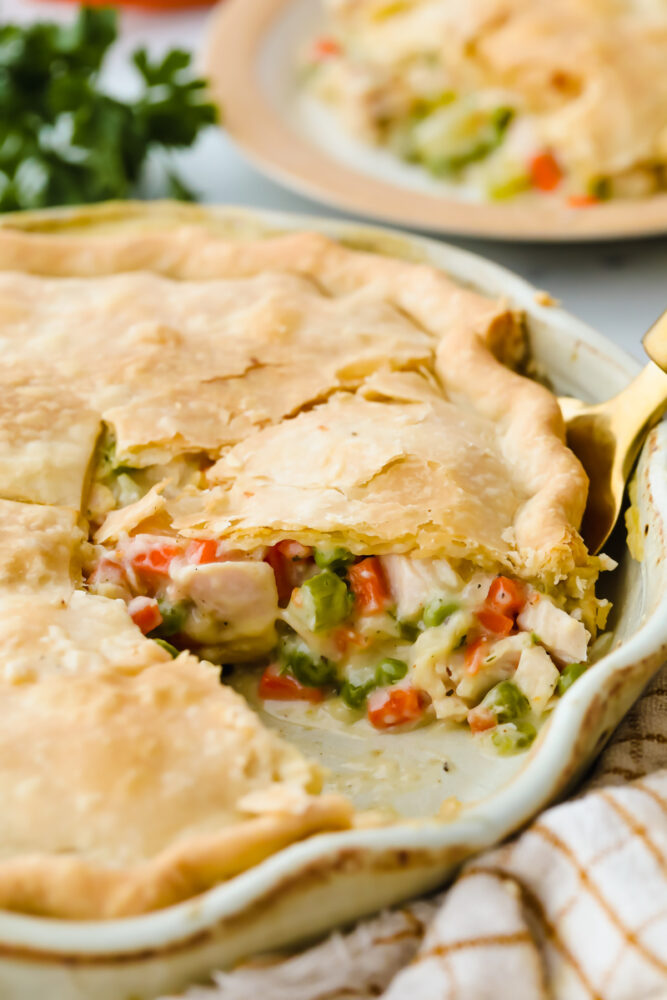
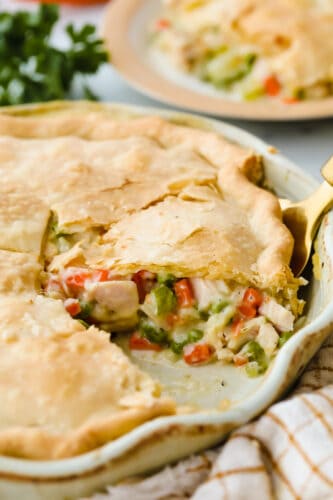
A turkey pot pie with a slice cut out of it.

Turkey Pot Pie

I am a turkey love so if I can find any excuse or way to cook it, then I will! This turkey pot pie is easily one of my favorite recipes to make. Especially if I have fresh turkey leftovers from Thanksgiving or Christmas! I mean you can’t beat a pie that is filled with flavorful veggies and cooked turkey! The recipe is so simple and it’s one that my whole family asks for.

Not only do I love that this is easy to make but it’s fast too! It takes less than an hour and that included baking time! While it’s cooking then you should make these mashed sweet potatoes, this asparagus, and this salad to go with it! I love how hearty and filling this pie is. You could even eat it on its own with no other sides and you would get everything that you needed out of just one dish! Try it out this holiday season, it’s a keeper!

Ingredients for Turkey Pot Pie

These ingredients are super simple! You can even leave out the turkey if you want to make this a vegetarian pie! See the recipe card at the bottom of the post for exact measurements.

Vegetable and Turkey Mixture

  • Pie crust: You can use a homemade pie crust or a store bought one for this turkey pot pie! Whichever you prefer.
  • Butter: The butter will mix up better if it’s at room temperature.
  • Onion: Dice up your onion into small pieces.
  • Celery: I like to chop up my celery into small, thin pieces.
  • Carrots: The carrots are my kids favorite part! They love cooked carrots!
  • Garlic: The minced garlic really brings out a fantastic flavor.
  • Dried thyme and parsley: I love the combintation of flavors that these two bring.
  • Cooked turkey: Shred up your turkey before putting it in the mixture.
  • Frozen peas: These will be added in very last!

Sauce

  • Butter: I used unsalted butter.
  • Flour: All purpose flour works great in this recipe!
  • Chicken broth: Instead of water, chicken broth gives a great added (and needed) flavor to the sauce.
  • Nutmeg: A secret ingredient that gives a delicious taste.
  • Salt and pepper: Use these as much or as little as you want, whatever amount you prefer!
  • Heavy cream: If you don’t have heavy cream then you can use half and half instead.

Let’s Bake a Pie!

This turkey pot pie only takes a few minutes to throw together! The hardest part is waiting for it to bake! But it’s worth it so go ahead and give it a try!

Vegetable/Turkey mixture

  1. Preheat oven and line dish with crust: Preheat oven to 375°F. Line a 9 or 10 inch pie dish with one of the packaged pie crusts. Set aside. The other crust will be saved for the top. 
  2. Cook vegetables in butter: Melt the butter in a large skillet over medium high heat. Add the onion, celery, and carrots. Then, cook until vegetables are tender, about 5 minutes.
  3. Mix in all the ingredients except the peas: Add the garlic and cook for 1 minute. Add the cooked shredded turkey. Then, stir all the ingredients together and cook for an additional minute. You can add a splash of chicken broth if the mixture seems a little dry. 
  4. Stir in peas: Stir in the frozen peas and then remove from heat and prepare the sauce for the turkey pot pie.

Sauce

  1. Mix butter and flour: In a large sauce pan, melt the butter over medium high heat. Gradually add the flour and stir into a paste. 
  2. Add chicken broth and seasonings: Add the chicken broth and whisk together until the sauce starts to thicken. Add the parsley, thyme, nutmeg, salt and pepper. Then, stir until all the ingredients are incoporated.
  3. Stir in cream and thicken: Stir in the heavy cream and then cook it over medium heat. Stir constantly until the sauce thickens.
  4. Combine with vegetable mixture: Pour the sauce over the vegetable/turkey mixture. Stir to combine.
  5. Add ingredients to crust, top with another crust: Fill the pie crust in the prepared pan. Top with the second pie crust and form pie edges. Cut and X in the middle of the crust with a knife.
  6. Bake and serve: Bake for 1 hour or until fully baked. Remove from oven and then let the turkey pot pie sit for 10 minutes before serving.
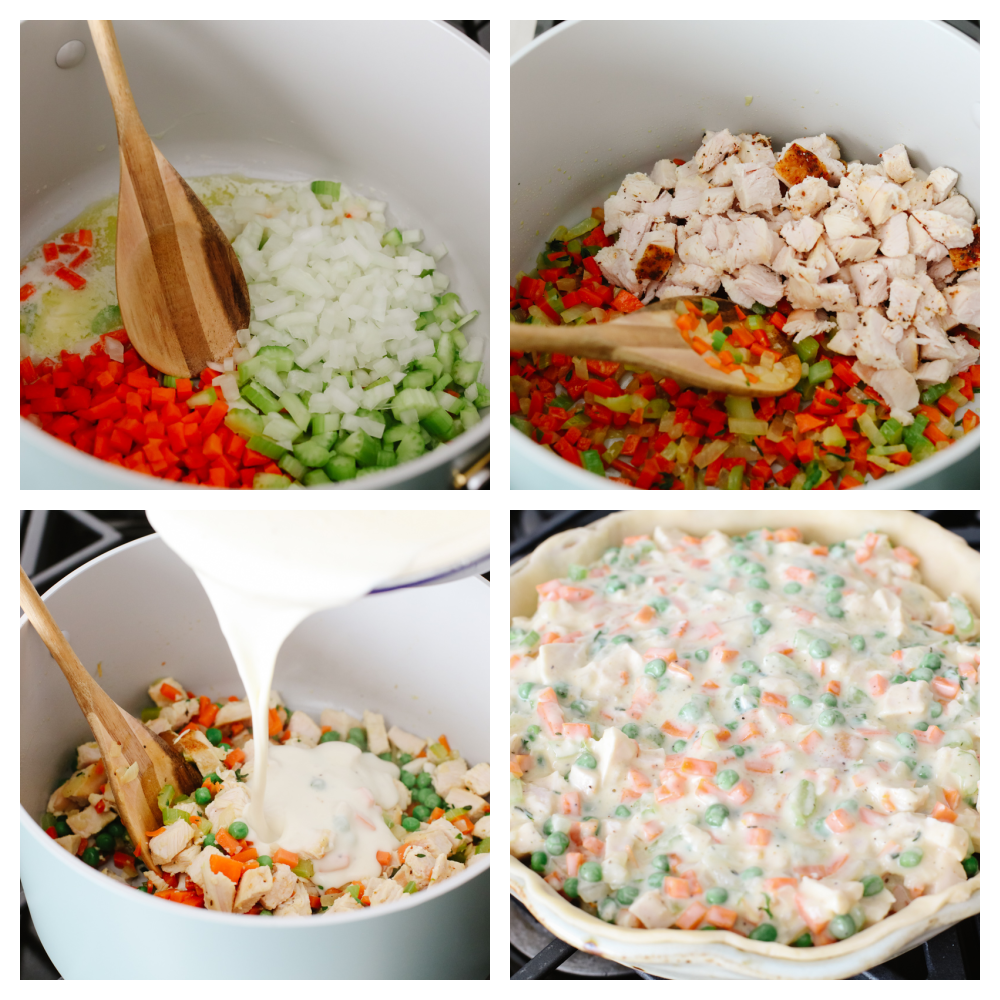
4 steps showing how to mix turkey and vegetables with the sauce and place it in the crust.

Variations

This turkey pot pie can be switched up to make it exactly how you want! Have leftover string beans? Cut those up and add them in! Whatever you do, it will taste amazing! Here are a few ideas.

  • Switch up the meat: This step is easy enough! If you have chicken then go ahead and use that instead of turkey. I do this all year long because chicken is super easy to make and have on hand!
  • Add in some potatoes: Dice up some cooked potatoes and add them into this pie! It gives it a delicious texture!
  • Use more veggies: Corn, broccoli, or any other vegetables that you love and have on hand can be used in this! Make sure that if they are fresh that you cook them to tender crisp before you add them into your sauce mixture!
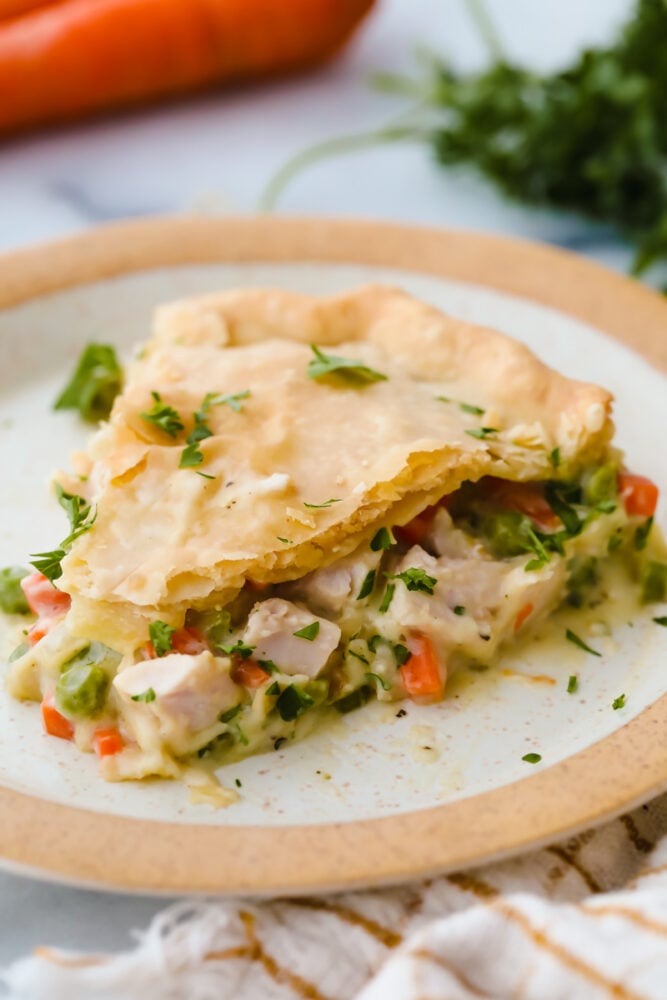
A slice of turkey pot pie on a plate.

How to Make Turkey Pot Pie Ahead of Time

If you are trying to meal prep, this is a fantastic meal to make ahead of time and freeze. Here is how you do it!

  1. Freeze: Make the pie as directed and let it cool completely. Then, cover it in plastic and then wrap it in some foil. Make sure to label the foil with the date. This can last in your freezer for up to 3 months!
  2. Reheat: Preheat your oven to 375 degrees. Unwrap your pie and cook it for 75-85 minutes until it is bubbly and golden.
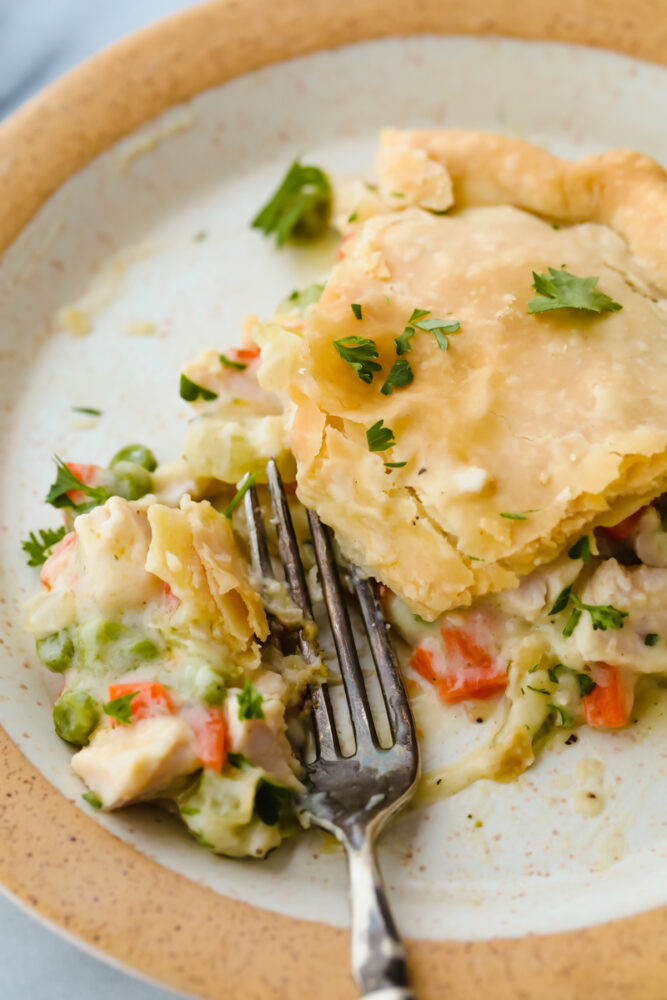
Turkey pot pie on a plate with a fork cutting into it.
Print

Turkey Pot Pie

This turkey pot pie is a hearty and classic dinner! It has a flakey crust and a creamy, vegetable and turkey filling that your entire family will go crazy over! 
Course Dinner
Cuisine American
Keyword pot pie, turkey pot pie
Prep Time 20 minutes
Cook Time 30 minutes
Total Time 50 minutes
Servings 8 slices
Calories 377kcal
Author Alyssa Rivers

Ingredients

Vegetable/Turkey mixture

  • 1 package homemade pie crust refrigerated pie crust, or puff pastry at room temperature
  • 2 Tablespoon butter
  • 1/2 onion, diced
  • 2 stalks celery, chopped
  • 2 medium carrots, chopped
  • 2 teaspoon garlic, minced
  • 1/2 teaspoon dried thyme
  • 1 teaspoon dried parsley
  • 3 cups cooked turkey, shredded
  • ½ cup frozen peas (added last)

Sauce

  • 4 Tablespoons butter
  • 1/2 cup flour
  • 2 cups chicken broth
  • teaspoon nutmeg
  • 1/2 teaspoon salt, or to taste
  • 1/2 teaspoon pepper, or to taste
  • 1 cup heavy cream or half & half

Instructions

Vegetable and Turkey mixture

  • Preheat oven to 375°F. Line a 9 or 10-inch pie dish with one of the packaged pie crusts. Set aside. The other crust will be saved for the top.
  • Melt the butter in a large skillet over medium-high heat. Add the onion, celery, and carrots. Cook until vegetables are tender, about 5 minutes.
  • Add the garlic and cook for 1 minute. Add the cooked shredded turkey. Stir all the ingredients together and cook for an additional minute. You can add a splash of chicken broth if the mixture seems a little dry.
  • Stir in the frozen peas. Remove from heat and prepare the sauce.

Sauce

  • In a large saucepan, melt the butter over medium-high heat. Gradually add the flour and stir into a paste.
  • Add the chicken broth and whisk together until the sauce starts to thicken. Add the parsley, thyme, nutmeg, salt, and pepper. Stir until all the ingredients are incorporated.
  • Stir in the heavy cream. Cook over medium heat, and stir constantly until the sauce thickens.
  • Pour the sauce over the vegetable/turkey mixture. Stir to combine.
  • Fill the pie crust in the prepared pan. Top with the second pie crust and form pie edges. Cut and X in the middle of the crust with a knife.
  • Bake for 1 hour or until fully baked. Remove from oven and let the pie sit for 10 minutes before serving.

Nutrition

Serving: 1slice | Calories: 377kcal | Carbohydrates: 37g | Protein: 5g | Fat: 23g | Saturated Fat: 10g | Polyunsaturated Fat: 2g | Monounsaturated Fat: 9g | Trans Fat: 1g | Cholesterol: 23mg | Sodium: 535mg | Potassium: 222mg | Fiber: 3g | Sugar: 2g | Vitamin A: 2929IU | Vitamin C: 10mg | Calcium: 33mg | Iron: 2mg


from The Recipe Critic https://ift.tt/3lXMTjU
https://ift.tt/30kdMXr
शनिवार, 11 दिसंबर 2021

Eggnog Cheesecake

This eggnog cheesecake is SOO GOOD. It’s creamy and melts in your mouth! That classic eggnog taste makes it the best dessert for the holiday season!

I can’t get enough of cheesecake! Some of my favorites are Peppermint, Pecan Pie, and this delicious Churro Cheesecake! They are all so different but so, so good!

A slice of cheesecake with a fork cutting into it.

Classic Eggnog Cheesecake

Well, putting two of my favorite things together in one (like this eggnog cheesecake!) really turned out amazing! This dessert could not be more perfect for the holiday season! In fact, it’s so good that I would bake it at least once now so you can see how good it is. Because you will definitely want to bake it again later! It has the perfect amount of eggnog flavoring. It’s not too strong but you can definitely taste it.

Eggnog is already so creamy that it complements the texture of a cheesecake so well! And not only does it taste amazing but it looks gorgeous! These sugared cranberries make the perfect topping for it! Don’t be intimidated by baking a cheesecake. I have added so many tips and tricks to this post that will help yours turn out just right! Go ahead and give it a try, you will be so glad that you did!

Ingredients for Eggnog Cheesecake

These ingredients are fairly simple! I especially love the eggnog combined with the nutmeg… It’s so festive! See the recipe card at the bottom of the post for exact measurements.

  • Graham crackers: You will crush these up to make graham cracker crumbs!
  • Sugar: This sweetens the crust up a bit.
  • Ground Nutmeg: I love the flavor that nutmeg brings. It reminds me of the holiday season!
  • Butter: I melted the butter to mix the crust all together.
  • Salt: Just a pinch will work!

Cheesecake

  • Cream Cheese: Set your cream cheese out about 30 minutes before you start baking. When you soften it to room temperature then it mixes up so smoothly!
  • Eggnog: You can use store bought eggnog or you can make this Homemade Eggnog! It’s soo good.
  • Granulated sugar: This adds some sweetness to balance out the tangy cream cheese.
  • Eggs: I used large eggs that were at room temperature.
  • Ground nutmeg: This will pull in that same flavoring from the crust. They go so well together!
  • Vanilla: This adds a little flavoring to the sweetness.
  • Rum Extract: This is totally optional so you can leave it out if you want!

Whipped Cream Topping

  • Heavy Whipping Cream: This is what you will mix up to make that fluffy topping which completes this eggnog cheesecake.
  • Eggnog: You can use store bought eggnog or you can make this Homemade Eggnog!
  • Ground Nutmeg: Adds a tiny bit of earthy flavor to the whipped cream.
  • Powdered sugar: This dissolves the easiest so it will help make the whipped cream smooth.

Let’s Bake a Cheesecake!

If you’ve never made a cheesecake then you should definitely try this eggnog cheesecake! Master it just in time for the holidays and everyone will be so impressed!

Crust

  1. Preheat oven and mix ingredients: Preheat the oven to 325. In a medium bowl mix graham cracker crumbs, sugar, nutmeg, salt and melted butter together. This should resemble damp sand.
  2. Form into pan: Pour your crumb mixture into a 9 inch springform pan and press evenly into the pan. You can use the bottom of a flat glass or a flat measuring cup to really press it in well and get a nice, even crust.
  3. Bake and cool: Bake for 10 minutes. Let cool completely

Cheesecake Filling

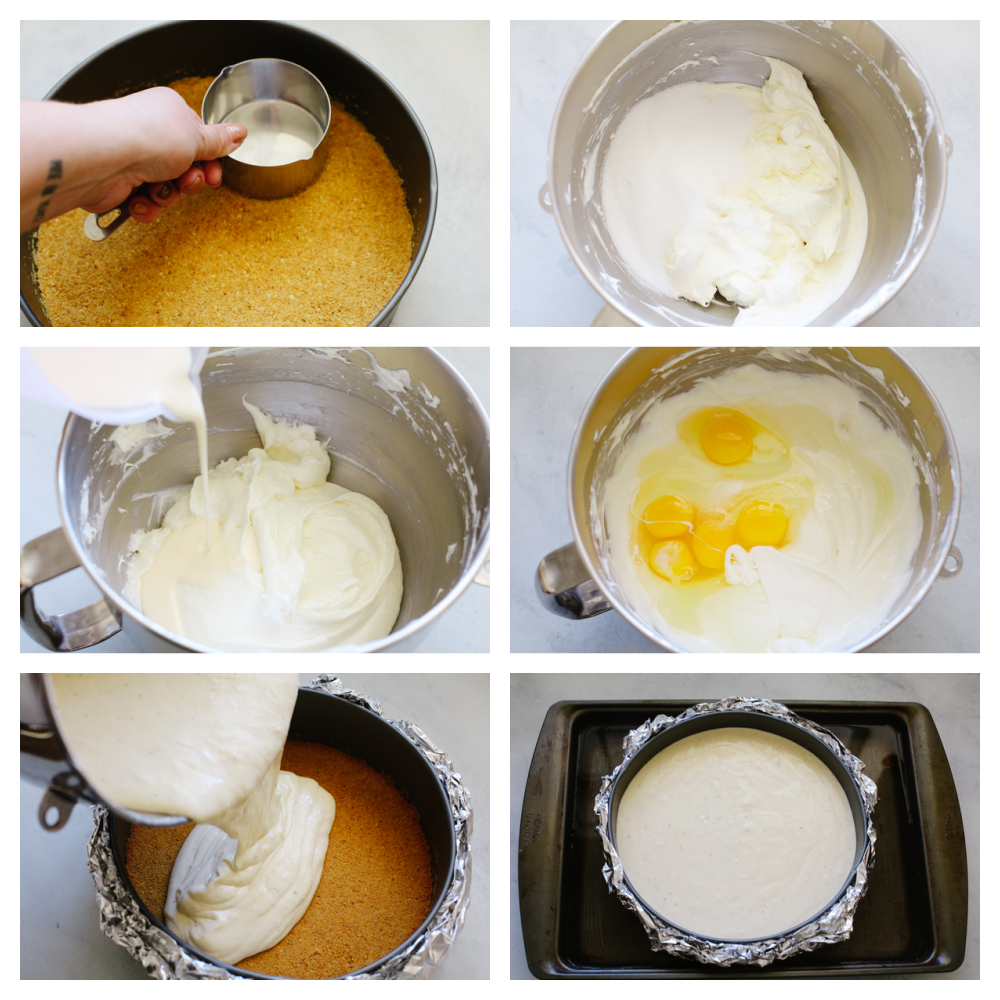
  1. Beat cream cheese: Add the softened cream cheese to the mixing bowl of a stand mixer and beat with a paddle at medium/high speed for about 1 minute. Scrape down the sides and bottom of the bowl and beat for a few seconds more.
  2. Combine with sugar and eggnog: Add the sugar to the cream cheese and mix at medium-low speed until just combined. Scrape the bowl again and slowly add the eggnog until it is combined and the batter is smooth.
  3. Add eggs and beat: Add eggs and beat on low speed until combined, about 30 seconds-1 minute. Scrape the bowl again.
  4. Mix in the rest of the ingredients: Add the nutmeg, vanilla and rum extract. Beat until just combined. At this point the batter should be smooth and fairly runny.
  5. Wrap springfoam pan with foil: Using 18 inch heavy duty aluminum foil, wrap the outside of your springform pan with 3-4 sheets of foil.
  6. Add cheesecake batter to pan: Place the wrapped pan in a deep roasting pan. You can alternatively use a baking sheet, so long as the sides are about 2 inches deep. Add the cheesecake batter to the springform pan.
  7. Add water to baking sheet (a water bath): Using very hot water, add water to the baking sheet until there is about 1 ½ inch of water around the springform pan. On a rack in the lower 3rd of the oven, carefully move your pan into the oven.

Baking Cheesecake

  1. Bake: Bake for 1-1 ½ hours. After about an hour of baking, check the cheesecake’s consistency. A slight jiggle of the pan (while still in the oven) should tell you if it’s ready or needs more time. The cheesecake should be jiggly, but not liquid. If it seems very liquid still, give it 15 more minutes and check it again.
  2. Turn off oven and leave it IN THE OVEN while it cools: Once the cheesecake is firm, yet jiggly, turn the oven off but leave the eggnog cheesecake in the oven for another hour or so, until the oven has cooled down. Resist the temptation to open the oven during this time! The purpose of this step is to allow the cheesecake to cool slowly as the oven cools. Doing this will prevent it from cracking, as one of the biggest reasons cheesecakes crack is the drastic temperature change going from the hot oven into the much cooler kitchen.
  3. Chill in fridge: Once the oven and the cheesecake are cooled, remove from the oven and carefully remove the foil lining the pan. Chill in the fridge for at least 6 hours.
  4. Release springform with knife, top and serve: Before serving, run a knife around the edge of the pan to ensure an easy release when the springform is removed. Top with the whipped cream topping and enjoy!

Whipped Cream

  1. Mix ingredients: sing a stand mixer with the whisk attachment or a hand mixer, whip the heavy cream, eggnog, nutmeg and powdered sugar together until medium still peaks form.
  2. Add whipped cream and garnish: Spread the whipped cream over the top of the cheesecake and dust lightly with ground nutmeg.
6 steps showing how to mix cheesecake batter and add it to a pan in a water bath.

How to Prevent Cheesecake from Cracking

Whenever you see a professional cheesecake, it is smooth with no cracks! Here is how you can get your eggnog cheesecake to do that!

  • Let it cool IN THE OVEN: I can’t stress the importance of this enough! Once the cheesecake is done cooking then you turn the oven off then leave the cheesecake in the oven for another hour. Keep it in there until the oven has completely cooled down.
  • Don’t open the door: Doing this will prevent it from cracking. One of the biggest reasons cheesecakes crack is the drastic temperature change going from the hot oven into the much cooler kitchen.
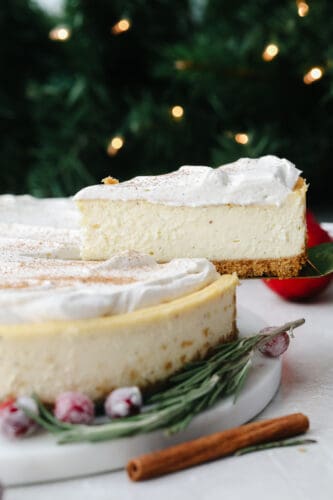
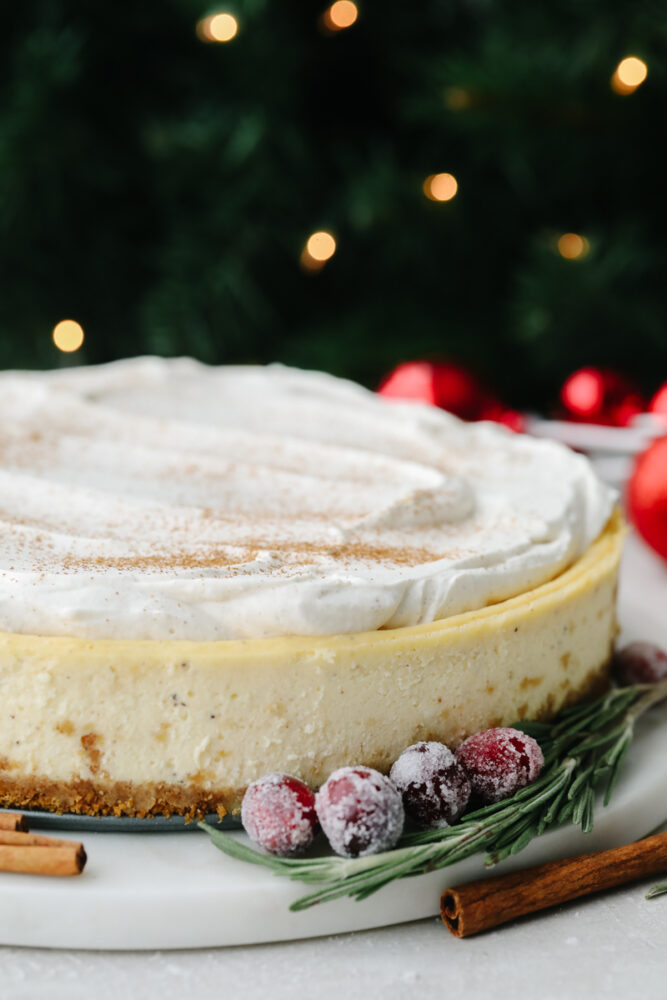
A zoomed in view of the side of a whole eggnog cheesecake.

Baking Tips

These are good baking tips to remember whenever you are making something in the kitchen! This eggnog cheesecake is so good and you want to follow all of the steps to make sure that it turns out perfectly!

  • Don’t overmix: When you over mix or set your mixer to mix on high then you add more air to your batter! This can cause some cracks in your cheesecake. To prevent this then you should use room temperature ingredients. Then you don’t have to mix so many lumps and you can do it on a lower speed.
  • Don’t use a toothpick: Using a toothpick to check for doneness is not something that you want to to with a cheesecake! It will cause it to crack. If it is firm yet slightly jiggly, then you can turn off the oven and let it cool (in the oven… again, I can’t stress this enough!)
  • Don’t open the oven door: I know that it’s tempting to open the oven door while you are baking your cheesecake. But when you open the door while you are baking, you let a lot of the heat out. This makes it so that your cheesecake will crack. Use the oven light instead of opening the door! 
  • Room temperature ingredients: This can take a bit of thought beforehand but it really helps! Make sure to take all of your refrigerated ingredients out and put them on the counter before you plan on baking. Bringing your ingredients to room temperature really helps them mix nicely together and makes the batter really smooth! 
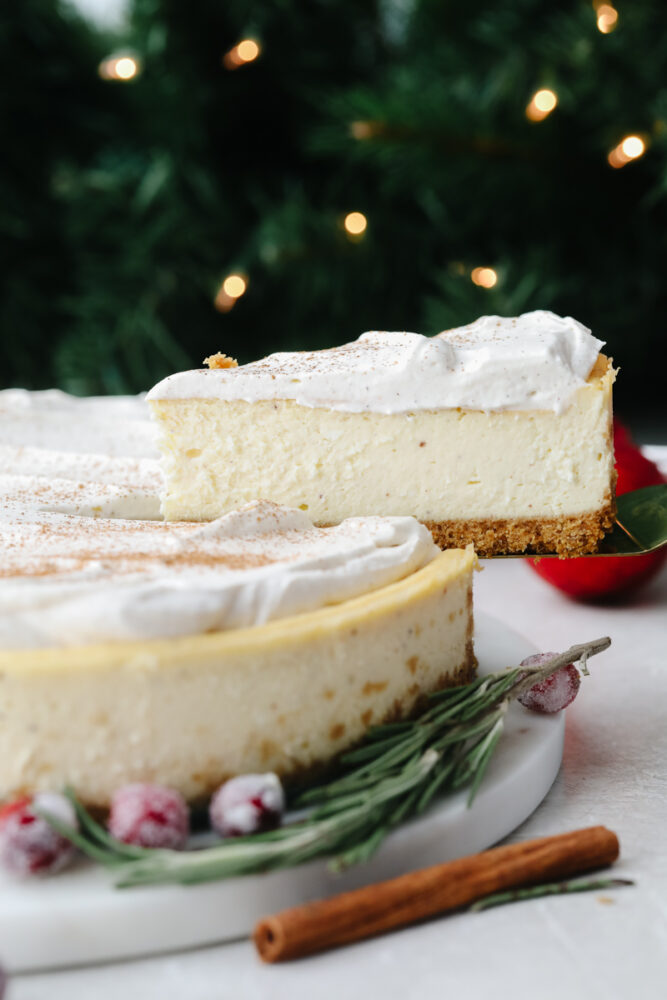
A slice of cheesecake being taken out.

How to Store Leftovers

If you have leftover eggnog cheesecake then you should place it in an airtight container and put it in your fridge. It can last for about a week!

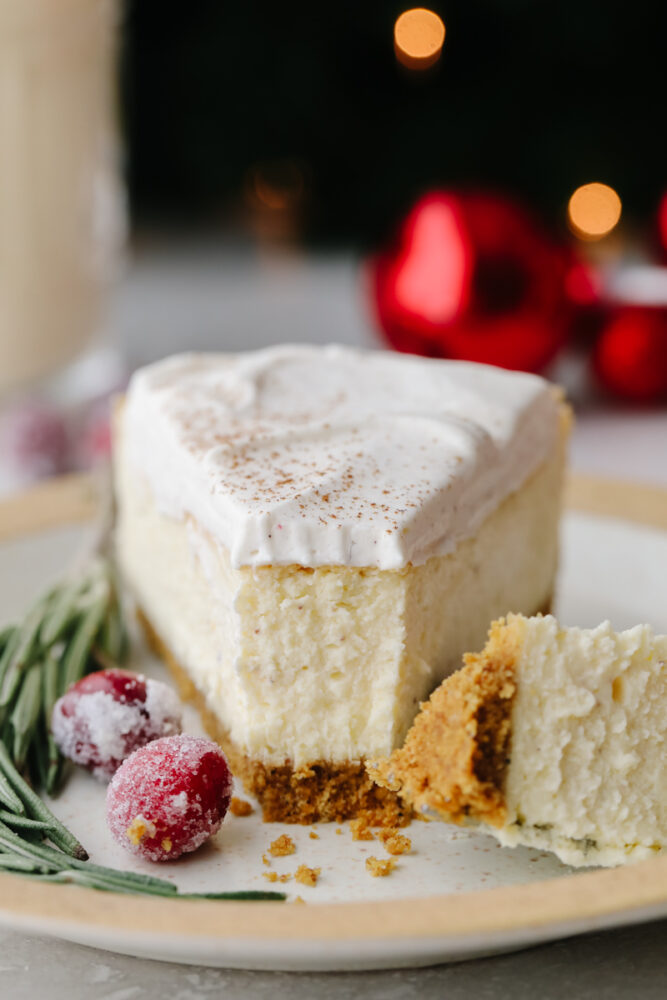
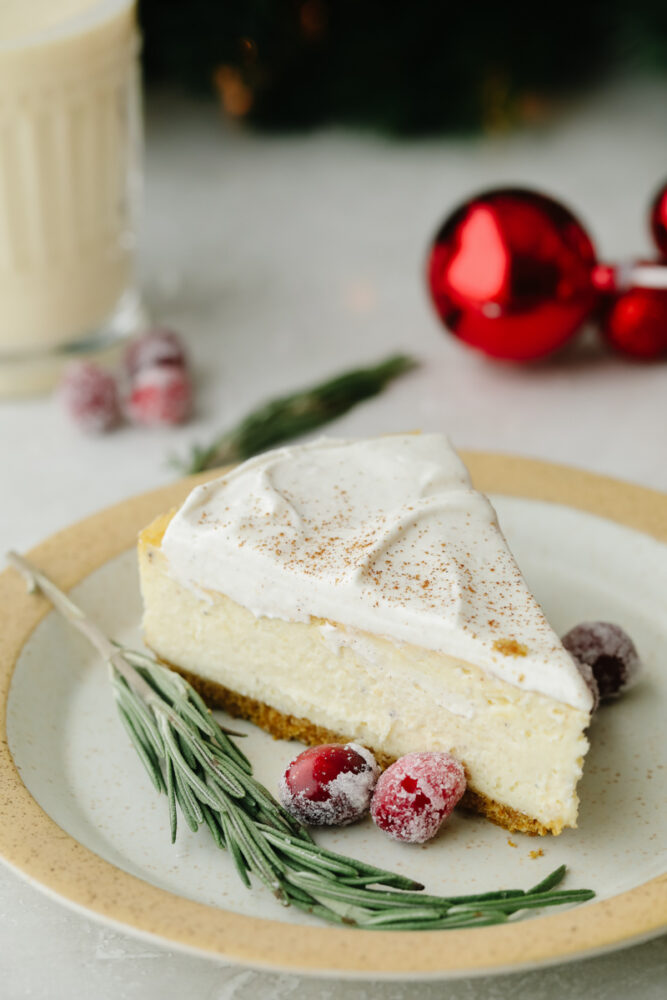
A slice of cheesecake on a plate with sugared cranberries.
Print

Eggnog Cheesecake

This eggnog cheesecake is SOO GOOD. The cheesecake is creamy, melts in your mouth, and is topped on a graham cracker crust. That classic eggnog taste makes it the best dessert for the holiday season!
Course Dessert
Cuisine American
Keyword eggnog cheesecake
Prep Time 35 minutes
Cook Time 1 hour 40 minutes
Chill Time 6 hours
Total Time 8 hours 15 minutes
Servings 12 Slices
Calories 551kcal
Author Alyssa Rivers

Ingredients

Crust

  • 1 ½ cup graham cracker crumbs about 12 crackers
  • ¼ cup sugar
  • ½ Teaspoon Ground Nutmeg
  • ¼ cup butter melted
  • Pinch salt

Cheesecake

  • 2 Pounds Cream Cheese Softened (4 8oz packages)
  • 1 Cup Eggnog
  • 1 Cup Granulated Sugar
  • 5 Large Eggs
  • ¾ Teaspoon Ground Nutmeg
  • 2 Teaspoons Vanilla
  • ½ Teaspoon Rum Extract optional

Whipped Cream Topping

  • 1 Cup Heavy Whipping Cream
  • 3 Tablespoons Eggnog
  • ¼ Teaspoon Ground Nutmeg
  • 1/4 Cup Powdered Sugar

Instructions

Crust

  • Preheat the oven to 325. In a medium bowl mix graham cracker crumbs, sugar, nutmeg, salt,and melted butter together. This should resemble damp sand.
  • Pour your crumb mixture into a 9-inch springform pan and press evenly into the pan. You can use the bottom of a flat glass or a flat measuring cup to really press it in well and get a nice, even crust.
  • Bake for 10 minutes. Let cool completely

Cheesecake Filling

  • Add the softened cream cheese to the mixing bowl of a stand mixer and beat with a paddle at medium/high speed for about 1 minute. Scrape down the sides and bottom of the bowl and beat for a few seconds more.
  • Add the sugar to the cream cheese and mix at medium-low speed until just combined. Scrape the bowl again and slowly add the eggnog until it is combined and the batter is smooth.
  • Add eggs and beat on low speed until combined, about 30 seconds-1 minute. Scrape the bowl again.
  • Add the nutmeg, vanilla, and rum extract. Beat until just combined. At this point, the batter should be smooth and fairly runny.
  • Using 18-inch heavy-duty aluminum foil, wrap the outside of your springform pan with 3-4 sheets of foil.
  • Place the wrapped pan in a deep roasting pan. You can alternatively use a baking sheet, so long as the sides are about 2 inches deep. Add the cheesecake batter to the springform pan.
  • Using very hot water, add water to the baking sheet until there is about 1 ½ inch of water around the springform pan. On a rack in the lower 3rd of the oven, carefully move your pan into the oven.
  • Bake for 1-1 ½ hours. After about an hour of baking, check the cheesecake’s consistency. A slight jiggle of the pan (while still in the oven) should tell you if it’s ready or needs more time. The cheesecake should be jiggly, but not liquid. If it seems very liquid still, give it 15 more minutes and check it again.
  • Once the cheesecake is firm, yet jiggly, turn the oven off but leave the cheesecake in the oven for another hour or so, until the oven has cooled down. Resist the temptation to open the oven during this time! The purpose of this step is to allow the cheesecake to cool slowly as the oven cools. Doing this will prevent it from cracking, as one of the biggest reasons cheesecakes crack is the drastic temperature change going from the hot oven into the much cooler kitchen.
  • Once the oven and the cheesecake are cooled, remove from the oven and carefully remove the foil lining the pan. Chill in the fridge for at least 6 hours.
  • Before serving, run a knife around the edge of the pan to ensure an easy release when the springform is removed. Top with the whipped cream topping and enjoy!

Whipped Cream

  • Using a stand mixer with the whisk attachment or a hand mixer, whip the heavy cream, eggnog, nutmeg, and powdered sugar together until medium still peaks form.
  • Spread the whipped cream over the top of the cheesecake and dust lightly with ground nutmeg.

Nutrition

Serving: 12slices | Calories: 551kcal | Carbohydrates: 37g | Protein: 9g | Fat: 41g | Saturated Fat: 23g | Polyunsaturated Fat: 2g | Monounsaturated Fat: 11g | Trans Fat: 1g | Cholesterol: 213mg | Sodium: 397mg | Potassium: 211mg | Fiber: 1g | Sugar: 30g | Vitamin A: 1589IU | Vitamin C: 1mg | Calcium: 141mg | Iron: 1mg


from The Recipe Critic https://ift.tt/3lXzSqj
https://ift.tt/3DRhZ2M

बुधवार, 8 दिसंबर 2021

Sugared Cranberries

Sugared cranberries are so simple to make! You can eat them on as a treat or use them to make any holiday treat look festive. They will take any dish to the next level!

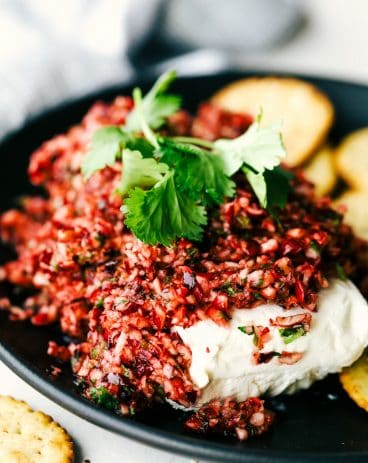
Tis the season for delicious holiday treats! Try out this Yule Log Cake, this Christmas Star Bread, or this yummy Cranberry Salsa. They will all bring you some Christmas cheer!

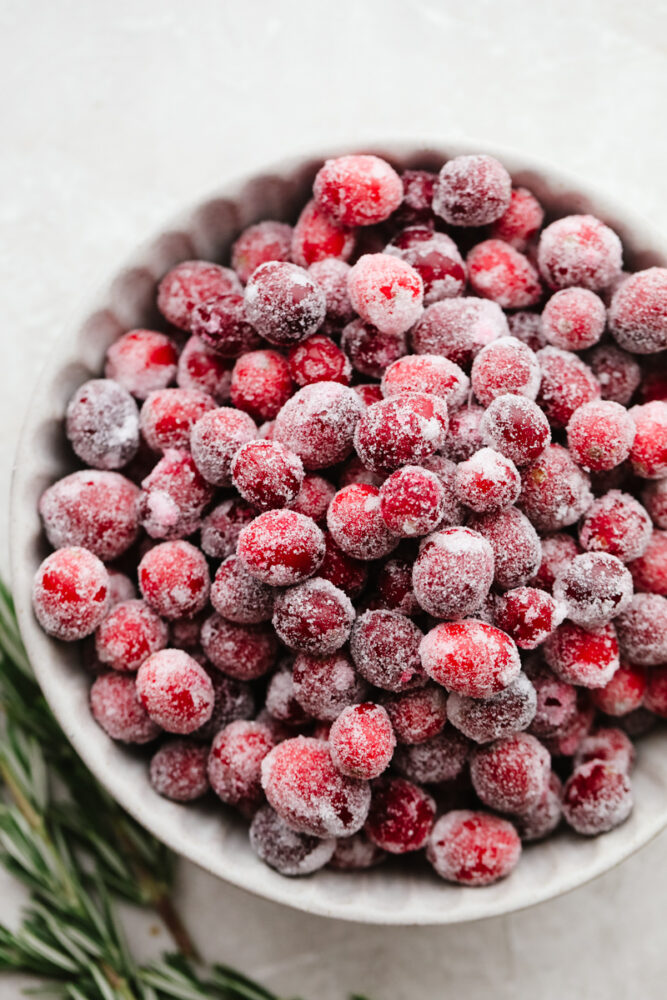
Sugared cranberries in a bowl.

Easy Sugared Cranberries

Did you know that sugared cranberries are not just meant to make your holiday treats look pretty? I mean, I know that they definitely do that! But when you coat the cranberries with this sugar mix it makes them taste delicious all on their own. My kids go crazy over them and they are SO EASY to make! In less than an hour, I can have a delicious and festive treat ready to go!

Cranberries are a tart fruit but when you add in some sugar, the taste of them is just right! Which makes them a little bit addicting! In fact, you may even want to double the batch just in case… It’s always better to have extra than not enough, right?? I not only love eating these plain but you can add them to this Cinnamon Roll Wreath, this Christmas Wreath Charcuterie, or decorate them on this Yule Log Cake. They are perfect for those!

Ingredients to Make Sugared Cranberries

Trust me when I say that a list of ingredients doesn’t get much more simple than this. There are only THREE things that you need! See the recipe card at the bottom of the post for exact measurements.

  • Fresh Cranberries: These should be fresh cranberries (not frozen) for this recipes. Remember to wash them first!
  • Granulated Sugar: This is what will bring in a sweet flavor to balance out the tart cranberries!
  • Water: You will mix some sugar and water to create a syrup to put on them.

Let’s Make Some Sugared Cranberries!

These only take 10 minutes to make! After that, you just need to let them soak in all of that sugar before you eat them! This is one of the easiest recipes that you will make this whole holiday season!

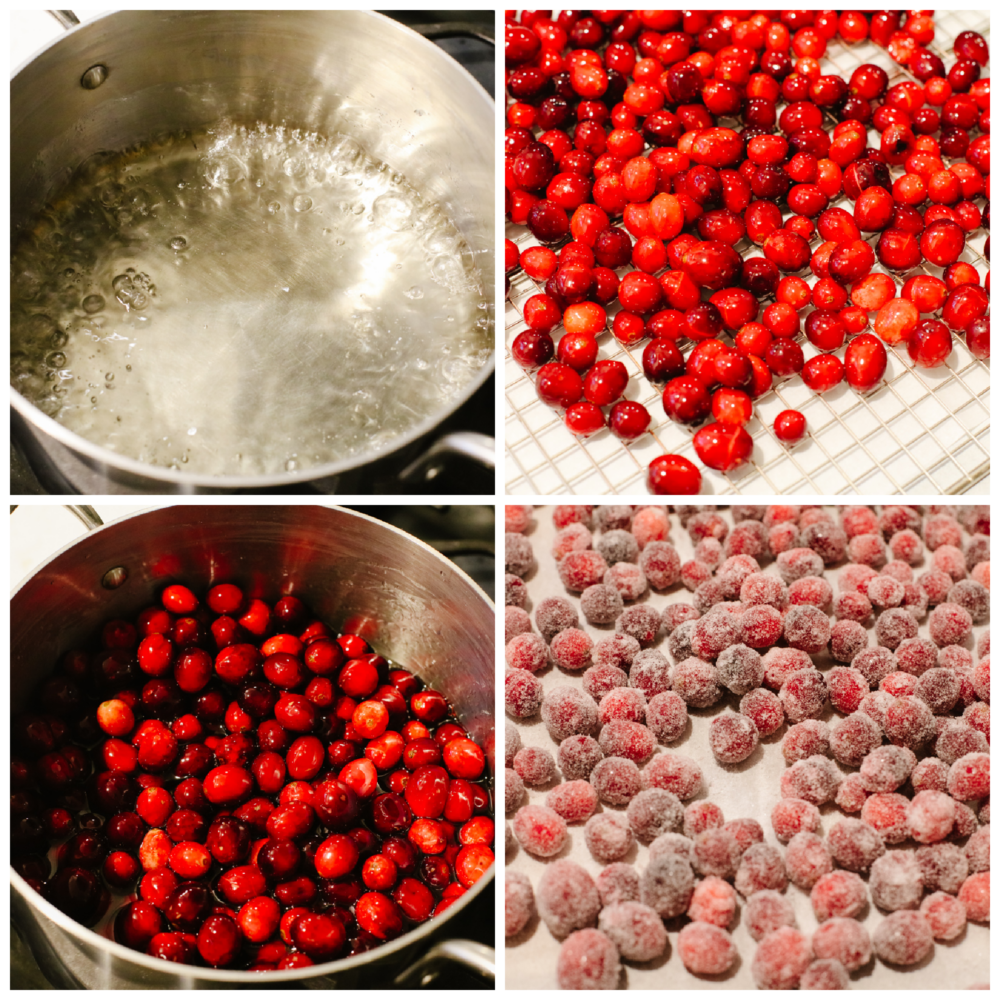
  1. Rinse: Rinse the fresh cranberries and check them over for any bad berries and discard them.
  2. Boil sugar and water: Add 1 cup of sugar and 1 cup of water to a medium pot and bring to a boil. Reduce to a simmer and simmer for 2-3 minutes until all the sugar is dissolved.
  3. Add cranberries and let dry: Remove from the heat and pour the cranberries in. Stir the cranberries in the syrup until they are all well coated. Then, use a slotted spoon to remove them to a cooling rack that has a piece of parchment underneath it. Let the cranberries dry for about 45-60 minutes.
  4. Toss dried cranberries in sugar: In batches, toss the cranberries in the remaining cup of sugar, using more as needed, until all the cranberries are well coated. Leave the cranberries on a piece of parchment for about an hour before serving.
4 pictures showing how to make a sugar syrup and coat it on the cranberries.

Quick Tips

Here are a few quick and easy tips to help these sugared cranberries turn out just right for you!

  • Don’t stack them too deep: When you are storing them, its best to use a lasger container so that they aren’t jam packed inside one. The more that they contact each other, the more the sugar comes off!
  • Don’t skip the drying step! This part is so important! It helps the cranberries absorb all of that sugar syrup and makes them a bit sweeter. Plus, you don’t want them to be too sticky when adding in the sugar coating at the end. This helps them taste (and look) just right!
  • What do I use these with? Like I said before, these are delicious enough to eat on their own! Or, try adding them to this Yule Log Cake or this Simple Charcuterie Board. Or, you could even put them on a toothpick and garnish a holiday drink! Get creative and use them on everything! The whole family will love them!
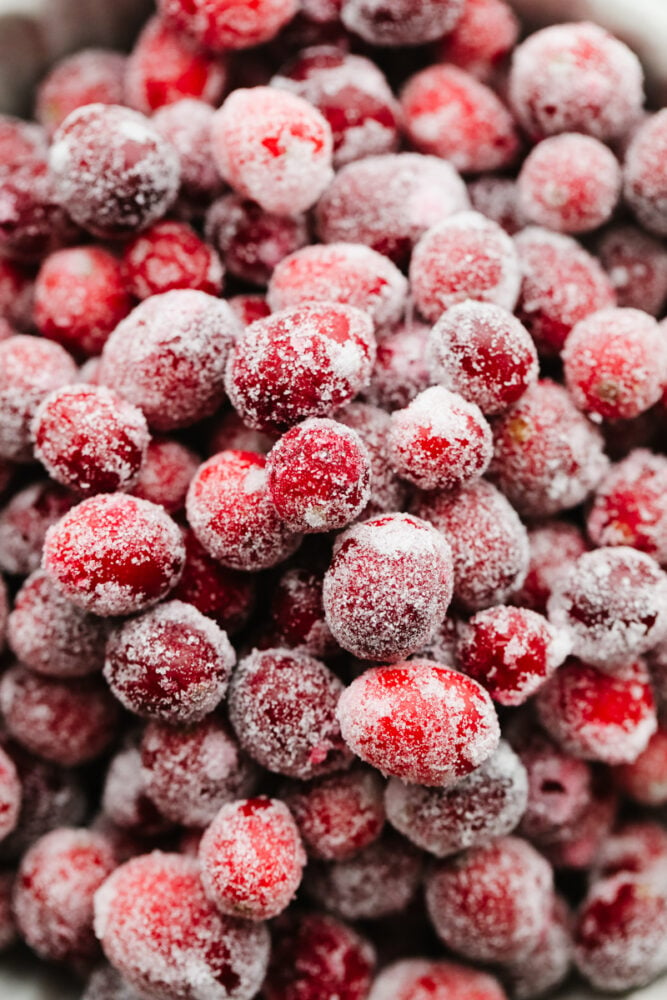
A zoomed in shot of sugared cranberries.

How to Store Leftovers

Sugared cranberries keep well at room temperature for about 2-3 days. After that, they begin to weep and get sticky! Just place them in an airtight container to store them.

Print

Sugared Cranberries

Sugared cranberries are so simple to make! You can eat them on their own or use them to make any holiday treat look festive. They will take any dish to the next level!
Course Dessert
Cuisine American
Keyword sugared cranberries
Prep Time 5 minutes
Cook Time 5 minutes
Total Time 10 minutes
Servings 3 Cups Cranberries
Calories 562kcal
Author Alyssa Rivers

Ingredients

  • 3 Cups Fresh Cranberries
  • 2 Cups Granulated Sugar Divided
  • 1 Cup Water

Instructions

  • Rinse the fresh cranberries and check them over for any bad berries and discard them.
  • Add 1 cup of sugar and 1 cup of water to a medium pot and bring to a boil. Reduce to a simmer and simmer for 2-3 minutes until all the sugar is dissolved.
  • Remove from the heat and pour the cranberries in. Stir the cranberries in the syrup until they are all well coated. Use a slotted spoon to remove them to a cooling rack with a piece of parchment underneath it. Let the cranberries dry for about 45-60 minutes.
  • In batches, toss the cranberries in the remaining cup of sugar, using more as needed, until all the cranberries are well coated. Leave the cranberries on a piece of parchment for about an hour before serving. Sugared cranberries keep well at room temp for about 2-3 days before they begin to weep and get sticky.

Nutrition

Calories: 562kcal | Carbohydrates: 146g | Protein: 1g | Fat: 1g | Saturated Fat: 1g | Polyunsaturated Fat: 1g | Monounsaturated Fat: 1g | Sodium: 7mg | Potassium: 88mg | Fiber: 5g | Sugar: 137g | Vitamin A: 60IU | Vitamin C: 13mg | Calcium: 12mg | Iron: 1mg


from The Recipe Critic https://ift.tt/3IGI8F4
https://ift.tt/3pG7PfZ