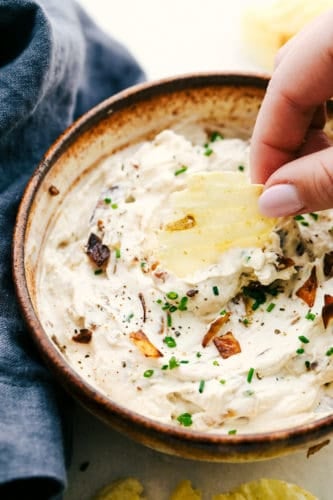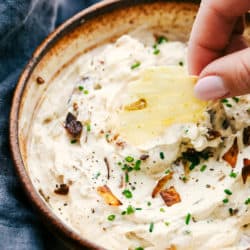
Sautéed Brussel Sprouts with Bacon is side dish supremacy! Crisp tender Brussel sprouts tossed with crispy bacon and a drizzle of maple syrup is pure heaven.
Brussel Sprouts are a full flavored cute veggie that packs a nutritional punch. For more ways to use them try them in Creamy Parmesan Garlic Brussels Sprouts, Apple Bacon Brussel Sprouts Salad and Air Fryer Crispy Parmesan Brussel Sprouts.

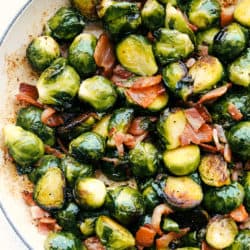
Sautéed Brussel Sprouts
These are not your mother’s Brussel sprouts! Those were the days of steamed and boiled everything. It turned vegetables to bland mush. No wonder we didn’t like our veggies growing up! These are sautéed to a crisp outside, but still tender inside. Flavored with smoky, salty bacon and a splash of maple syrup for a sweet and salty flavor that is out of this world yummy! My whole family loved this flavorful side dish.
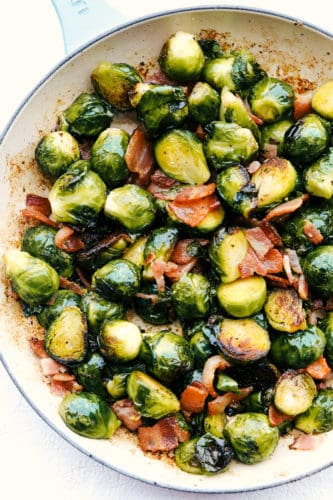
Besides bacon makes everything better! Cooking the Brussel sprouts in the bacon drippings caramelizes the sprouts to absolute perfection. The sprouts soak up the flavor and creates a deep nutty savory taste that pairs impeccably with the maple syrup. The maple syrup adds just enough deep sweet flavor that is not too sugary, it’s just right. This side dish comes together quickly too. Which is ideal when you need a gorgeous side dish in a pinch! This dish pairs perfectly with Steak, Chicken or Fish! Whatever you need it for, this is the recipe to use!
Ingredients for Easy Brussel Sprouts
These ingredients can’t get much simpler with only four ingredients! Easy and quick Brussel sprouts that are pure goodness! You can find all of these ingredients at your local grocery store if you don’t have them on hand. Brussel sprouts can be found separately or sometimes they can be found still connected to the stalk. If this is the case just cut the them off the stalk at the base. Rinse and pat dry your sprouts before sautéing.
- Bacon: Chop the bacon before you cook it.
- Brussel Sprouts: Cut the sprouts in half
- Salt and Pepper: Just to taste
- Maple Syrup: Use pure maple syrup for the best flavor
Sautéing Brussel Sprouts and Bacon
This is such a quick recipe to whip up. It’s best cooked right before serving, so plan accordingly. You don’t want to make this too far ahead, they can get mushy. Eating this as soon as it’s done cooking is the best, crispy bacon, tender Brussel sprouts and sweet maple syrup, so good!
- Cook: In a medium pan over medium high heat cook the bacon till crisp. Remove from the pan and place on a paper towel lined plate.
- Sauté: Keep the bacon drippings in the pan and add the Brussel sprouts. Sauté till crisp tender about 7-10 minutes.
- Add: Add the bacon back to the pan and drizzle with maple syrup. Cook for another minute stirring to coat. Serve immediately.

Tips and Variations
These Brussel sprouts can’t get much better than this, they are so dang good! You can vary this to your liking and play with the flavors if you would like.
- Add: If you want more flavor, you can add in chopped onion and garlic with the Brussel sprouts.
- Faster: You can chop up the Brussel sprouts into smaller pieces to sauté faster. They will cook faster so keep on eye on it and stir often.
- Oil or Butter: If you need a bit more fat to sauté the Brussel sprouts in you can add a little bit of oil or butter. Either will work but I will say that butter adds a bit more flavor.
- Size: Brussel sprouts can really vary in size from tiny to huge. Try to get all the same sized sprouts or trim them to the same size so that they’ll cook at the same rate.
- Lid: If you like your Brussel sprouts a bit more tender, start by covering the sprouts with a lid to give them a quick steam. This will about 4 to 5 minutes long. Then remove the lid and finish browning them to get that nice crispy outside. Cooking them with the lid on to start will trap in the heat and moisture and help tenderize them. But you’ll want to finish sautéing them to give them that perfect nutty flavor.
- More Crunch: If you want more crunch add chopped almonds or walnuts to the pan and sauté for about 2 to 3 minutes before adding the bacon and maple syrup.
- Cheese: Sprinkle with shredded parmesan for a salty nutty bite that goes wonderfully well with the bacon and syrup.
- Syrup: Feel free to add more syrup if you want a little bit more sweet. It’s all a matter of taste.
Benefits of Brussel Sprouts
Who knew but these mini looking heads of cabbage are extremely good for you! Another reason to add them to your recipes this season. Brussels sprouts are part of the vegetable family that includes broccoli and cabbage, a cruciferous vegetable. The flavors brought on from roasting can be described as savory, slightly nutty, and even a tad sweet, especially the smaller sized sprouts.
- Vitamins: They are a super power house food with their high contents of vitamin C, and K and other minerals.Vitamin K is important for blood clotting and bone health. Vitamin C is an antioxidant that helps promote iron absorption and is involved in tissue repair and immune function.
- Fiber: They are high in fiber which is good for gut health.
- Antioxidants: They are best known for the high antioxidant compounds. Antioxidants reduce the oxidative stress in your cells and helps lower your risk of chronic disease.
- Blood Sugars: Because of their low carb high fiber profile they can help keep blood sugars steady.
- Healthy Fats: According to Healthline, Brussels sprouts are one of the best plant sources of omega-3 fatty acids, with 135 mg of ALA in each half-cup (78-gram) serving of cooked Brussels sprouts.This is especially important if don’t eat much fish or foods high in omega 3.
- Reduce Inflammation: Because of their amazing properties they can reduce inflammation, which chronic inflammation can cause diseases and cancers.

More Amazing Side Dishes
Side dishes are the super sidekicks that can make superheroes out of ordinary dinners. They can even steal the show! Meals just aren’t complete without a stellar side dish. Whether it’s a fruit or veggie or both, they just add to your dinner. Pick from these favorites.
- Easy to Make Green Bean Bundles
- The Best Winter Fruit Salad
- Garlic Butter Hasselback Potatoes
- Jiffy Corn Casserole (Only 5 Ingredients)
- Stick of Butter Baked Rice
Perfect Sautéed Brussel Sprouts with Bacon
Ingredients
- 6 sliced bacon chopped
- 1 pound brussel sprouts halved
- salt and pepper
- 1 tablespoon maple syrup
Instructions
-
In a medium sized skillet over medium high heat, cook the bacon until crisp. Remove and set aside on a paper towel lined plate. Leave the bacon drippings in the pan.
-
Add the Brussel sprouts and sauté until tender for 7-10 minutes. Add the bacon back to the pan and add the maple syrup. Cook for a minute longer and serve.
Nutrition
from The Recipe Critic https://ift.tt/3mJJhPR
https://ift.tt/2LTMdfZ