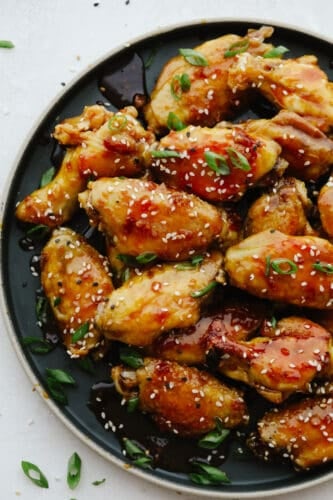
Sticky honey garlic wings are incredibly delicious and an excellent appetizer for absolutely any event or party! They have a mouthwatering, sweet taste that will keep you snacking all night long!
These wings are so easy to make and everyone will be asking you for the recipe! I love that they are crispy and golden on the outside but once you drizzle them with that sweet honey garlic sauce, you will be hooked. If you love wings as much as I do, then try these air fryer wings, chili lime wings, or drizzle this buffalo sauce on a wing recipe that you already have!

Honey Garlic Chicken Wings
Amazing and delicious, these sticky honey garlic wings will be the talk of the town! My favorite thing is when I come home from a party and I am inspired to try one of the dishes that I was served! This recipe is one of those that once you make it, will be requested at every event that you host. On top of that, these wings are baked and not fried! That’s exactly how you will achieve that crispy, golden chicken. You will love it!
I especially love that this recipe not only tells you how to make the perfect wings, but it is a spin on the traditional buffalo sauce that wings are so often served with. A mixture of honey and garlic makes these wings finger-licking good! It brings out a whole new level of flavor that your taste buds will thank you for later. Don’t forget to garnish them with that green onion! It will make these taste so fresh and you will have the perfect wings!!
Chicken Wing Ingredients
Aside from the protein in this recipe, all of the other ingredients are pantry staples that you most likely have on hand already! That’s what makes whipping up these sticky, honey garlic wings such a cinch! See the recipe card below for exact measurements.
- Chicken wings: I think its easiest to buy chicken wings that are already broken down into drumettes and wingettes. It will make this recipe that much easier!
- Baking Powder: This will coat your wings and get them ready to get baked to a golden crisp!
Honey Garlic Sauce Ingredients
- Honey: This adds in the sweetness for the dish.
- Soy Sauce: Try buying this soy sauce! It’s a personal favorite of mine and has just the perfect taste!
- Apple cider vinegar: This superstar ingredient not only has health benefits but it creates a slight tangy taste.
- Garlic cloves: Garlic adds in some flavor. If you don’t have fresh cloves to mince, you can use the minced garlic from your fridge. ½ tsp equals about 1 clove of garlic.
- Water: This will be mixed with the cornstarch.
- Cornstarch: Cornstarch and water will create a base that helps the sauce get thicker.
- Sesame seeds and chopped green onions: These are a delicious last touch added as a garnish!
How Do I Make Sticky Honey Garlic Wings?
These wings are a simple two-step process! You will start with baking the wings first and then you can make the sauce next. Here are the instructions on how to easily make both!
- Prep: Preheat oven to 400 degrees. Line a baking sheet with parchment paper and lightly spray with cooking spray. Add the wings to a medium sized bowl or ziplock bag and toss with the baking powder.
- Bake: Place them on an evenly layer on the baking sheet. Bake for 45-50 minutes (turning once!) until crispy.
To Make the Honey Garlic Sauce
- Whisk: In a medium saucepan over medium high heat whisk add the honey, soy sauce, apple cider vinegar, and garlic. In a small bowl whisk the water and cornstarch and pour into the sauce.
- Boil: Bring to a boil and reduce to a simmer. Whisk the sauce until it starts to thicken ad coats the back of a spoon.
- Toss: In a large bowl add the wings and toss in the sauce until they are coated.
- Garnish: Top with sesame seeds and green onions if desired.

Tips for Crispy Wings
Football season, holidays, and all of the gatherings are about to start in the fall! Now is the time to step up your game and figure out how to get the crispiest, tastiest wings of all!
- Pat dry: Make sure that before you start coating them with the baking powder that you take the time to pat each wing dry. This will eliminate any water that is in them (which causes them to steam and not be as crispy). Just pat them down with a paper towel!
- High heat: The temperature that you bake these at is key to getting the wings crispy. Make sure not to ajdust this temperature or you will have cooked wings that aren’t crispy.
- How do I know when they are done cooking? While crispy is the goal, you don’t want them OVER cooked either! This will dry them out. Your wings will be done when they are golden and no longer pink. The internal temperature should be 165 degrees.

How to Store, Freeze and Reheat Chicken Wings
The best dish is one that keeps on giving! Luckily, this recipe for honey garlic wings makes it easy to store in your fridge or freezer! You can simply thaw and reheat them to enjoy at a later time!
- Refrigerate: If you have leftovers that you would like to put in the fridge, just store them in and airtight container in the fridge for 4-5 days.
- Freeze: Make sure that you let your wings cool completely to room temperature. Freeze for 2-3 hours on a baking sheet and then transfer them to an airtight container. They can last in the freezer for up to 3 months. Make sure to remove them and let them thaw in the refrigerator overnight before reheating.
- Reheat: There are a few ways to reheat your wings! You can reheat the wings in an air fryer at 375 degrees for 2-3 minutes. You can reheat them in the oven at 350 degrees for 10-20 minutes until the internal temperature (with a meat thermometer) is 165 degrees. Or if you need quick and easy, just place them in the microwave until heated through!

Try These Popular Finger Foods

Appetizers
Super Easy Baked Coconut Shrimp

Dressings, Sauces, and Dips
The Best Buffalo Chicken Dip

Appetizers
Air Fryer Fried Pickles
Appetizers
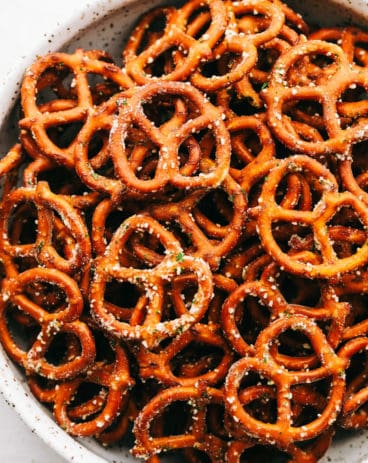
Easy and Addicting Ranch Pretzels

Sticky Honey Garlic Wings
Ingredients
- 4 pounds chicken wings
- 2 Tablespoons Baking Powder
Honey Garlic Sauce
- 1/2 cup honey
- 1/4 cup soy sauce
- 1 Tablespoon Apple Cider Vinegar
- 3 cloves garlic minced
- 2 Tablespoons water
- 2 teaspoons cornstarch
- sesame seeds and chopped green onions for garnish
Instructions
-
Preheat oven to 400 degrees. Line a baking sheet with parchment paper and lightly spray with cooking spray. Add the wings to a medium-sized bowl or ziplock bag and toss with the baking powder.
-
Place them on an even layer on the baking sheet. Bake for 45-50 minutes turning once until crispy.
To make the Honey Garlic Sauce
-
In a medium saucepan over medium-high heat, whisk add the honey, soy sauce, apple cider vinegar, and garlic. In a small bowl whisk the water and cornstarch and pour into the sauce.
-
Bring to a boil and reduce to a simmer. Whisk the sauce until it starts to thicken ad coats the back of a spoon.
-
In a large bowl add the wings and toss in the sauce until they are coated.
-
Garnish with sesame seeds and green onions if desired.
Nutrition
from The Recipe Critic https://ift.tt/3xGhnd6
https://ift.tt/2XniMbX