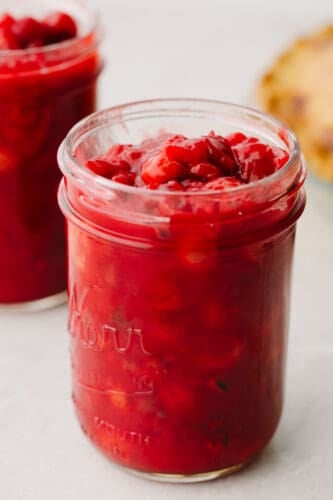
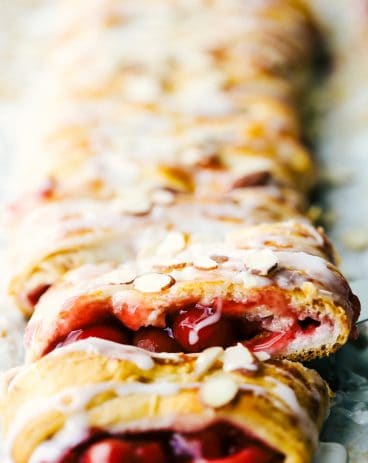
This cherry pie filling comes together so quickly and will make enough for you to have on hand for pies all year! Delectable and sweet with a hint of tartness, this filling is perfection and you won’t be able to go back to store-bought ever again.
The thick, consistency of this filling combined with the soft cherries makes this taste absolutely divine. I love trying out all different types of pies at this time of year. Here are some of my favorites apple, rhubarb, and chocolate!

What Makes this Filling THE Best?
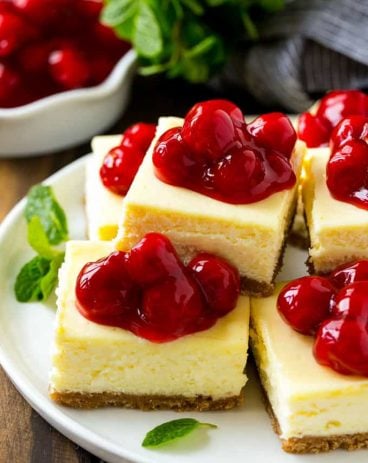
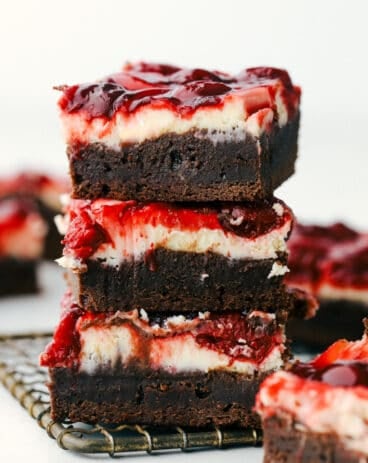
There is something about making pies that’s so soothing to me. It brings me back to my childhood! I remember trying different pies at all sorts of family events, fairs, and holiday get-togethers! So I love any chance that I get to make a pie and this filling makes that process so easy! This recipe will make (4) pints jars worth of filling which allows me to have quick and easy access to this delicious filling all year long! Try using the cherry pie filling in this cherry cheesecake or these cherry pie bars. I absolutely love it!
This cherry pie filling is exactly the right consistency that you want in a pie. Add it to these mini cherry pies and you will love the texture and flavor! It is thick, smooth, and delicious and if I’m being completely honest, I could eat it plain! I especially love the slight hint of lemon and almond that is brought into the flavoring. This is what makes it stand out and taste a little bit different (and definitely better!) than most cherry fillings that I have tasted before. Make this right when you need it or make this ahead of time to have on hand for later. Either way, this will satisfy your tastebuds and I just know that your family will go crazy over it!
Ingredients for Cherry Pie Filling
Simple ingredients will help this recipe come together for a taste that you will be remembering for years to come! Try out this recipe and you will be so happy that you did! See the recipe card below for complete measurements.
- Pint jars: This recipe is perfect for storing this filling for later so make sure that you have glass pint jars to store it!
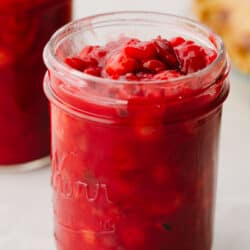
- Cherries: You can you either fresh or frozen pitted sour cherries.
- Sugar: The sugar will help counteract the tartness of the cherries!
- Cornstarch: This will be used to thicken the syrup.
- Almond extract: I loooove the taste that this small addition brings to this recipe!
- Lemon juice: This will enhance that delicious natural flavor of the cherries!
- Butter: Use unsalted butter in this recipe for the best results.
- Red food coloring (optional): You only need to use this to achieve a very vibrant red color! It’s totally optional.
Let’s Make Some Filling!
Quick, easy, and tastes amazing, this cherry pie filling is definitely a recipe that anyone can make! It will take you about 15 minutes from start to finish (if you have pitted cherries)! Super fast with delicious results!
- Sterlize: You will want to sterilize your jars in boiling water. Then, place them in a warm oven that is set to 215° while you make the filling. Make sure they stay in the oven for at least 15 minutes.
- Stir: Add the pitted cherries, sugar and cornstarch to a medium sauce pan. Cook over medium-low heat until the sugar dissolves and thickens, stirring constantly. Once nice and thick, remove from the heat and stir in almond extract, lemon juice and butter. If you want a brighter red filling then feel free to add red food coloring until it is the desired level of red.
- Fill: Fill the warm jars with hot pie filling, being sure to only fill to the bottom rung of the mouth of the jar! If you over fill it, it will explode!
- Bathe and cool: Screw the lids on tight and process jars in a hot water bath for 20 minutes. Remove from the water and let cool.
Tips For Canning Cherry Pie Filling
Canning pie filling is very easy and makes it so you have fresh pie filling on hand all the time! It’s super easy and won’t take you any extra time! In fact, you will save time since this makes enough for you to use now AND later!
- Picking Cherries: For this recipe I used fresh sour cherries, but you can use frozen sour cherries if you’d like. You can also use sweet cherries, but the sugar will need to be reduced to ¾ cup -½ cup.
- Jars: I used wide mouth pint sized jars, but you can use quart sized jars or regular mouthed jars, depending on what you have on hand and what you prefer. One pie typically uses 2 pint jars of filling.
- Red Food Coloring: You don’t have to use any food coloring but if you want it to look extra vibrant, you can use some! I used it when making this because I wanted the pie filling to look more like the traditional bright red cherry pie filling that we are accustomed to!

How to Store Cherry Pie Filling
Having jars of cherry pie filling on hand means whipping together a cherry pie without the stress of making the filling and the benefit of not having to use store-bought!
- On the shelf: Unopened jars of filling can be stored on the shelf in your pantry or another cool, dark place for up to 3 years. Be sure to label the jar with the date and contents.
- In the fridge: Once you have opened a jar of filling, you can store the leftovers in the fridge for up to a week.

More Delicious Cherry Recipes

Delicious Cherry Pie Filling
Ingredients
- 4 pint jars
- 4 cups fresh or frozen sour cherries (pitted)
- 1 cup granulated sugar
- 1/4 cup cornstarch
- ¼ teaspoon almond extract
- 1 Tablespoon lemon juice
- 2 Tablespoon unsalted butter
- Red food coloring (optional)
Instructions
-
Sterilize your jars in boiling water and then place them in a warm oven that is set to 215° while you make the filling, or at least a minimum of 15 minutes.
-
Add the pitted cherries, sugar, and cornstarch to a medium saucepan. Cook over medium-low heat until the sugar dissolves and thickens, stirring constantly. Once nice and thick, remove from the heat and stir in almond extract, lemon juice, and butter. If you want a bright red filling, add red food coloring until it is the desired level of red.
-
Fill the warm jars with hot pie filling, being sure to only fill to the bottom rung of the mouth of the jar. If you overfill it, it will explode!
-
Screw the lids on tight and process jars in a hot water bath for 20 minutes. Remove from the water and let cool.
Nutrition
from The Recipe Critic https://ift.tt/3sujoZ2
https://ift.tt/3mdQn2A