Alyssa Rivers August 20 लेबलों वाले संदेश दिखाए जा रहे हैं. सभी संदेश दिखाएं

शुक्रवार, 20 अगस्त 2021

Baked Caprese Chicken

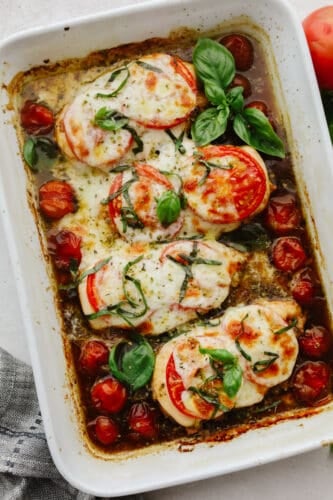
Baked Caprese chicken is nothing less than delicious and delightful! It’s fancy enough for company but simple enough for a quick and easy weeknight dinner that your family will go crazy for!

Tender and juicy seasoned chicken that is baked in a balsamic reduction with fresh mozzarella, basil, and tomato not only sounds divine but it tastes heavenly! If you are looking for some super easy, kid-friendly recipes, be sure to try this Parmesan Chicken or Herb Chicken.

Baked chicken in casserole dish.

What is Baked Caprese Chicken?

There’s something about “Caprese” dishes that sound fancy. Commonly made with fresh tomato, basil, and mozzarella, you have some superstar flavors that pair with almost anything! Caprese chicken (or chicken Caprese) is an Italian-inspired chicken dish made with the following ingredients: tomatoes, fresh mozzarella, herbs, olive oil, and vinegar. It’s an easy Italian dish that can be cooked in a variety of ways but one of the simplest ways is to bake it! This Caprese chicken recipe is sure to become a new family favorite!

Having new and easy recipes in my back pocket to whip out on busy nights is my secret weapon. They keep our dinner menu constantly changing and never boring! This is definitely one of those recipes that I love to have everything on hand on the regular. I can throw it together quickly but it looks like I’ve spent all day in the kitchen! It’s an impressive dish that even the most beginner of cooks can make. Try it on its own or add in some pasta and vegetables and you will have yourself a meal to remember!

Ingredients for Chicken Caprese

Easy and fresh are exactly what I love about this dish! You can even use a few of the ingredients from your garden if you have those on hand making this a complete labor of love! See the recipe card below for exact measurements.

  • Chicken breasts: Boneless, skinless chicken breast work the best for this dish.
  • Balsamic vinegar: Used as a delicious glaze on top!
  • Honey: Adds a touch of natural sweeteness to counter the vinegar.
  • Garlic: Mince up your garlic clove. If you don’t have any that are fresh, use the minced garlic from your fridge. ½ tsp equals about 1 clove of garlic.
  • Olive oil: I like olive oil because of the taste but if you only have vegetable oil, you can use that instead!
  • Italian seasoning: Try making this homemade italian seasoning. It will definitely elevate this recipe to the next level!
  • Salt: Brings out all of the natural flavors of the ingredients.
  • Pepper: Just use a dash of pepper, this recipe doesn’t need any heat.
  • Cherry tomatoes: This part is easy, you will just be using these whole! No chopping or slicing needed!
  • Large tomatoes: Slice up the tomatoes so they can go on top of the chicken.
  • Mozerella cheese: Most fresh mozerella comes pre-sliced. if it doesn’t, slice up into thin pieces.
  • Basil: Garnish with fresh basil on top! It brings on a fresh flavor!

How to Make Caprese Chicken

From start to finish, this recipe takes only about 10 minutes to prepare. After that, all you have to do is bake it for 35 minutes and you will be done! Simple AND easy!

  1. Preheat and prepare: Preheat oven to 400 degrees. Add the chicken to a 9×13 inch pan.
  2. Whisk: In a small bowl whisk the balsamic vinegar, honey, garlic, olive oil, Italian seasoning, salt and pepper.
  3. Pour: Pour over the chicken and add cherry tomatoes to the side of the chicken. Place the tomato slices on the top.
  4. Bake: Bake for about 20-25 minutes or internal temperature is 165 degrees. Add cheese the last 5 minutes to melt.
  5. Garnish: Sprinkle with fresh chopped basil if desired.
3 images of the process of baking chicken.

Tips for Getting Your Chicken Just Right

Making sure that you know the basics of cooking chicken is essential to having your recipes turn out as best as they can! Here are a few tips on how to make the most amazing baked Caprese chicken possible!

  • Dry chicken: When people bake chicken, the number one compaint I hear is that it came out dry. To avoid this, you want to cook chicken at a higher temperature. This recipe calls for an oven temperature of 400 degrees. Make sure to follow that exactly and it will allow your chicken to sweat and create natural juices that give you that juicy, baked Caprese chicken!
  • Let it rest: If you want your meat to retain that juice that you worked so hard for while baking, you need to let your meat rest after you take it out of the oven. Don’t cut into it for about 10 minutes after cooking. Resting allows the chicken to soak in all of the juices and not dry out!
  • How do I know when the chicken is done? You definitely don’t want to be eating undercooked chicken. You can use an internal meat thermometer to check if your chicken is cooked all the way through. Chicken that is done when it reaches 165 degrees.
Close up of baked chicken.

Variation Ideas

If you are looking for a way to add a little bit more to this Caprese chicken, go ahead and try a couple of these ways to make this meal your own! Get creative, your family will love it!

  • Pasta: Add this dish to some pasta. It will really envelope that Italian culture and you will love how it fills you right up!
  • Make it a meal: I especially love to have some sides with this chicken that really complement this as the main dish. I think that these potatoes and this salad are fantastic is doing just tha!
  • Open faced sandwich: Try toasting some french bread and putting this on top! An open faced sandwich is a delicious way to make this meal an informal lunch option!
Chicken being served on a wooden spoon.

How to Store Baked Caprese Chicken

This dish is so mouthwatering and amazing, I’m not sure that you will have anything leftover! But if you do, here are some ways that you can store it until next time!

  • Refrigerate: Store this in an airtight container (glass with a lid or a ziplock). You can store it in your fridge for up to 4 days.
  • Freezer: Wait until your chicken has completely cooled. Take off the fresh cheese and tomatoes (these won’t freeze well with the chicken) Place the chicken in a ziplock bag and seal it tight! The chicken can stay frozen in the freezer for up to 3 months. Make sure to write the date on your bag so you know how long its good for!
  • Reheat: To reheat your chicken, let it thaw in the fridge overnight. Once thawed, you can then place it in a casserole dish and add the fresh mozerella cheese, tomato and basil. Bake at 375 degrees for about 30 minutes or until the internal temperature reaches 165 degrees.
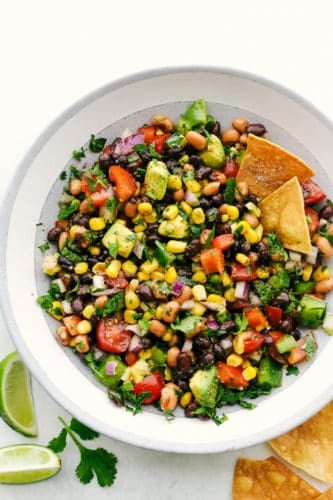
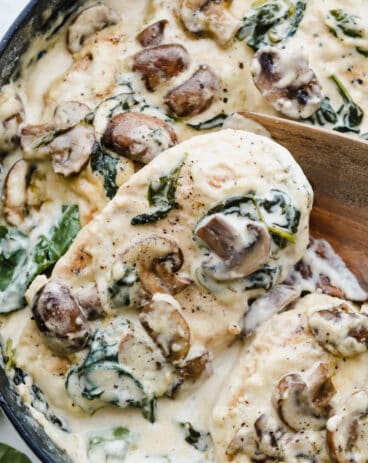
Close up of baked Caprese chicken.
Print

Baked Caprese Chicken

Baked Caprese chicken is nothing less than delicious and delightful! It's fancy enough for company but simple enough for a quick and easy weeknight dinner that your family will go crazy for!
Course Dinner, Main Course
Cuisine American, Italian American
Keyword baked caprese chicken, caprese chicken, chicken caprese
Prep Time 5 minutes
Cook Time 30 minutes
Total Time 35 minutes
Servings 4 people
Calories 317kcal
Author Alyssa Rivers

Ingredients

  • 1 pound boneless skinless chicken breasts
  • 1/4 cup balsamic vinegar
  • 2 Tablespoons honey
  • 1 cloves garlic minced
  • 1 Tablespoons olive oil
  • 1 teaspoons italian seasoning
  • 1/4 teaspoon salt
  • pinch of pepper
  • 1 cup cherry tomatoes
  • 2 large tomatoes sliced
  • 4 slices mozerella cheese
  • chopped basil for garnish

Instructions

  • Preheat oven to 400 degrees. Add the chicken to a 9×13 inch pan.
  • In a small bowl whisk the balsamic vinegar, honey, garlic, olive oil, Italian seasoning, salt, and pepper.
  • Pour over the chicken and add cherry tomatoes to the side of the chicken. Place the tomato slices on the top.
  • Bake for about 20-25 minutes or internal temperature is 165 degrees. Add cheese for the last 5 minutes to melt.
  • Garnish with fresh chopped basil if desired.

Notes

Updated on August 20, 2021
Originally Posted on April 15, 2019

Nutrition

Calories: 317kcal | Carbohydrates: 18g | Protein: 32g | Fat: 13g | Saturated Fat: 5g | Polyunsaturated Fat: 1g | Monounsaturated Fat: 5g | Trans Fat: 1g | Cholesterol: 95mg | Sodium: 468mg | Potassium: 771mg | Fiber: 2g | Sugar: 15g | Vitamin A: 1174IU | Vitamin C: 23mg | Calcium: 176mg | Iron: 1mg


from The Recipe Critic https://ift.tt/3z5tG4e
https://ift.tt/3mj5Xdl

Homemade Cherry Pie

Homemade cherry pie is about as classic as they come and this recipe is no exception! Absolutely delicious, this mouthwatering pie has a tart filling and flaky crust that is so tasty that you won’t be able to stop at just one slice!

I love a good, staple dessert and anything with cherries fills that requirement! Cherries are one of my favorite ways to add that a touch of tartness with a little bit of sweetness to my baking. So if you are a cherry lover like me, try out these brownies, cookies, or this delicious cake!

A cherry pie with a pie server.

Why Is Cherry Pie the BEST?

Being such a classic, cherry pie is something that I saw growing up at every event. I had cherry pie at Thanksgiving, Christmas, and the Fourth of July. As a kid, the filling part of pies was my absolute favorite and this homemade cherry pie is absolutely no exception! Cherries are the best because when you make this pie, it has a sugary sweet filling that has JUST the right level of tartness. It makes my mouth water just thinking about it!

I am always intrigued by a pie recipe that uses real and fresh fruit. The filling for this is completely delightful. With its thick consistency in cherries that are slightly softened. This pie tastes incredible with a flakey homemade crust. I know that cherries are a summer fruit, but I make sure to have them around ALL year because they are something that I crave even in the dead of winter. You can also make this pie ahead of time and freeze it for that exact reason! After all, who doesn’t want the delicious taste of juicy cherries all year long??

Fresh Homemade Cherry Pie Ingredients

Like I said before, FRESH is the keyword to making this pie absolutely scrumptious. Plus it is so delicious that it will have your guests wondering if you spent all day in the kitchen! See the recipe card below for exact measurements.

  • Pie Crust: You can make a Homemade crust or store bought pie crusts.
  • Pitted Sour cherries: Fresh cherries will take this recipe to the next level but frozen cherries are also a delicious and easy choice!
  • Sugar: Using some added sugar will help balance out the natural tartness of the cherries.
  • Cornstarch: This ingredient is so important because it will be used to help thicken the filling.
  • Almond extract: A delightfuly unexpected ingredient that takes this pie to the next level.
  • Lemon Juice: You can use the lemon juice that you have on hand in your fridge or you can use juice from a fresh lemon. Whatever is easier!
  • Butter: Use unsalted butter for the best flavor in this recipe.
  • Egg yolk: You will use this to make an egg wash for your crust to get that amazing golden brown color.
  • Water: Mix this with your egg yolk for your egg wash.

How to Make the Best Cherry Pie

Making a homemade cherry pie doesn’t need to feel complicated. In fact, this recipe is so delicious and great for a beginner! You will wonder why you haven’t been making pies more often in the first place. Follow these instructions for a fresh pie completely baked to perfection.

  1. Mix and cook: Add the pitted cherries, sugar and cornstarch to a medium saucepan. Cook over medium-low heat until the sugar dissolves and thickens, stirring constantly. Once nice and thick, remove from the heat and stir in almond extract, lemon juice and butter. Allow to cool completely.
  2. Pour and bake: Once the filling is cooled, preheat the oven to 400°. Press one pie crust in a 9 inch pie pan. Pour the filling in the pie crust and top with the second crust, crimping the edges together and making sure there is a vent for steam to escape. Mix the egg yolk and water together to make the egg wash. Brush the egg wash evenly over the top crust and bake for 45-50 minutes, until the filling is bubbling and the crust is nice and golden brown. Cool completely before serving.
4 pictures showing how the cherry pie filling is made and placed into a pie crust.

Tips to Baking the Sweet Cherry Pie

Baking a pie doesn’t have to be complicated or stressful! In fact, follow these quick tips and your pie will go down as a favorite of your family and friends. This will become their most requested dessert after they taste it!!

  • Cold pie crust: Whether you are using a store-bought or homemade crust, you will definitely want to implement this tip! To ensure that you are getting that perfectly flaky crust, make sure to chill your pie crust before filling it up and baking it. The butter in your pie crust will melt while baking. The butter will steam in the oven which causes the crust to separate into several flaky layers. This is exactly what will set your pie apart!
  • Don’t use too much flour: When rolling out the dough, use as little flour as possible. The extra flour sticks to the dough and leaves you with a hard crust.
  • Runny pie filling: If you open the oven and find that your pie filling hasn’t thickened up, it usually means that your pie hasn’t baked for long enough. Bake your pie until the filling is visibly bubbling through the vented pie.

Can I Make the Pie Ahead of Time?

The answer to this is a definite YES. The beauty of making pies is that you want to have them be completely cooled before serving anyways. If you allow yourself some time to make these a few hours or even a day ahead of time (just store the finished pie in the fridge until you need it), then you will save yourself a lot of stress and will have a beautiful pie ready at the drop of a hat!

A beautiful golden brown finished pie.

How to Store Cherry Pie

The beauty of pies is that you can bake your pie ahead and store it for later! Or, if you are lucky and have some leftovers, here are some quick tips on how to store them!

  • Refrigerator: Freshly baked cherry pie will keep in your fridge for 4-5 days. Just cover lightly with foil or plastic wrap or even an overturned bowl so you don’t ruin that beautiful crust!
  • Freezer: Once your pie has cooled completely, place the entire pie (in the pie tin) in a large ziplock bag. Seal it completely and the pie can be kept frozen for up to 4 months.
  • Reheat: If you want to serve your pie warm, thaw your pie at room temperature. Once thawed, bake in a preheated oven at 425 degrees for about 15 minutes or until completely warmed through.
A slice of cherry pie on a plate with a fork.
Print

Homemade Cherry Pie

Homemade cherry pie is about as classic as they come and this recipe is no exception! Absolutely delicious, this mouthwatering pie has a tart filling and flaky crust that is so tasty that you won't be able to stop at just one slice!
Course Dessert
Cuisine American
Keyword cherry pie, cherry pie recipe
Prep Time 40 minutes
Cook Time 50 minutes
Total Time 1 hour 30 minutes
Servings 12 slices
Calories 127kcal
Author Alyssa Rivers

Ingredients

  • 2 Homemade or store bought pie crusts
  • 4 Cups fresh or frozen sour cherries and their juice pitted
  • 1 Cup granulated sugar
  • 1/4 cup cornstarch
  • ¼ teaspoon almond extract
  • 1 Tablespoon lemon juice
  • 2 Tablespoon unsalted butter
  • 1 egg yolk
  • 2 Tablespoon water

Instructions

  • Add the pitted cherries, sugar, and cornstarch to a medium saucepan. Cook over medium-low heat until the sugar dissolves and thickens, stirring constantly. Once nice and thick, remove from the heat and stir in almond extract, lemon juice, and butter. Allow cooling completely.
  • When the filling is cooled, preheat the oven to 400°. Press one pie crust in a 9-inch pie pan. Pour the filling in the pie crust and top with the second crust, crimping the edges together and making sure there is a vent for steam to escape. Mix the egg yolk and water together to make the egg wash. Brush the egg wash evenly over the top crust and bake for 45-50 minutes, until the filling is bubbling and the crust is nice and golden brown. Cool completely before serving.

Nutrition

Calories: 127kcal | Carbohydrates: 27g | Protein: 1g | Fat: 2g | Saturated Fat: 1g | Polyunsaturated Fat: 1g | Monounsaturated Fat: 1g | Trans Fat: 1g | Cholesterol: 21mg | Sodium: 2mg | Potassium: 107mg | Fiber: 1g | Sugar: 23g | Vitamin A: 109IU | Vitamin C: 4mg | Calcium: 9mg | Iron: 1mg


from The Recipe Critic https://ift.tt/3zgXye9
https://ift.tt/37XUqrn

गुरुवार, 20 अगस्त 2020

Mouthwatering Cowboy Caviar

Cowboy caviar is a delicious blend of canned beans, corn and fresh Roma tomatoes, onions and avocados all chopped and prepared to be mixed together to start dipping in. This appetizer is easy to make and has a fresh and flavorful blend!

This is the perfect combination of a savory appetizer! If you are a dip fan and need an easy and delicious appetizer, try this 5 Minute Million Dollar Dip, Asiago Dip or Loaded Creamy Ranch Dip (Poolside Dip).

Cowboy caviar in a white bowl with two chips sticking out of the dip.

Mouthwatering Cowboy Caviar

This easy cowboy caviar is so simple to make and comes together in a matter of minutes. It is one of the best dips and so fresh from start to finish. Watch this dip disappear within minutes of stirring it all together!

Dip your favorite hard, crispy chips right into the ultimate cowboy dip. Load the chip up and enjoy the party right in your mouth! It is that good. Any chip will do but the thicker and bigger the chip, the easier it is to stack it tall with cowboy caviar and crunch down. Your family will love this for an appetizer, snack or game night!

Easy Cowboy Caviar Ingredients:

The ingredients for this cowboy caviar are simple and fresh! Each ingredient adds texture, flavor and all together compliments each other. Make this cowboy caviar as easy as possible and start dipping!

  • Black Beans and Black Eyed Peas: Cans are easiest and can be opened quickly and then poured in.
  • Red Onion: Dice the onions into small cubes.
  • Corn: This corn can be from a can or even fresh.
  • Avocados: Slice and dice the avocados into large chunks.
  • Roma Tomatoes: Freshly diced and cut into cubes.
  • Cilantro: Perfect blend of heat and sweetness.
  • Jalapeno: Spiciness added into the dip. 
  • Olive Oil: Creates a moist mixture with lots of flavor.
  • Lime: Juice of one lime
  • Cumin and Chili Powder: Add in a hint of spice
  • Salt and Pepper to taste 

How to Make the Ultimate Cowboy Caviar:

This appetizer is the perfect dip and comes together quickly and easily. Simply prepare and cut up most ingredients then place in a bowl together to be tossed. All th ingredients mixed together makes the perfect combination!

  1. Mix Together: In a medium sized bowl combine black beans, black eyed peas, onion, avocado, tomatoes, cilantro, jalapeño, olive oil, lime juice, cumin, and chili powder.  Toss until combined and coated.  Salt and pepper to taste.

Cowboy caviar in a white bowl.

Variations of Cowboy Caviar:

Mix and match your favorite ingredients to make it your own. Try it sweet and savory with a little more spice. So many options to choose from!

  • Beans: Instead of canned beans, try using dried beans. These are healthier with a lower sodium content and just as easy as the canned beans.
  • Vinegar: Add in using apple cider vinegar or red whine vinegar for a hint of sweetness with a little bit of tart taste.
  • Onions: Mix together white, yellow or a few green onions to mix in to the caviar.
  • Spicy: Make the appetizer a little more spicy, add in the seeds from the jalapeño. For less spineless, use less jalapeño and onions.

Storing Fresh Dip:

It is easy to store this fresh cowboy caviar. Avocado is the only ingredient that tends to turn brown and discolor. If you are looking to store this I would leave out avocado until you are about to serve the dip.

  • Make ahead: Mix together all the ingredients except for the avocado. Leave that out until you are ready to serve the appetizer. This will last covered in the refrigerator for 1 to 2 days ahead of time.
  • Storing: If you are worried about storing for a long period of time, prepare each ingredient and set aside in their own individual containers. When ready to serve, place everything into a mixing bowl and gently stir it together, mixing and blending it well.
  • Leftover Ideas: This cowboy caviar is the best and will even benefit on a few other inspired recipes like an omelet, top any meat or toss it in a green salad for added flavoring.

An unclose photo of the caviar and a person dipping in the salsa with a thick, crunchy chip.

More Dips to Try!

Print

Cowboy Caviar

Cowboy caviar is a delicious blend of canned beans, corn and fresh Roma tomatoes, onions and avocados all chopped and prepared to be mixed together to start dipping in. This appetizer is easy to make and has a fresh and flavorful blend! 
Course Appetizer, Side Dish, Snack
Cuisine American, Mexican
Keyword caviar dip, cowboy caviar
Prep Time 20 minutes
Total Time 20 minutes
Servings 12 People
Calories 84kcal
Author Alyssa Rivers

Ingredients

  • 1 15 ounce can black beans, drained and rinsed
  • 1 15 ounce can black eyed peas, drained and rinsed
  • 1/2 red onion diced
  • 1 cup corn
  • 1 avocado diced
  • 2 roma tomatoes diced
  • 1/4 cup cilantro chopped
  • 1 jalapeno seeded and finely chopped
  • 1/4 cup olive oil
  • juice of one lime
  • 1/2 teaspoon cumin
  • 1/2 teaspoon chili powder
  • salt and pepper to taste

Instructions

  • In a medium sized bowl combine black beans, black eyed peas, onion, avocado, tomatoes, cilantro, jalapeño, olive oil, lime juice, cumin, and chili powder. Toss until combined and coated. Salt and pepper to taste.

Nutrition

Calories: 84kcal | Carbohydrates: 5g | Protein: 1g | Fat: 7g | Saturated Fat: 1g | Sodium: 4mg | Potassium: 140mg | Fiber: 2g | Sugar: 1g | Vitamin A: 204IU | Vitamin C: 6mg | Calcium: 4mg | Iron: 1mg


from The Recipe Critic https://ift.tt/2Q9vd4f
https://ift.tt/3ggVDf7