Alyssa Rivers August 23 लेबलों वाले संदेश दिखाए जा रहे हैं. सभी संदेश दिखाएं

सोमवार, 23 अगस्त 2021

The Best Manicotti EVER!

This manicotti is filled with 3 kinds of cheese and baked to absolute perfection! It’s comfort food at its finest that everyone will go crazy over! It’s definitely sure to please a large crowd!

The cheese combined with the noodles and savory sauce creates a mouthwatering flavor that you will want to remember! I have fallen in love with Italian food over the years and this one is no exception! Try a few more of my favorite Italian recipes such as Tuscan Shrimp, Creamy Sausage Tortellini Skillet and Creamy Tuscan Sausage Pasta!

Cooked manicotti in a casserole dish.

Stuffed Manicotti Recipe

Manicotti is one of my all-time favorite Italian recipes to make! It is something that my kids devour up each time that I make it, which we all know is a WIN! It’s a very traditional Italian recipe that you will see often on the menu at a restaurant but it also happens to be very easy to make at home! You use large noodles that you stuff with flavor and ingredients which makes this recipe is a little different than your traditional pasta that is topped with sauce. You will love it!

If you love cheese, then this is the recipe for you! It uses 3 different kinds of cheeses, all of which will melt into the shell creating an amazing texture and taste. This recipe is actually really simple and quick which makes it an excellent recipe to be kept on the regular dinner meal rotation! The flavors are simple and classic and don’t have too many ingredients that my kids question. In fact, chop up your spinach really small and they will never even notice that healthy ingredient in there! Whether you are a beginner or an expert in the kitchen, this is definitely something for everyone to love!

Manicotti Shell Ingredients

Most of these ingredients are common ones that you will already have on hand! The best recipes are the ones that I don’t have to make an extra trip to the store for! See the recipe card below for a list of complete ingredients and measurements.

  • Manicotti: Use this pasta or if you don’t have manicotti shells, try and use large jumbo shells instead!
  • Cheeses: You will use ricotta, mozzarella, and parmesan cheese to make a mixture that tastes heavenly!
  • Spinach: Baby spinach or regular spinach will work just fine!
  • Italian seasoning: Use what you have in your pantry or put together some of this very savory and delicious Italian seasoning with the spices you already have on hand!
  • Egg: The egg is used to hold all of the different cheeses together!
  • Marinara sauce: You can use store-bought marinara sauce or try out this delicious homemade sauce.

How to Make Homemade Manicotti

Like I said before, quick and simple is the name of this game! It only takes a few minutes of mixing before you are ready to pop this into the oven and bake! The outcome is divine!

  1. Preheat and cook pasta: Preheat oven to 350 degrees. Cook the manicotti according to package directions and rinse in cold water.
  2. Mix: In a medium sized bowl combine one cup mozzarella cheese, parmesan, spinach, Italian seasoning, and egg.
  3. Stuff: Fill up the shells with the cheese mixture. I find that using a piping back works the best.
  4. Add the sauce and bake: In a 9×13 inch pan add 1 cup of marinara sauce to the bottom. Line the manicotti in an even layer. Cover with remaining sauce and cheese. Bake the manicotti for 25-30 minutes or until cheese is melted and bubbly.
4 pictures showing steps to mixing and stuffing pasta.

Tips for Perfect Manicotti Pasta

There are a few things I have learned over the years when it comes to cooking pasta! Here are a few things that I think will help you out with this recipe. You will become a pasta master in no time!

  • Al Dente: Make sure to undercook your manicotti (leave it a tiny bit firm). Follow the instructions on your pasta packaging to cook to “Al Dente”. This makes it easier to stuff the shells and they will continue to get a bit softer as they are baking in the oven!
  • Add salt to water: Make sure to season your water with a little bit of salt as you begin cooking the pasta! This will make a huge different in your flavor of the pasta. A flavor you will realize that you were missing if you have skipped this step before! Trust me, just try it!
Manicotti being served with a serving spoon.

How to Store the Best Manicotti

We all want to know how we can save time in the kitchen and this is a recipe that can do just that! Follow these instructions for making this ahead of time so that when it comes time for dinner, all you have to do is pop it in the oven! This is a fantastic dish to eat the next day! If you have leftovers, here is how you can keep them fresh and ready to eat all week!

  • Refrigerate: If you want to make this ahead for later that day, you can make it up to 8 hours earlier. Follow the directions on the recipe card and make as usual. Once you have filled the shells and covered them with sauce, cover your casserole dish with foil and leave it in the fridge. When you are ready to cook it, take it out and bake as directed. You may need to add an extra 10-15 minutes of cooking time since you started with a chilled dish.
  • Freezer: Make as usual (but DON’T bake it!) and cover in an airtight container to be placed in the freezer. You can bake this frozen! Bake as directed, you will just need to add an additional 30 minutes to the cooking time!
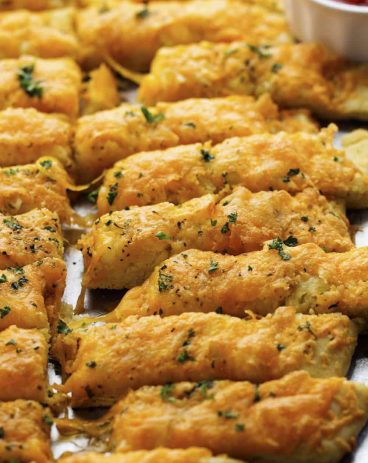
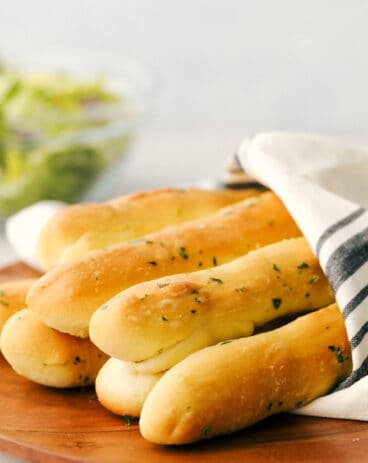
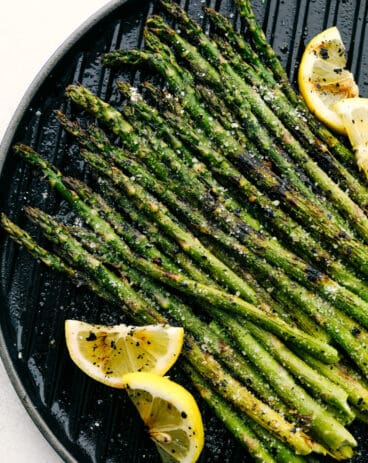
Close up of manicotti being served.
Print

The Best Manicotti EVER!

This manicotti is filled with 3 kinds of cheese and baked to absolute perfection! It's comfort food at its finest that everyone will go crazy over! It's definitely sure to please a large crowd!
Course Dinner, Main Course
Cuisine Italian, Italian American
Keyword homemade manicotti, manicotti, manicotti recipe
Prep Time 15 minutes
Cook Time 30 minutes
Total Time 45 minutes
Servings 10 manicotti
Calories 268kcal
Author Alyssa Rivers

Ingredients

Instructions

  • Preheat oven to 350 degrees. Cook the manicotti according to package directions and rinse in cold water.
  • In a medium sized bowl combine one cup mozzarella cheese, parmesan, spinach, Italian seasoning, and egg.
  • Stuff the shells with the cheese mixture. I find that using a piping bag works the best.
  • In a 9×13 inch, pan add 1 cup of marinara sauce to the bottom. Line the manicotti in an even layer. Cover with remaining sauce and cheese. Bake for 25-30 minutes or until cheese is melted and bubbly.

Nutrition

Calories: 268kcal | Carbohydrates: 15g | Protein: 17g | Fat: 15g | Saturated Fat: 9g | Polyunsaturated Fat: 1g | Monounsaturated Fat: 4g | Trans Fat: 1g | Cholesterol: 72mg | Sodium: 339mg | Potassium: 143mg | Fiber: 1g | Sugar: 1g | Vitamin A: 785IU | Vitamin C: 1mg | Calcium: 340mg | Iron: 1mg


from The Recipe Critic https://ift.tt/3mEl1m3
https://ift.tt/383XySH

The Perfect Cake Donuts

Cake donuts are rich and golden and take the word delicious to the next level! The sweet taste completely melts in your mouth and the delicate frosting with sprinkles will leave you asking for more!

The combination of the fluffy texture of a cake with the delicious flavor and shape of a donut is what makes these cake donuts the BEST! It’s a dessert that your family will go crazy over!! If you have a sweet tooth, you absolutely have to try these other dessert recipes like Brownie Cookies, Ice Cream Sandwiches, and Angel Food Cupcakes!

Stack of donuts.

How are Cake Donuts Different than Regular Donuts?

As someone who loves donuts, I am here to tell you the difference between them and what makes these ones the absolute best. First, let me tell you what actually qualifies something to be a donut. A donut is sweetened dough that is typically cooked in the shape of a ring. Easy right? I bet you already knew that! So what is it that makes a cake donut different?? Well, unlike other donuts, when baking a cake donut, you don’t use yeast! It uses baking powder to get that rich, fluffy texture. And without using yeast, well, this recipe is that much easier!!

Cake donuts are just as sweet as regular donuts. The thing that is truly different is their texture which is just like a cake. This makes them a little bit richer and you will get full more quickly while eating them! I especially love that in this recipe, the delicious glaze runs right to the edge of the donut. It not only tastes like heaven but they look so pretty! Donuts are a staple for breakfast, brunch, snack time, and dessert which means that they will get eaten for sure!

Ingredients for Cake Donuts

Simple and satisfying, these cake donuts are at the top of my list when I am picking a delicious dessert recipe. I usually have all of the ingredients on hand which makes baking them a cinch! See the recipe card for exact ingredient measurements!

  • Flour: I used an all purpose flour when making these donuts.
  • Sugar: The necessary ingredient for them to be sweet!
  • Baking powder: This is what will give them that cake like texture. The bubbles make from this make the cake fluffy!
  • Salt: salt makes this delicous and encourages that golden brown color of the donut.
  • Butter: Make sure to use unsalted, melted butter.
  • Eggs: Beat the eggs before mixing them in!
  • Whole milk: A superstar ingredient, whole milk provides fat, sugar, protien content and creaminess to the donuts!
  • Vanilla: Vanilla does a great job enhancing the overall sweet flavor.

Ingredients for Glaze

  • Powdered sugar: powdered sugar is the necessary component for the sweetness of the glaze!
  • Butter: You will use unsalted, melted butter for the glaze as well!
  • Vanilla: If you want to switch it up or you have it on hand, vanilla bean paste is an excellent option for the vanilla taste as well!  
  • Milk: This will bind all of the ingredients together.

How to Make Cake Donuts

Mixing all of the ingredients together goes quickly! You can save some time and make the glaze while your donuts are baking and it will be all ready to go once they cool! Mix this up by adding food coloring to the glaze or changing up the sprinkles to mini chocolate chips, mini m&m’s, or really, whatever your heart desires! They will be delicious no matter what!

  1. Prepare: Preheat the oven to 350° and grease donut pans with cooking spray.
  2. Dry Ingredients: In a large bowl whisk together flour, sugar, baking powder, and salt.
  3. Wet Ingredients: In a medium bowl whisk together the butter, eggs, milk and vanilla.
  4. Mix: Add the wet ingredients to the dry ingredients and mix together until smooth.
  5. Pipe: Use a large ziplock bag with the corner snipped off or a large pastry bag to pipe the batter into the greased donut pans, filling the pans only ¾ of the way full.
  6. Put it in the oven: Bake for 10-12 minutes, until golden brown. While the donuts are baking, mix together the vanilla glaze.
  7. Make the Glaze: Mix the powdered sugar, melted butter and vanilla. Add the milk 1 tbsp at a time until it reaches the desired thickness. You don’t want it to be so thin that it runs right off the donut, but you also don’t want it to be thick and paste like.
  8. Cool, glaze and sprinkle: Cool the donuts for 5-10 minutes before dipping in the glaze and sprinkling with desired sprinkles.
Four photos of the process of making cake donuts.

Donut Hacks

If you make these cake donuts at home, you’ll realize how good they taste, and suddenly, it saves you a trip to your local donut shop!! Once you make these once, you won’t be able to stop! Here are a few ideas on how you can make sure that these donuts turn out just PERFECT!

  • Everything is better when it’s chocolate! For a chocolate glaze instead, just simply add ½ cup of melted chocolate chips to the glaze mixture!
  • Donut poppers: Don’t have a donut pan? Try putting the batter in mini muffin tins and make them “donut poppers”. You will need to change the cooking temperature to 400 degrees and cook them for 8-9 minutes instead!
  • Tap your pan: Once your donuts are piped into the pan, pick it up with both hands and gently tap it onto your counter. This will even your donut batter out and help to eliminate any air pockets!

Tips For The Best Cake Donuts

Homemade Cake Donuts are quiet easy and take little to no time to make!

  • Donut Pan: Using a cake donut pan is essential to getting the distinct ring form for the donuts. These pans can be found at most craft stores and even some grocery stores. They typically come with 6, 12, or 20 donut wells.
  • Filling The Pan: Be sure to fill the donut pan only ¾ of the way full. Any more full and the center of the donut will disappear as the donut batter rises.
  • Vanilla Bean Paste: This is optional, but using vanilla bean paste will take your donuts to the next level! Vanilla bean paste is a thick paste of vanilla bean caviar (what the vanilla beans are called) and will give your donuts and icing a speckled look as well as amazing vanilla flavor!
Donuts on a cooling rack.

Storing Homemade Cake Donuts

I love to double this recipe so that I can have these cake donuts for breakfasts, snacks, and dessert all week! If you store them in an airtight container, they can stay fresh at room temperature for 5 days! If you store them in your fridge, they will last a few more days. Also, try to keep your donuts away from any windows in the kitchen because the sun will cause the glaze to melt off! As with any donuts, these homemade cake donuts are best eaten the same day they are made. But if you have leftovers (I bet you won’t!) they can keep them at room temperature for 2-3 days.

  • Served Fresh Out Of The Oven: For optimal enjoyment, these donuts are best served as soon as they have cooled enough to be dipped in the icing.
  • Room Temp: They are best stored flat on a baking sheet with a plastic lid on top. If you don’t have a plastic lid for your cookie sheet then try to store them without icing and covered them with plastic wrap. If they already have icing on them and are covered in plastic wrap, it may remove some of the icings when the plastic wrap is taken off.
A cake donut being held that is half eaten.
Print

The Perfect Cake Donuts

Cake donuts are rich and golden and take the word delicious to the next level!! The sweet taste completely melts in your mouth and the delicate frosting with sprinkles will leave you asking for more!
Course Breakfast
Cuisine American
Keyword cake donuts, cake donuts recipe
Prep Time 20 minutes
Cook Time 12 minutes
Total Time 32 minutes
Servings 18 Donuts
Calories 191kcal
Author Alyssa Rivers

Ingredients

  • 2 cups all purpose flour
  • 1 cup granulated sugar
  • 2 teaspoon baking powder
  • 1/2 teaspoon salt
  • ¼ cup unsalted butter melted
  • 2 large eggs beaten
  • ¾ whole milk
  • 2 teaspoon vanilla

Vanilla Glaze

  • 2 cups powdered sugar
  • 2 Tablespoon unsalted butter melted
  • 1 teaspoon vanilla or vanilla bean paste
  • 3 Tablespoon milk

Instructions

  • Preheat the oven to 350° and grease donut pans with cooking spray.
  • In a large bowl whisk together flour, sugar, baking powder, and salt.
  • In a medium bowl whisk together the butter, eggs, milk and vanilla.
  • Add the wet ingredients to the dry ingredients and mix together until smooth.
  • Use a large ziplock bag with the corner snipped off or a large pastry bag to pipe the batter into the greased donut pans, filling the pans only ¾ of the way full.
  • Bake for 10-12 minutes, until golden brown. While the donuts are baking, mix together the vanilla glaze.
  • Cool for 5-10 minutes before dipping in the glaze and sprinkling with desired sprinkles. Cool completely on a cooling rack.

Vanilla Glaze

  • Mix the powdered sugar, melted butter and vanilla. Add the milk 1 tbsp at a time until it reaches the desired thickness. You don't want it to be so thin that it runs right off the donut, but you also don't want it to be thick and paste like.

Nutrition

Calories: 191kcal | Carbohydrates: 35g | Protein: 2g | Fat: 5g | Saturated Fat: 3g | Polyunsaturated Fat: 1g | Monounsaturated Fat: 1g | Trans Fat: 1g | Cholesterol: 31mg | Sodium: 75mg | Potassium: 73mg | Fiber: 1g | Sugar: 24g | Vitamin A: 152IU | Calcium: 29mg | Iron: 1mg


from The Recipe Critic https://ift.tt/3ybBKz3
https://ift.tt/3z9zB8v

रविवार, 23 अगस्त 2020

Slow Cooker Brown Sugar Balsamic Glazed Pork

This juicy, melt in your mouth brown sugar balsamic glazed pork is an explosion of flavor. With simple ingredients, easy prep and taste that wows, this dish will make you the hit of the dinner table. You will dream about this pork after you make it.  It’s just that good!

Making quick slow cooker sandwiches are a MUST in the summer! If you love sandwiches as much as we do try these favorites: Slow Cooker French Dip Sandwiches and Slow Cooker Chicken Caesar Sandwiches.

Brown sugar balsamic glazed pork in a bun.

Brown Sugar Balsamic Glazed Pork

This is one of those recipes that you have to try. You throw it into the crockpot and let it work its magic. By the time it was finished and I pulled it out it was falling apart because it was so tender. But you are going to LOVE this glaze. It will still be fantastic.

The combination of brown sugar and balsamic vinegar are a match made in saucy heaven. We poured some of the sauce over the meat before making the sandwiches to make them extra juicy. This sauce would be sublime served as a gravy over rice or potatoes as well. Cooking the meat on low ensures a nice tender meat. If your crockpot cooks hot, add extra water or broth to avoid burning.

Brown Sugar Glazed Pork Ingredients:

Slow cooker pork is so simple to make and comes together quickly. Tender pork for a sweet and savory dinner! Place everything in the slow cooker and let it work its magic!

  • Pork Tenderloin: You can also substitute pork shoulder or pork butt for these sandwiches
  • Salt: Don’t skimp here, it helps to bring out flavor and tenderize the meat.
  • Coarse Pepper: If you don’t have coarse regular pepper will work here too.
  • Minced Garlic: For faster prep use jarred minced garlic.
  • Brown Sugar: Try dark brown sugar for an extra zing of flavor
  • Cornstarch: This will thicken the sauce for you.
  • Balsamic Vinegar: This can usually be found in your local grocery store next to apple cider vinegar.
  • Soy Sauce: You can use low sodium soy sauce here if you want.
  • Water: You’ll use half a cup in the crockpot with the pork and half a cup in the sauce.

How to Make Glazed Pork:

First sear the pork to create a crispy outside with a tender inside. Create a sauce that is irroestiable then place it all together in a slow cooker.

  1. Sear Roast:  Rubbing in the salt and pepper ensures flavor and tenderizing. Rub the salt and pepper over the pork tenderloin. If you are pan searing it, heat 2 T olive oil in a skillet over medium high heat. Let each side get very dark brown about 1-2 minutes. 
  2. Add ingredients to Slow Cooker : Add 1/2 cup of water to the crockpot and place the pork inside.Cook the pork on low for 6-8 hours.
  3. Make Sauce:The last hour of cooking, in medium saucepan mix together garlic, 1/2 cup water, brown sugar, cornstarch, balsamic vinegar, and soy sauce together. Bring to a boil and reduce the heat to medium low and stir until the glaze thickens. Slowly add more cornstarch if needed.
  4. Glaze in Oven: Brush the roast with the glaze 2-3 times the last hour of cooking. To get the caramelized crust, remove the pork roast from the crockpot and place on an aluminum foil lined pan. Brush more of the glaze on top and broil on high for 2-3 minutes until the desired crust is achieved.
  5. Shred: With two forks shred the pork. Serve with remaining glaze on the side.

The process of cooking pork and slow cooking it.

Tips and Variations for this Slow Cooker Dish:

These simple tips and variations will help guide you to making the best pork for dinner!

  • Meat: This can be made using chicken breasts or boneless skinless chicken thighs even use a beef chuck roast.
  • Cook Longer: Let the sauce cook with the roast for 15 min up to 30 min for added richness.
  • Shredding Meat: Shred the meat on a cookie sheet covered with aluminum foil, poor sauce over the top and broil for a caramelized dark crust along the top
  • Broth: Use beef broth or vegetable broth instead of water to cook the roast in.
  • Try it with an Instant Pot: This can also be done in an instant pot, add an extra half a cup of water or cook it in the sauce. Set the Instant Pot to high pressure for 45 minutes. Keep in mind you need to allow extra time for it to come to pressure and to naturally release for 15 minutes.

Shredded pork in a slow cooker being stirred with a wooden spoon.

Storing Slow Cooker Pork:

This pork is so easy to make and perfect for making a large crowd. Make this ahead of time and easily warm it up when ready to serve!

  • Make Ahead: This is so easy to make ahead of time and warms up perfectly. Store in the refrigerator for 4 to 5 days in an airtight container.
  • Freezing Pork: Let the meat cool, then place in an airtight container or ziplock bag. Let out access air and lay flat in the freezer. When ready to serve, place in the refrigerator over night.
  • Warming Up: Place in the slow cooker, reheat in the microwave or cook it in the oven until warmed through.

Pork sandwich sitting on a white plate.

More Amazing Crockpot Recipes to Try:

  • Pork Carnitas 
  • Skinny Pulled Pork Barbacoa
  • Beef Carnitas Tacos
  • Asian Pulled Pork
  • Cafe Rio {Copycat} Sweet Pulled Pork
Print

Slow Cooker Brown Sugar Balsamic Glazed Pork

This juicy, melt in your mouth brown sugar balsamic glazed pork is an explosion of flavor. With simple ingredients, easy prep and taste that wows, this dish will make you the hit of the dinner table. You will dream about this pork after you make it.  It's just that good!
Course Dinner, Main Course
Cuisine American
Keyword slow cooker glazed pork
Prep Time 20 minutes
Cook Time 6 hours
Total Time 6 hours 20 minutes
Servings 6 Servings
Calories 353kcal
Author Alyssa Rivers

Ingredients

  • 2-3 pounds Pork tenderloin
  • 1 teaspoon salt
  • 1/2 teaspoon coarse pepper
  • 1 teaspoon minced garlic
  • 1/2 cup Water
  • 1 cup Brown sugar
  • 1-2 tablespoon Cornstarch
  • 1/2 cup Balsamic Vinegar
  • 1/2 cup Water
  • 4 tablespoons Soy sauce

Instructions

  • Rub the salt and pepper over the pork tenderloin. If you are pan searing it, heat 2 Tablespoons olive oil in a skillet over medium high heat. Let each side get very dark brown about 1-2 minutes. Add 1/2 cup of water to the crockpot and place the pork inside.
  • Cook the pork on low for 6-8 hours. The last hour of cooking, in medium saucepan mix together garlic, 1/2 cup water, brown sugar, cornstarch, balsamic vinegar, and soy sauce together. Bring to a boil and reduce the heat to medium low and stir until the glaze thickens. Slowly add more cornstarch if needed.
  • Brush the roast with the glaze 2-3 times the last hour of cooking. To get the caramelized crust, remove the pork roast from the crockpot and place on an aluminum foil lined pan. Brush more of the glaze on top and broil on high for 2-3 minutes until the desired crust is achieved.
  • With two forks shred the pork. You can serve with rice, potatoes, or in sandwiches. Serve with remaining glaze on the side.

Notes

Updated on August 23, 2020
Originally Posted on October 10, 2013

Nutrition

Calories: 353kcal | Carbohydrates: 42g | Protein: 33g | Fat: 5g | Saturated Fat: 2g | Cholesterol: 98mg | Sodium: 1154mg | Potassium: 692mg | Fiber: 1g | Sugar: 39g | Vitamin C: 1mg | Calcium: 48mg | Iron: 2mg


from The Recipe Critic https://ift.tt/3gjKRVn
https://ift.tt/3j86wlm