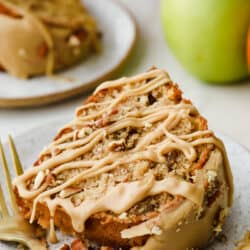
Praline Apple Bundt Cake is loaded with apples, pecans and covered in a brown sugar praline glaze — the perfect fall dessert! It’s a new favorite that I’m sure will make its appearance more than once this fall!
Filled with all of the essential fall ingredients to make a delicious dessert, this bundt cake will for sure fit the bill for any party or get-together! The ooey-gooey glaze drizzled on top makes this just about perfect! The cake is one of my favorite things to satisfy my sweet tooth so if you’re like me you will love these recipes like Kentucky butter cake, churro cupcakes, and this delicious coconut cream cake!

Apple Bundt Cake
For me, nothing screams fall like the combination of apples, cinnamon, and brown sugar. This cake is one of my favorite ways to satisfy my apple-loving heart! It is baked to perfection and tastes just how a cake should. Moist, fluffy, light, and sweet. The texture is incredible and then when you top it off with a sweet praline glaze it really takes it over the top and makes it extra special! Add in the fact that this is a bundt cake so it not only tastes amazing but it looks so beautiful too, you will be reaching for this recipe every time you need to bake for any guests!
This cake makes the perfect dessert or a fantastic Sunday brunch option! It is so simple and easy to make. The hardest part is waiting an entire 55 minutes for it to bake in the oven before you can eat it!! It is simply too irresistible for those who love cake and it gets gobbled up so quickly, you may even want to make an extra! I don’t know what it is about Fall but the baking level is taken up a notch. This recipe is no exception and will be one that you love and look forward to every autumn!
Ingredients for Praline Apple Bundt Cake
Made up of all the delicious fall ingredients that I love, this bundt cake will surely deliver exceptional taste. Most of the ingredients you will already have in your kitchen gives you no excuse not to make this and eat it up today! See the recipe card below for a list of exact measurements.
- Light sour cream: You can use Greek yogurt if you don’t have any sour cream on hand!
- Canola oil: This will add moisture to the cake.
- Eggs: I always see the best results when my eggs are at room temperature before I start baking.
- Vanilla: Adds sweetness to the cake.
- Brown sugar: Make sure to lightly pack the brown sugar into your measuring cup.
- Baking powder: This lightens the texture creating bubbles in the cake. This is what makes a cake so fluffy!
- Baking soda: Baking soda helps your cake to rise and not be flat and chewy.
- Salt: A must have ingredient, salt enhaces all of the other flavors in the ingredients!
- Cinnamon: This is where it starts to taste like Fall.
- Flour: I like to use an all purpose flour in this cake.
- Apples: You will use apples twice in this recipe, some will be chopped and others will be shredded!
- Pecans: Chop, toasted and divide these.
Glaze
- Brown sugar: This is going to be the main ingredient that you taste! It’s so delicious!
- Milk (or cream): Use this for the glaze to take on a creamy consistency.
- Butter: Unsalted butter should be used for this glaze.
- Powdered sugar: This is what will actually stick all of the ingredients together and make it just the right thickness.

Lets Make a Cake!
Apples are great things to change up a dessert because they are usually affordable and easy to come by. This apple praline bundt cake really capitalizes on the apple flavor and is mixed with the cinnamon and the creamy glaze, this recipe will make your mouth water! Let’s try it out and make a cake!
- Prep: Preheat oven to 350 degrees Grease a 10 cup bundt pan.
- Whisk: In a large bowl, whisk together sour cream or yogurt, oil, eggs and vanilla. Whisk in brown sugar until smooth.
- Add in dry ingredients: Add baking powder, baking soda, salt, cinnamon and stir until combined. Stir in flour just until combined. Stir in chopped and shredded apples and 1 cup pecans.
- Bake: Pour into greased bundt pan and bake for 50-55 minutes, until a toothpick comes out clean. Let cool in pan for 15-20 minutes before inverting onto a cooling rack to cool to room temperature.
- Glaze: In a medium saucepan, combine brown sugar and milk. Bring to a boil over medium heat and cook for 3-4 minutes, whisking constantly.
- Remove from heat and stir in butter until melted. Stir in powdered sugar and whisk until smooth. Let cool 5-10 minutes to thicken slightly before pouring over cooled cake. Sprinkle with remaining ½ cup pecans.

Bundt Cake Tips
This praline apple bundt cake is decadent and delicious! I’m not kidding when I say that this turns out tasting amazing and it looks gorgeous as well. Bundt cake pans are so awesome that way! Feel free to make this your own by changing up the glaze to frosting or add different toppings of your choice! Any other kinds of nuts, berries, or even chocolate chips would be delightful! Here are some more tips to make this recipe turn out just right!
- Peeling the Apples: I didn’t peel the apples for this recipe, but if you prefer to, you can!
- Get the cake out: To get the cake out once it’s cooked, let it sit for 15 minutes. Then take a butter knife and run it along the inside edges so that it gently seperates the cake from the pan. When you remove the cake, between the cooking spray and this trick, it should come out pefectly shaped!
- Using a bundtlet pan: If you want to make these into individual servings using a bundtlet pan, change your cook time to 25-30 minutes instead.

How to Store Praline Apple Bundt Cake
If you have leftovers from this recipe, you will definitely want to know how to store them so that you can snack on them whenever you get a chance! Here are some tips on how to do that!
- Counter: You can store this in an airtight container at room temperature for up to 5 days!
- Freezer: If you want to freeze an entire cake or leftovers, just do so WITHOUT the glaze on top. (The glaze doesn’t have the same texture after freezing.) You can store it in your freezer in an airtight container for up to 3 months. To thaw, just place it in your fridge until it’s soft.

More Apple Recipes for the Fall
Salads
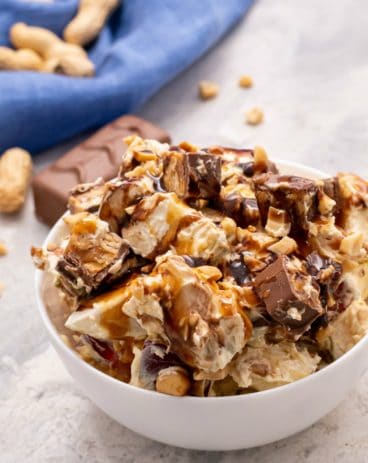
Snickers Caramel Apple Salad

Appetizers
Baked Cinnamon Sugar Apple Chips

Desserts
Apple Churro Cheesecake Bars
Salads
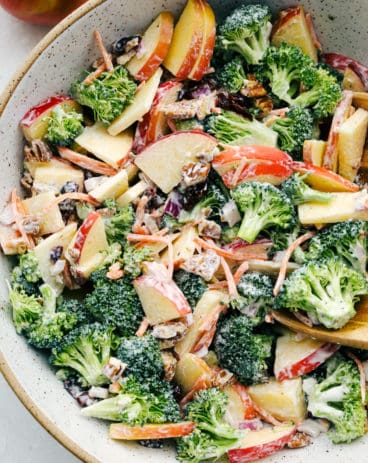
Broccoli Apple Salad
Praline Apple Bundt Cake
Ingredients
- 1 cup light sour cream or Greek yogurt
- 1 cup canola oil
- 4 large eggs
- 3 teaspoons vanilla
- 2 cups lightly packed brown sugar
- 3 teaspoons baking powder
- 1/2 teaspoon baking soda
- 1/2 teaspoon salt
- 2 teaspoons cinnamon
- 3 cups all purpose flour
- 2 apples finely chopped
- 1 apple shredded
- 1 1/2 cups chopped toasted pecans, divided
Glaze
- 1 cup brown sugar
- 1/2 cup milk or cream
- 1 tablespoon butter
- 1 1/2 cups powdered icing sugar
Instructions
-
Preheat oven to 350 degrees. Grease a 10 cup bundt pan.
-
In a large bowl, whisk together sour cream or yogurt, oil, eggs and vanilla. Whisk in brown sugar until smooth.
-
Add baking powder, baking soda, salt, cinnamon and stir until combined. Stir in flour just until combined. Stir in chopped and shredded apples and 1 cup pecans.
-
Pour into greased bundt pan and bake for 50-55 minutes, until a toothpick comes out clean. Let cool in pan for 15-20 minutes before inverting onto a cooling rack to cool to room temperature.
Glaze
-
In a medium saucepan, combine brown sugar and milk. Bring to a boil over medium heat and cook for 3-4 minutes, whisking constantly.
-
Remove from heat and stir in butter until melted. Stir in powdered sugar and whisk until smooth. Let cool 5-10 minutes to thicken slightly before pouring over cooled cake. Sprinkle with remaining ½ cup pecans.
Notes
Nutrition
from The Recipe Critic https://ift.tt/2Wkcido
https://ift.tt/3msHUIJ