Alyssa Rivers January 18 लेबलों वाले संदेश दिखाए जा रहे हैं. सभी संदेश दिखाएं

मंगलवार, 18 जनवरी 2022

Broccoli Tots

A delicious and cheesy twist on a classic favorite, these broccoli tots will fly off of your table. They are the perfect side or appetizer for any meal!

Broccoli is one of my favorite veggies to add to a meal. You can use it as a mix-in, side, or part of your main dish! A few of my favorite broccoli recipes are this Beef and broccoli, this lo mein, or this soup!
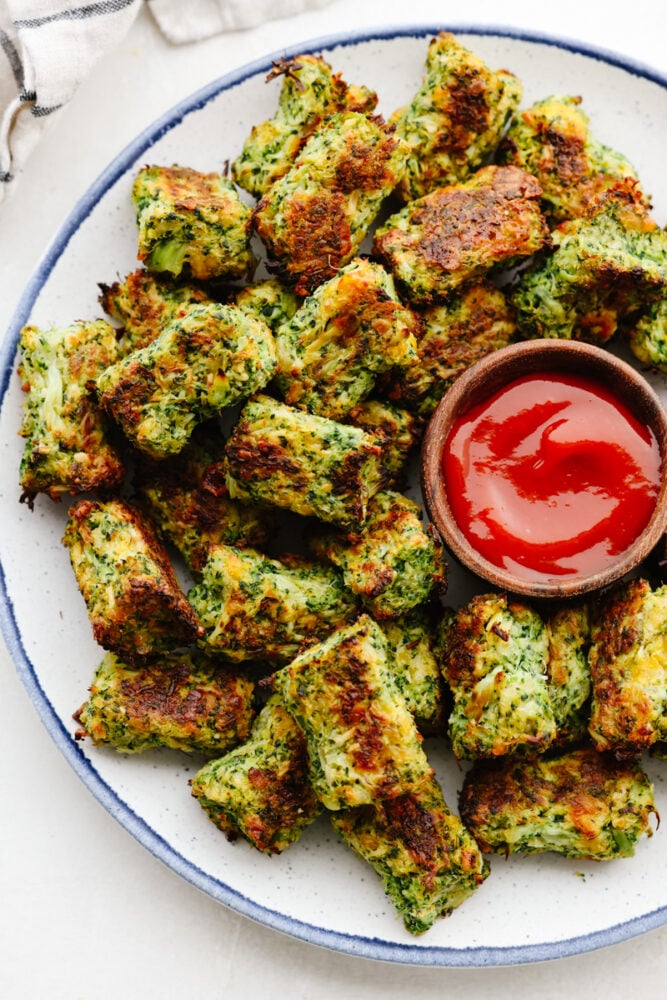
A plate of broccoli too with some ketchup.

What are Broccoli Tots?

If you love tater tots, then these broccoli tots are for you! If you have some broccoli on hand, then you definitely need to try these. You mix some cheeses with seasonings, an egg, and some riced broccoli, and voila! You are ready to pop these in the oven and get them nice and crispy to add to your meal. These are insanely delicious and go perfect with a hamburger or even this fried chicken.

These broccoli tots are similar to my cauliflower tots that I had made a few months ago. I wanted to do them with broccoli, too, since the ingredients go hand in hand. These broccoli tots have the same consistency as tater tots (crispy on the outside and soft on the inside), but they are baked instead of fried. They are so delicious, and you MUST TRY them.

Ingredients to Make Broccoli Tots

This ingredients list is short and sweet with common kitchen ingredients. There is nothing in these that you have to search for at the grocery store! See the (printable) recipe card at the bottom of the post for exact measurements.

  • Broccoli: You will need to cook your broccolis up and pulse it in a food processer before you can make these tots.
  • Egg: The egg will bind all of the ingredients together alloweing you to shape them into a tot.
  • Cheddar cheese and parmesan cheese: The cheeses not only add a great flavor but they make the texture soft.
  • Flour: I used all purpose flour in this recipe.
  • Onion: Grate this up so that the onion pieces are small and mix in well with the other ingredients.
  • Garlic clove: If you don’t have a fresh garlic clove then you can used minced garlic. ½ tsp equals about 1 clove of garlic.
  • Salt and pepper: These will finish off the tots with some great flavor!

Let’s Make Some Tots!

These broccoli tots are going to be your new favorite side to add to every meal! Dip them, eat them plain or serve them up as an appetizer. Any way you choose will be perfect and delicious!

  1. Preheat oven: Preheat the oven to 400° and spray a baking sheet well with pan spray.`
  2. Cook the broccoli: If using frozen riced broccoli, prepare it according to the package and let it cool until it is cool enough to handle. If using fresh broccoli, prepare a pot of boiling water. Cut the broccoli into florets and place it in a steamer basket over the boiling water. Cover and steam for 5 minutes until the florets are fork-tender. Alternatively, the broccoli can be steamed in the microwave in a microwave-safe bowl with a bit of water in the bottom for 5 minutes. 
  3. Pulse the broccoli: Once cooked, place the steamed florets in a food processor and pulse for 10-15 seconds until you get a nice riced consistency.
  4. Add ingredients and mix: Transfer the riced broccoli to a tea towel or several layers of cheesecloth and squeeze to remove as much liquid as possible. There is more liquid than you’d think, I’m usually able to squeeze out nearly a cup of liquid. Measure out 4 cups of broccoli and add to a large bowl. Add the egg, both cheeses, flour, onion, garlic, salt and pepper. Mix together and set aside to rest for 5 minutes or so.
  5. Form tots and bake: Using your hands, form the tots (about 35) that are about 1.5x.5 inches and line them up on the baking sheet leaving space between them. Bake for 20 minutes before removing from the oven, flip them over and then bake for another 15-20 minutes, until golden brown.
  6. Serve: Enjoy with ketchup or your favorite dipping sauce
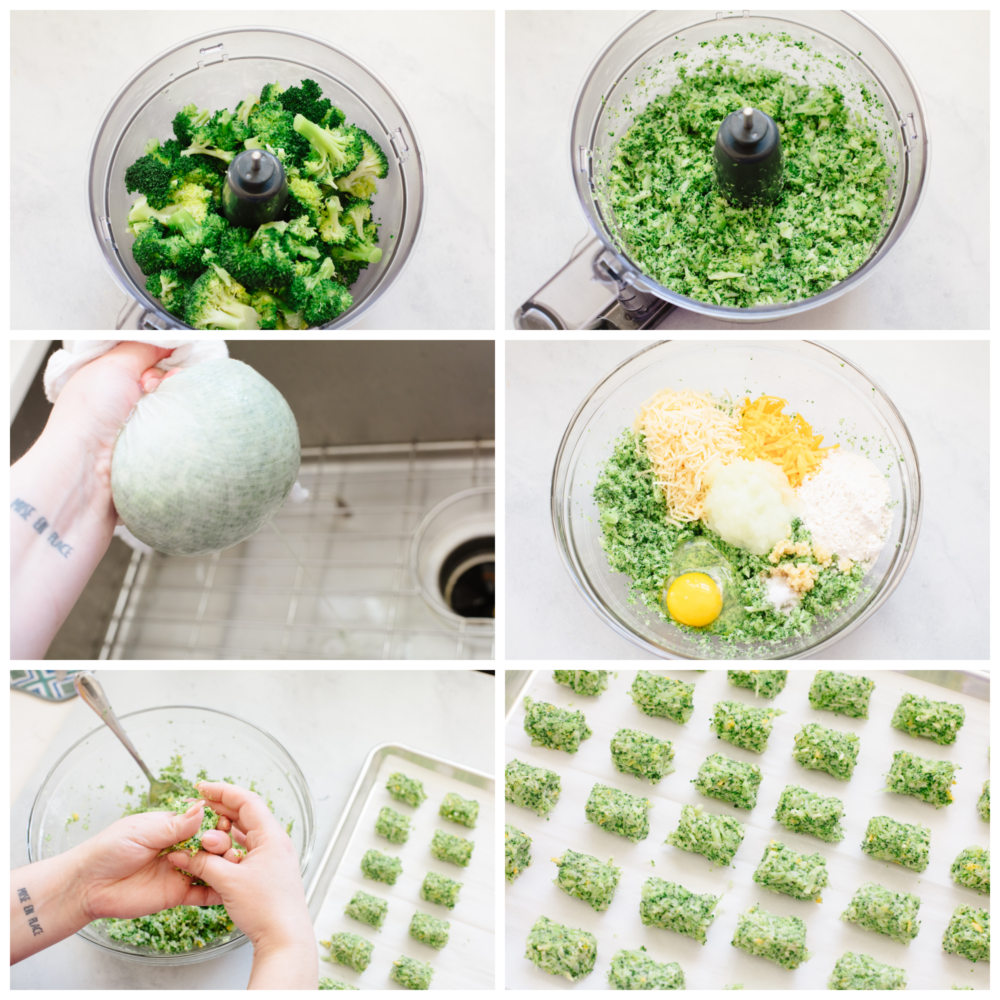
6 pictures showing how to pulse broccoli, mix the ingredients and form the tots.

Tips for Cooking with Broccoli

This recipe uses broccoli that’s been cooked and riced before you can begin making the tots. Here are a few tips to making these tots turn out perfectly!

  • Can I use frozen broccoli? Yes! You can use any kind of broccoli that you have on hand for these tots! Just make sure to cook it befrehand according to the directions on the package.
  • Don’t forget the flip: When you are cooking these in your oven, you will need to flip them halfway through. This makes it so that they cook evenly and get nice and crispy all the way around.
  • What do I dip these in? I am a huge fan of using ketchup to dip these in but you could use Homemade Ranch Dressing, this Everything Bagel Dip or some Easy Veggie Dip!
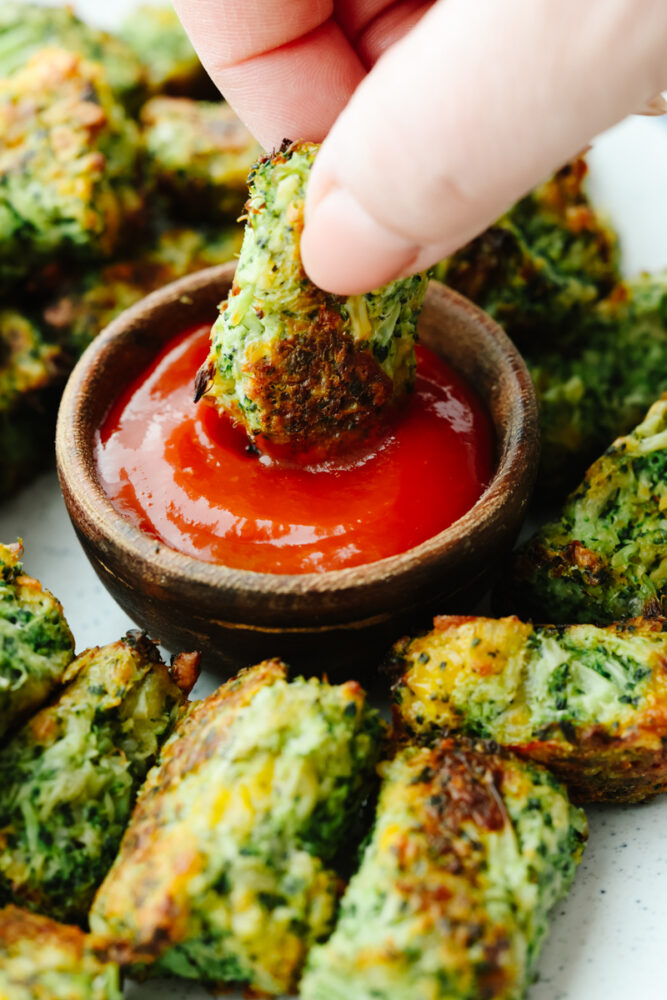
A broccoli tot being dipped into ketchup.

How to Store Leftovers

These broccoli tots make fantastic leftovers. In fact, you can make some ahead of time and freeze them to cook up later! Here is how you can store and reheat them for another day.

  • Refrigerator: Once the tots have cooled then store them in an airtight container. Put them in your fridge and they will last about 5 days.
  • Freezer: Double the recipe so that you can have some on hand to freeze. Place them in and airtight container, label it with the date and put it in your freezer. They will last for up to 3 months.
  • Reheat: The best way to reheat your tots will be in an air fryer or an oven. This will make them taste crispy and fresh again! Preheat your air fryer or oven to 400 degrees and cook them for 3-5 minutes or until heated through. You can take frozen ones and put them directly in your oven (no need to thaw them) They will just take couple minutes longer to cook.
Print

Broccoli Tots

A delicious and cheesy twist on a classic favorite, these broccoli tots will fly off of your table. They are the perfect side or appetizer for any meal!
Course Side Dish
Cuisine American
Keyword broccoli tots
Prep Time 35 minutes
Cook Time 40 minutes
Total Time 1 hour 15 minutes
Servings 35 Tots
Calories 29kcal
Author Alyssa Rivers

Ingredients

  • 4 Cups riced Broccoli
  • 1 large Egg
  • ½ Cup Shredded Cheddar Cheese
  • ½ Cup Shredded Parmesan Cheese
  • ¼ Cup All Purpose Flour
  • cup Grated Onion
  • 1 Clove Garlic minced
  • ½ Teaspoon Salt
  • ¼ Teaspoon Ground Pepper

Instructions

  • Preheat the oven to 400° and spray a baking sheet well with pan spray.`
  • If using frozen riced broccoli, prepare it according to the package and let it cool until it is cool enough to handle. If using fresh broccoli, prepare a pot of boiling water. Cut the broccoli into florets and place it in a steamer basket over the boiling water. Cover and steam for 5 minutes until the florets are fork-tender. Alternatively, the broccoli can be steamed in the microwave in a microwave-safe bowl with a bit of water in the bottom for 5 minutes.
  • Once cooked, place the steamed florets in a food processor and pulse for 10-15 seconds until you get a nice riced consistency.
  • Transfer the riced broccoli to a tea towel or several layers of cheesecloth and squeeze to remove as much liquid as possible. There is more liquid than you’d think, I’m usually able to squeeze out nearly a cup of liquid. Measure out 4 cups of broccoli and add to a large bowl. Add the egg, both kinds of cheeses, flour, onion, garlic, salt, and pepper. Mix together and set aside to rest for 5 minutes or so.
  • Using your hands, form the tots (about 35) that are about 1.5x.5 inches and line them up on the baking sheet leaving space between them. Bake for 20 minutes before removing from the oven, flip them over, and then bake for another 15-20 minutes, until golden brown.
  • Enjoy with ketchup or your favorite dipping sauce.

Nutrition

Calories: 29kcal | Carbohydrates: 3g | Protein: 2g | Fat: 1g | Saturated Fat: 1g | Polyunsaturated Fat: 1g | Monounsaturated Fat: 1g | Trans Fat: 1g | Cholesterol: 8mg | Sodium: 76mg | Potassium: 6mg | Fiber: 1g | Sugar: 1g | Vitamin A: 512IU | Vitamin C: 25mg | Calcium: 49mg | Iron: 1mg


from The Recipe Critic https://ift.tt/3A7HFrm
https://ift.tt/3fA8YRL
Avocado Hummus Dip

If you are looking for the most delicious appetizer out there, this avocado hummus is for you! Delectable, creamy, and perfect with any veggies or crackers, this dip is the BEST!

I love a good dip. I mean, who can resist that creamy texture and fantastic taste mixed with some crunch? Try out this million-dollar dip, this cheese sauce, or this crab dip. You will love them all!

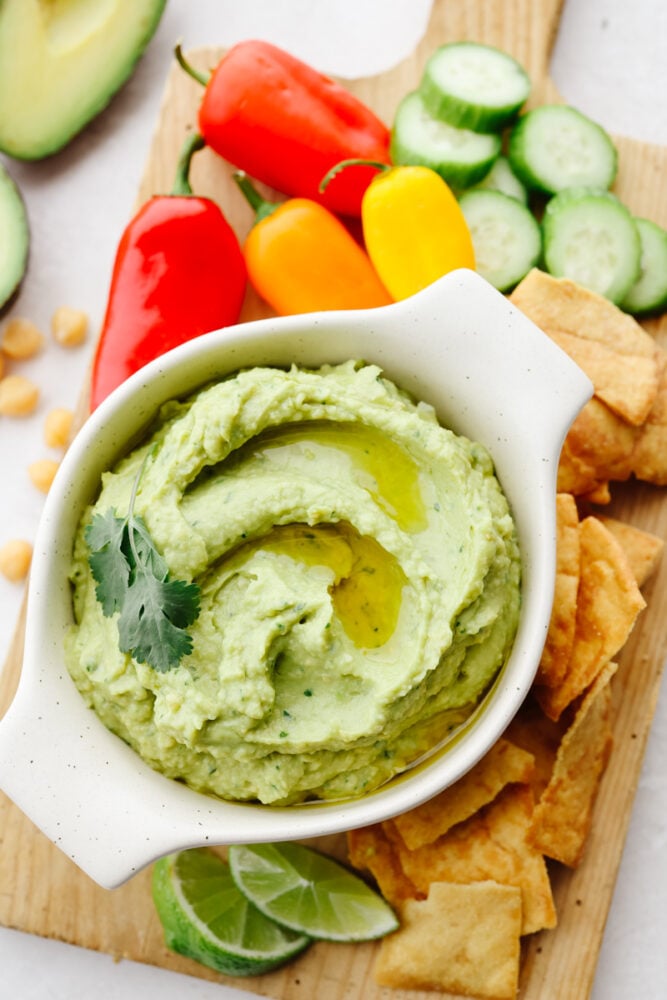
Avocado hummus in a bowl on a wooden cutting board with some pita chips, cucumbers and peppers.

Avocado Hummus Dip

If you love guacamole then this avocado hummus dip should be calling your name! It’s similar to guacamole but made with avocado and garbanzo beans( which are organic chickpeas). I love that the texture is ultra creamy! Then, when you mix in the lime juice and the cilantro, it takes it to the next level with a fresh taste. You will want to dip everything and anything in it. And the best part is that you can!

I have used this dip as an appetizer and just for an after-school snack for my kids! It works with just about anything, which is another reason why I love it. It’s not only delicious but super versatile. Whip this up and dip in some veggies and crackers or even pita chips, and you have yourself a super healthy snack! Fair warning, though: once you stop, you won’t be able to stop!

Ingredients in Avocado Hummus Dip

Gather up these ingredients as soon as possible because you don’t want to miss out on this avocado hummus! See the (printable) recipe card at the bottom of the post for exact measurements.

  • Garbanzo beans: Drain your beans before mixing them in.
  • Avocados: Remove the skin and the pit from each avocado.
  • Lime juice: You can use fresh lime juic or lime juice from a bottle. Fresh will bring a much brighter taste to the hummus.
  • Tahini paste: This can be found either on the peanut butter aisle or the international foods aisle in your local grocery store.
  • Garlic: Minced garlic is perfect for this recipe!
  • Sea salt: Use more if you prefer a salty taste.
  • Cilantro: I prefer a subtle taste of cilantro but feel free to add more if you love that flavor!
  • Water: This is used to help your hummus reach the desired consistency. Use more water for a thinner hummus.
  • Olive oil: This will be used in the hummus and also as a garnish on top.

Let’s Make Some Hummus!

Avocado hummus is absolutely divine. Creamy and the perfect texture, this is definitely a recipe that will be repeated in your household! Plus, it only takes about 10 minutes to put together, so that’s a win!

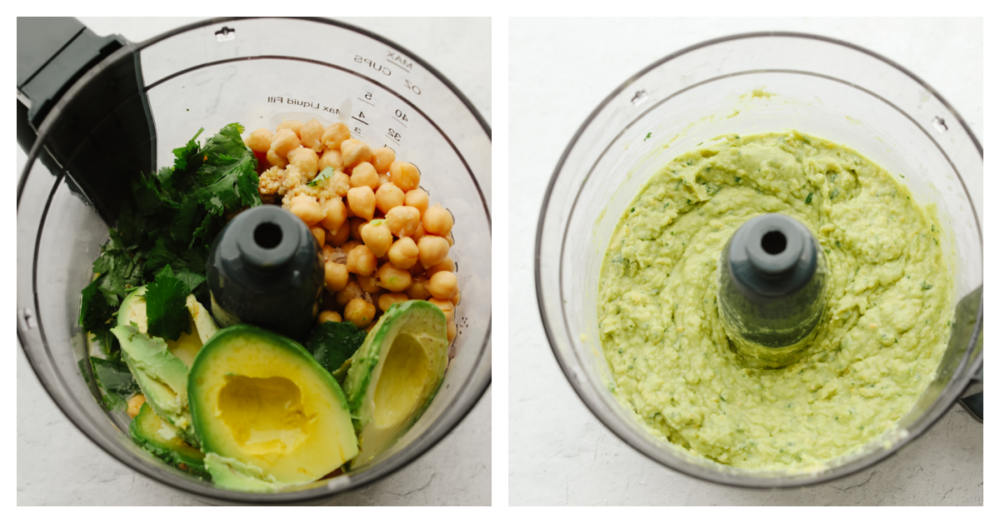
  1. Combine and blend: Combine all the ingredients in a food processor or blender and blend until smooth.
  2. Add water to thin it: If the dip is too thick, extra water will help. Add 1 tbsp of water at a time if needed to reach desired dipping consistency. 
  3. Serve: Serve with chips, crackers, vegetables, pita bread, or anything desired for dipping!
2 pictures showing how to add the ingredients and blend them together.

How to Eat Avocado Hummus

Hummus can be eaten as a dip and also as a spread on so many things! Here are a few ideas that you can try. They are SOO GOOD.

  • Use it as a spread: You can use this on sandwiches, wraps, or as a spread on some toast! It’s so good and a much healthier option than mayo!
  • Potatoes: Try using ¼ cup of hummus when making mashed potatoes for an amazing taste and texture.
  • Dip: Hummus is most well known as being used as a dip. Try it out with some vegetables like tomatoes, cucumbers, peppers or even some crackers or pita chips!
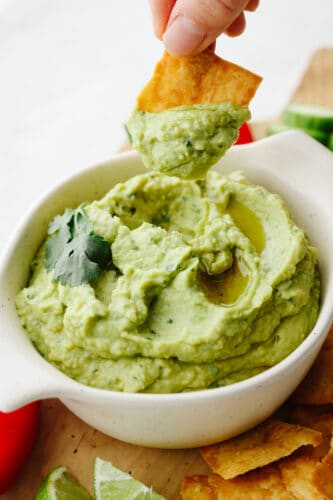
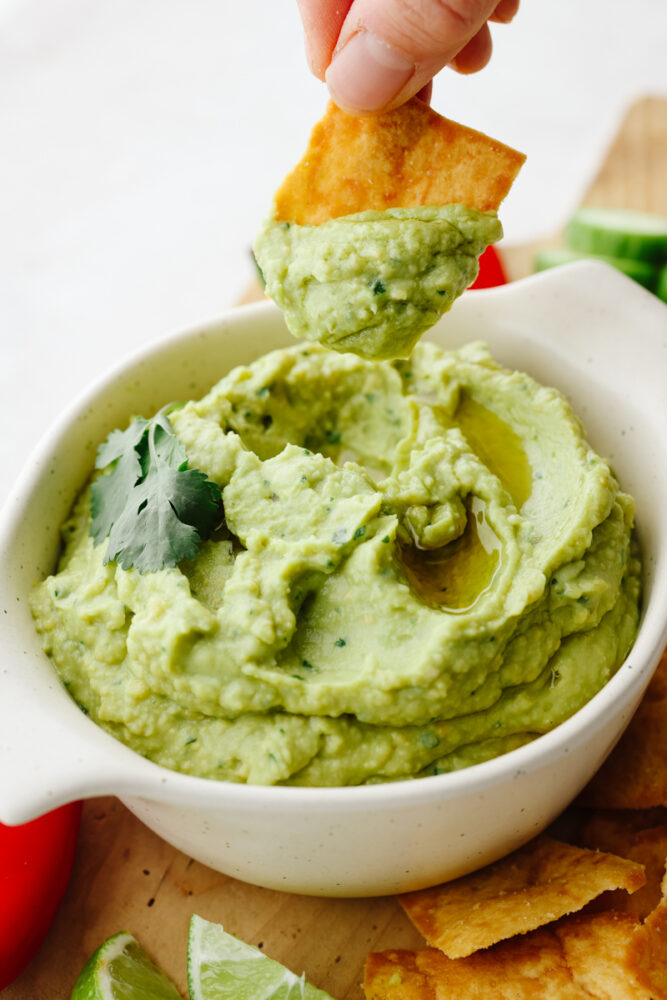
A bowl of avocado hummus being dipped with a pita chip.

How to Store Leftovers

If you have leftover avocado hummus then just place it in an airtight container and put it in your fridge. It will last 5-7 days.

Print

Avocado Hummus Dip

If you are looking for the most delicious appetizer out there, this avocado hummus is for you! Delectable, creamy, and perfect with any veggies or crackers, this dip is the BEST!
Course Appetizer
Cuisine American
Keyword avocado hummus
Prep Time 10 minutes
Total Time 10 minutes
Servings 6 people
Calories 226kcal
Author Alyssa Rivers

Equipment

  • Food processor or blender

Ingredients

  • 15 ounce can garbanzo beans, drained
  • 2 large avocados or 3 medium (skin & pit removed)
  • 3 Tablespoons fresh lime juice
  • 3 Tablespoons tahini paste
  • 2 teaspoons garlic, minced
  • 2 teaspoon sea salt (more to taste)
  • ¼ cup fresh cilantro (more if you desire)
  • 1/4 cup water (more as needed)
  • 3 Tablespoon olive oil
  • cilantro and drizzled olive oil (for serving and presentation)

Instructions

  • Combine all the ingredients in a food processor or blender and blend until smooth.
  • If the dip is too thick, extra water will help. Add 1 tbsp of water at a time if needed to reach desired dipping consistency.
  • Serve with chips, crackers, vegetables, pita bread, or anything desired for dipping!

Nutrition

Calories: 226kcal | Carbohydrates: 22g | Protein: 8g | Fat: 13g | Saturated Fat: 2g | Polyunsaturated Fat: 3g | Monounsaturated Fat: 7g | Sodium: 8mg | Potassium: 254mg | Fiber: 6g | Sugar: 4g | Vitamin A: 28IU | Vitamin C: 4mg | Calcium: 48mg | Iron: 2mg


from The Recipe Critic https://ift.tt/3rpVaig
https://ift.tt/3roRPAc

सोमवार, 18 जनवरी 2021

Instant Pot Creamy Parmesan Chicken and Rice

Have one of the most decadent and delectable dinner in no time with this Instant Pot Creamy Parmesan Chicken and Rice. With savory mushrooms, tender rice, and juicy chicken it’s a winner, winner, chicken dinner!

Instant pots are a dream appliance since they are faster, more forgiving and it creates spectacular food. Try these instant pot favorites like this Lemon Garlic Chicken, 10 minute Spaghetti, and Chili.

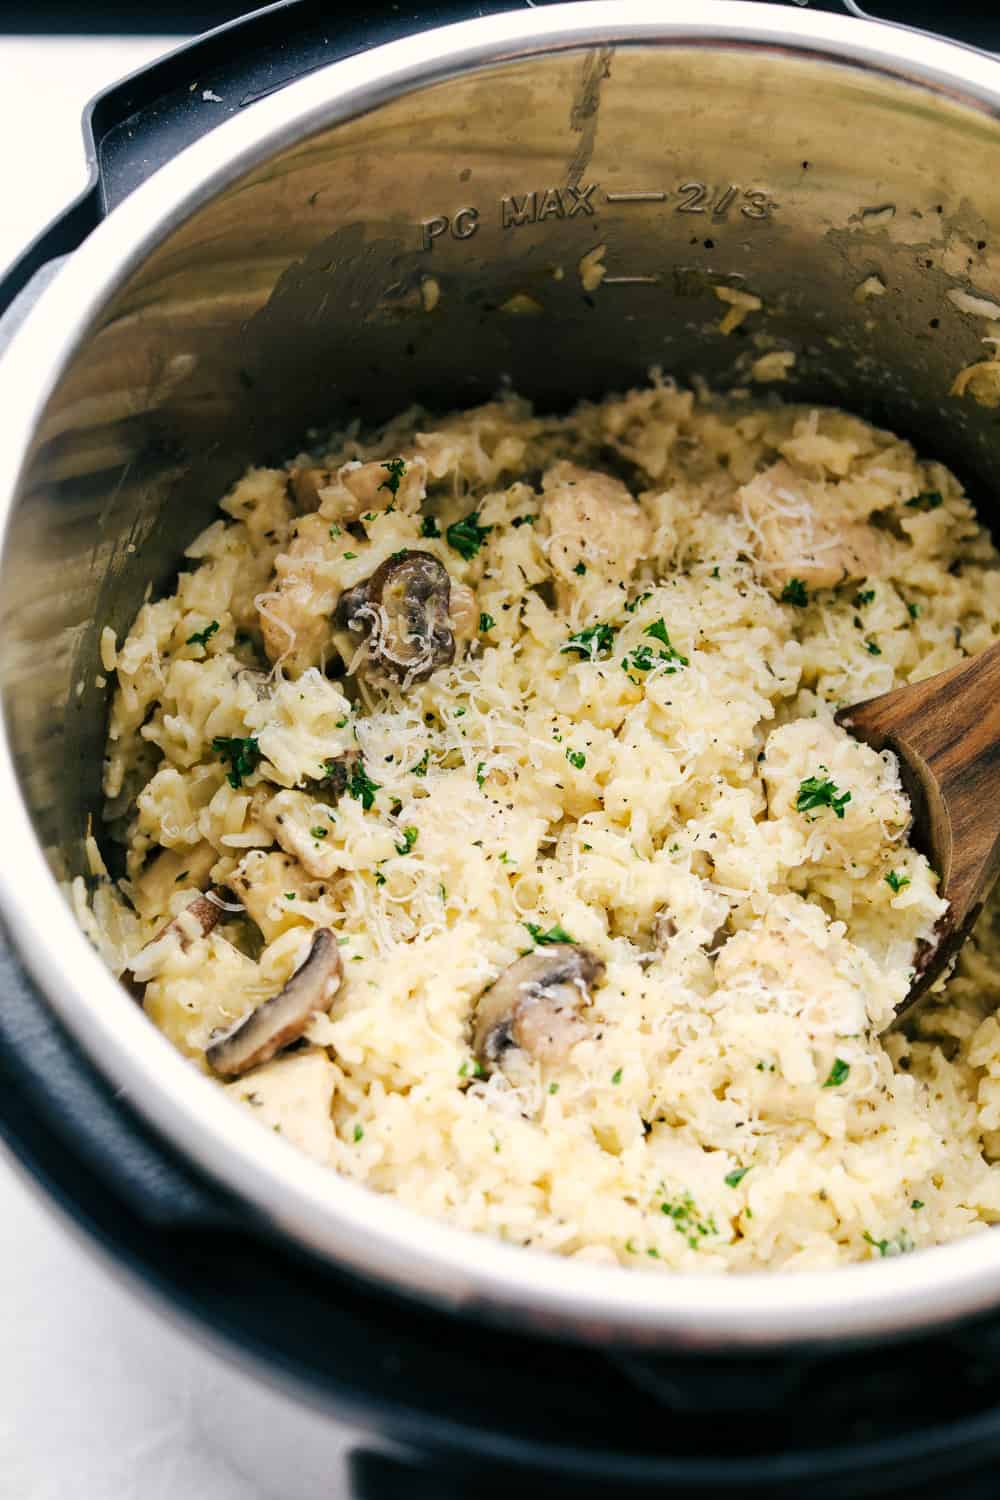
Instant pot chicken and rice is easy, creamy and so delicious.

Instant Pot Chicken and Rice

Everyone has those days that there is just not enough hours in the day to get everything done. Then when it is dinner time you have no time to cook what you had planned. This is when instant pot creamy parmesan chicken and rice recipe comes to save the day. The cream and parmesan creates such a dreamy creamy texture your whole family is going to love. Tender and juicy bites of chicken provide flavor and protein. And don’t forget the mushrooms, they add a great umami flavor to this delicious instant pot chicken and rice. It is the perfect chicken and rice combination!

Chicken and rice is a great comfort food. With the sensational creaminess and flavor it just fills you up perfectly. Instant pot chicken and rice is just one way to enjoy this comfort food. For more variations of chicken and rice try my casserole, one pan or this fiesta skillet recipe. Serve any of these main dishes with a batch of rolls and a nice green salad. Now you have a complete dinner that everyone will love!

Creamy Parmesan Chicken and Rice Ingredients

Simple ingredients creates this incredible chicken dish. No creamed soups in this instant pot chicken and rice. The pressure cooker does the work infusing the chicken with flavor and creating tender rice. This comes together quickly.

  • Olive Oil: For sautéing
  • Onion: Finely chopped.
  • Chicken: Cut into bite sized pieces.
  • Italian Seasoning: A perfect blend of spices.
  • Salt and Pepper:To taste
  • Chicken Broth: Creates the flavor and cooks the rice.
  • Rice: Rinse your rice. I used jasmine
  • Mushrooms: Sliced or roughly chopped
  • Heavy Whipping Cream: This creates the creaminess of the dish.
  • Shredded Parmesan Cheese: If you have it freshly grated is best.
  • Salt and Pepper: To taste
  • Chopped Parsley and Freshly shredded Parmesan Cheese for Garnish

Making Chicken and Rice in the Instant Pot

Just a little bit of sautéing is all you need to do and then let the instant pot take over with chicken and rice. A quick 8 minutes is all you need once it comes to pressure. Dinner is on the table in no time.

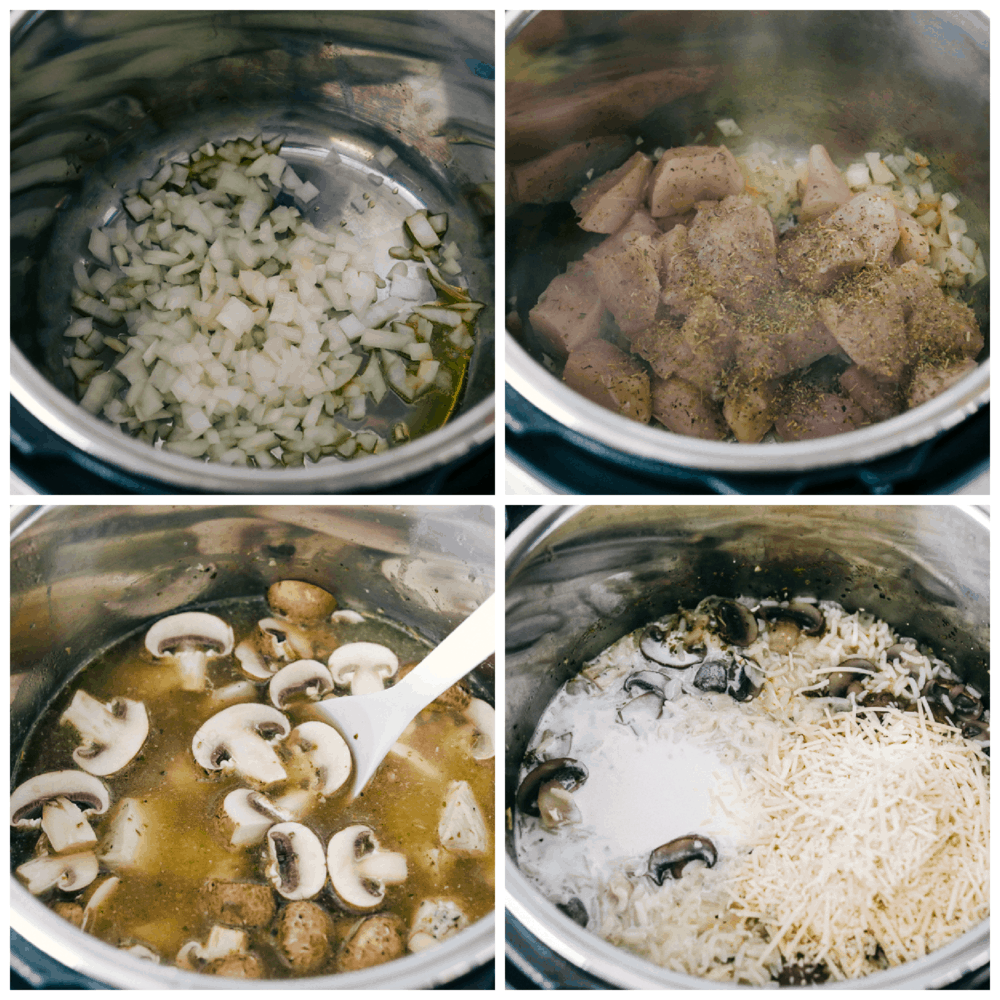
  1. Sauté: Set the instant pot to sauté. Add in olive oil and onion.
  2. Stir: Cook until it is almost tender and then add the chicken. Sprinkle the Italian seasoning and salt and pepper. Continue to sauté until no longer pink.
  3. Combine: Add in the chicken broth, rice, and mushrooms. Cover your instant pot and make sure it is in the sealed position. Cook on manual high for 8 minutes.
  4. Release: Carefully quick release the remaining pressure.
  5. Finish it: Stir in the heavy cream and parmesan cheese. Serve with freshly shredded cheese and chopped parsley for garnish.

Sauteing onions, chicken and making chicken and rice.

Tips for Amazing Instant Pot Chicken and Rice

Creating this instant pot chicken and rice is super simple, anyone can do it. Here are a few tips to make it irresistible.

  • Chicken: You can use chicken breasts or chicken thighs in this dish. Be sure to cut the chicken in the same bite sized pieces. This way the chicken will cook evenly.
  • Mushrooms: If you don’t love mushrooms, you can leave them out all together or sub them out for zucchini, squash or broccoli.
  • Rice: This instant pot chicken and rice recipe is written for white rice. Brown rice will take longer to cook so I don’t recommend it. I used jasmine rice in this recipe and it was delicious. Basmati is another great choice.
  • Creaminess: Instant pot chicken and rice is almost a risotto type consistency and texture.
  • Over cook:  Don’t leave the chicken and rice to naturally release. It will over cook the chicken and create a gluey rice consistency. You want to quick release once the timer goes off.
  • Can I use Whole Chicken? This instant pot recipe is written for chicken already cut up. Using whole chicken would increase the cooking time and over cook the rice.
  • Leftovers:  Keep leftovers in the fridge tightly sealed for up to 3-4 days. Reheat in the microwave till just warmed through.

Are You New to the Instant Pot Family?

If you are new to using the instant pot, welcome to the family! This instant pot chicken and rice is the perfect recipe to break in your new appliance. Here are some tips about your incredible appliance!

  • How it works: Instant pots are a form of pressure cookers. They work by creating heat and trapping it in a tight seal. This allows the temperature to be much higher than boiling point of water and the steam can’t escape. The steam cooks the food much more quickly than the traditional stovetop or oven cooking.
  • Can they explode?  There is that underlying fear the first time you use your instant pot that the pressure is going to build and explode. But unlike the pressure cookers of old, today’s instant pots have built in sensors (about 10 of them) that will turn the cooker off or reduce pressure if they detect anything wrong. You should be safe as long as you use it properly.
  • Why are they so great? Instant pots are kitchen marvels. They are used for rice cooker, vegetable steamer, and roast cooker. If you can cook it in the slow cooker or oven, you can probably cook it in the instant pot in less time. They enhance the flavor of your dish by literally forcing flavor into your dish. And my favorite reason I love instant pots is that when I come home from a long day and realize I didn’t get any chicken out of the freezer for dinner, it doesn’t matter. I can cook the chicken from frozen and in about an hour have tender, juicy chicken ready to eat.
  • Do Read Your Manual! There are dos and don’ts to using an Instant Pot. It’s important to get to know yours, so read the manual carefully and often.

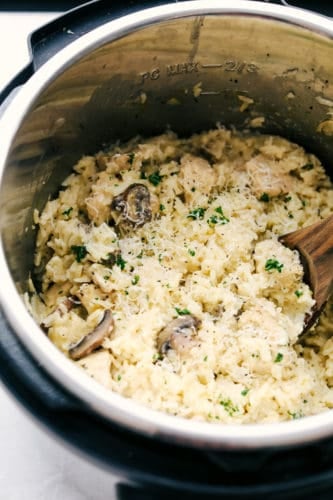
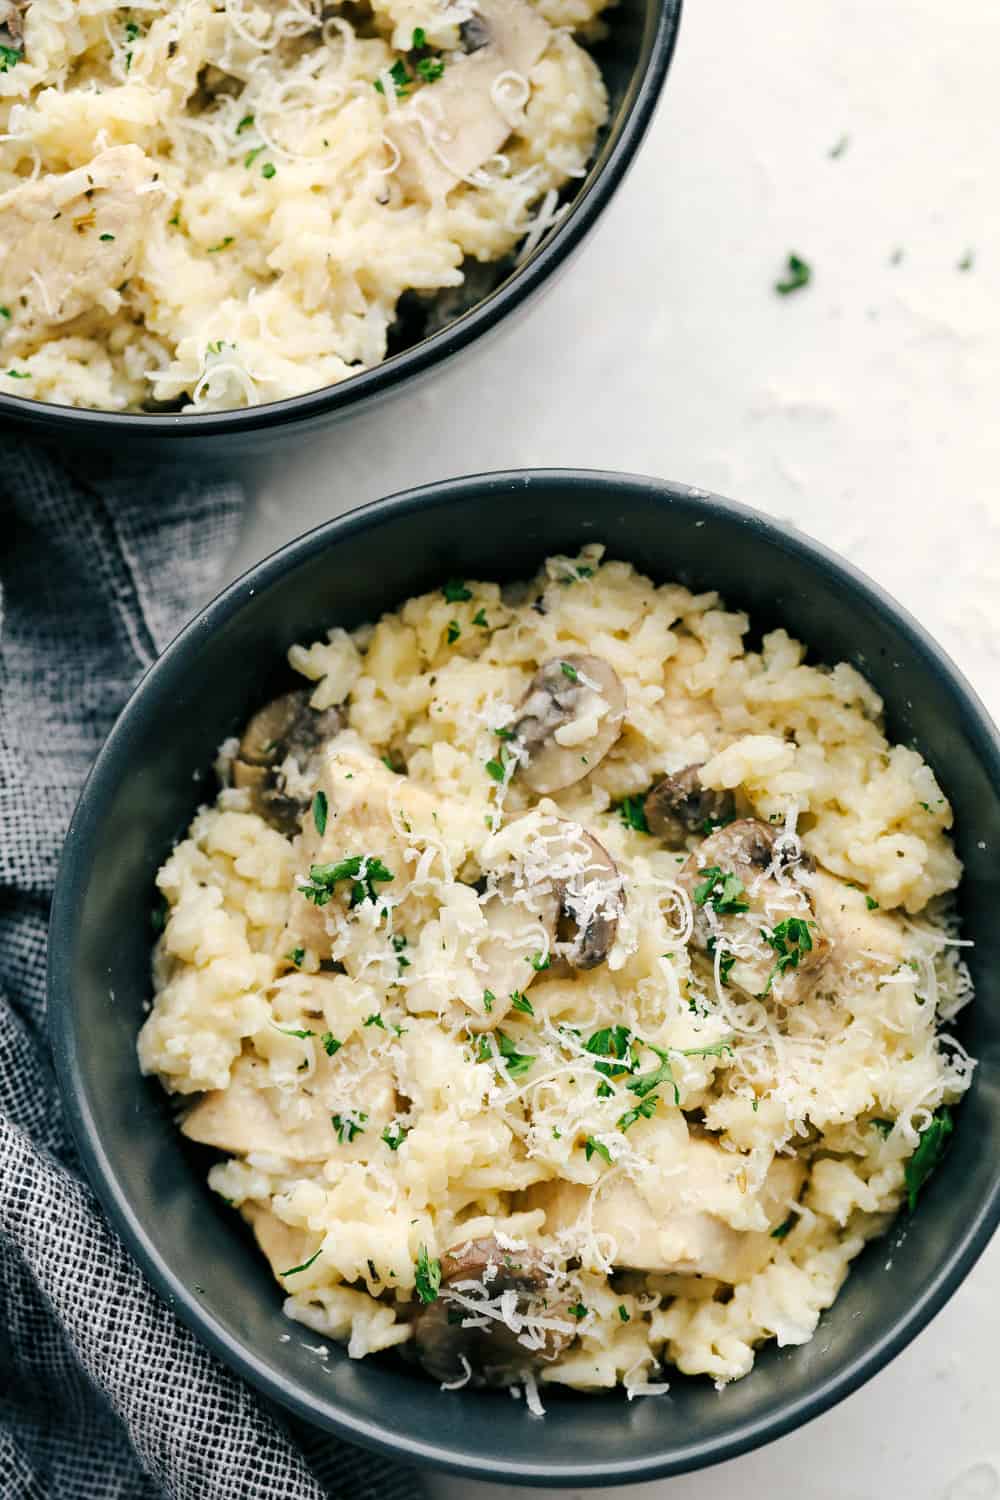
Instant pot Chicken and rice in a bowl.

More Chicken Dinners to Try!

Chicken is a favorite protein to cook with. It’s so versatile, low fat and an incredible source of protein. Chicken and rice is just the beginning of the endless possibilities you can create with chicken. Here is some inspiration to try tonight.

Print

Instant Pot Creamy Parmesan Chicken and Rice

Have the one of the most decadent and delectable dinner in no time with this Instant Pot Creamy Parmesan Chicken and Rice. With savory mushrooms, tender rice, and juicy chicken it's a winner, winner, chicken dinner!
Course Dinner, Main Course
Cuisine American
Keyword chicken and rice, instant pot chicken and rice
Prep Time 10 minutes
Cook Time 20 minutes
Total Time 30 minutes
Servings 6 People
Calories 409kcal
Author Alyssa Rivers

Ingredients

  • 1 Tablespoon Olive Oil
  • 1 small onion diced
  • 1 1/2 pounds chicken cut into one inch cubes
  • 1 Tablespoon Italian seasoning
  • salt and pepper
  • 4 cups chicken broth
  • 1 1/2 cups rice rinsed (I used Jasmine)
  • 1 cup mushrooms sliced
  • 1/2 cup heavy whipping cream
  • 1/4 cup shredded parmesan cheese I prefer freshly shredded
  • salt and pepper to taste
  • chopped parsley and freshly shredded parmesan cheese for garnish

Instructions

  • Set the instant pot to sauté. Add in olive oil and onion. Cook until it is almost tender and then add the chicken. Add the Italian seasoning and salt and pepper. Continue to sauté until no longer pink.
  • Add in the chicken broth, rice, and mushrooms. Cover your instant pot and make sure it is in the sealed position. Cook on manual high for 8 minutes. Carefully quick release the remaining pressure.
  • Stir in the heavy cream and Parmesan Cheese. Serve with freshly shredded cheese and chopped parsley for garnish.

Nutrition

Calories: 409kcal | Carbohydrates: 41g | Protein: 17g | Fat: 20g | Saturated Fat: 8g | Cholesterol: 71mg | Sodium: 690mg | Potassium: 375mg | Fiber: 1g | Sugar: 1g | Vitamin A: 414IU | Vitamin C: 13mg | Calcium: 107mg | Iron: 2mg


from The Recipe Critic https://ift.tt/2XQyp8N
https://ift.tt/3qIJbKX