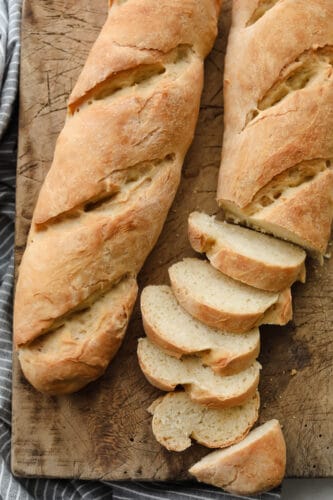
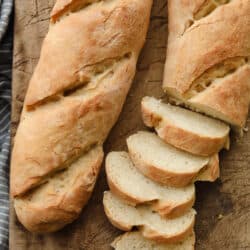
This French Baguette is super easy and is going to change your life! It has a perfect crusty outside and tender soft inside, perfect for your bread cravings.
Bread makes every meal a little bit better and complete! Try these incredible bread recipes the next time you need some bread in your life, Rolls, Homemade Bread, and Garlic Bread.

French Baguette Recipe
Nothing beats the smell of fresh-baked bread! And this French baguette recipe is so easy, all it takes is time and you can fresh bread at your fingertips. This loaf will have the signature crusty outside with the perfect soft chewy inside you would come to expect from french bread. Using a water pan in the oven will give it the perfect crust, and letting it prove overnight, or all day will allow the inside to be perfect. You may never grab a loaf from the store again! This French baguette will taste so much better!
One of the best things about a French baguette is that the structure is such that you can slice into it while it’s still warm. Let it cool for 5-10 minutes then slice into it and slather it with butter or your favorite toppings. Homemade Jam, Cinnamon Honey Butter, or toast it and turn it into some of the best Bruschetta ever! Dip this French baguette in some gourmet olive oil and cracked pepper or just eat it plain. You can’t go wrong, any way you eat it! This French Baguette is so luscious, your whole family is going to love this, you have to try it!
Ingredients for Homemade French Baguette
With just 5 ingredients this is one of the easiest bread recipes to make! These pantry staple ingredients are the perfect combination in this French baguette bread. Find the total amount of measurements in the recipe card below.
- All purpose flour: This is a good sturdy flour, perfect for the french baguette.
- Water:To mix with the flour to create the dough.
- Salt:This will give it flavor so be sure to put it in, otherwise your dough will taste bland and not good.
- Instant yeast:Give the bread it’s rise, using instant means you do not have to activate it first.
- Honey:Honey not only gives the bread a touch of sweetness, it will feed the yeast and give it a nice rise.
How to Make an Authentic Baguette
The overnight proof lets the yeast really develop into a fabulous taste and texture. French baguette is a favorite recipe that goes well with so many family meals or eating it all on its own!
- Combine and Rise: Add all the ingredients in the bowl of a stand mixer and combine with a dough hook. Once combined, cover with plastic wrap and let it rest on the counter overnight, about 12 hours.
- Shape: In the morning the dough will be bubbly and wet and large. Flour your hands and counter and gently remove the dough to the floured surface. Cut into two pieces and gently stretch into 12-14 inch rectangle. Gently but snugly roll the rectangles inward to form logs and place on a parchment lined baking sheet.
- Rise and slice: Dust generously with flour and cover with a clean dish towel. Allow to rise for 1-2 hours. Once risen use a very sharp knife or a clean razor blade to cut about 4-5 long diagonal slits along the loaf, cutting in about ½ inch.
- Steam: In the oven, arrange the racks so there is one on the bottom rack and one in the middle. Place a cookie sheet full of hot water on the bottom rack. Preheat the oven to 475°.
- Bake: Be careful of the steam from the pan in the oven, add the loaves on the middle rack. Bake for 15 minutes.
- Rotate: Remove the water pan and turn the baguettes around. Lower the temperature to 450° and bake for 15 more minutes, until nice and golden brown.
- Cool and Enjoy: Allow the loave to cool for at least 5 minutes before cutting into them.

The Best French Baguette Tips
Fresh from the oven this french baguette not only smells amazing but tastes divine! These tips are the best to making the perfect bread every time!
- Overnight Proving: Letting the dough ferment overnight will allow the bread to form a deep rich flavor that is typical of french bread. If you do not plan on making this in the morning, you can place the dough in the fridge to rise overnight till ready to use. Remove from the fridge 30 minutes before rolling out, allowing the bread to come to room temperature. You can also make this first thing in the morning and let it prove all day and then bake it so it’s nice and fresh for dinner.
- Slashing: Use a really sharp knife to make the cuts in the dough before placin it in the oven. This will prevent the bread from bursting and ruining it’s shape. I have also used a sharp serrated knife with great success.
- Steaming the Oven: This is a crucial step to getting that signature crusty texture of a french baguette, so do not skip it. Place the cookie sheet in the oven and then pour the water in cookie sheet. That way your chances of spilling the water are less. You can also use a skillet or pot in the oven as long as it has an oven safe handle. Do not use glass. If you pour cold water or even hot water into a glass pan that’s heated it can explode. If all you have is a glass 9×13 put it in the oven before turning it on, fill it with water and then turn on your oven. Make sure you put enough water in your pans that it doesn’t all evaporate while baking. You will burn your pan.

Storing and Freezing French Bread
There is nothing better than slicing into fresh warm bread, and baguettes are best eaten the day they are made while still warm.
- Storing: This french loaf is easy to store. Wrap it loosely and keep it at room temperature for 2 to 3 days. If the bread isn’t as crusty after a while you can place it in a warm oven (200 degrees) for 5 or 10 minutes, and it should come out good as new.
- Freeze: Make a double batch and then freeze some loaves for a later date. Wrap the completely cooled loaves in plastic wrap and then in foil. Keep in the freezer for up to 3 months. Let it thaw at room temperature. To bring back it’s crustiness place in a warm oven for 5-10 minutes till you bring back that crusty goodness you love. You can also slice the bread before freeze and place in a freezer safe bag and then remove just what you need. Toast the bread in a toaster for ultimate crunch and flavor.

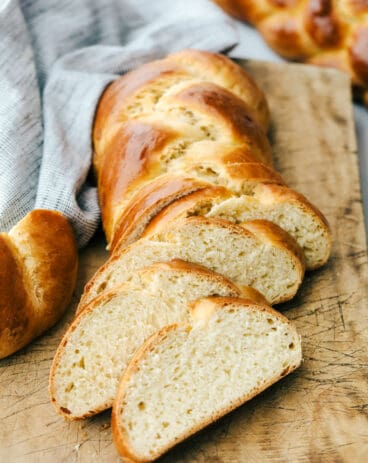
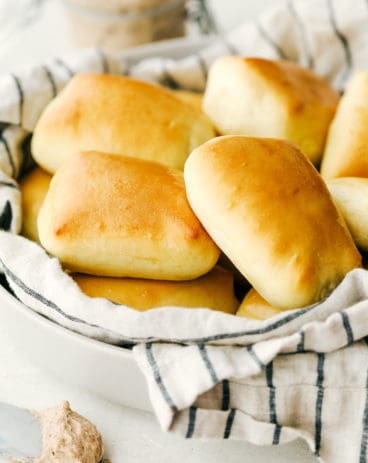
More Bread Recipes To Love
Bread
Challah Bread

Bread
English Muffins
Side Dishes
Copycat Texas Roadhouse Rolls

Bread
Focaccia Bread
French Baguette
Ingredients
- 4 cups all purpose flour
- 1 ½ cups water plus 1 Tablespoon
- 2 teaspoons salt
- 2 ½ teaspoons Instant yeast
- 2 Tablespoons Honey
Instructions
-
Add all the ingredients in the bowl of a stand mixer and combine with a dough hook. Once combined, cover with plastic wrap and let it rest on the counter overnight, about 12 hours.
-
In the morning the dough will be bubbly and wet and large. Flour your hands and counter and gently remove the dough to the floured surface. Cut into two pieces and gently stretch into 12-14 inch rectangle. Gently but snugly roll the rectangles inward to form logs and place on a parchment lined baking sheet.
-
Dust generously with flour and cover with a clean dish towel. Allow to rise for 1-2 hours. Once risen use a very sharp knife or a clean razor blade to cut about 4-5 long diagonal slits along the loaf, cutting in about ½ inch.
-
In the oven, arrange the racks so there is one on the bottom rack and one in the middle. Place a cookie sheet full of hot water on the bottom rack. Preheat the oven to 475°.
-
Be careful of the steam from the pan in the oven, add the loaves on the middle rack. Bake for 15 minutes.
-
Remove the water pan and turn the baguettes around. Lower the temperature to 450° and bake for 15 more minutes, until nice and golden brown.
-
Allow the loave to cool for at least 5 minutes before cutting into them.
Nutrition
from The Recipe Critic https://ift.tt/3hTZku0
https://ift.tt/3r0Gqpu