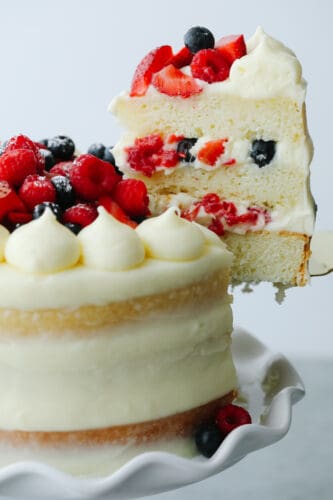
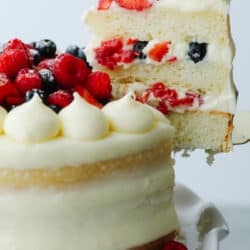
Showcase fresh summer berries with a supremely moist sponge cake and fluffy Chantilly cream! This beautiful Chantilly Berry Cake is a light, airy treat that is bound to impress!
Berries and cream is a classic pairing that is so absolutely delicious! For more perfectly sweet and creamy fruit desserts, try lemon berry trifle, galette, and fruit pizza!

The Best Chantilly Cake Recipe
As much as I love a good chocolate cake, the flavors of this berry Chantilly cake have been SO refreshing and delicious, with the perfect balance of creamy and sweet! Layers of an amazingly moist white sponge, Chantilly cream, and fresh berries make this cake a showstopper. It not only has the perfect summer taste but the bright, white color of the cake and bright berry colors give it a beautiful, summery presentation as well!
This Chantilly cake honestly tastes like you are eating a delicious, berry-filled cloud. And the best part is – as fancy as this cake looks, it is easy and straightforward to put together! I know you will love this Chantilly cake as much as I do! It is perfect for every occasion and has mouthwatering flavor and texture that will be a hit with everyone at your gathering!
Berry Chantilly Cake Ingredients
- All-Purpose Flour: For structure and a light, fluffy texture. You can also use cake flour. Avoid using flours with a high protein content as they can make your cake dense.
- Baking Powder and Baking Soda: Help your cake to rise and achieve a perfect texture.
- Salt: To enhance flavor.
- Butter: Softened.
- Granulated Sugar: For sweetness and to help the cake ingredients meld together.
- Egg Whites: For use as a binding agent, keep at room temperature for best results. Use egg whites and not yolks to maintain a crisp, white color.
- Vanilla Extract: For flavor. It is best to use clear vanilla extract in this cake to keep it from turning slightly yellow.
- Almond Extract: Optional, for added flavor.
- Whole Milk: For moisture and fat content.
- Sour Cream: The secret ingredient for a perfectly moist cake! Adds fat content to your cake.
- White Vinegar: Creates a chemcial reaction with baking soda; helps your cake to rise.
Chantilly Filling
- Mascarpone Cheese: Mascarpone cheese is a soft, sweet cheese that acts as the foundation of your Chantilly cream.
- Cream Cheese: For flavor and texure. Keep at room temperature before adding into your mixture.
- Heavy Cream: Used for making whipping cream. This adds the perfect, light texture to your filling.
- Powdered Sugar: For sweetness and smooth texture.
- Vanilla Extract: For flavor. Use clear vanilla extract to keep the cream bright white.
- Almond Extract: For added flavor.
- Fresh Berries: I use raspberries, strawberries and blueberries in this recipe.
How to Make Chantilly Berry Cake Recipe
I have broken this recipe up into 3 easy parts to simplify the process. This is a cake that anyone can make and one that yields a delicious, fluffy result every time!
- Preheat Oven and Prep Pans: Preheat the oven to 350°. Spray three 8 inch round cake pans with cooking spray and dust with flour. Set aside.
- Mix Dry Ingredients: In a medium bowl, sift together the flour, baking powder, baking soda and salt. Set aside.
- Create Egg White Mixture: In the bowl of your mixer, beat the butter until creamy. Add the sugar and beat again for about 3-5 minutes on medium high speed until it turns white and fluffy. Add in the egg whites one at a time and mix on medium until each one is fully mixed in.
- Mix in Wet Ingredients: Add the extracts, milk, sour cream and vinegar to the butter mixture and mix on medium speed until combined. Add the dry ingredients and mix until jut combined.
- Pour Into Pans: Separate the cake batter evenly into the three cake pans and bake for about 30-35 minutes, until a toothpick comes out clean and the center of the cake springs back when lightly pressed.
Creamy Chantilly Cream
- Mix Cheese and Cream: In the bowl of a stand mixer, add the mascarpone cheese and cream cheese. Use the paddle attachment to beat the cheeses together until well creamed. Add in the heavy whipping cream slowly while mixing on low so the mixture stays creamy and does not get lumpy.
- Mix in Sugar and Extracts: Once all the whipping cream has been added, add in the powdered sugar and extracts. Beat on medium until smooth and combined. If the cream is still fairly runny, you can switch to the whisk attachment and whip on medium for a few minutes to allow it to thicken. You may also make the cream a day in advance and let it chill and set up more firm in the fridge before using.
How to Layer Chantilly Cake with Berries
- Layer Cream and Berries on Cake: On a cake stand or plate, add one of the cooled cake layers. Spread an even layer of Chantilly cream over the top of the layer and add a layer of berries on top. Add the next layer of cake and repeat until the third layer has been added on top.
- Frost: Frost the sides of the cake and the top evenly. If desired, pipe remaining cream around the top and bottom of the cake. Add berries as desired for garnish.
- Chill: Chill the cake in the fridge until ready to serve.

What is Chantilly Cream?
It may sound like it is hard to make, but Chantilly Cream is just a fancy name for whipped cream that has been sweetened with vanilla. In this recipe, I use mascarpone and cream cheese to thicken my cream for more stable cake layers. For a boozy, traditional take on Chantilly Cream, add a splash of Brandy or Irish Cream to your mixture. Other flavors can also be added- in this recipe, I use almond extract because I like subtle nuttiness. Lemon, chocolate, coffee, caramel, and strawberry are other flavors that I think would taste amazing when added to this melt-in-your-mouth cream!
Chantilly Berry Cake Tips
If you master a few simple tips and tricks, you will be able to create bakery-worthy cakes each time! Chantilly cake is always a favorite and so easy to make.
- Don’t Overmix: Be careful not to overmix your whipped cream. After hard peaks, whipped cream will turn into butter.
- Use Cream With a High Fat Percentage: Make sure your heavy cream is at least 36% full fat to achieve the best Chantilly Cream texture.
- Add Liqueurs: Add a splash of Brandy or Irish Cream for extra flavor and a boozy take on this recipe.
- Add Other Flavors: You can add other extracts to your Chantilly Cream for a pop of flavor between layers. Strawberry, chocolate, and coffee are delicous variations. You could add lemon flavoring to your cream and even a dollop of lemon curd between layers for a tangy twist on this berry dessert.
- Keep Heavy Cream Cold: Keep your heavy cream, mixing bowl, and any mixer attachments cold before making your whipped cream. The fat in heavy cream fuses better when at a colder temperature, which leaves you with the perfect texture and thickness once whipped.
- Level Cake Layers: Spend a few extra minutes leveling your cake layers with a serrated knife once they have cooled down completely. This will not only help your cake stand up perfectly straight, but allow your cake to soak up moisture and flavor from your fruit and cream layers.
- Chill Before Assembly: Chill your cake layers before assembling. It helps keep your cake more stable and helps with frosting.

Storing Leftover Chantilly Cake
- In the Refrigerator: Since the frosting and layers are whipped cream-based, it is best to keep your Chantilly cake in the refrigerator. It will keep for up to 2 days.
- In the Freezer: You can store unfrosted cake layers in the freezer, wrapped tightly in plastic wrap, for 3-6 months. Chantilly Cream can also be stored on its own in an airtight container for up to a week. Simply thaw and whip before use.

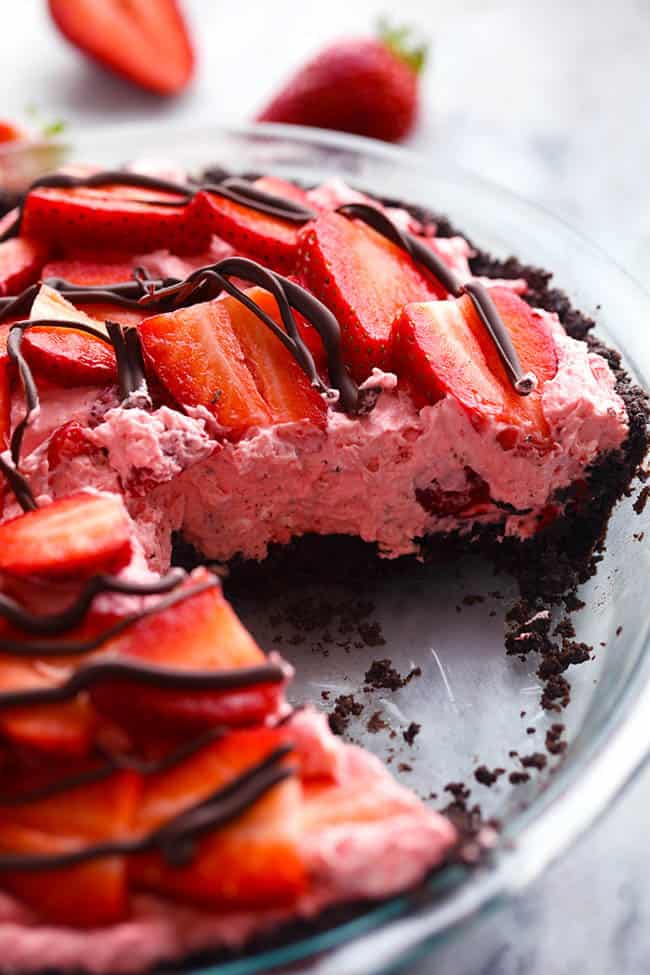
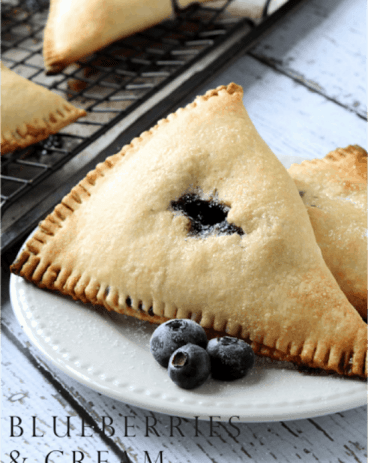
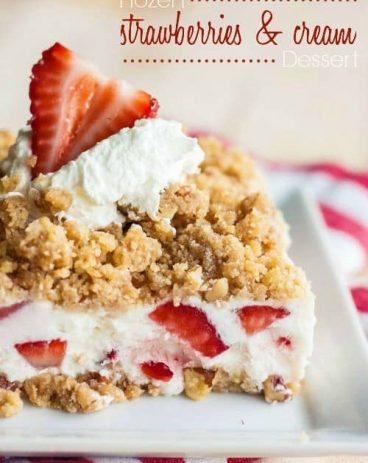
More Berries and Cream Desserts
Chantilly Berry Cake
Ingredients
Cake
- 2 1/3 cups all purpose flour
- 2 teaspoon baking powder
- ½ teaspoon baking soda
- 2 teaspoon salt
- 1 ½ cups butter softened
- 1 ¾ cups granulated sugar
- 6 large Egg whites room temperature
- 2 teaspoon vanilla extract
- 1 teaspoon almond extract optional
- 1 ½ cup milk whole
- ½ cup sour cream
- 2 Tablespoons white vinegar
Chantilly Filling
- 16 ounces Mascarpone Cheese
- 16 ounces Cream Cheese room temperature
- 1 cup heavy cream
- 5 cups powdered sugar
- 1 ½ teaspoons vanilla
- ½ teaspoon almond extract
- 2 cups fresh raspberries strawberries and blueberries
Instructions
Cake
-
Preheat the oven to 350°. Spray three 8 inch round cake pans with cooking spray and dust with flour. Set aside.
-
In a medium bowl, sift together the flour, baking powder, baking soda and salt. Set aside.
-
In the bowl of your mixer, beat the butter until creamy. Add the sugar and beat again for about 3-5 minutes on medium high speed until it turns white and fluffy. Add in the egg whites one at a time and mix on medium until each one is fully mixed in.
-
Add the extracts, milk, sour cream and vinegar to the butter mixture and mix on medium speed until combined. Add the dry ingredients and mix until just combined.
-
Separate the cake batter evenly into the three cake pans and bake for about 30-35 minutes, until a toothpick comes out clean and the center of the cake springs back when lightly pressed.
Chantilly Cream
-
In the bowl of a stand mixer, add the mascarpone cheese and cream cheese. Use the paddle attachment to beat the cheeses together until well creamed. Add in the heavy whipping cream slowly while mixing on low so the mixture stays creamy and does not get lumpy.
-
Once all the whipping cream has been added, add in the powdered sugar and extracts. Beat on medium until smooth and combined. If the cream is still fairly runny, you can switch to the whisk attachment and whip on medium for a few minutes to allow it to thicken. You may also make the cream a day in advance and let it chill and set up more firm in the fridge before using.
Assembly
-
On a cake stand or plate, add one of the cooled cake layers. Spread an even layer of Chantilly cream over the top of the layer and add a layer of berries on top. Add the next layer of cake and repeat until the third layer has been added on top.
-
Frost the sides of the cake and the top evenly. If desired, pipe remaining cream around the top and bottom of the cake. Add berries as desired for garnish.
-
Chill the cake in the fridge until ready to serve.
Nutrition
from The Recipe Critic https://ift.tt/2U5wZJl
https://ift.tt/3kd5JTL