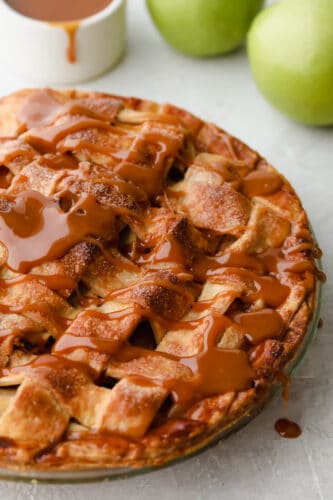
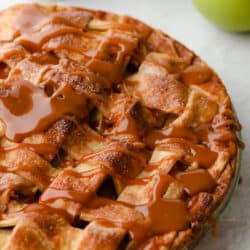
Caramel apple pie is the traditional American dessert, but totally elevated. Sour tart apples are smothered in caramel, it’s insanely delicious.
Pie is about as scrumptious as it gets for desserts. Try one of these tried and true pies that are some of the best, Strawberry, Peach, and Chocolate.

Caramel Apple Pie Recipe
Caramel Apple Pie is a twist on an all-American Pie that is absolutely incredible. The caramel takes the pie to a whole new level. Apples and caramel were meant to be together like in these Caramel apple cinnamon rolls or these Caramel apple cheesecake bars. Divine! Everyone will love this pie, even my friends who don’t love apple pie at all, LOVED this pie. The sweet caramel makes all the difference.
This is a great pie to take to a party. Wait to get to your destination and you’re ready to serve it before pouring the caramel on top. This is going to be the show-stopper dessert for sure. This is such a fabulous pie, you won’t want to just save it for Thanksgiving or the fall. You are going to want to make this pie year round! Don’t fret, this pie is easier than you think, just try it and you’ll never go back to regular apple pie again!
Ingredients For Apple Pie
- 2 Premade or homemade pie crust: Make one for the bottom crust and one for the lattice top
- 8 Large granny smith apples: Wash the apples and peel, core and slice them.
- Fresh lemon juice: Using the lemon juice helps keep the lemon juice from browning the apples.
- Granulated sugar: Sweet sugar to help with the tartness of the apples.
- Cornstarch: Thickens the filling.
- Ground cinnamon: Cinnamon is a spice of choice for appples.
- Ground nutmeg: Balances the cinnamon.
- Dash of salt: You have to have the salt to balance the sweet.
- 1 Egg yolk plus 2 tbsp water for egg wash: The egg wash will help the crust brown perfectly.
Salted Caramel Sauce
- Heavy cream: Need to have the heavy cream for the best caramel.
- Granulated sugar: Sweet sugar melted down makes the caramel sweet.
- Light corn syrup: This helps to stabalize the corn syrup.
- Salt: Need a little bit of salt to balance the caramel.
- Salted butter: Need the butter to help make great caramel sauce.
- Vanilla extract: Needed to make the caramel decadent.
How To Make Caramel Apple Pie
- Prep: Prepare the caramel sauce and set aside.
- Pie Crust: Preheat the oven to 400°. Press the bottom crust into a 9 inch pie pan and trim the excess with a sharp knife. Set in the fridge until the filling is ready.
- Pie Mixture: In a small bowl mix the sugar, cornstarch, cinnamon, nutmeg and salt. In a medium bowl toss the sliced apples together with the spiced sugar mixture and the lemon juice. Pour into the chilled pie shell.
- Caramel Drizzle: Generously drizzle about half of the caramel sauce over the apples and then top with the lattice crust. Brush the top crust with the egg wash and sprinkle with course sugar.
- Bake: Place the pie on a baking sheet to prevent over spilling on the bottom of your oven and bake for 50 minutes, or until the filling is bubbling and the crust is nice and golden brown.
- Cool: Allow to cool on a rack for 20-30 minutes before drizzling more caramel sauce over the top.
Salted Caramel Sauce
- Microwave: In the microwave, heat the cream until steaming, about 45 seconds. Set aside.
- Don’t Stir: In a heavy bottomed sauce pan heat the sugar, corn syrup and salt over medium high heat until it begins to turn an amber color. Try not to stir it, as that can cause your caramel to crystalize. Instead swirl the pan if you see a spot turning darker faster than the rest of the sugar. Once it is all a nice amber color, turn the heat down to medium and whisk in the butter.
- Cool: Once the butter has been completely absorbed remove from the heat and slowly add in the warm cream. The mixture will bubble up with the butter and cream, so it’s important to make sure it’s in a medium pot, not a small one. Whisk in the vanilla and add more salt if needed. Set aside to cool. It may need to be gently warmed in the microwave before pouring on your pie, as it will set up as it cools.

Quick Tips Title
Making this pie takes a bit of time, but it is totally worth it!
- Apples: Because you are adding sweet caramel you will want to use a tart apple for the pie. Granny smith are the best choice, not only because they are tart, but they are also firm and hold up to the cooking.
- Cutting Apples: You can either leave your apples in slices or chop them into bite sized pieces for easier eating. I use an apple cutter to make cutting the apples faster after I’ve peeled them.
- Not to thick or too thin: When cutting your apples keep them uniform so that they will cook at the same rate. Also cut them so that they are not super thick or too thin. I usually cut my apples slices lenght ways in half after I’ve used an apple slicer to get a perfect size. You want them to cook evenly.
- Pie Crust: You can make your own pie crust, use this recipe found here. Or you can buy your pie crust for easier prep.
- Lattice: The lattice top is attractive and the holes allow the pie to vent, which is important. If you do not wish to do the lattice or do not have time you can simply put the second rolled out pie dough on top and using a knife create several slits for venting. Add the egg wash and sprinkle with turbinado sugar if desired.

How to Make Caramel
Making a good quality caramel is all about patience and time. Since caramel can go from perfect to burnt in a matter of minutes, you will have to pay attention to it.
- Size of Pot Matters: First of all you want to make sure you use a medium to large pot, it will bubble and rise as you add the butter and cream so you do not want it to overflow.
- Stirring: There is a time to stir and a time not to stir. When you are melting the sugar in the beginning try not to stir it. The sugar will clumb up before it melts which is ok. You can swirl the pan to help the sugar melt evenly if you desire, but less is more. This process can take up to 15 minutes so be patient.
- Candy Thermometer: You do not have to have a candy thermometer to make caramel, although it can take some of the guess work out making it. Focus on color instead of temperature. Once the caramel is an amber color and is melted is when you want to start adding the butter and turning down the heat. If you use a thermometer it should be at 350 degrees before adding the butter and next steps.
- Quality Ingredients: To get the best caramel use good quality ingredients. You will have to use full fat cream, half and half will not set up right. Buy good quality butter as well. After you taste how good and rich it is, you’ll be glad you did.
- Storing: The caramel will continue to thicken as it cools so if you need to reheat it you can either use the microwave or place in a pot on the stove. It will keep in the fridge for up to 3 weeks. It can even be frozen for up to 2 months.

Storing Caramel Apple Pie
This pie is best eaten the day it is made. But if you have leftovers you tightly cover the apple pie and place in the fridge for up to 3 days. Reheat individual pieces in the microwave and top with ice cream and caramel sauce before serving. This truly is one delicious pie!

More Recipes with Caramel
Desserts
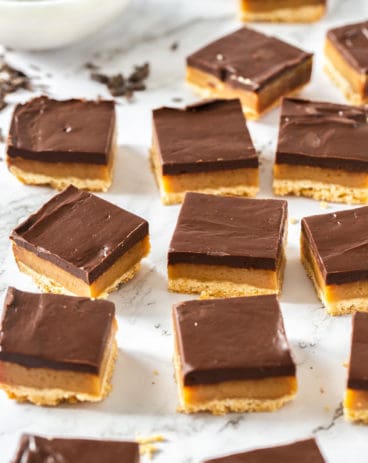
Millionaire Shortbread
Desserts
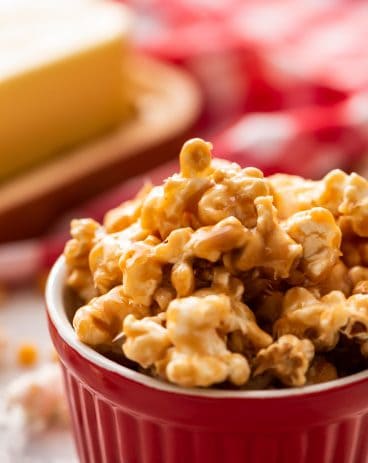
Amazing Salted Caramel Popcorn
Desserts
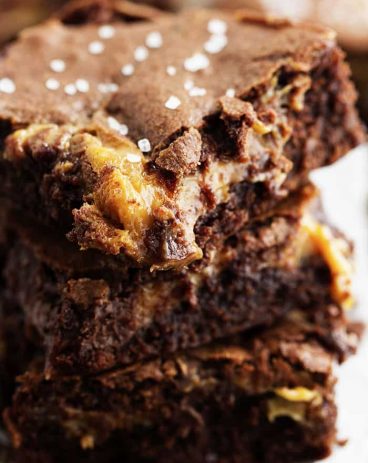
Salted Caramel Brownies
Caramel Apple Pie
Ingredients
- 2 homemade pie crust or pre-made pie crust (one for the bottom crust and one for the lattice top)
- 8 large granny smith apples peeled, cored, sliced
- 1 Tablespoon fresh lemon juice
- ¾ cup granulated sugar
- 1/4 cup cornstarch
- 1 teaspoon ground cinnamon
- ¼ teaspoon ground nutmeg
- dash of salt
- 1 Egg yolk plus 2 tbsp water for egg wash
Salted Caramel Sauce
- 1 1/2 cups heavy cream
- 1 cup granulated sugar
- 1/3 cup light corn syrup
- 1 teaspoon salt
- ¼ cup salted butter
- 1 teaspoon vanilla extract
Instructions
-
Prepare the caramel sauce and set aside.
-
Preheat the oven to 400°. Press the bottom crust into a 9 inch pie pan and trim the excess with a sharp knife. Set in the fridge until the filling is ready.
-
In a small bowl mix the sugar, cornstarch, cinnamon, nutmeg and salt. In a medium bowl toss the sliced apples together with the spiced sugar mixture and the lemon juice. Pour into the chilled pie shell.
-
Generously drizzle about half of the caramel sauce over the apples and then top with the lattice crust. Brush the top crust with the egg wash and sprinkle with course sugar.
-
Place the pie on a baking sheet to prevent over spilling on the bottom of your oven and bake for 50 minutes, or until the filling is bubbling and the crust is nice and golden brown.
-
Allow to cool on a rack for 20-30 minutes before drizzling more caramel sauce over the top.
Salted Caramel Sauce
-
In the microwave, heat the cream until steaming, about 45 seconds. Set aside.
-
In a heavy bottomed sauce pan heat the sugar, corn syrup and salt over medium high heat until it begins to turn an amber color. Try not to stir it, as that can cause your caramel to crystalize. Instead swirl the pan if you see a spot turning darker faster than the rest of the sugar. Once it is all a nice amber color, turn the heat down to medium and whisk in the butter.
-
Once the butter has been completely absorbed remove from the heat and slowly add in the warm cream. The mixture will bubble up with the butter and cream, so it’s important to make sure it’s in a medium pot, not a small one. Whisk in the vanilla and add more salt if needed. Set aside to cool. It may need to be gently warmed in the microwave before pouring on your pie, as it will set up as it cools.
Nutrition
from The Recipe Critic https://ift.tt/2UZYLqA
https://ift.tt/3euB6FO