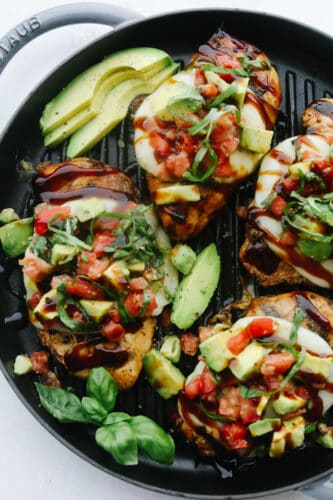
Grilled California Avocado Chicken is tender chicken marinated in an amazing honey garlic balsamic sauce and is grilled to perfection! Topped with a thick slice of mozzarella cheese and avocados, tomatoes, and basil, this chicken is INCREDIBLE!!
The combination of chicken and avocado is one of my favorites! If you love California chicken and don’t have a grill try this delicious California avocado skillet chicken, Chicken Enchiladas with Avocado Cream, or Avocado Chicken Salad.

Grilled California Avocado Chicken
I could not wait to share with you this grilled California avocado chicken! Cue all of the heart eye emojis for the avocado, tomato, and basil combination! My mouth was watering making this avocado salad of sorts to top off the chicken. It provides a fresh and delicious element on top of the moist, flavorful chicken. It also makes for a vibrant, colorful, and delicious presentation. So pretty! In spite of looking too great to eat, this grilled California avocado chicken was quickly devoured by my family!
Usually, when something looks and tastes this good, I know I am going to have to put in lots of ingredients and lots of time to make it. However, this avocado chicken comes together so quickly and easily I was shocked! I am telling you, this was one of the best things that I have ever thrown on the grill. I already can’t wait to make it again. The flavors came together so well and I know that this will become a family favorite at your house as well!
Avocado Chicken Ingredients
First of all, this chicken marinates in a honey garlic balsamic sauce. It marinates to perfection and honestly grills up tender and juicy! The flavor is absolutely unreal in this chicken.
- Balsamic vinegar: This is the acidic ingredient in the marinade that will act as a tenderizer.
- Honey: Part of the marinade that adds flavor and keeps the chicken super juicy.
- Garlic: Cloves, minced
- Olive oil: The oil in your marinade will penetrate the meat, and bring the other flavors of the marinade along with it.
- Italian seasoning: The perfect blend of flavors for most things, but especially this avocado chicken!
- Salt and pepper: To taste.
- Chicken: Boneless skinless breasts will grill best.
- Mozzarella: I love how fresh sliced mozzarella pairs with the tomato and basil, but any good melting cheese will work to smother the chicken.
- Avocados: Diced to bite size perfection.
- Roma tomatoes: Any tomato will work, just be sure to cut into bite sized pieces.
- Basil: Fresh chopped basil is perfect on this chicken.
- Optional: Balsamic vinegar for drizzling
How to Grill California Chicken
And just when you think that it can’t get any better, top it with a thick slice of mozzarella cheese when it comes off of the grill. It gets so melty and ooey-gooey. Then, JUST when you think it can’t possibly get any better with the ooey-gooey cheese on top comes the avocado, tomato, and basil. Mind blown!
- Marinate chicken: In a medium sized bowl, whisk the balsamic vinegar, honey, garlic, olive oil, italian seasoning, and salt and pepper. Add the chicken breasts and coat. Marinate for 30 minutes.
- Mix avocado topping: Meanwhile, in a small bowl add the avocado, tomato, basil and salt and pepper to taste. Set aside.
- Grill: Heat the grill to medium high heat. Grill the chicken on each side about 6 minutes or until cooked throughout and no longer pink.
- Dress chicken and serve: Top with mozzarella cheese and avocado, tomato basil mixture. Drizzle with balsamic vinegar and serve immediately.

Grilling the Perfect Grilled California Avocado Chicken
Chicken can be tricky to grill without drying it out, but I’ve got all the tips to keep it moist and tender.
- Make sure your grill is clean before you begin and rub some oil on the grates to prevent the chicken from sticking.
- Thinly sliced chicken breasts won’t take as long to reach temperature. If your chicken breasts are really thick, pound them to thin them out. It will reduce cooking time and help it to cook more evenly.
- Basic rule is 3-5 minutes per side on medium to high heat, but will vary depending on the thickness of your meat.
- You are aiming for a medium, indirect heat while grilling so that the outside of the chicken does not burn while you get the inside up to temperature.
- Keep the grill closed while cooking. This will keep the heat in and allow the chicken to cook quicker and more evenly.
- The chicken is done the temperature reaches 165 degrees or the juices run clear.
- The chicken will continue to cook slightly even after removed from the grill.

Variations for Grilled Chicken
It may not be possible to improve on this amazing recipe, but we tried.
- Marinate: Marinate in a combination of olive oil, lime juice, cilantro and garlic. (The longer it marinates the more flavor you will get, so if you have more time, let it sit in the juices for up to 24 hours.)
- Add more flavor! If you want even more spice and flavor: Add garlic seasoning on the chicken and use pepper jack cheese instead of mozzarella.
- Toppings: To change it up, you could even add black olives or bacon on top. Because let’s be honest. Everything is better with bacon!
- What to serve with it? Serve with rice, a fresh salad, or seasoned fingerling potatoes.
- Bake instead of grilling: Cover the chicken with foil and cook chicken only at 350 for approximately 45 minutes depending on thickness of the chicken. Then, uncover and add cheese and basil and place back in the oven for an additional 5 minutes or until the cheese melts. Finally, top with the fresh avocado mixture immediately before serving.

Storing Grilled Chicken
I am not sure you will have any leftovers with this delicious chicken but it is easy to store just in case. Here are a few steps to help keep your grilled chicken fresh.
- Allow to cool after cooking no more than 2 hours before refrigerating or freezing.
- Store in a shallow airtight container.
- Grilled California Avocado Chicken will be good in the refrigerator for 3-4 days or in the freezer for 4 months.
- To avoid freezer burn be sure to pack your chicken tightly with airtight heavy-duty foil, plastic wrap or freezer paper or putting it in a freezer bag.

More Chicken Recipes To Love
Dinner
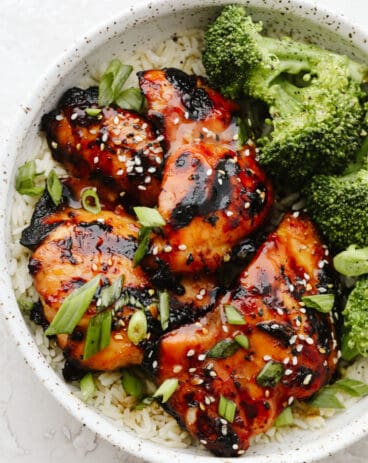
Grilled Honey Garlic Chicken
Appetizers
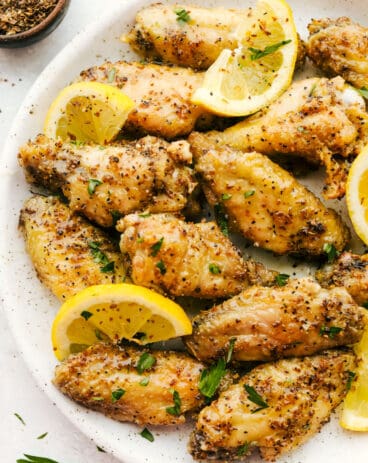
Lemon Pepper Chicken Wings
Dinner
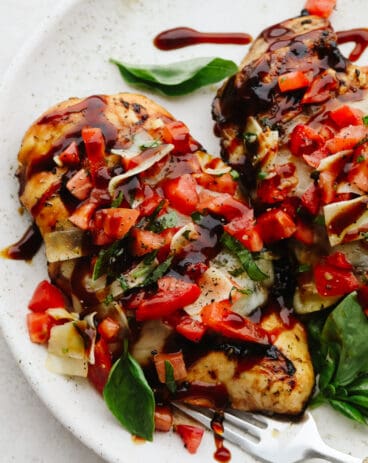
Amazing Bruschetta Chicken
Salads
The Best Chicken Salad

Grilled California Avocado Chicken
Equipment
-
Utopia Kitchen Cooking Knives
Ingredients
- 3/4 cup balsamic vinegar
- 1/4 cup honey
- 3 cloves garlic minced
- 2 Tablespoons olive oil
- 2 teaspoons italian seasoning
- 1/2 teaspoon salt
- 1/4 teaspoon pepper
- 4 boneless skinless chicken breasts
- 4 slices mozzarella cheese
- 2 avocados diced
- 3 roma tomatoes diced (any tomato will work)
- 1/4 cup fresh chopped basil
- salt and pepper
- balsamic vinegar for drizzling optional
Instructions
-
In a medium sized bowl whisk the balsamic vinegar, honey, garlic, olive oil, Italian seasoning, and salt and pepper. Add the chicken breasts and coat. Marinate for 30 minutes.
-
Meanwhile, in a small bowl add the avocado, tomato, basil and salt and pepper to taste. Set aside.
-
Heat the grill to medium high heat. Grill the chicken on each side about 6 minutes or until cooked throughout and no longer pink. Top with mozzarella cheese and avocado, tomato basil mixture. Drizzle with balsamic vinegar and serve immediately.
Video
Notes
Nutrition
A Reader’s Review
from The Recipe Critic https://ift.tt/2MbHLZD
https://ift.tt/3zo9SbM