Alyssa Rivers July 23 लेबलों वाले संदेश दिखाए जा रहे हैं. सभी संदेश दिखाएं

शुक्रवार, 23 जुलाई 2021

Incredible Parmesan Zucchini Gratin (Zucchini Casserole)

Three Cheese Zucchini Gratin has layers of creamy, cheesy sauce and is topped with a crunchy buttery topping. Ooey-gooey and cheesy, this low-carb take-on comfort food will please any crowd!

This recipe is a twist on classic scalloped potatoes. Gratins are so rich and indulgent, they make any meal a joy to serve and eat. Try creamy cauliflower, brussels sprouts, or potato and mushroom gratins for a more mouthwatering flavor you will LOVE!

Parmesan Zucchini Gratin in a white dish.

Zucchini Casserole Recipe

If you want a side dish to impress this is it! Not only is Zucchini tasty, but it’s also good for you too! It’s low in calories, keto-friendly, and packed with antioxidants, potassium, and vitamins B and C. For those times when you really want comfort food but don’t want to overload in calories, this is the dish for you. Zucchini gratin is just as satisfying and filling as a potato dish with half the carbs!

The other great thing about this recipe is that it is extremely easy to throw together. It utilizes so many simple ingredients that you may not even need to go shop for any! I know your family is going to go crazy over this quick and easy dish. As a side, it pairs so well with a variety of dishes, but honestly, this zucchini gratin is so good, you may want to just eat it alone!

Zucchini Gratin Ingredients

These pantry staples come together to create the most hearty, cheesy goodness! Zucchini gratin is the perfect combination and the best side dish at the table this summertime. For complete recipe details, see the recipe card below.

  • Zucchini: You will need 6 medium zucchinis, sliced. You can also grate your zucchini instead for a more noodle-like texture.
  • Mozzarella Cheese: The stretchy, melty texture of Mozzarella is perfect for gratins.
  • Parmesan Cheese: Parmesan adds a great flavor and nuttiness.
  • Cheddar Cheese: Cheddar is always a favorite for sharp flavor and color.
  • Milk: Any percent of milk will do, skim, 1%, 2% or even whole.
  • Heavy Whipping Cream: Adds moisture and thickness to your creamy sauce.
  • Flour: For use as a thickening agent. All-purpose flour works great!
  • Butter: Adds a rich flavor to your gratin. Everything is better with butter!
  • Salt: Add more or less to taste.
  • Garlic Powder: For a perfect savory flavor! Trust me, you want garlic in this.

Zucchini Gratin Cheesy Topping

If you love cheese then this topping is to die for! Bake the zucchini gratin just enough to have the cheese melt with that crusted overlay on top of the casserole. You are going to love this combination once baked!

  • Bread Crumbs: You can use Panko or Regular bread crumbs
  • Parmesan: This adds extra flavor and texture to your gratin.
  • Butter: Holds everything together and helps it taste amazing.

Making Three Cheese Zucchini Gratin

In just 4 easy steps, you will have a delicious dinner that the whole family will love! This zucchini gratin recipe only takes 15 minutes of prep time and then it’s hands-off!

  1. Mix Together Sauce: In a medium sauce pan melt the butter and whisk in the flour until thick. Slowly whisk in the milk and heavy cream. Stir in the cheese and mix till melted. Add in the garlic powder and salt.
  2. Layer: Cut the zucchini into ¼ inch slices. Layer on the bottom of sprayed 2 quart casserole dish. Spoon some of the sauce on top of the first layer. Layer more zucchini and sauce till you’ve used it all ending with sauce last.
  3. Add Topping: For the topping mix together the bread crumbs and parmesan and sprinkle on top. Pour the melted butter on top.
  4. Bake: Bake at 375 degrees for 25-30 min till bubbly and heated through. Broil the top for about 5 minutes until golden brown.
The process of making zucchini casserole.

Parmesan Zucchini Gratin Tips and Variations

Parmesan zucchini gratin is an easy, tasty dish that everyone will enjoy. Use these great tips and tricks to customize and enhance your dish!

  • Using Different Cheeses: You can definitely mix up the cheeses to your liking or to work with what you’re serving. From cream cheese, feta, to pepper jack you can get creative with it. Gruyere and brie are also great additions- they add more creaminess to your zucchini gratin sauce.
  • Cream: You can use half and half if you want to reduce the fat of your gratin.
  • Cut Zucchini Evenly: Slice your zucchini evenly so that it cooks at the same rate. You can use yellow zucchini here as well or a mixture of both.
  • Spices: Add in different spices for extra zing. Make it Italian with basil and oregano. For a Mexican take, use cumin, chili powder, and paprika.
  • Toppings: For a fun twist, try French fried onions on top! I also recommend sprinkling homemade Italian seasoning on top for an extra pop of flavor.
  • Zucchini Too Watery: Zucchini naturally has a very high water content, so there are a couple tricks I use to make sure your gratin doesn’t become too watery. The first is to sprinkle your freshly cut zucchini with salt and let it sit in a strainer. The salt will work to pull the water out. You can also sauté your zucchini before layering to reduce its moisture.
Parmesan Zucchini Gratin in a white dish.

What to Serve With Zucchini Gratin

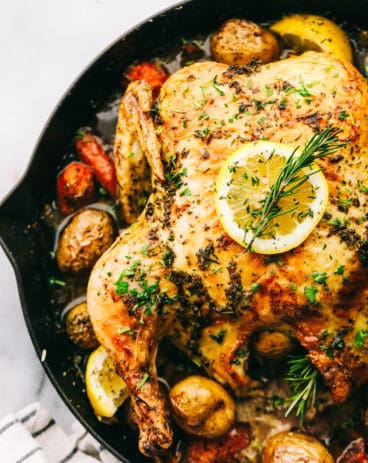
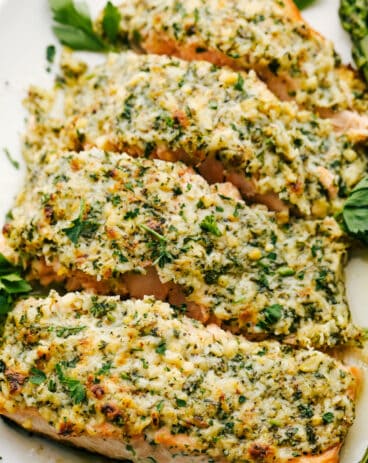
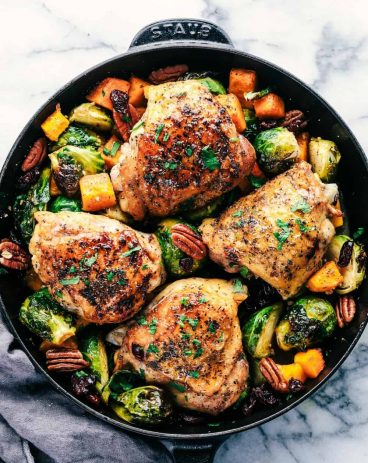
Parmesan zucchini gratin pairs perfectly with grilled meats and seafood. Try a roasted chicken or baked salmon for a super satisfying meal. This gratin is so good on its own, though, you could easily have this as your main dish served with a loaf of crusty bread and a side salad and you’ve got a delectable dinner on your hands!

Storing Leftover au Zucchini Gratin

  • In the Refrigerator: Keep in a sealed container for up to 3 days in the fridge.
  • To Reheat: Cook in oven at 350 degrees Fahrenheit until warm.
  • Make Ahead: You can mix this up and freeze for up to 2 months. Thaw overnight in the fridge and then bake as directed. You may need to add 5-10 minutes to make sure it cooks all the way through.
Taking a scoop of Parmesan Zucchini Gratin.
Print

Three Cheese Zucchini Gratin

Three Cheese Zucchini Gratin has layers of creamy, cheesy sauce and is topped with a crunchy buttery topping. Ooey-gooey and cheesy, this low-carb take-on comfort food will please any crowd!
Course Side Dish
Cuisine American
Keyword zucchini casserole, zucchini gratin
Prep Time 15 minutes
Cook Time 25 minutes
Total Time 40 minutes
Servings 6 Servings
Calories 423kcal
Author Alyssa Rivers

Ingredients

  • 2 Tablespoons butter
  • 2 Tablespoons all-purpose flour
  • 1 teaspoon salt
  • 1/2 teaspoon freshly ground black pepper
  • 2 cup whipping cream can also use half and half
  • 1/2 cup grated Parmesan cheese divided
  • 1 cup shredded mozzarella cheese divided
  • 6 small zucchini sliced about ¼ inch thick
  • Snipped fresh chives for garnish

Instructions

  • Preheat oven to 400 degrees. Lightly spray a 2-quart casserole dish with cooking spray and set aside. In a small saucepan melt 2 Tablespoons butter over medium heat and which in the flour, salt and pepper. Add the whipping cream and stir for about 2 minutes until it starts to thicken. Add ¼ cup parmesan cheese.
  • Arrange half of the zucchini in the prepared casserole dish overlapping each other. Spread half of the sauce on top followed by ½ cup mozzarella cheese. Repeat with another layer of zucchini and sauce topped with mozzarella cheese and remaining parmesan cheese.
  • Bake for 25 minutes or until the zucchini are fork tender and the top is starting to brown. Sprinkle with chives before serving.

Notes

Updated on July 23, 2021
Originally Posted on August 7, 2014

Nutrition

Calories: 423kcal | Carbohydrates: 18g | Protein: 21g | Fat: 31g | Saturated Fat: 19g | Cholesterol: 93mg | Sodium: 1103mg | Potassium: 619mg | Fiber: 2g | Sugar: 7g | Vitamin A: 1369IU | Vitamin C: 35mg | Calcium: 560mg | Iron: 2mg


from The Recipe Critic https://ift.tt/2UxFCNd
https://ift.tt/3wZVCoe

Sourdough Bread

Sourdough Bread is one of the most flavorful, good-for-you loaves of bread out there. Easier than you think with a taste and texture that is absolutely heavenly!

Bread is comfort food that goes beyond the ordinary. Try these other tried and true bread recipes when you need them, Challah, English Muffins, and Sweet Rolls.

Round loaf of sourdough bread.

Sourdough Bread Recipe with Starter

Sourdough bread is considered the king of bread. Its crusty outer exterior and its chewy tender interior make this a hearty loaf that carries a punch. The slightly tangy flavor that comes from the fermented starter is a classic favorite of many. When you pull this sourdough bread out of the oven, be prepared for pure deliciousness! It not only smells sensational but it is going to taste divine!

Do not let the fact that you are using a starter intimate you, this bread is extremely simple with very little hands-on time. Most of the work takes place as it sits and ferments and develops flavor and texture. That’s one of the great things about this sourdough bread, it can work around your schedule and be ready to bake when you are. Make it the night before for a morning bake or in the morning for a nighttime bake. Either way, you have to try this super easy and luscious sourdough bread!

Ingredients for Easy Sourdough Bread

Simple ingredients come together to make an irresistible sourdough loaf. The crisp outside and soft inside is the perfect combination to making this sourdough bread the best side dish to any meal. For all ingredient measurements, see the recipe card below.

  • Sourdough starter: Unlike regular bread, the sourdough starter is what you need for bread to rise.
  • Water: Every bread needs a liquid to mix with the flour and water is usually the most common.
  • Salt: Without salt, your bread will have no flavor. Always add the salt.
  • Bread flour: Bread flour has higher amount of protein to form the gluten for a good chewy loaf.

How to Make Sourdough Bread

The main thing to remember about sourdough is that it takes time. While making the recipe you are able to leave it and come back to it knowing it is working its magic throughout the whole process. This sourdough bread is one of a kind and the best recipe to use!

  1. Combine: Mix the starter and water together in a large bowl with a fork. Add the flour and salt and continue to mix until it comes together. You may need to use your hands to help it form a shaggy dough. Cover with a wet cloth and set aside for 30 minutes.
  2. Stretch, rest, repeat: After 30 minutes of resting, stretch one side of the dough up and fold over the top. Give the bowl a quarter turn and stretch and pull that side of the dough up, folding over the top. Turn the bowl a quarter turn again and repeat. Repeat once more until four stretches and pulls have been made. Repeat this process 3-4 times with 15-30 minutes before each time.
Mixing the starter with flour, and stretching and folding.

Rise and Shape the Dough

It is best to create a circular loaf for your sourdough bread when baking. This helps it bake evenly and efficiently.

  1. Rise: Cover the bowl with a towel and let it rise on the countertop for 7-10 hours, or in the fridge for 24 hours for slower fermentation. If your kitchen tends to be warmer it may be ready in less than 7 hours and if your kitchen is cooler it may take longer than 10. It should have risen about 50%.
  2. Shape: Turn the dough out onto a lightly floured surface and very gently form it into a round. Stretch the top side up and fold into the center. Rotate the dough and repeat until all the sides have been folded to the center. You may use a bench scraper or your hands to push and pull the dough along the counter to create tension, but only just enough to form a nice round shape.

Rest and Bake the Sourdough

Once the round ball is formed from your dough and has risen it is time to start baking it. Scoring the top helps create a presentation in the baked bread but also helps when baking. Let it cool and enjoy your sourdough bread with your family!

  1. Heat your dutch oven: Place parchment in a bowl and dust lightly with flour. Put your dough ball on the parchment and cover. Place in the fridge to rest for an hour. Meanwhile, preheat the oven to 500° with the dutch oven in the oven to preheat as well. Allow the dutch oven to heat for a full 50-60 minutes while the dough rests.
  2. Score and bake: Use a sharp knife or a razor blade, score the top of the dough at a 35-40-degree angle cutting in about ½ inch deep. Very carefully use the parchment as a sling to transfer the dough to the preheated dutch oven. Reduce the oven to 450° and place the lid on the dutch oven. Bake for 20 minutes. When 20 minutes is up, remove the lid from the dutch oven and bake for another 20-25 minutes, until the crust has turned a deep golden-brown color and the internal temp reads 205°-210°.
  3. Cool and eat: Cool on a cooling rack for at least 1 hour before slicing in order to avoid the bread turning gummy.
Letting the dough rest, stretching, forming and prepping the loaf for baking.

Tips for the Best Sourdough Bread

Remember the key is time and practice. Don’t give up if the first loaf doesn’t go your way. You’ve totally got this! And your family will love eating your mistakes too!

  • Weight vs Cup Measurement: You will notice I included the weight measurements along with the traditonal cup measurements. This is because the best way to get an accurate measurement is by weight. Depending on you scoop your flour your weight of the flour can vary vastly. If you have a kitchen scale, use it. You’ll notice a big difference. If you do not have scale, use the fluff, scoop and scrape method to accurately measure the flour. Fluff it before scooping into your measuring cup and then using a flat knife level it off.
  • Rise time can Vary: Depending on the temperature of your kitchen the rise time of your bread can vary. Look for a dough that has risen about 50% of it’s orginal height. You will need to be flexible. You can let it rise in the fridge which will take longer and give you a bit more control over it.
  • Why Stretch and Fold: Stetching and folding the dough strengthens the dough without over working it. It will add height and structure.
  • Dutch Oven: Using a dutch oven mimics using a steam oven and creates the best crust. You can also use a large loaf pan to bake your bread, but the crust will be different.
  • How to know your loaf is done: In the internal temperature of a sourdough loaf is 205-210 degrees F. Check by therometer since your eye can be decieving here.
  • Make the slits right before: Before placeing the dough in the oven, make your slashes. do not do it before it has risen, but after.

Variations for Sourdough Bread

Once you get the hang of the dough, you can add in mix-ins and be sure to store it for the best results. Most add-ins are incorporated during the first stretch and fold.

  • Nuts: Nuts add flavor and texture to your sourdough. You can chop them coursely for a rustic effect or finely for an even distribution. Combine walnuts and honey or cinnamon and pecans for a sweeter take on sourdough.
  • Fruit: Dried fruit is a wonderful additon as it compliments the acidity of the sourdough with it’s natural sweetness. Using some of the water needed for the dough, soak the chopped dried fruit for a few hours. Add the fruit and water to the dough before mixing. Citrus zest in another great way to add flavor and zing.
  • Cheese: Adding either cubed or shredded cheese adds impeccable flavors. Toss the cheese in some of the flour used for mixing before adding it during the stretch and fold.
  • Seeds: Think pumpkin, sunflower or even seasame seeds. Again add them in during the first stretch and fold.
  • Herbs: Fresh or dried add incredible flavors, think dill, thyme, oregano, and garlic. Rosemary and basil also go well with sourdough. 1-2 Tablespoons is all you need.
  • Olives: Green, kalamata, and even black olives add a nice bite to them. drain them well and mix in during the first stretch and fold.

Storing Homemade Sourdough Bread

When storing your sourdough loaf, let it cool completely. Then store it at room temperature tightly wrapped for up to 5 days. You can also freeze sourdough bread. Wrap tightly in plastic and then in a freezer-safe bag for up to 3 months. Do not refrigerate. It will dry out.

Perfectly light and airy sourdough bread.

How to use Sourdough bread

Sourdough bread is a tangy bread, with large holes, crispy crust and a chewy texture. It makes this bread ideal for using to scoop up the last bits of spaghetti or lasagna. It will hold up to dunking in Tomato or French Onion Soup. These make incredible sandwiches whether its for a Meatloaf or Cuban. Serve it alongside your favorite dishes for side dish that will be sure to disappear. Try these other ways to use your sourdough loaf, I’m sure you will be making this often!

Slices of sourdough bread ready to eat.
Print

Sourdough Starter and Bread

Sourdough Bread is one of the most flavorful, good-for-you loaves of bread out there. Easier than you think with a taste and texture that is absolutely heavenly!
Course Bread, Side Dish
Cuisine American
Keyword sourdough bread, sourdough bread recipe
Prep Time 6 days 30 minutes
Cook Time 45 minutes
Rise 13 hours
Total Time 6 days 14 hours 15 minutes
Servings 12 slices
Calories 138kcal
Author Alyssa Rivers

Ingredients

  • 1/3 cup Sourdough starter (90 grams)
  • 1 ½ cups water (346 grams)
  • 2 teaspoons salt
  • 3 ½ cups bread flour (520 grams)

Instructions

  • Mix the starter and water together in a large bowl with a fork. Add the flour and salt and continue to mix until it comes together. You may need to use your hands to help it form a shaggy dough. Cover with a wet cloth and set aside for 30 minutes.
  • After 30 minutes of resting, stretch one side of the dough up and fold over the top. Give the bowl a quarter turn and stretch and pull that side of the dough up, folding over the top. Turn the bowl a quarter turn again and repeat. Repeat once more until four stretches and pulls have been made. Repeat this process 3-4 times with 15-30 minutes before each time.
  • Cover the bowl with a towel and let it rise on the countertop for 7-10 hours, or in the fridge for 24 hours for slower fermentation. If your kitchen tends to be warmer it may be ready in less than 7 hours and if your kitchen is cooler it may take longer than 10. It should have risen about 50%.
  • Turn the dough out onto a lightly floured surface and very gently form it into a round. Stretch the top side up and fold into the center. Rotate the dough and repeat until all the sides have been folded to the center. You may use a bench scraper or your hands to push and pull the dough along the counter to create tension, but only just enough to form a nice round shape.
  • Place parchment in a bowl and dust lightly with flour. Place your dough ball on the parchment and cover. Place in the fridge to rest for an hour. Meanwhile, preheat the oven to 500° with the dutch oven in the oven to preheat as well. Allow the dutch oven to heat for a full 50-60 minutes while the dough rests.
  • Use a sharp knife or a razor blade, score the top of the dough at a 35-40-degree angle cutting in about ½ inch deep. Very carefully use the parchment as a sling to transfer the dough to the preheated dutch oven. Reduce the oven to 450° and place the lid on the dutch oven. Bake for 20 minutes. When 20 minutes is up, remove the lid from the dutch oven and bake for another 20-25 minutes, until the crust has turned a deep golden-brown color and the internal temp reads 205°-210°.
  • Cool on a cooling rack for at least 1 hour before slicing in order to avoid the bread turning gummy.

Notes

I

Nutrition

Calories: 138kcal | Carbohydrates: 28g | Protein: 5g | Fat: 1g | Saturated Fat: 1g | Polyunsaturated Fat: 1g | Monounsaturated Fat: 1g | Sodium: 390mg | Potassium: 37mg | Fiber: 1g | Sugar: 1g | Vitamin A: 1IU | Calcium: 7mg | Iron: 1mg


from The Recipe Critic https://ift.tt/3rtx0Tw
https://ift.tt/3rty7Tf

गुरुवार, 23 जुलाई 2020

Salmon Burgers

Salmon Burgers are light and tasty burgers that are easy to make ahead and enjoy all summer!  The homemade salmon patty is flavorful and quick and easy to grill!

For more delicious creative burgers try Grilled Portobello Burger or Turkey Burger.  These burgers are so impressive and are loaded with flavor!

Finished salmon burgers on a tray.

Delicious Salmon Burgers

Salmon burgers are so satisfying and healthy.  Those two words don’t usually go together, but this nutrient packed burger is both good for you and just good!  It is one of the best salmon burger recipes, including restaurant versions.  The fresh taste of seafood and the tangy and bright seasonings are perfection in every hearty bite.

Making a salmon burger from scratch is easy to do and it comes together in under 30 minutes.  Make these patties in bulk and freeze them to grill later, or grill them freshly made.  Either way, the result is a must try salmon burger that is impressive and crowd-pleasing!

Ingredients in Salmon Burgers:

Most of the ingredients in these from-scratch salmon burgers are already in your pantry, spice cabinet, or refrigerator door.  They are staple ingredients that take your salmon and turn it into an insanely delicious burger.

  • Salmon: Buy a center cut filet that has skin and pin bones removed.
  • Dijon: Adds moistness and flavor.
  • Worcestershire sauce: Tangy taste and binding ingredient.
  • Green Onion: Mild onion flavor and crunchy texture.
  • Fresh dill: Adds more depth of flavor and pairs well with the salmon.
  • Lemon juice: A bit of freshness.
  • Salt and Pepper: To taste!
  • Bread crumbs: Holds the patty together while its grilling.
  • Optional: Serve with butter lettuce and tartar sauce.

How to Make Salmon Burgers from Scratch:

Salmon burgers are so fresh and satisfying and easy to make from scratch at home.  They are better than anything you can buy at a restaurant and are ready in just minutes!

  1. Prep: Preheat the grill to medium high heat. Cut the salmon into one-inch cubes.
  2. Mix ingredients: Place salmon in a food processor with dijon, Worcestershire sauce, green onion, dill, lemon juice, salt and pepper. Pulse until combined.  Meanwhile, in a medium sized bowl add the salmon and breadcrumbs then add it to the mix.
  3. Form patties: Shape meat mixture into four patties.
  4. Grill: Let patties cook on grill for 3-4 minutes on each side.
  5. Serve: Remove from grill and place on buns and desired toppings.

Steps to make a Salmon burger.

Tips for the Best Salmon Burgers:

Salmon is a versatile fish that goes well with both bold and subtle flavors.  So, when building your salmon burger there are many ways to get creative!

  • Toppings: Keep your burger simple or load it with flavorful toppings like avocado, tomato, onion, lettuce.
  • Sauces: Pesto, dill sauce, honey mustard, or tartar are my favorite sauces to pair with a salmon burger.
  • Serve with Burgers: Try Garlic parmesan green beans, roasted honey garlic carrots, or crispy garlic sweet potato fries.
  • Perfect Temperature: A finished salmon burger should have a golden-brown color on the outside and an opaque pink color on the inside as it cooks.  Salmon must reach an internal temperature of 145 degrees to be safe to eat.

Can Salmon Burgers Be Made Ahead?

Salmon patties are so easy to make ahead and store.  They are great way to use up any leftover salmon too!  Cover them tightly in aluminum foil or plastic wrap before storing.  Be sure to separate each patty with parchment paper so that they can easily be pulled apart to re-heat later.

  • Refrigerator: Cooked salmon patties will last for up to 4 days in the refrigerator. While raw patties should not be left in the refrigerator longer than 2 days.
  • Freezer: Both grilled and raw salmon patties can be frozen for up to 3 months.
  • Re-heat: To thaw, place in a pan on medium-high heat until heated through.

Close up on picking up a finished salmon burger.

More Delicious Burger Recipes:

Print

Salmon Burgers

Salmon Burgers are light and tasty burgers that are easy to make ahead and enjoy all summer!  The homemade salmon patty is flavorful and quick and easy to grill!
Course Dinner, Main Course
Cuisine American
Keyword grilled burger, salmon burger
Prep Time 10 minutes
Cook Time 10 minutes
Total Time 20 minutes
Servings 4 Burgers
Calories 219kcal
Author Alyssa Rivers

Ingredients

  • 1 pound salmon skin removed
  • 1 Tablespoon dijon
  • 1 teaspoon Worcestershire sauce
  • 2 Tablespoons green onion chopped
  • 1 Tablespoon fresh dill
  • Juice of half a lemon
  • 1 teaspoon salt
  • 1/4 teaspoon pepper
  • 1/2 cup breadcrumbs

Optional for serving:

  • tarter sauce
  • butter lettuce

Instructions

  • Preheat the grill to medium high heat. Cut the salmon into one inch cubes. Place in a food processor with dijon, Worcestershire sauce, green onion, dill, lemon juice, salt and pepper. Pulse until combined. In a medium sized bowl add the salmon and breadcrumbs and mix.
  • Shape into four patties and place on the grill. Grill for 3-4 minutes on each side. Remove from grill and place on buns and desired toppings.

Nutrition

Calories: 219kcal | Carbohydrates: 11g | Protein: 25g | Fat: 8g | Saturated Fat: 1g | Cholesterol: 62mg | Sodium: 788mg | Potassium: 594mg | Fiber: 1g | Sugar: 1g | Vitamin A: 75IU | Vitamin C: 1mg | Calcium: 38mg | Iron: 2mg


from The Recipe Critic https://ift.tt/2WNRCHY
https://ift.tt/2E9mNXT