Alyssa Rivers July 31 लेबलों वाले संदेश दिखाए जा रहे हैं. सभी संदेश दिखाएं

शनिवार, 31 जुलाई 2021

Melon Salad with a Citrus Honey Mint Dressing

I don’t know about you but nothing hits the spot more on a hot summer day than fresh fruit and salads! Combine the two together and our melon salad will leave you feeling refreshed and satisfied!

This simple melon salad is easy to make but completely delightful to your tastebuds! It cools you down with the watery melon taste but adds a splash of flavor with the citrus honey mint dressing! Pair this with our burgers, corn, and some lemonade. These 4 recipes will create a summer meal for the books!
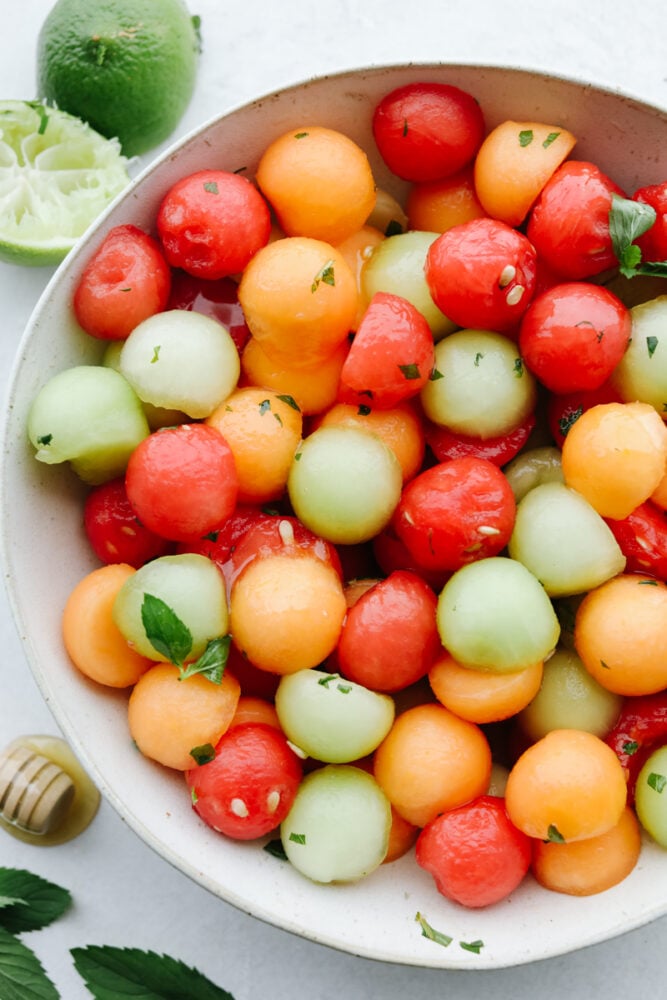
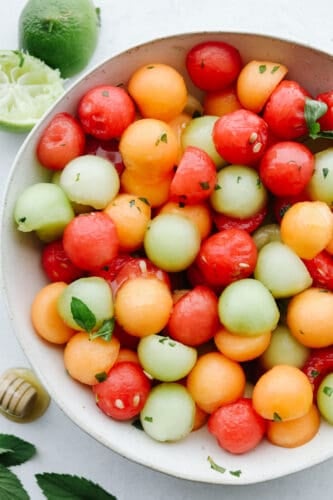
A bowl filled with different types of melons topped with a dressing.

Melon Salad with Citrus Honey Mint Dressing

Summer brings with it the desire to be outside, enjoying the refreshing sun on my face. There is always excitement in the air for all of the vacations and holidays and outdoor activities! I catch the summer bug and will do just about anything to hold on to that feeling! Making delicious and refreshing salads is one of those things and this one is a salad to remember. I love any excuse to use juicy melons including making a delicious watermelon agua fresca which is always a huge hit!

There is just something so simple about mixing different melons together and creating so much flavor. This recipe is not only delicious but most importantly, it’s a super easy recipe to make! After all, who doesn’t like a recipe that only requires 1 tool and a few ingredients?? Once you’ve finished balling up the melons, take it to the next level by drizzling the citrus honey mint dressing all over, and voila! You have a salad to impress!

What’s in Melon Salad with Citrus Honey Mint Dressing?

There isn’t much I love more than a simple recipe that packs a punch! This melon salad has only a few ingredients and delivers on taste, ease AND it looks impressive! For ingredient measurements, see the recipe card below.

  • Watermelon, honeydew, and cantaloupe: Use a melon baller scoop to create perfectly round balls. If you don’t have one of these, you can slice your melon up into cubes!
  • Lemon and lime: These juices will give this salad a fresh taste and a great citrus flavor!
  • Mint: Chop the mint up finely so that the flavor can be spread evenly throughout the salad.
  • Honey: The honey will balance out the citrus with a dash of sweetness!
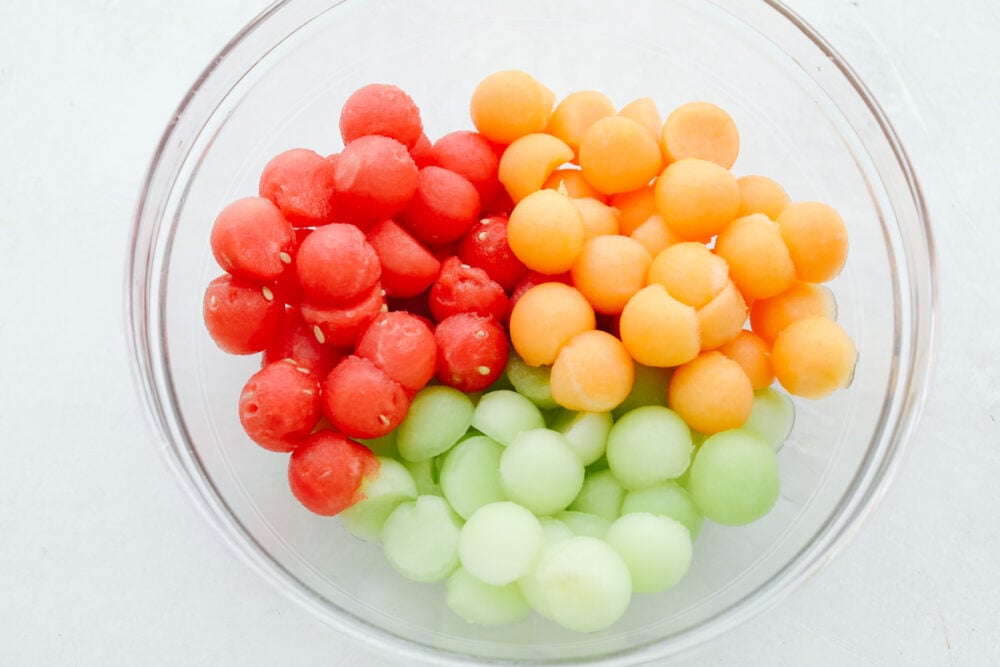
A bowl filled with fruit, all scooped as small pieces.

How to make Melon Salad with Citrus Honey Mint Dressing

It only takes as long as scooping out the melon to make this recipe!! It looks impressive and colorful all while being simple and insanely delicious!

  1. Scooping the melon: Take each melon and using your melon scoop (or if you don’t have one, just cut the melon into cubes). Scoop out the melon and place it into the bowl. Do this for all 3 melons then combining them together.
  2. Whisk the Dressing: Next thing to do is make the dressing! Combine the lemon and lime juice into a separate small bowl, stir in the honey until it is dissolved. Then, chop up the mint into fine pieces and stir it in with the honey and juices.
  3. Mix together: Last step is to pour it over the salad until the melons are covered. Serve and enjoy!!
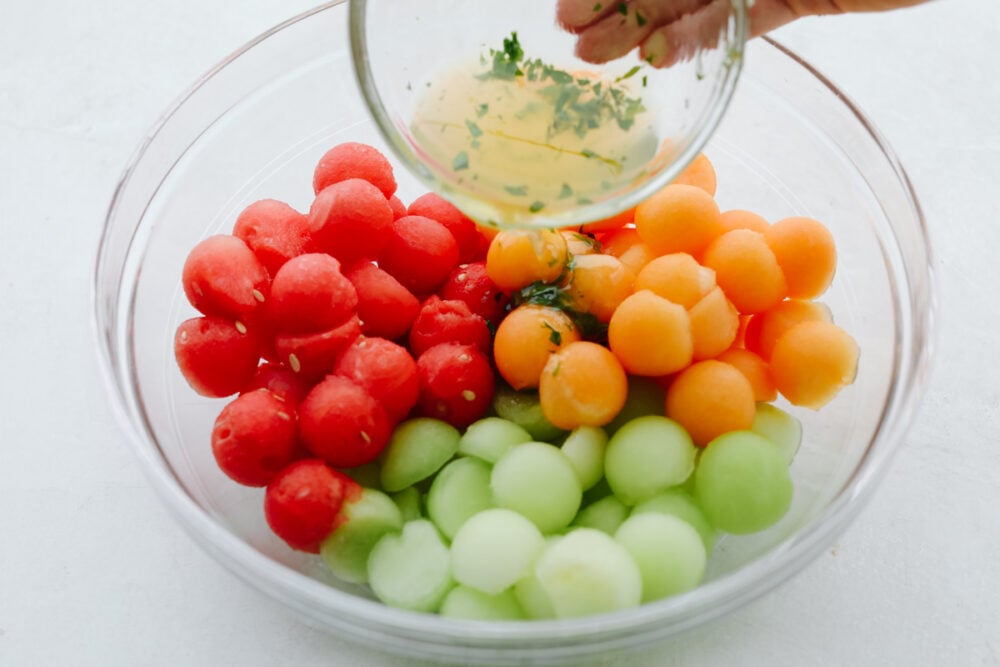
A bowl filled with watermelon, honeydew and cantaloupe scooped in small sizes with dressing being poured on them.

Tips and Variations For the Best Fruit Salad

We all know that the best part about salads is that you just put them in the refrigerator and keep coming back for more. The trick is how to make them last the longest! Follow these easy tips and you’ll be able to munch on these leftovers for days!

  • Smoothie and Juices: Once the melons get soft and extra juicy, then they are probably about on their last leg. However, this is a great time to use them in a smoothie or juice! Toss them in a blender with some ice and any additional fruit and you have yourself a delicious summer drink!
  • Cutting Melons: If you don’t have a round scoop to cut the melons into circles, cutting them into ½ inch to inch squares will also work. If you still want it to look fancy, try cutting them into trianagles for a fun shape and look.
  • Add Ins: Berries, mango and peaches are a sweet addition to this melon salad.
  • Serving: Garnish the melon salad with fresh mint and place in a clear bowl or platter for all to see the beatiful melon colors.
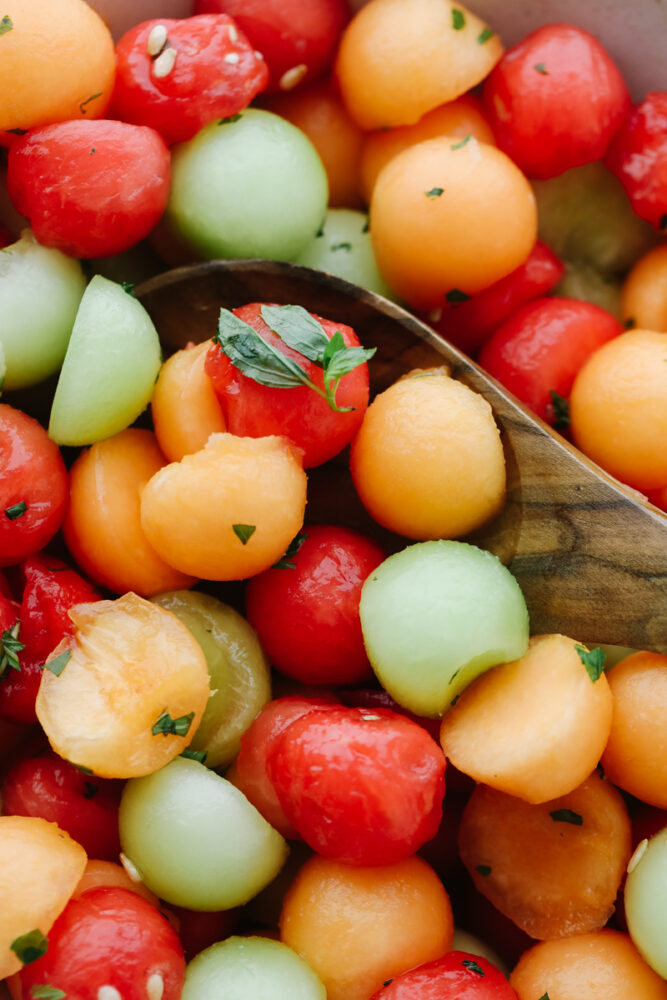
3 different melons on a spoon topped with mint dressing.

Leftovers Callout Title

  • Making Ahead: Store your round melon balls in an air tight container with lemon juice over top for 3 to 5 days. Whisk together the dressing right before you are ready to serve.
  • Refrigerating: Wrap your container with tightly sealed plastic wrap. This will preserve the melons in your fridge for 3-5 days. Don’t forget to seal it after each time it gets opened!
  • Freezeing Fruit: If you find yourself not able to finish the salad in time, you can freeze it! Place it in an airtight container and you can freeze it for up to 12 months!
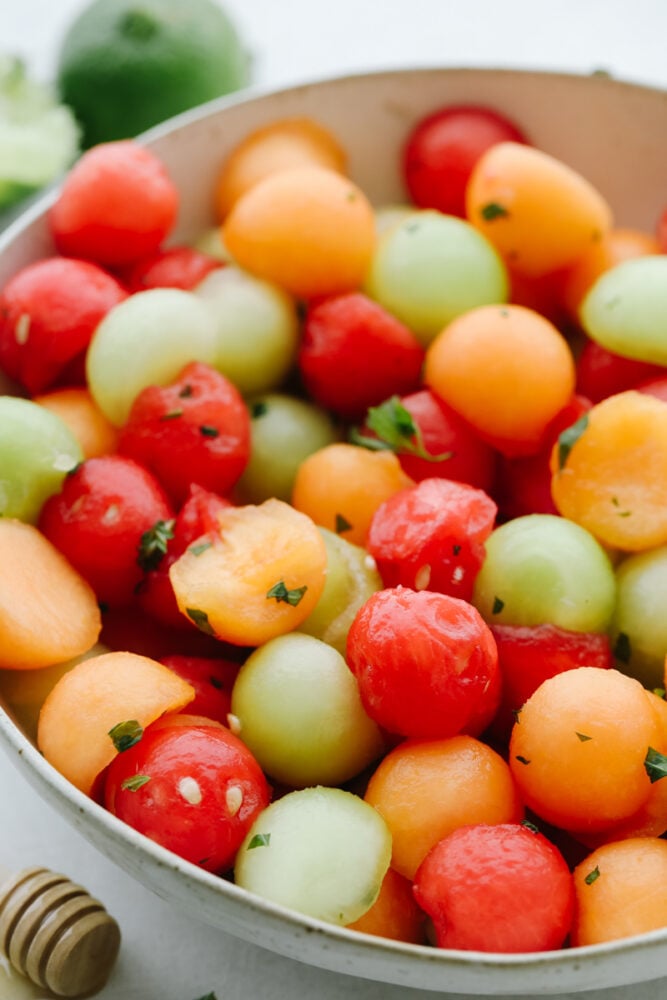
A bowl of fruit salad with melons and dressing.
Print

Melon Salad with Citrus Honey Mint Dressing

I don't know about you but nothing hits the spot more on a hot summer day than fresh fruit and salads! Combine the two together and our melon salad will leave you feeling refreshed and satisfied!
Course Salad, Side Dish
Cuisine American
Keyword melon salad
Prep Time 15 minutes
Total Time 15 minutes
Servings 4 people
Calories 548kcal
Author Alyssa Rivers

Ingredients

  • 1 small watermelon
  • 1 cantaloupe
  • 1 honeydew

Honey Citrus mint glaze:

  • Juice of half lemon
  • Juice of half of a lime
  • 3 Tablespoons honey
  • 1 Tablespoon mint chopped

Instructions

  • Using a melon baller scoop round spheres out of each of the melons and place them into a medium-sized bowl.

To make the honey citrus dressing:

  • In a small bowl add the lemon juice, lime juice, honey and mint and whisk. Pour over the salad and mix until incorporated.

Nutrition

Calories: 548kcal | Carbohydrates: 138g | Protein: 10g | Fat: 2g | Saturated Fat: 1g | Polyunsaturated Fat: 1g | Monounsaturated Fat: 1g | Sodium: 92mg | Potassium: 2373mg | Fiber: 8g | Sugar: 120g | Vitamin A: 11282IU | Vitamin C: 200mg | Calcium: 114mg | Iron: 4mg


from The Recipe Critic https://ift.tt/2V7iXra
https://ift.tt/3C3ICl2
Dill Pickle Dip

Calling all pickle lovers! Loaded with chopped pickles and herbs, this dill pickle dip is bursting with flavor and absolutely irresistible!

Dips are the perfect summer treat. They are the best crowd-pleasers with how easy-to-make and delicious they are! Jalapeno popper, million-dollar, and hot corn are some of my other favorites!

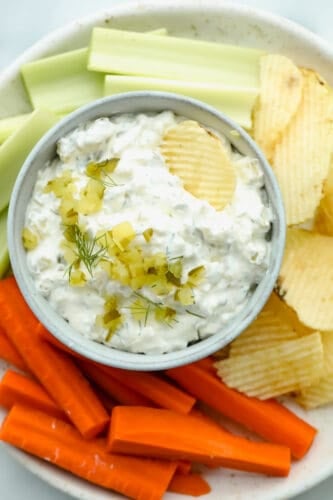
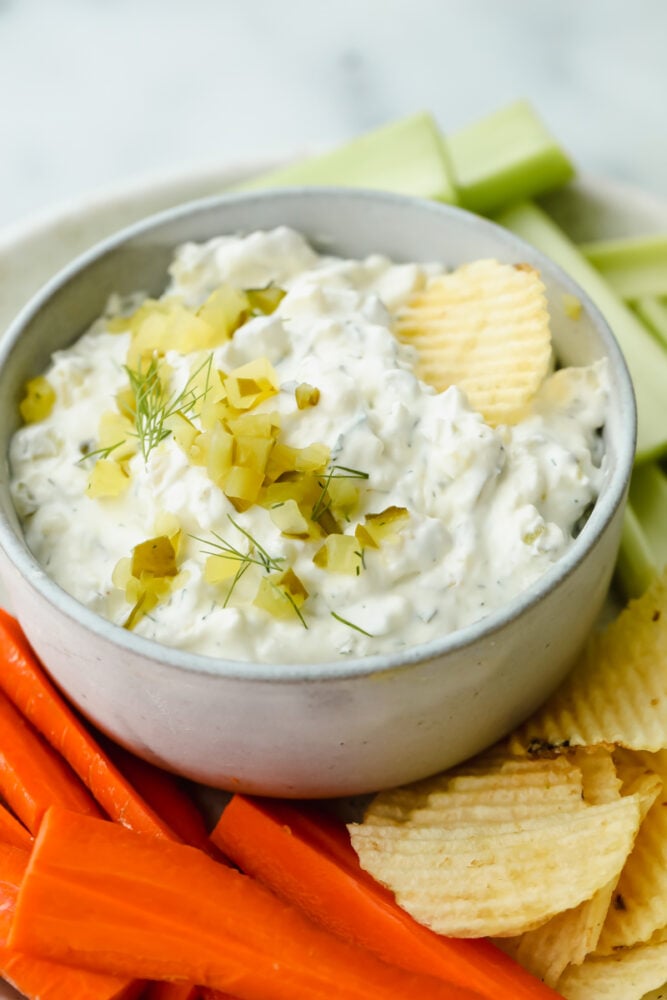
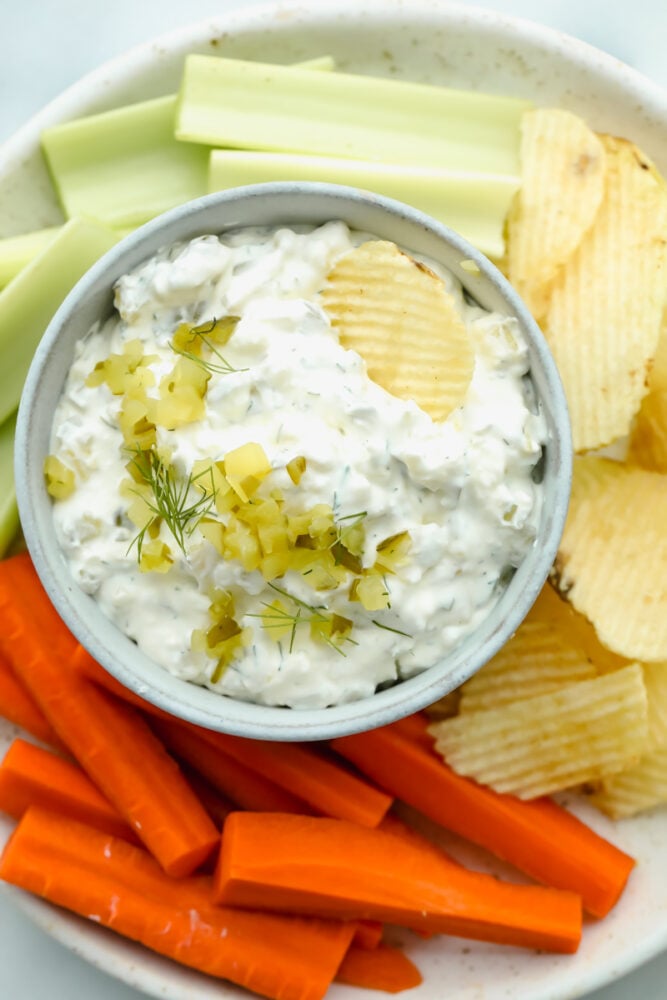
Dill pickle dip with potato chips, celery, and carrots.

Easy and Delicious Dill Pickle Dip Recipe

As someone who loves easy and delicious dips, I am SO excited to share this recipe with you. This dip only has 6 ingredients and comes together in minutes to create the most amazing zesty, creamy flavor! Because of this, it is always requested at family parties and is gobbled up in no time. The tangy flavor pairs so well with chips, crackers, fresh veggies, you name it! Even my family members who don’t like pickles have become a believer after trying this pickle dip.

Dill pickle dip is the perfect, easy dish for potlucks and game days. Additionally, it is so easy to make and just as easy to store and take on the go! That being said, my personal favorite way to enjoy this insanely good dip is for a Netflix binge night. Like binging your new favorite show, resisting another bite of this flavorful, addictive dill pickle dip is impossible. It is the perfect addition to your easy-to-make snack arsenal!

What You Need For Pickle Dip

With only a handful of simple ingredients, this pickle dip is an easy and inexpensive treat to throw together! It is also easy to customize flavors and substitute ingredients to your liking. I have all individual measurements listed in the recipe card below.

  • Cream Cheese: This is the creamy base of the dill pickle dip. Having your cream cheese at room temperature helps everything to mix together well! Also, a dairy-free variation of this dip can be made with cream cheese like Miyoko’s or Daiya.
  • Sour Cream: Sour cream adds a smooth texture and tangy flavor to your dill pickle dip. Greek yogurt works as a great substitute, too!
  • Chopped Dill Pickles: Small whole dill pickles, finely chopped, are what I like to use in this recipe! You can adjust the size of your dill pieces to your liking.
  • Garlic Powder: Adds a boost of flavor to your dip. Using fresh garlic is another way to achieve this.
  • Dill Weed: Used to add fresh, zesty flavor to your dip and also a hint of texture.
  • Dill Pickle Juice: Dill pickle juice will add additional flavor to your dip. It can also be used to make your dill pickle dip thinner until you reach your desired consistency!

How to Make the Best Dill Pickle Dip

This dip is rich and tasty with minimal effort. As a result, no one will suspect you made it minutes before the party with how much scrumptious flavor is loaded in each bite! You can even use your extra time to make homemade chips to really impress your guests.

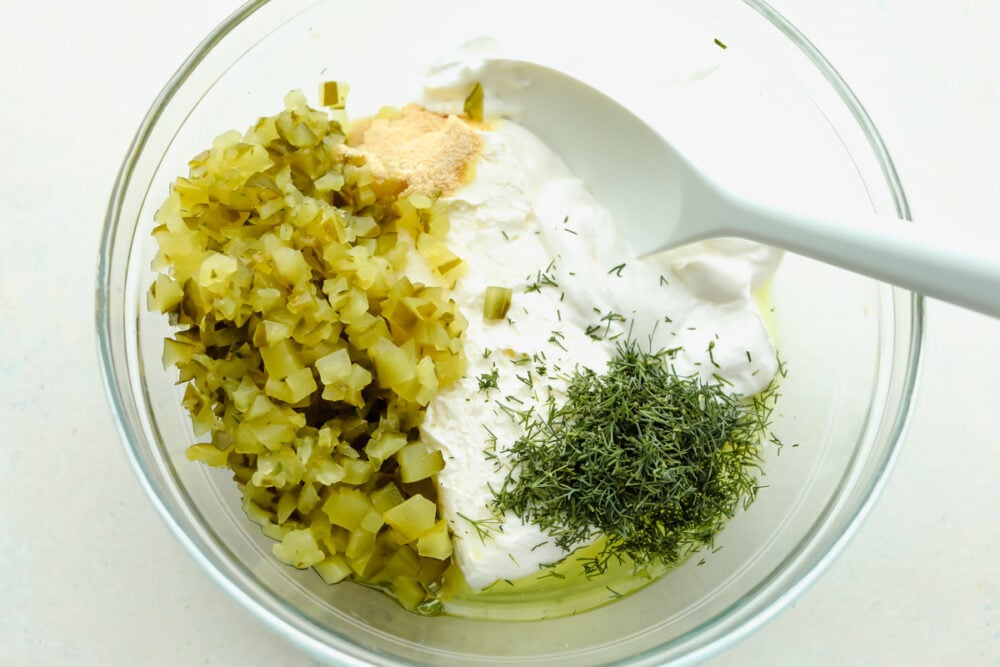
  1. Combine Ingredients: In a medium size combine the cream cheese, sour cream, chopped dill pickles, garlic powder, dill weed, and pickle juice until incorporated.
  2. Serve or Chill: Serve immediately or chill for an hour to let the flavors blend and cheese to thicken.
Dill pickle dip ingredients in a glass bowl.

Making the Best Dill Pickle Dip

Dill pickle dip can easily be customized to suit your tastes. So, whether you want to add more flavors or change up texture, you can use these easy tips to craft the best dip possible!

  • Different Pickles: Any kind of pickle will work here, use your favorite! You could try using hot pickles to add a little heat to your dill pickle dip!
  • Flavor Enhancers: Adding diced onion or onion powder to your dip gives it a pop of savory flavor. Jalapeños, a dash of Chili powder or paprika can add great flavor, as well. A little heat plays perfectly with the zesty flavor of dill.
  • Convert to Cheese Ball: Want dill pickle dip but in cheese ball form? No problem! Easily convert your dip into a cheese ball by placing mixture onto plastic wrap and gently shaping it into a ball. Next, refrigerate for at least an hour or until it is set in place. It is then ready to be transferred to a serving dish.
  • Dip Too Thick: If your dill pickle dip becomes too thick, add a spoonful of pickle juice at a time until you get the consistency you are looking for. Also, keep in mind that this dip will become thicker while resting in the refrigerator. If you’re making it in advance, you may need to add a splash of pickle juice to your dip before serving.
  • Serve With: Serve your dill pickle dip up with crackers, chips, veggies or pita. Zucchini chips are a tasty, healthy snack that also pairs wonderfully with dill pickle dip! Also, you can use this as a spread for sliders and sandwiches for a zesty pop of flavor!
Dill pickle dip on serving dish with chips and veggies.

Storing Leftover Dill Pickle Dip

My favorite part about dips is that they are so incredibly easy to store! You can eat them straight from the Tupperware container which makes them the ultimate anytime snack.

  • In the Refrigerator: Store your dill pickle dip in an airtight container for 3-4 days.
  • In the Freezer: This dip will keep in the freezer for up to 2 months in an airtight container. Thaw in the fridge before serving.
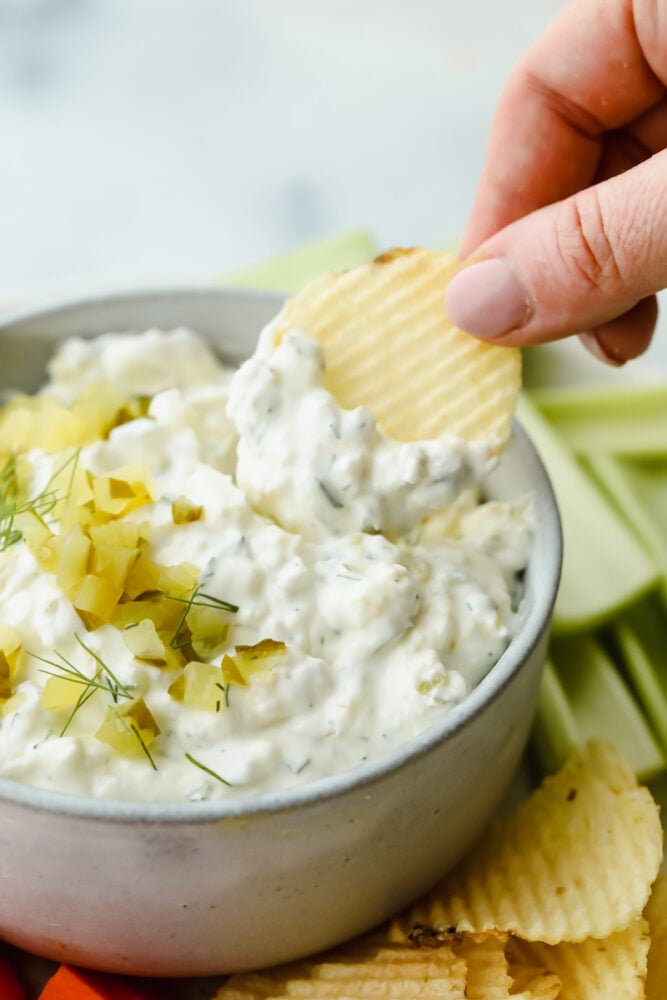
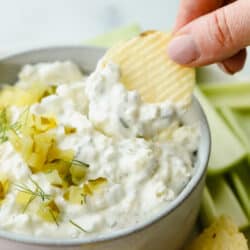
Putting dill pickle dip on a potato chip.
Print

Dill Pickle Dip

Calling all pickle lovers! Loaded with chopped pickles and herbs, this dill pickle dip is bursting with flavor and absolutely irresistible!
Course Appetizer, Snack
Cuisine American
Keyword dill pickle dip, dill pickle dip recipe
Prep Time 10 minutes
Total Time 10 minutes
Servings 6 people
Calories 169kcal
Author Alyssa Rivers

Ingredients

  • 8 ounce cream cheese softened
  • 1/2 cup sour cream
  • 1 cup finely chopped dill pickles
  • 1 teaspoon garlic powder
  • 1 Tablespoon dill weed chopped
  • 2 Tablespoons dill pickle juice

Instructions

  • In a medium-size bowl combine the cream cheese, sour cream, chopped dill pickles, garlic powder, dill weed, and pickle juice until incorporated.
  • Serve immediately or chill for an hour to let the flavors blend together and the cheese to thicken.

Nutrition

Calories: 169kcal | Carbohydrates: 3g | Protein: 3g | Fat: 17g | Saturated Fat: 9g | Polyunsaturated Fat: 1g | Monounsaturated Fat: 4g | Cholesterol: 52mg | Sodium: 211mg | Potassium: 86mg | Fiber: 1g | Sugar: 2g | Vitamin A: 632IU | Vitamin C: 1mg | Calcium: 59mg | Iron: 1mg


from The Recipe Critic https://ift.tt/3rNWyLl
https://ift.tt/3xf83MU

शुक्रवार, 31 जुलाई 2020

Oven Baked Denver Omelet

An Oven Baked Denver Omelet is a delicious omelet packed with ham, onions, peppers and cheese that you can throw into the oven in a moments notice!  It is a hearty and satisfying family breakfast that everyone will go crazy over!

Freezer friendly breakfast meals are a must on busy mornings that still require warm nutritious meals.  Try Breakfast Burritos or Denver Omelet Breakfast Muffins for delicious and easy recipes everyone will enjoy.

Denver omelet slice on a white plate.

Oven Baked Denver Omelet

Commonly known as a “Western Omelet” this Baked Denver Omelet is the BEST baked omelet recipe. It is filled with fresh ingredients like ham, fresh onion, green peppers and cheese and is ready in no time at all!  Break out of a breakfast rut and try these warm, fluffy eggs fresh out of the oven.  A large pan of these tasty and healthy eggs that are filled with ooey-gooey cheese will be an instant hit for breakfast, lunch or dinner!

Whether you are baking them for your family or a brunch for a crowd, they are easy to prepare for a crowd.  They are light and tasty but also filling and satisfying!  No more standing over a skillet while you cook omelet after omelet for every member of your family.  Simply whisk these ingredients together then bake.  In less than 30 minutes you will have a warm and filling breakfast that everyone will love and enjoy together!

Denver Omelet Ingredients:

Just a few simple ingredients come together quickly and easily to make a fresh and satisfying breakfast for your entire family.  These are staple ingredients are no-fuss and set up perfectly in your oven and become a light and fluffy omelet everyone will love!

  • Eggs: Whisk together eggs with cream to make the perfect buttery and light egg.
  • Half and half cream: Makes the eggs light and fluffy.
  • Cheddar cheese: Freshly shredded cheese mixed in will add sharp, earthy flavor.
  • Ham: Chopped and fully cooked deli ham adds the perfect salty taste.
  • Onion: Adds a sweet bite of flavor!
  • Green pepper: Mild and sweet flavor that adds color, flavor, and crunch.

Let’s Bake an Omelet!

All the flavors you love in an omelet are easy to put together and bake in less than 30 minutes!  Just whisk together the ingredients and pour into a greased pan, then relax while your stress free breakfast bakes!

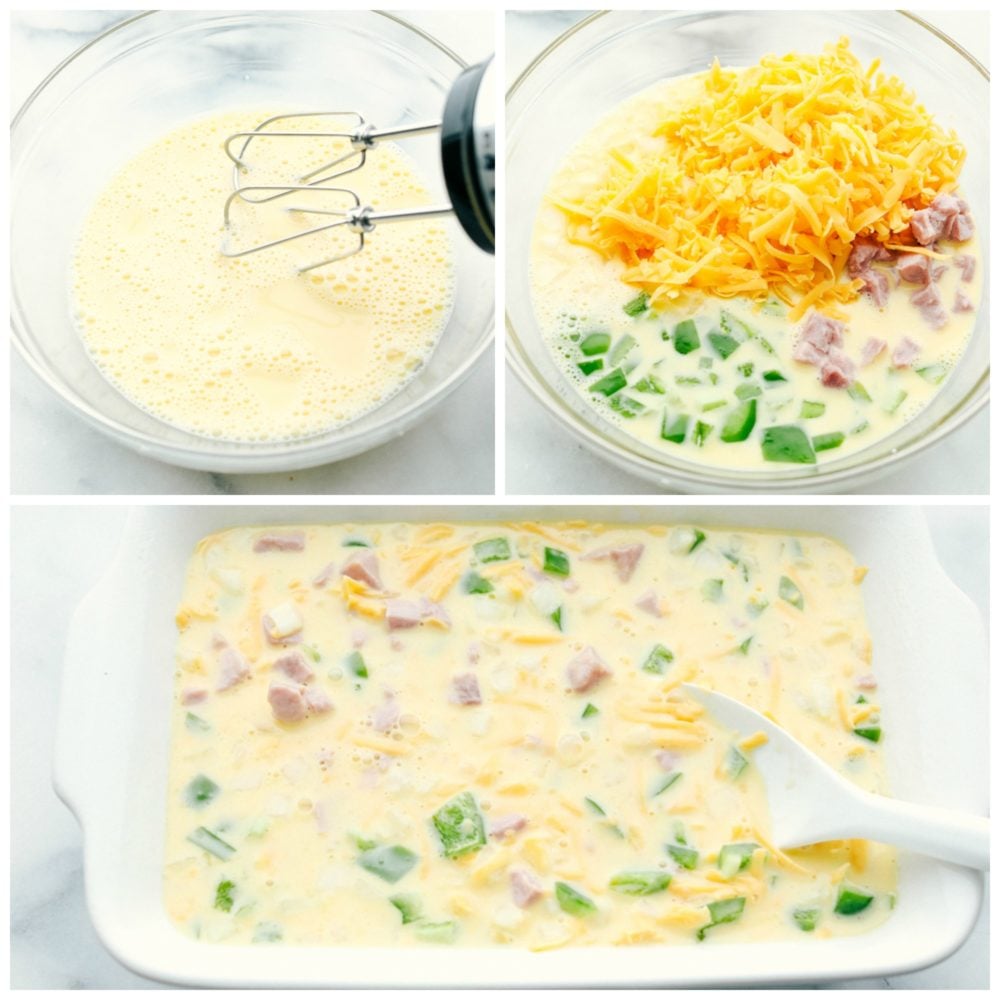
  1. Prep: Preheat oven to 400 degrees. In a medium sized mixing bowl whisk together eggs and cream. Add in cheese, ham, onion and green pepper.
  2. Bake: Pour into a greased 9×9 inch pan. Bake for 25 minutes or until golden brown.

Steps to make a denver omelet.

Variations of Denver Omelette:

This Baked Denver Omelet is packed with so many delicious ingredients my family loves like ham, onions, peppers, and gooey cheese. The great thing about this recipe is that you can customize it so it is a huge hit with your family like it is with mine!

  • Toppings: Pico de Gallo, Mango Lime Avocado Salsa, Salsa, sausage gravy, sour cream, or guacamole.
  • Serve with: Hash browns, Sweet Potato Hash, bacon, fresh fruit, Biscuits and Gravy
  • Additional fillings: Bacon, crumbled cheese such as feta or blue cheese, spinach, mushrooms, zucchini.
  • Ingredient swaps: Use milk or heavy whipping cream instead of half and half.
  • Pro Tip: Cook onion and peppers before adding them in to give them a slightly caramelized taste and reduce the moisture they will add to the egg.
  • Seasoning: Add seasoning salt for and pepper to increase the flavor of this light and tasty baked omelet.  Also try paprika, chili powder or red pepper flake if you like an extra punch of spice.

Can You Make a Baked Denver Omelet Ahead?

Yes! Make this Denver omelet ahead and store it until you are ready to serve.  Let the omelet cool completely before covering it tightly with aluminum foil or plastic wrap.

  • Freeze: Make ahead and freeze for 3-6 months without sacrificing flavor or quality.
  • Refrigerate: Store in an airtight container for 3-4 days in the refrigerator.
  • To thaw: Thaw in the refrigerator or place directly in the oven to heat.
  • To re-heat:  Microwave a slice of Denver omelet for 30 seconds at a time until it is heated throughout.  Or place entire tray in the oven at 350 for 10 minutes or until warm throughout.

Cutting a slice of oven baked denver omelet.

More Egg Breakfast Recipes:

Print

Oven Baked Denver Omelet

A delicious omelet packed with ham, onions, peppers and cheese that you can throw into the oven in a moments notice!
Course Breakfast
Cuisine American
Keyword omelet, omelet recipe, oven baked denver omelet
Prep Time 10 minutes
Cook Time 25 minutes
Total Time 35 minutes
Servings 6 Servings
Calories 251kcal
Author Alyssa Rivers

Ingredients

  • 8 eggs
  • 1/2 cup half and half cream
  • 1 cup cheddar cheese shredded
  • 1 cup ham chopped fully cooked
  • 1/2 cup onion
  • 1/2 cup green pepper

Instructions

  • Preheat oven to 400 degrees. In a medium sized mixing bowl whisk together eggs and cream. Add in cheese, ham, onion and green pepper.
  • Pour into a greased 9x9 inch pan. Bake for 25 minutes or until golden brown.

Notes

Updated on July 30, 2020
Originally Posted on July 4, 2014

Nutrition

Calories: 251kcal | Carbohydrates: 3g | Protein: 18g | Fat: 18g | Saturated Fat: 9g | Cholesterol: 260mg | Sodium: 486mg | Potassium: 234mg | Fiber: 1g | Sugar: 1g | Vitamin A: 623IU | Vitamin C: 11mg | Calcium: 193mg | Iron: 1mg


from The Recipe Critic https://ift.tt/39JJUE0
https://ift.tt/314mO7b