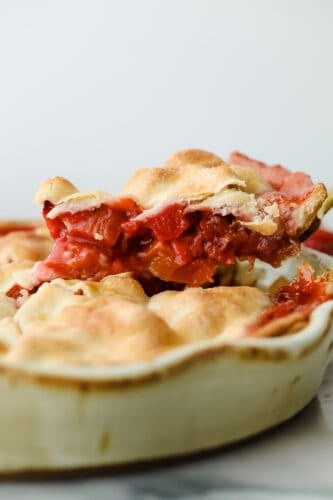
A sweet, tart fruit filling and golden, flaky crust make this Strawberry Rhubarb Pie the dessert of the summer. With a pie this fresh and decadent, you won’t want store-bought again!
The juicy sweetness of strawberry and the bright, tart flavor of rhubarb is a winning combination, perfect for a summertime treat! My peach, lemon, and key lime pies are more family favorites with summer-ready flavor that you are going to love making this season!

Perfect Strawberry Rhubarb Pie Recipe
Being my mom’s favorite, we always had strawberry rhubarb pie on hand growing up at our house. For some reason, I was never too keen on the idea of having a vegetable in a sweet pie. I wish I could go back in time and have my younger self try this strawberry rhubarb pie because it is the BEST! If you are unsure about rhubarb, it is time to give this delicious pie a try. With the perfect soft, flaky crust and combination of fruity flavors, I am positive it will make you a believer, too!
It’s rhubarb season right now, so don’t miss out! Fresh rhubarb always tastes best in baked goods. The tart, tangy flavor pairs perfectly with things like muffins, cobblers, and crisps! It is also really easy to prepare. Most fresh rhubarb comes with its toxic leaves already removed, so all you need to do is chop it up and add it to your recipe! This strawberry rhubarb pie is the perfect addition to your summer desserts.
Fresh Strawberry Rhubarb Pie Ingredients
A lot of these ingredients will already be in your pantry, all you need is fresh fruit and a homemade crust to make your pie really pop! See all the measurements in the recipe card below.
- Homemade or Store-Bought Pie Crust: You will need a 9-inch pie crust. You can get this from the store, but if you want your pie to be extra buttery and flaky, try incorporating my grandma’s perfect pie crust!
- Fresh Rhubarb: Chopped into small pieces. Sometimes fresh rhubarb can be hard to find, so you can use frozen rhubarb as a substitute.
- Fresh Strawberries: Hulled and chopped into small pieces.
- Granulated Sugar: To sweeten your fruit filling and help flavors melt together.
- Brown Sugar: Adds moisture and richness to your fruit filling.
- Cornstarch: Keeps fruit filling from becoming too runny. This can also be substituted with tapioca flour.
- Salt: A pinch to enhance flavors.
- Vanilla Extract: To add flavor to your filling. Pure vanilla extract works best.
- Lemon Zest: To balance sweetness and add zesty flavor.
- Lemon Juice: Adds fresh, juicy flavor to your fruit filling.
- Salted Butter: I like using salted butter to enhance the flavors in this pie.
- Egg Yolk: The fat content in an egg yolk adds richness and binds ingredients together.
- Water: To mix with egg yolk to create egg wash.
How to Make Homemade Strawberry Rhubarb Pie
Making a pie at home doesn’t have to be complicated. Follow these instructions for a fresh, delicious pie baked to perfection! This combination of strawberry and rhubarb taste like summer in every bite!
- Preheat: Preheat oven to 425.
- Prepare Pie Crust: In a 9 inch pie pan, place one of your pie crusts evenly in the pan and press it into the pan. Set aside in the fridge until the filling is ready.
- Mix Fruit and Dry Ingredients: In a medium bowl, add your chopped rhubarb and strawberries. In a smaller bowl, mix the granulated sugar, brown sugar, cornstarch and salt together.
- Add Wet Ingredients and Fill Pie: Pour over the fruit and mix. Add the vanilla, lemon zest and lemon juice and mix again. Pour the filling in the prepared pie shell and dot with butter.
- Cover Pie: Place the top crust over the filled pie and crimp the edges together. Cut a few vents in the tip crust to allow steam to escape.
- Add Egg Wash: Use a fork to mix the egg yolk and water together and with a pastry brush, brush it evenly across the top crust. You may sprinkle some granulated sugar or coarse sugar crystals over the top for added texture and sweetness.
- Bake: Place pie on a baking sheet lined with parchment (this will prevent spills in your oven if the pie bubbles over) and bake on the middle rack for about 45-50 minutes, until the filling is bubbling and the top crust is very golden brown. If the crust is getting too dark before the time is up, cover it gently with foil to avoid burning the top crust while the bottom crust bakes through.
- Cool: Allow to cool at least 30 minutes before serving.

Strawberry Rhubarb Pie Tips and Tricks
Use these tips to help you create a pie so good, your friends and family will fight for the last piece. This strawberry rhubarb pie is a sweet and savory combination that everyone loves!
- Rhubarb: When shopping for fresh rhubarb, look for firm stalks that are not ripped or blemished. If your rhubarb is bright, this typically means that it has a more tart flavor. To prepare fresh rhubarb, simply wash, make sure leaves are discarded, and cut into small pieces. If using frozen rhubarb, thaw and drain before adding to your pie or it will become runny and mushy.
- Strawberries: Make sure your strawberries are plump and deep red in color. Once strawberries are picked, they do not continue to ripen, so avoid strawberries with too much green or white on them.
- Using Too Much Flour: If making your pie crust from scratch, try not to use too much flour when rolling out your dough. It can absorb extra flour and leave you with a hard, tough crust.
- Cold Pie Crust: This is the secret to getting a perfectly flaky crust. When a cold pie crust is put in the oven, a chemical reaction occurs and a flaky outer layer is created.
- Let Your Pie Cool Completely: One of the harder tips to follow, I know, but patience is key! Letting your pie cool completely is the only way to ensure that you will not have a soupy mess when its cut into. Wait at least 30 minutes before serving.

What to Serve With Your Pie
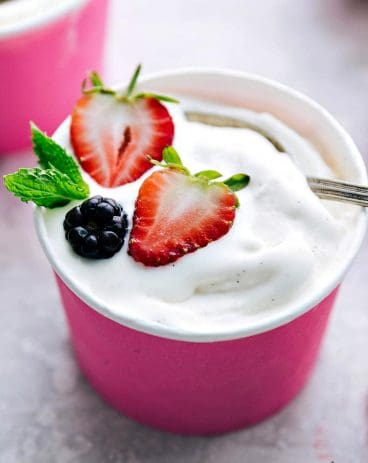
Nothing beats a warm strawberry rhubarb pie with a scoop of melting ice cream on top. It is the perfect dessert for a summer night. Try my homemade keto ice cream or vanilla soft serve frozen yogurt on top for a healthy twist on an indulgent treat. Have extra strawberries and rhubarb on hand? Serve up strawberry rhubarb crisp and muffins for a selection of fruity desserts that will make any get-together a little sweeter!


Desserts
Strawberry Rhubarb Crisp

30-Minute
Rhubarb Muffins
Desserts
Vanilla Soft Serve Frozen Yogurt
How Long Does Strawberry Rhubarb Pie Keep?
Your strawberry rhubarb pie will keep at room temperature for up to 2 days with either plastic wrap or tin foil over it. If you live in a very hot climate, though, I don’t recommend keeping your pie at room temperature or your fruits will turn mushy. It is best to keep your strawberry rhubarb pie refrigerated and will last for up to 5 days.

More Amazing Pies
Desserts
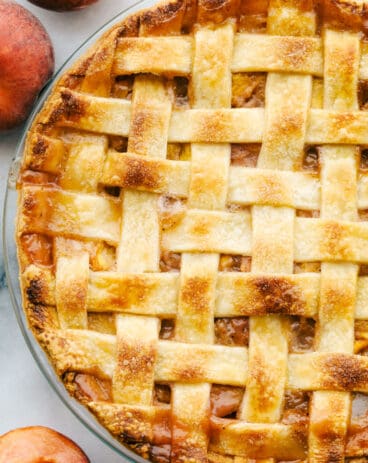
Incredible Homemade Peach Pie
Desserts
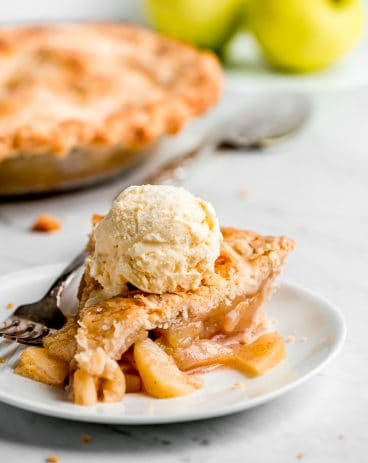
Perfect Apple Pie
Desserts
No-Bake Key Lime Pie
Desserts
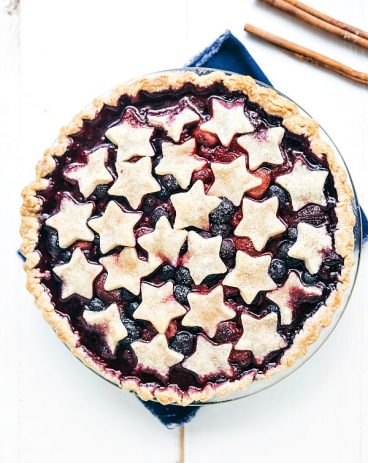
Triple Berry Pie

Strawberry Rhubarb Pie
Ingredients
- 2 homemade pie crust or store bought 9 inch pie crusts
- 3 cups fresh rhubarb chopped
- 3 cups fresh strawberries hulled and cut into large pieces
- ½ cup granulated sugar
- ¾ cup brown sugar
- ¼ cup cornstarch
- Pinch of salt
- ½ teaspoon vanilla extract
- 1 teaspoon lemon zest
- 1-2 teaspoon lemon juice
- 3 Tablespoon salted butter
- 1 egg yolk
- 2 Tablespoon water
Instructions
-
Preheat oven to 425.
-
In a 9 inch pie pan, place one of your pie crusts evenly in the pan and press it into the pan. Set aside in the fridge until the filling is ready.
-
In a medium bowl, add your chopped rhubarb and strawberries. In a smaller bowl, mix the granulated sugar, brown sugar, cornstarch and salt together.
-
Pour over the fruit and mix. Add the vanilla, lemon zest and lemon juice and mix again. Pour the filling in the prepared pie shell and dot with butter.
-
Place the top crust over the filled pie and crimp the edges together. Cut a few vents in the tip crust to allow steam to escape. Use a fork to mix the egg yolk and water together and with a pastry brush, brush it evenly across the top crust. You may sprinkle some granulated sugar or coarse sugar crystals over the top for added texture and sweetness.
-
Place pie on a baking sheet lined with parchment (this will prevent spills in your oven if the pie bubbles over) and bake on the middle rack for about 45-50 minutes, until the filling is bubbling and the top crust is very golden brown. If the crust is getting too dark before the time is up, cover it gently with foil to avoid burning the top crust while the bottom crust bakes through.
-
Allow to cool at least 30 minutes before serving.
Nutrition
from The Recipe Critic https://ift.tt/3gT22zx
https://ift.tt/3zKu1tG