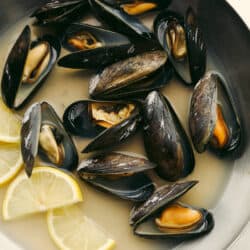
Creamy lemon garlic seafood pasta has the most delicious flavor and texture all in one dish! It’s SOO GOOD that you can bet that your guests won’t be able to resist coming back for seconds!
If you love the mix of seafood and pasta then you MUST try these other seafood recipes! Start with this Shrimp Alfredo, this Mac and Cheese, and or these delicious Scallops!

Creamy Lemon Garlic Seafood Pasta
Ok, before you make this recipe, you are probably wanting to know exactly what seafood is in it! This seafood pasta has some of my all-time favorite shellfish in it. Mussels, scallops, and shrimp. Not only are they mouthwatering in taste and texture but they are some of the easiest seafood choices to cook! We’re talking 30 minutes and they are done and ready to eat! Add in some creamy lemon garlic pasta and you will be dying for this dish to finish cooking!
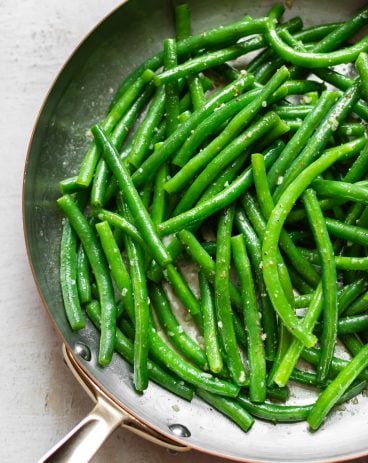
This seafood pasta is so rich and filling that you don’t need too much more to make it a meal! I would add some garlic bread and some asparagus or maybe a salad and then call it good. That way, you have something for everyone! This dish not only tastes insanely delicious but it looks so fancy! Cook it up for a dinner party with your family and friends and they will all be asking for the recipe by the end of the night! Happy eating!
Ingredients You Need to Make Seafood Pasta
This seafood pasta will be one of the most simple pasta recipes that you can make. It’s a great one to try if you’ve never cooked with shellfish before! See the recipe card below for a list of exact ingredient measurements.
Ingredients
- Linguini noodles: I like to use liguini noodles because they are wider. But you could use any noodles that you have on hand!
- Butter: Try and use unsalted butter for this recipe.
- Scallops: These should be fresh, rinsed and patted dry.
- Large shrimp: You will want to make sure that your shrimp is peeled and deveined before starting this recipe.
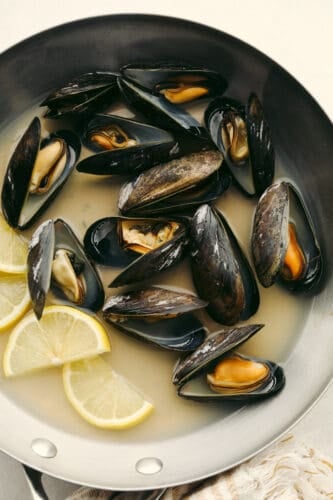
- Mussels: I like to debeard my mussels immedietly before cooking so that they stay as fresh and alive as possible.
- Salt and pepper: I used these to taste!
Creamy Lemon Garlic Sauce
- Butter: Unsalted butter is the best so that you don’t have any added salt taste to worry about.
- Cream: Heavy whipping cream works fine for this!
- Chicken broth: Using chicken broth instead of water will give this dish more flavor!
- Cream cheese: This is what gives the sauce that delightful and creamy texture.
- Parmesan: This cheese adds in the perfect extra taste to this recipe.
- Lemon: You can use juice from a fresh lemon or bottled lemon juice. Whatever you have will work!

Let’s Cook Up Some Delicious Seafood Pasta!
Once you’ve cleaned and prepped your seafood then you should get excited because it’s cooking time! And after cooking time is eating time.., Which is the best of all!
- Boil and cook pasta: Bring a large pot of water to boil and cook pasta according to package directions. Reserve 2 cups of pasta water.
- Add scallops and then the shrimp: In a medium sized saucepan over medium high heat add the butter. Add the scallops and cook for 2-3 minutes and add the shrimp the last 1-2 minutes and cook until no longer pink. Remove and set aside on a plate.
- Steam the mussels in pasta water: Add the reserved water to the saucepan and bring to a boil. Add the mussels and reduce to a simmer and cover. Let the mussels steam for 5 minutes. Discard the ones that didn’t open. Set aside with the shrimp and scallops.
To Make the Creamy Lemon Sauce
- Heat and stir: Add ¼ cup butter to the saucepan, heavy cream, chicken broth, and cream cheese. Stir until cream cheese has melted and is smooth and creamy. Add the parmesan cheese and juice of one lemon and let simmer until it has thickened.
- Add in pasta and seafood: Stir in pasta and seafood and stir until heated through. Serve with fresh chopped parsley and parmesan cheese if desired.

How to Pick Out Seafood
In order to make this amazing seafood pasta turn out then, you need to pick out the best seafood! It will make or break this dish! Here are some tips on how to pick out the best shrimp, scallops, and mussels.
- How to pick shrimp: For this recipe, you will want to get some large shrimp that is already peeled and deveined. This will save you SO much time in your prepwork. Plus, its not fun to do so just make it easy on yourself! When you are buying shrimp, smell it! Make sure that it doesn’t smell like ammonia. You will also want to avoid shrimp that is limp, slimy or falling apart. That means they are old! If you don’t have access to fresh shrimp then frozen will work fine. Just make sure to thaw them in your fridge before cooking.
- How to pick out scallops: When you are picking out your scallops, you are going to look for a couple of things. They should be firm and dry. In fact, they should have a feel and texture similar to a pork chop! Also, don’t buy any that are wet, shiny or soft. These won’t taste good!
- How to pick out mussels: The mussels are trickier to buy since they are in their shell. Always buy extra because some will be cracked or decaying and you won’t know that until you start cooking! Good mussels will look wet and smell like ocean water. They won’t be fishy at all. Make sure that they are all tightly closed. You don’t want any that are open!

How to Clean and Prep Seafood
A key to a good seafood pasta dish is preparation! Don’t let this part scare you. It’s super easy and it will pay off when you go to eat this dish!
- How to prepare shrimp: To make sure that your shrimp is ready to cook for this recipe then you need to make sure that is peeled, deveined and the tails have been taken off. If you didn’t buy them like this then thats ok! You can do it yourself! Start by pulling off the head and legs. Then, remove the shell and the tail. To devein the shrimp (this means to take out the large, black vein in the back… this is the shrimps intestinal track) then you will cut along the outer edge of the shrimps back. Cut it about ¼ inch deep. grap the vein with your fingers or knife and pull it out. Now, your shrimp is ready to cook!
- How to clean and prep mussels: Once you have your mussels, you want to make sure that you RINSE them (don’t soak them in water… they need to breath!) in cold water. Using a scrub brush or your fingernail, remove any dirt on them. Next, you will see on the outside of the shell a stringy, black tag. This is called a beard. You want to remove this right before cooking. To remove it, pull it towards the hinge of the mussel and it should come right off! Then, you are ready to cook some mussels!
- How to prepare scallops: These are super easy to prepare! Just give them a good rinse in some cold water and pat them dry. Then you are done!

Storing Leftovers
This is a great dish to eat for lunch or dinner the next day if you are lucky enough to have some leftovers! Here is how you can safely store it.
- Refrigerator: Once your seafood pasta has cooled, then place it in an airtight container in your fridge. It will last about 3-5 days.
- Reheat: To reheat this seafood pasta, you will want to do it on the stove. Place your leftovers it on a skillet. Add a little bit of water and your seafood pasta and cover it with a lid. Simmer it and steam it all until it’s heated through.
Make it a Feast!
Side Dishes
Garlic Butter String Beans

Side Dishes
Copycat Red Lobster Cheddar Bay Biscuits
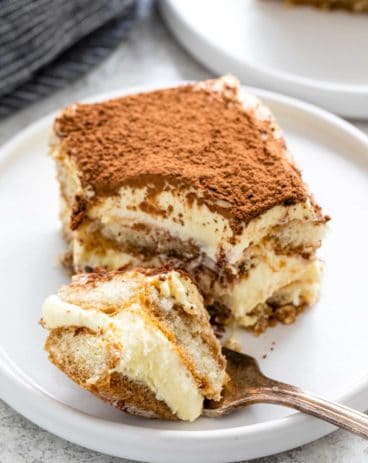
Desserts
Easy Tiramisu Recipe
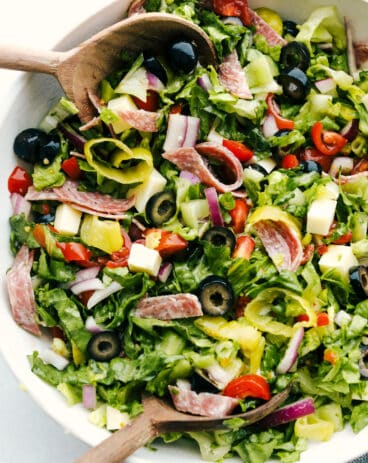
Salads
Italian Chopped Salad
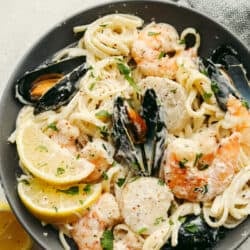
Creamy Lemon Garlic Seafood Pasta
Ingredients
- 12 ounces linguini noodles
- 1 Tablespoon Butter
- 1/2 pound scallops
- 1/2 pound large shrimp peeled and deveined
- 1/2 pound mussels
- salt and pepper
Creamy Lemon Garlic Sauce:
- 1/4 cup butter
- 2 cups cream
- 1 cup chicken broth
- 4 oz cream cheese
- 1/4 cup Parmesan
- Juice of a lemon
Instructions
-
Bring a large pot of water to boil and cook pasta according to package directions. Reserve 2 cups of pasta water.
-
In a medium-sized saucepan over medium-high heat add the butter. Add the scallops and cook for 2-3 minutes and add the shrimp for the last 1-2 minutes and cook until no longer pink. Remove and set aside on a plate.
-
Add the reserved water to the saucepan and bring to a boil. Add the mussels and reduce to a simmer and cover. Let the mussels steam for 5 minutes. Discard the ones that didn't open. Set aside with the shrimp and scallops.
To make the creamy lemon sauce:
-
Add ¼ cup butter to the saucepan, heavy cream, chicken broth, and cream cheese. Stir until cream cheese has melted and is smooth and creamy. Add the parmesan cheese and juice of one lemon and let simmer until it has thickened.
-
Stir in pasta and seafood and stir until heated through. Serve with fresh chopped parsley and parmesan cheese if desired.
Nutrition
from The Recipe Critic https://ift.tt/3ndyvF2
https://ift.tt/3ovHfWi