This smoked salmon dip is so creamy and delicious! With the smoked salmon flavor taking the stage followed by a hint of lemon and dill, this dip is SOO GOOD!
I have bought salmon dip from the store and not only is it super expensive but it only has a tiny bit of salmon flavor! This dip is SO much better and you can taste the smoked salmon so strongly in every single bite! Plus, when you combine it with some tangy cream cheese and some lemon, garlic, and dill… well… It doesn’t get much better!
I especially love this dip because you can use it on so many occasions! It’s fancy enough to use at a holiday dinner as an appetizer. Or, you can whip it up for yourself and put it on some crackers, a crostini, or even a toasted bagel at breakfast. This dip is insanely delicious! In fact, because it only takes 5 minutes to whip up, I bet that you make it all the time! I know that I do. Enjoy!
Ingredients for Smoked Salmon Dip
When you mix these ingredients together you are mixing up a little slice of heaven! It’s so, so good! See the recipe card below for a list of exact ingredient measurements!
Cream cheese: If you set this out beforehand so that it is at room temperature when you mix it then the dip will be so much smoother!
Mayonnaise: Low fat or regular will work just fine!
Sour cream: This helps give it a little bit of tang.
Smoked salmon: Just chop this up quickly, it doesn’t need to be perfect since you are mixing it in anyway.
Lemon juice: I just used bottled lemon juice for this recipe but you can always use fresh!
Garlic powder: I love anything with garlic.
Worchestershire: You may not be able to say that word but it sure makes any recipe delicious!
Dill: This is the secret ingredient to making this dip extra tasty!
Let’s Make Some Dip!
If you have 5 minutes then you have enough time to make this smoked salmon dip! It’s that easy! Plus, it’s super delicious!
Mix ingredients: In a food processor add the cream cheese, mayonnaise, sour cream, salmon, lemon juice, garlic powder, Worcestershire, and dill.
Pulse and serve: Pulse until smooth and creamy. Serve.
What to Serve It With
If you are looking at this smoked salmon dip thinking that it looks super delicious but you have no idea what to eat it with… I’m here to tell you! Here are some ideas that are so delicious to eat with this dip!
Crackers: It goes without saying that crackers and dip are a match made in heaven! Try it with some ritz crackers, some wheat thins, or even any of the specialty crackers that they have at Trader Joes!
Bagels: You always see fancy seafood spreads at brunch. But with this recipe, you can have it in the comfort of your own home! This dip tastes fantastic on a toasted bagel or biscuit!
How to Store Leftovers
Whether you are making this ahead of time or just have extra, you can easily store it for later! Place it in an airtight container in your fridge and it can last for up to 5 days! Double the batch and enjoy!
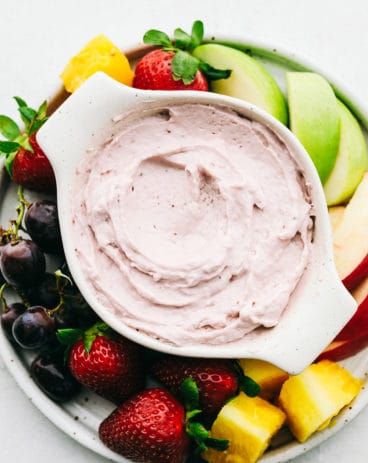
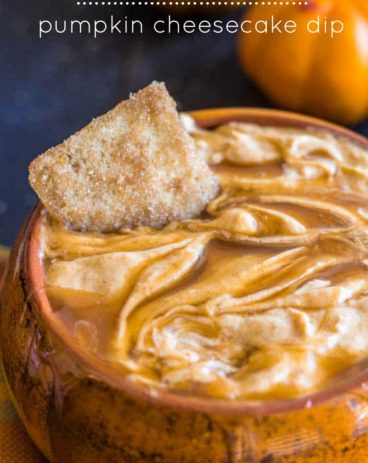
More Delicious Dip Recipes to Try
Dip is just something that I love to make and have in my fridge. It’s a great go to snack for me and it’s also the best appetizer for any get together! Here are a few of my favorite tried and true dip recipes that I love and go to ALL the time. There is a wide variety so there should be something for everyone!
This smoked salmon dip is so creamy and delicious! With the smoked salmon flavor taking the stage followed by a hint of lemon and dill, this dip is SOO GOOD!
CourseAppetizer
CuisineAmerican
Keywordsalmon dip, smoked salmon dip
Prep Time10minutes
Total Time10minutes
Servings8people
Calories184kcal
AuthorAlyssa Rivers
Ingredients
8ouncecream cheese
1/4cupmayonnaise
1/4cupsour cream
6ouncespackaged smoked salmonroughly chopped
1Tablespoonlemon juice
1/4teaspoongarlic powder
1/2teaspoonworchestershire
2Tablespoonsdill
Instructions
In a food processor add the cream cheese, mayonnaise, sour cream, salmon, lemon juice, garlic powder, Worcestershire, and dill.
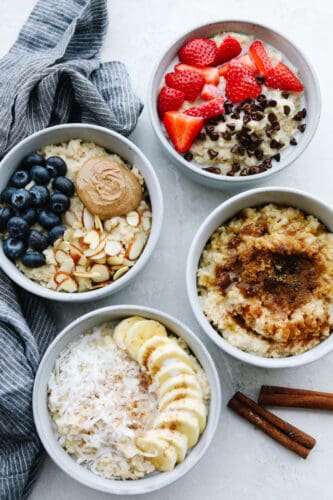
A warm, tasty bowl of homemade oatmeal is the perfect way to start your day! Here are 4 yummy variations filled with fresh fruit, nuts, brown sugar, and more!
Looking for more easy, healthy breakfast recipes? A smoothie bowl, acai bowl, or overnight oats are my go-to breakfasts! They’re so good and will power you through your day!
Healthy and Delicious Homemade Oatmeal Recipe
Oatmeal, honestly, is one of my favorite breakfasts. I’ve probably had it a million times but something about it is so hearty and comforting! The best part is, you can add so many different toppings, no two breakfasts are ever the same! I’ve got 4 tasty variations here for you, from almond and blueberry to strawberry chocolate and brown sugar cinnamon! Each is equally delicious, and I know you’ll love having them for breakfast! I certainly have. It’s an easy way to upgrade a classic meal.
Another perk of this homemade oatmeal? It’s nice and healthy! Oatmeal, yogurt parfaits, and overnight oats are what I typically have for breakfast and I love that they are things I can feel good about putting in my body. Oatmeal, specifically, is great because it will keep you full, is a great source of fiber, and also helps to lower cholesterol! And with toppings this good? You’ll forget it’s a healthy breakfast! I’ll give you all the ins and outs on making oatmeal from scratch and some great topping ideas to get you started. You’re going to love them!
Ingredients for Homemade Oatmeal
Oatmeal packets are nice, but it’s so much cheaper to buy rolled oats and make servings yourself! Short and sweet, this ingredient list is as simple as it gets. It makes it super easy to throw together in the morning! Measurements can be found in the recipe card below.
Old-Fashioned Rolled Oats: I typically have rolled oats on hand, but you can also use steel cut!
Water: Necessary for the oats to absorb.
Milk of Choice: Added for creaminess! Whether it’s dairy, non-dairy, or nut milk, use your favorite here! I like using macadamia milk to keep calories low. You can also use more water if you’d like!
Salt: Just a pinch is needed to enhance flavor.
Making Oatmeal From Scratch
It only takes a few minutes to whip up some homemade oatmeal! It’s the perfect blank canvas for all of your favorite toppings. You’re going to love how quick, easy, and delicious it is!
Combine Oats With Liquids and Salt: In a small saucepan, combine the oats, water, milk, and salt over medium high heat.
Boil, Then Simmer: Once it comes to a low boil, reduce the heat and let simmer until it reaches your desired thickness. To keep the oatmeal from burning on the bottom of the pan, stir occasionally.
Remove From Heat: After the oatmeal has cooked through for about 5 minutes, remove the pan from the heat.
Toppings: Next, add desired toppings and a splash of additional milk if you would like.
Tips and Tricks for Making the Best Oatmeal
Homemade oatmeal can easily be up-leveled with just a few simple tricks! Use them to craft the breakfast of your dreams! You’ll love how it turns out.
Toast Your Oats: If you want to make the most flavorful oatmeal possible, you can first toast your oats in a bit of butter. This will give them a rich, nutty flavor.
Stir Occasionally: While it’s important to stir enough so your oats don’t burn on the bottom of your pan, don’t overmix! Stirring too frequently can make your oatmeal slimy.
Make Ahead: This tip is perfect for all of you busy readers out there! For easy meal prep, you can make a large batch of homemade oatmeal and then divide it into jars or airtight containers to be reheated throughout the week. Pop a serving in the microwave for 2 minutes, and it tastes as good as new!
Strawberry Chocolate Chip Oatmeal
This is by far one of my favorite topping combinations. Who doesn’t love a good chocolate-covered strawberry? Contrary to what you’d think, chocolate is actually a beneficial ingredient here! Dark chocolate chips are packed with antioxidants, potassium, and iron! It’s even been linked to lowering blood pressure!
Slice Strawberries: Slice a few strawberries into pieces and place in bowl.
Add Chocolate Chips: Whether it’s milk, white, or dark chocolate, add your favorite here! I always like using dark chocolate chips for their amazing health benefits.
Add a Splash of Cream: I always like to add an extra splash of milk or cream to this combination. It makes it taste like dessert!
Almond Blueberry Oatmeal
For this bowl, I use a mix of blueberries, almonds, and almond butter. The rich, juicy flavor of blueberries pairs so well with nutty goodness! If you aren’t already invested, this mix is loaded with health benefits and will have you feeling great all day! Blueberries, of course, are a superfruit. Low in calories, but high in vitamins and antioxidants! Then, add in protein and healthy fats from almonds and peanut butter and you have a winning combination!
Add Blueberries: First, give your blueberries a quick wash and then add them to your bowl. You can swap these for other superfruits like pomegranate arils or acai.
Add Almonds and Nut Butter: For some tasty texture, add in sliced almonds to your oatmeal. You can also add a dollop of nut butter. I use almond butter here, but peanut butter works great, too!
Banana Coconut Oatmeal
If you want a breakfast that is sweet and delicious, this one’s for you! I use sliced bananas, coconut, a dash of nutmeg, and coconut milk. This particular combination is like a cross between rice pudding and coconut sticky rice. It’s scrumptious! It’s also loaded with potassium and healthy fats.
Slice Bananas: To begin, I like to slice my banana into half-inch pieces. Add them to your oatmeal.
Add Coconut: Next, sprinkle in some shredded coconut. You can use sweetened or unsweetened, depending on your preference.
Spice: Add a dash of nutmeg. This is a great way to add a little extra nutty flavor to your oatmeal.
Add Creamer: To finish up, I like to add in a splash of coconut milk or creamer. It makes it so creamy and sweet!
Brown Sugar Cinnamon Oatmeal
This one is always a classic. Something about it is so nostalgic to me. Nothing beats a warm bowl of homemade oatmeal with cinnamon sugar sprinkled on top. It’s so delicious and comforting!
Make Cinnamon Sugar Mixture: My ratio is typically 1 tablespoon of brown sugar to ½ teaspoon cinnamon. Mix together and sprinkle over oatmeal.
Adding Cream or Honey: To make your oatmeal a bit sweeter, you can add honey, a splash of milk, or creamer.
Storing Leftover Homemade Oatmeal
Homemade oatmeal is great for making ahead! With proper storage, you’ll be able to enjoy this tasty breakfast over and over!
In the Refrigerator: Your homemade oatmeal will store for up to one week in an airtight container.
Reheating: In a microwave-safe bowl, add a serving of oatmeal and pop in the microwave for 2 minutes. Stir after one minute to ensure it’s warmed through.
More Ways to Use Oats
So, you’ve got a big can of rolled oats at home. You can make some tasty homemade oatmeal, but a lot of other amazing recipes as well! Rolled oats come in handy especially for desserts! They add the best texture and nutty flavor! These are some of my favorite desserts that utilize this versatile ingredient.
A warm, tasty bowl of homemade oatmeal is the perfect way to start your day! Here are 4 yummy variations filled with fresh fruit, nuts, brown sugar, and more!
CourseBreakfast
CuisineAmerican
Keywordhomemade oatmeal, oatmeal
Prep Time5minutes
Cook Time5minutes
Total Time10minutes
Servings1person
Calories154kcal
AuthorAlyssa Rivers
Ingredients
Basic Homemade Oatmeal
1/2cupold-fashioned rolled oats
1/2cupwater
½cupmilk of choice or more water(dairy, non-dairy, nut)
Pinch of salt
Strawberry Chocolate
strawberries, sliced
mini chocolate chips
milk or cream (splash)
Blueberry Almond
blueberries
sliced almonds
almond butter
Banana Coconut
banana, sliced
shredded coconut
nutmeg, dash
coconut milk, creamer (splash)
Brown Sugar Cinnamon
brown sugar
cinnamon
Instructions
In a small saucepan, combine the oats, water, milk, and salt over medium-high heat.
Once it comes to a low boil, reduce the heat and let simmer until it reaches your desired thickness. Stir occasionally to keep the oatmeal from burning on the bottom of the pan.
After the oatmeal has cooked through for about 5 minutes, remove the pan from the heat.
Add desired toppings and a splash of additional milk if you would like.
Notes
1 cup of liquid is the amount needed for this recipe. It can be all water, all milk, or ½ cup of each. When cooking oatmeal, it is a 1:2 ratio of oats to liquid. Milk will help give it a creamier texture.Also, a lot of recipes call for the liquid to come to a boil before adding the oats. I have found that step isn’t necessary. I think the texture turns out just as great, if not better when it’s all brought to a boil together.
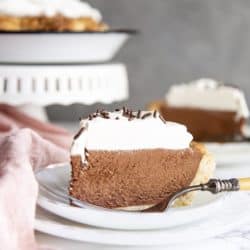
A flakey crust is filled with a decadent, dreamy, creamy, chocolate filling and topped with pillows of cream for this irresistible French Silk Pie. The filling is so smooth and rich, and then encased in a buttery crust. It’s a crowd pleaser where ever you serve it!
This pie truly is a chocolate lovers dream pie. The rich chocolaty filling can be adjusted to your level of chocolateness. And because we heat the eggs, you don’t have to worry about eating raw egg. You can just enjoy the velvety smoothness without a care in the world.
Serve this at any holiday or special occasion and watch your friends and family turn you into a hero. Everyone loves a good dessert made with love…and chocolate….and cream!
Baking the Crust
Flour: All purpose flour is best, so it holds its structure
Sugar: Helps as a binder and browning
Salt: Gives it flavor
Butter: Butter gives it that flakey goodness
Cold Water: To add moisture
Ingredients for Creamy Dreamy Mousse Filling
Heavy Cream: Don’t substitute
Powdered Sugar: Using powdered sugar gives sweetness without graininess.
Unsweetened Baking Chocolate: Or unsweetened chocolate bar
Bittersweet Baking Chocolate: Or chocolate bar
Eggs: Creates the binder and light fluffiness
Sugar: Gives the sweet to the bitter
Butter: soften the butter to room temp
Vanilla: Divided
Whipped Cream Ingredients
Heavy Cream: You’ll want it to whip up nice and high
Powdered Sugar: Dissolves easily
Vanilla: Add the sweet flavor
Garnish: Chocolate curls
Making the Best French Silk Pie Crust
Whisk: In a small bowl mix the flour, sugar, and salt with a whisk
Food Processor: Place the flour mixture in the food processor and add cold cubed butter. Pulse several times till mixture is pea or bean sized.
Water: Turn the processor on and drizzle the cold water over the dough mixture through the water hole. Add enough water for the dough to pull together. Stop and scrape the bottom to make sure the flour is all incorporated.
Refrigerate: Turn the dough out onto the counter and form into a disk. Wrap in plastic wrap and place in the fridge for at least an hour.
Roll: Remove from fridge and roll into a circle about 2 inches larger than your pie dish. Use extra flour to keep dough from sticking to the counter and roller.
Form: Place the dough over the pie dish, and lightly press the dough into the bottom and side of the pie dish. Trim excess dough leaving just enough to fold under and create a fluted edge.
Cover: Cover and refrigerate for another 15-30 min or you can freeze for later.
Parchment: Using a fork poke steam holes in the bottom of the pie dough and on the sides.Place a large piece of parchment over the dough and place pie weights or dry beans on top to fill the whole pie crust. Make sure the parchment is large enough to cover the edges of the crust entirely.
Blind Bake: Place the pie dish on a large baking sheet and bake at 425 for 25 min. Carefully remove the pie and remove the parchment and pie weights. Then bake for another 5 min. Place on a cooling rack to cool.
Mousse Filling
Melt: In a double boiler melt the chocolate and set aside to cool.
Heat: In another or double boiler or in a small saucepan set over low heat, heat the eggs and 1/2 cup sugar till mixture reaches 160 degrees F. Whisk constantly so the eggs don’t cook, about 7-10 min.
Remove: Remove from heat and add it to the melted chocolate whisk until completely mixed.
Beat: In a stand mixer add the heavy cream and 1 tablespoon of powdered sugar, beat on medium speed. Stream in 1/2 teaspoon of vanilla and continue to beat till stiff peaks form. Scoop into a small bowl and refrigerate till needed.
Fluffy: In the same mixing bowl add the softened butter and the remaining 1/2 sugar and beat till light and fluffy, about 2-3 minutes. Ad the cooled chocolate and egg mixture, beat till completely smooth, another 2-3 minutes.
Fold: Fold in the whipped cream and spread the mixture evenly into the completely cooled pie shell. Chill for at least 2 hours before serving.
Whipped Cream Topping
Add whipping cream and powdered sugar in a stand mixer and beat on medium speed. Stream in the vanilla and beat until stiff peaks form. Spread on top of pie and add garnishing as desired.
Making French Silk Heavenly
There are a few tips for this decadent French silk pie!
Chocolate: This recipe creates a decadent rich chocolate flavor,if you’d like a lighter chocolate taste switch out the unsweetened for bittersweet and then switch the bittersweet for semi-sweet. I do not recommend using chocolate chips. Use a fine baking bar such as Bakers or Ghirardelli or another quality chocolate bar. You won’t regret it.
Cream: Because you need to really whip the cream and create perfect fluffiness, I don’t recommend using substitutions for the Heavy Cream.
Pie Crust: You can use a premade pie crust to speed the process. Bake as directed on package. You can also make an chocolate cookie crust if you desire as well.
Eggs: Because we bring the eggs up to a safe 160 degrees, you don’t have to worry about eating raw eggs! So serve to anyone and everyone. Be sure heat it slowly however so it doesn’t cook.
Just Beat it: To get a heavenly smooth silky texture to your chocolate filling you need to beat it more than you think you do. Beating the process for a long time ensures that the sugar dissolves and butter and eggs become light and fluffy.
Storing and Freezing Your Pie
You’ll love the fact that you can make it ahead of time and freeze it for later too.
Make ahead:This definitely takes time to make, but it’s so worth it and what makes it better is you can make it ahead of time. Make and refrigerate up to 2 days ahead of time. Just don’t put the whipped topping on top till ready to serve.
Freezing: Make the pie as directed but don’t put the whipped topping on, refrigerate for 2 hours. Cover completely with plastic wrap, then cover with foil, and freeze up to 2 months. Thaw in the fridge overnight. Make whipped topping and garnish as desired.
More Chocolate Desserts to Conquer
Because chocolate is always the right answer to what’s for dessert.
A flakey crust is filled with a decadent, dreamy, creamy, chocolate filling and topped with pillows of cream for this irresistible French Silk Pie. The filling is so smooth and rich, and then encased in a buttery crust. It's a crowd pleaser where ever you serve it!
CourseDessert
CuisineAmerican
Keywordfrench silk pie, french silk pie recipe
Prep Time40minutes
Cook Time35minutes
Total Time1hour15minutes
Servings8People
Calories717kcal
AuthorAlyssa Rivers
Ingredients
Pie Crust
1 and 1/2cupall-purpose flour
2rounded tablespoon granulated sugar
1/4rounded teaspoon kosher salt
5ounceunsalted buttercold & cubed
2 - 4tablespooncold water
Chocolate Mousse Filling
¾cupheavy whipping cream
1tablespoonpowdered sugar
3ounceunsweetened baking chocolate
3ouncebittersweet baking chocolate
3large eggs
1cupgranulated sugardivided
12tablespoonunsalted buttersoftened to room temperature
Add flour, sugar and salt in a small mixing bowl and mix thoroughly with a whisk. Transfer flour mixture to a food processor fitted with the dough blade. Add cubed cold butter to the flour mixture, pulse several times until butter is about pea and bean size. Variations in size are okay.
Turn the food processor to “on” position and drizzle cold water over the dough mixture through the water hole, as soon as the dough starts to pull together turn the food processor off. You may need to stop the food processor in between and get a spatula to mix up the flour at the bottom.
Turn the dough out on the counter or cutting board, and shape into a disk. Wrap in plastic and rest in the refrigerator for at least an hour.
Take the disk of pie dough out of the fridge and roll into a circle about 2” larger than your pie dish. Use extra flour to keep the dough from sticking to the counter and roller.
Carefully place the dough over the pie dish, lightly press the dough into the bottom and side of the pie dish, let the excess dough hang over the side. Trim the excess dough leaving just enough to fold under and create a fluted edge.
Cover the pie dish with plastic wrap and keep refrigerated, or freeze (preferred), for 15 - 30 minutes.
Preheat the oven to 425°F.
Remove pie crust from the freezer and use a fork to poke steam vents on the bottom of the pie dough and on the sides.
Place a large piece of parchment paper over the frozen pie dough, place pie weights on top or pour dry beans on top to fill the whole pie crust. Make sure the parchment is large enough to cover the edges of the crust entirely.
Place the pie dish on a large baking sheet. Bake pie crust for 25 minutes with pie weights or beans, then carefully remove the parchment paper along with the pie weights and bake for another 7 - 10 minutes until the crust is golden.
Remove the pie crust from the oven and let it cool completely on a wire rack.
Make the filling
Melt the chocolate in a double boiler or in a heatproof bowl set over a steaming pot of water. Set aside to cool.
Heat the eggs and ½ cup of granulated sugar in a double boiler or in a small saucepan set over low heat until the mixture reaches 160°F, whisking constantly so the eggs don’t cook. This will take about 7 - 10 minutes. Take it off the heat and add it to the slightly cool melted chocolate and whisk until thoroughly incorporated. Set aside to cool.
Add ¾ cup of heavy whipping cream and 1 tablespoon of powdered sugar to a stand mixer bowl, beat on medium speed. Stream in ½ teaspoon of vanilla and continue beating until stiff peaks. Scoop it into a small bowl and refrigerate until needed.
In the same mixing bowl, add the softened butter and the remaining ½ cup of granulated sugar and beat until light and fluffy, about 2 - 3 minutes. Add the cooled chocolate and egg mixture, beat another 2 - 3 minutes until completely smooth.
Fold in the whipped cream and spread the mixture evenly into the completely cooled pie shell. Chill for at least 2 hours before serving.
Make the whipped cream topping
Add ¾ cup of heaving whipping cream and 2 tablespoons of powdered sugar to a stand mixer bowl, beat on medium speed. Stream in ½ teaspoon of vanilla and continue beating until stiff peaks. Spread the whipped cream on top of the pie and add garnishing as desired.
Notes
Unsweetened baking chocolate is used for a darker chocolate flavor.
For a sweeter chocolate filling, you can use all bittersweet baking chocolate instead, or even semisweet baking chocolate.
Use baking bars or baking wafers or your favorite eating chocolate, don’t use chocolate chips.
After removing the pie weights and before putting the pie crust back into the oven, if you notice that that edge is already getting too brown, put a pie shield or a few strips of foil around the edge to prevent burning.