Chicken Stew is hearty, filling, and comforting! It is the perfect dish for Sunday dinner or a cold rainy day! This chicken stew is made with potatoes, carrots, onions, celery, and chicken cooked until fall-apart tender.
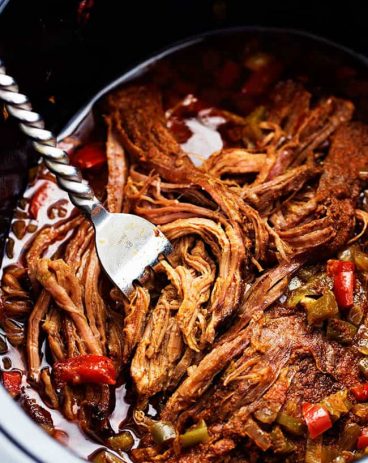
Stews are a fall favorite! Try this Tortellini Soup, Beef Stew, or Vegetable Beef Soup for more stew ideas this fall.

Homemade Chicken Stew
Nothing says comfort food like a warm stew. I took one of my favorite Beef Stew Recipes and replaced the beef with chicken thighs. It is just as rich and comforting as beef stew and is perfect for those cold winter days! This tastes amazing when you serve it with some crusty bread and a delicious side salad! Then you will have an entire delicious meal that the whole family will love!
This chicken stew cooks in the oven for 1 ½ hours or until the chicken is super tender and falls apart easily. It is best to cut the celery, carrots, potatoes, and onions on the larger side. This will help them since they will be cooking for a long period of time in the oven without breaking down! Not only is this stew delicious but it’s super simple to make. Plus, when I can cook my entire meal, veggies included, in one pot… Well, I call that a win!
Ingredients for Chicken Stew
This stew is perfect for your family! This is comfort food at its finest! See the recipe card below for exact ingredient measurements.
- Chicken: I like to use boneless skinless chicken thighs. They have the most flavor and hold up better when cooking for longer periods of time.
- Salt: This will enhance all of the other flavors in the stew!
- Pepper: I use just the right amount to add some flavor but I’m not adding any heat.
- Butter: I used unsalted butter that’s at room temperature (for easier mixing)
- Vegetables: Onions, carrots, baby potatoes and celery are added.
- Spices: Bay leaves, fresh thyme and sage are added. Feel free to substitute dried in place of the fresh.
- Dry sherry: You can also substitute white wine in place of the dry sherry or leave it out if you prefer.
- Chicken stock: This gives the base of the dish a lot of flavor.
- Cornstarch: This is used to thicken up the stew at the end!
- Parsley: This will be a garnish on top!
How to Make Stew
Enjoy this homemade chicken stew this fall. Impress your family with how simple it is to make a hearty and delicious family dinner!
- Preheat and prep: Preheat oven to 350 degrees. Season chicken on both sides with salt and pepper.
- Brown the chicken:Heat butter in a large dutch oven over medium high heat. Add in chicken and sear on both sides until golden brown, 2-3 minutes a side. (You just want to get color on the chicken it won’t be fully cooked). Remove the chicken from the pan and set aside.
- Saute the veggies: Add in the carrots, onion and celery to the pan and saute for 5 minutes.
- Deglaze the pan: Add in the sherry to deglaze the pan. Scrap the brown bites off the bottom of the pan.
- Cook: Return the chicken to the pan along with the chicken broth, thyme, sage and bay leaves. Cover and place in the oven for 1 hour.
- Add in potatoes and cook for additional 30 minutes: Carefully remove the pot from the oven and add in the potatoes. Return back to the oven and cook for 30 more minutes or until the potatoes are tender.
- Thicken the stew: To thicken the stew remove ¼ cup of the chicken broth liquid to a small bowl and whisk in 2 tablespoons of cornstarch. Add the mixture to the pot and bring to a rolling simmer on the stove. Cook for 1-2 minutes or until the sauce is thickened.
- Serve: Remove bay leaves and top with fresh parsley and serve immediately with crusty bread for serving!

Understanding How to Make the BEST Stew
If you aren’t familiar with how to make stew, then there may be a few things that you need to know! Here are a couple of common questions that people have before cooking up this chicken stew. Once you know these then you will be a pro!
- What does it mean to deglaze? So when it comes to making a stew, this is a super important step! When you are told to deglaze a pan it means that you are adding a liquid to your hot pan to release all of the carmelized bits at the bottom (the bits of dark brown from searing your meat and veggies). It’s what adds so much more flavor to the base of your stew! You’ve probably done this in recipes before and just didn’t know that there was a name for it!
- Why thicken your stew? At the end of this recipe, it tells you how to add cornstarch to thicken your stew. The reason for this is because stew is not as thin as a soup. Stew is typically thicken and heartier. So, if you want that classic consistency then add in that cornstarch!
- Why can’t I add the potatoes in at the same time as the other vegetables? You don’t add in the potatoes until about halfway through because they cook so fast. You don’t want your potatoes to turn out all mushy! So putting them in later helps them to keep their shape and cooks them so that they are just right!

How to Store Leftovers
Some people will argue that stew is actually better to eat the next day! And with this chicken stew… they may just be right! In fact, double the recipe and you can have this again for lunch or dinner during the week! If you have leftovers, here is how you can store them!
- Refrigerate: Once your stew has cooled then place it in an airttight container in your fridge. It will last 3-4 days!
- Reheat: When you are ready to eat your stew then take it out of the fridge and place it in a pot. You can reheat it on your stove on medium heat until heated through.

More Hearty Soups to Enjoy!
Soup Recipes
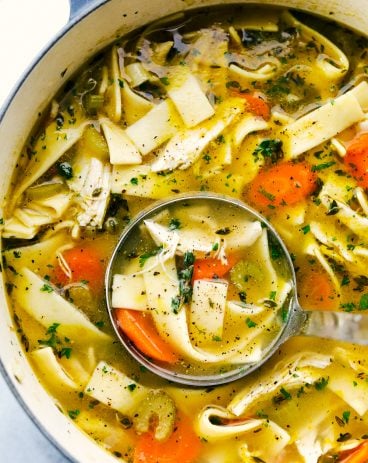
Literally the BEST Chicken Noodle Soup

Soup Recipes
Award Winning Cheeseburger Soup
Soup Recipes
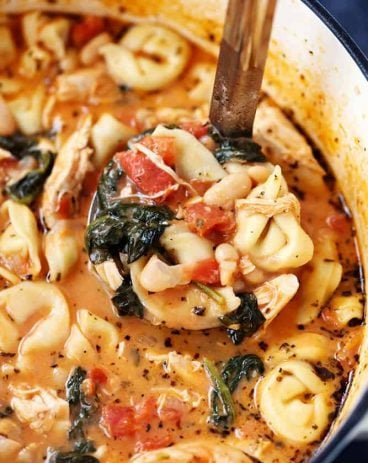
Creamy Tuscan Garlic Tortellini Soup
Soup Recipes
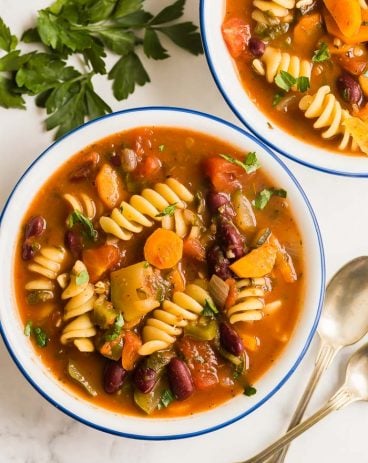
Minestrone Soup

One-Pot Chicken Stew
Ingredients
- 1 1/2 pounds boneless skinless chicken thighs
- 1 tesapoon salt
- 1/2 teaspoon pepper
- 2 Tablespoon unsalted butter
- 1 large onion, large dice
- 3 medium carrots, sliced into ½ inch slices
- 3 ribs celery, large dice
- 1/2 cup dry sherry
- 1 teaspoon fresh thyme
- 2 teaspoon fresh sage
- 3 whole bay leaves
- 1 1/2 pounds mini tri-color potatoes, cut in half
- 4 cups chicken stock
- 2 Tablespoon cornstarch
- parsley for serving, if desired
Instructions
-
Preheat oven to 350 degrees. Season chicken on both sides with salt and pepper.
-
Heat butter in a large dutch oven over medium high heat. Add in chicken and sear on both sides until golden brown, 2-3 minutes a side. (You just want to get color on the chicken it won't be fully cooked). Remove the chicken from the pan and set aside.
-
Add in the carrots, onion and celery to the pan and saute for 5 minutes.
-
Add in the sherry to deglaze the pan. Scrap the brown bites off the bottom of the pan.
-
Return the chicken to the pan along with the chicken broth, thyme, sage, and bay leaves. Cover and place in the oven for 1 hour.
-
Carefully remove the pot from the oven and add in the potatoes. Return back to the oven and cook for 30 more minutes or until the potatoes are tender.
-
To thicken the stew remove ¼ cup of the chicken broth liquid to a small bowl and whisk in 2 tablespoons of cornstarch. Add the mixture to the pot and bring to a rolling simmer on the stove. Cook for 1-2 minutes or until the sauce is thickened.
-
Remove bay leaves and top with fresh parsley and serve immediately with crusty bread for serving!
Notes
Nutrition
from The Recipe Critic https://ift.tt/3i2oHsk
https://ift.tt/3xAOdxv