Alyssa Rivers October 08 लेबलों वाले संदेश दिखाए जा रहे हैं. सभी संदेश दिखाएं

शुक्रवार, 8 अक्तूबर 2021

Copycat Red Lobster Cheddar Bay Biscuits

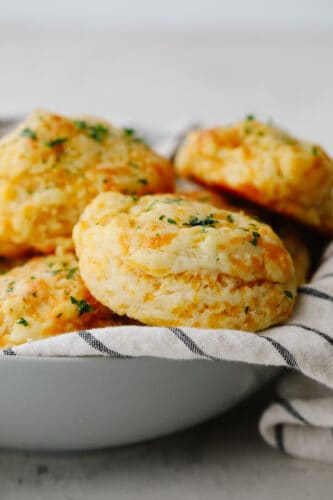
These delicious copycat Red Lobster cheddar biscuits are better than the real thing! Warm, buttery, and ready in 20 minutes!

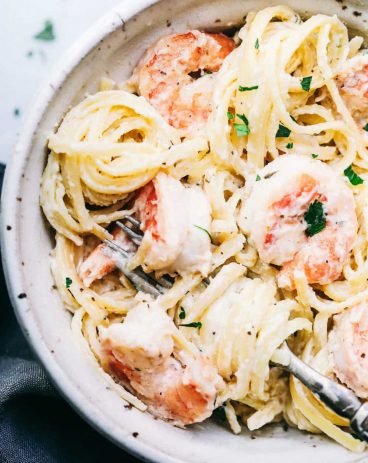
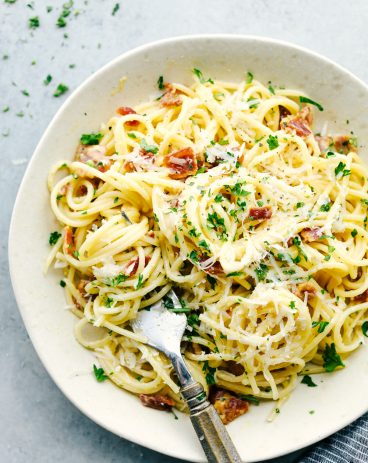
Tasty biscuits are the perfect addition to any meal. Need more Red Lobster-inspired deliciousness? Try out my scampi, chowder, and a reader-favorite lobster tail!

A stack of cheddar biscuits in a gray bowl.

Easy Homemade Biscuit Recipe

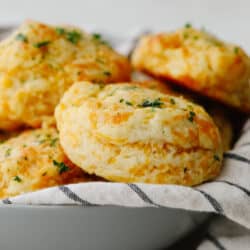
Cheddar Bay biscuits are easily one of the best things on Red Lobster’s menu. They’re warm, soft, and buttery with the perfect savory flavor. I swear I could eat 100 of them in one sitting! With the delicious baked cheddar flavor and garlic butter glaze on top, how can you resist? These biscuits just melt in your mouth. I’m always debating whether or not to go pick some up to serve with dinner. Then I thought, why not just make them at home? Homemade rolls always taste better than anything you can buy, so I thought the same would go for these bad boys.

And let me tell you- these are the best biscuits that I have ever had! When I had my first bite, I was blown away! And the best part is- they are totally foolproof! Anyone can make them. My 13-year-old makes these all the time. They bake perfectly and have the most delicious cheesy garlic flavor packed into each biscuit. I am warning you. You will want to eat the entire batch yourself. Don’t pass this recipe up! I would make them every meal from now on if I could! Whether you serve them up with seafood, pasta, or just want to eat them on their own, these copycat Red Lobster Cheddar Bay biscuits are sure to please! And if you want to recreate more staple dishes from your favorite restaurants, check out my list of copycat recipes here!

Ingredients for Copycat Red Lobster Biscuits

Making copycat Red Lobster Cheddar Bay biscuits only requires a few simple ingredients! I love that I can recreate the amazing flavor and texture of these biscuits with just pantry staples. Your family is going to go crazy over them!

  • All-Purpose Flour: All-purpose flour works great for giving your biscuits a nice, fluffy structure.
  • Sugar: Adding a bit of sugar to your biscuit dough balances the flavor.
  • Baking Powder: For a biscuit that is airy and flaky, baking powder is key!
  • Garlic Powder: Garlic is a must for that perfect savory flavor in your Cheddar Bay biscuits!
  • Salt: Enhances overall flavor.
  • Buttermilk: Buttermilk is what makes these biscuits so rich and soft! You can use storebought, but I always like making mine from scratch! It’s super easy!
  • Butter: I use unsalted butter in my biscuit dough. Since we’re adding salt and garlic powder, I don’t want my butter to make the biscuits too salty.
  • Cheddar Cheese: Shredded cheddar cheese is going to give your biscuits the most amazing flavor! Perfectly savory and sharp.

Garlic Butter Topping

  • Butter: Melted butter is the base for your biscuit glaze. Tastes great, too!
  • Garlic Powder: A little garlic powder brushed on top of your biscuits makes all the difference! Each bite is packed with flavor.
  • Fresh Parsley: Finely chopped parsley is the perfect aromatic finishing touch. It adds a hint of peppery, fresh flavor.

Making Copycat Cheddar Bay Biscuits

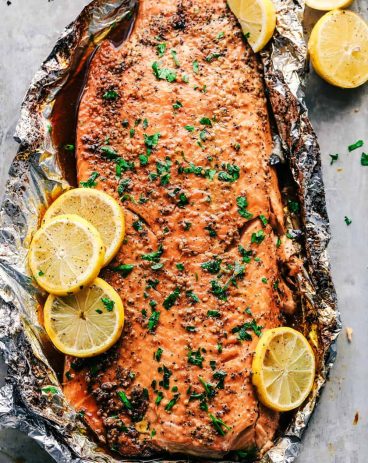
Making these biscuits is beyond easy! Only 10 minutes of prep and 10 minutes in the oven give you warm, flavorful biscuits you won’t be able to get enough of! Gives you more time to focus on making a tasty entrée. Garlic salmon and cajun garlic butter cod are some of my favorites!

  1. Preheat Oven, Prep Baking Sheet: Let’s make some biscuits! First, preheat your oven to 450 degrees Fahrenheit. Line a baking sheet with parchment paper and set aside.
  2. Mix Dough Ingredients: Then, in a large mixing bowl, combine flour, sugar, baking powder, garlic powder, and salt. Whisk together the melted butter and buttermilk. Combine with the dry ingredients until incorporated. It will make a thick dough. Fold in the cheddar cheese.
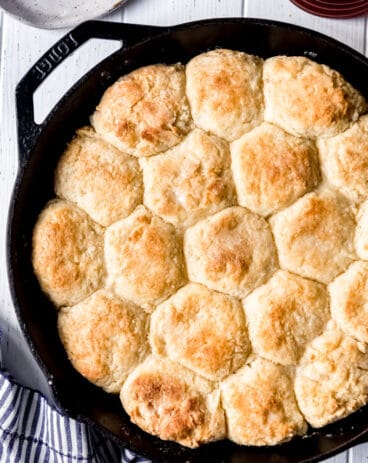
  3. Form Biscuits: Next, measure out each biscuit in a ¼ cup measuring cup. The measuring cup worked great for packing the dough into the cup and spooning the dough out onto the baking sheet. It made perfect round biscuits.
  4. Bake: Bake for 10-12 minutes in preheated oven until golden brown.
  5. Brush Glaze on Top: To finish up, combine garlic butter topping ingredients and brush onto each biscuit.
Process shots of preparing copycat Red Lobster biscuits.

Cheddar Biscuit Tips and Tricks

Here are my suggestions for customizing your biscuits to perfection! You are going to absolutely love these! My family can never get enough when they’re around.

  • Cheeses: Cheddar is a classic addition in this recipe, but you can mix and match other cheeses to your liking! I love switching these up with fresh parmesan or gouda. For a little kick, add shredded pepper jack!
  • Additional Flavors: If you want a bit of heat in your biscuits, add a pinch of cayenne pepper to your dough! And if you are a lover of fresh herbs like me, add a little Italian seasoning to your butter glaze! This is my personal blend of basil, oregano, marjoram, rosemary, and thyme. I love the aromatic, flavorful finish it adds to the biscuits.
Closeup of cheddar biscuits on parchment paper.

What Can I Serve Cheddar Biscuits With?

The sky is the limit! These tasty biscuits work well as a side for basically anything. My personal favorite way to serve them is alongside seafood, pasta, and chicken. For a complete meal, serve these biscuits with your favorite pasta, grilled salmon, and a side salad!

Storing Leftover Biscuits

These buttery biscuits are perfect for storing, reheating, and freezing for the perfect anytime snack!

  • At Room Temperature: This is my preferred way of storing them. Keep your biscuits in an airtight container or wrapped in plastic wrap for 3-4 days.
  • Reheating: Pop individual biscuits in the microwave for 10-15 second intervals untili warm. For bigger batches, wrap biscuits in foil, place on a baking sheet, and warm at 350 degrees Fahrenheit for 5-10 minutes.
  • Freezing Rolls: Both unbaked and baked rolls can be frozen. Keep in an airtight container for up to 3 months.
Closeup of a copycat Red Lobster cheddar biscuit broken in half.
Print

Copycat Red Lobster Cheddar Bay Biscuits

Delicious Copycat Red Lobster Cheddar Biscuits that are better than the real thing! So easy and fool proof and ready in 20 minutes!
Course Bread, Side Dish
Cuisine American
Keyword biscuit recipes, biscuits, cheddar bay biscuits
Prep Time 10 minutes
Cook Time 10 minutes
Total Time 20 minutes
Servings 11 Biscuits
Calories 288kcal
Author Alyssa Rivers

Ingredients

  • 2 cups all purpose flour
  • 1 Tablespoon Sugar
  • 1 Tablespoon baking powder
  • 2 teaspoons garlic powder
  • 3/4 teaspoon salt
  • 1 cup buttermilk
  • 1/2 cup unsalted butter melted
  • 2 cups shredded cheddar cheese

Garlic Butter Topping:

  • 3 Tablespoons unsalted butter melted
  • 1/2 teaspoon garlic powder
  • 1 Tablespoon fresh parsley finely chopped

Instructions

  • Preheat oven to 450 degrees. Line a baking sheet with parchment paper and set it aside.
  • In a large mixing bowl, combine flour, sugar, baking powder, garlic powder, and salt. Whisk together the melted butter and buttermilk. Combine with the dry ingredients until incorporated. It will make a thick dough. Fold in the cheddar cheese.
  • Measure out each biscuit in a ¼ cup measuring cup. The measuring cup worked great for packing the dough into the cup and spooning the dough out onto the baking sheet. It made perfect round biscuits.
  • Bake for 10-12 minutes in preheated oven until golden brown. Combine garlic butter topping ingredients and brush onto each biscuit. Makes 11 biscuits.

Notes

Updated on October 8, 2021
Originally Posted on May 2, 2014

Nutrition

Calories: 288kcal | Carbohydrates: 21g | Protein: 8g | Fat: 19g | Saturated Fat: 12g | Cholesterol: 54mg | Sodium: 313mg | Potassium: 191mg | Fiber: 1g | Sugar: 2g | Vitamin A: 626IU | Vitamin C: 1mg | Calcium: 227mg | Iron: 1mg


from The Recipe Critic https://ift.tt/302PIYB
https://ift.tt/309BLIw

The Perfect Mini Pumpkin Pies

Mini pumpkin pies are the perfectly sized dessert that is made just for you! You can indulge in just one or have a few! Either way, they are so delicious that everyone will be asking for the recipe!

If you love classic pumpkin pie then this dessert is for you! And individual servings make this perfect to bring as a dessert to any potluck. If you like this then you should definitely try Mini Cheesecakes, Mini Cherry Pies, and this delicious Mini Key Lime Pie!

A mini pumpkin pie with a bite taken out of it.

Mini Pumpkin Pies

Why is it that anything small just tastes more delicious? Not only do these mini pumpkin pies look so cute in such a small for but they taste exactly like classic pumpkin pie. And because you don’t have to cut out a slice, you can eat more than one and no one even has to know! The flaky crust is perfect for the creamy filling. It is the perfect dessert to kick of pumpkin season!

I love a good pumpkin pie but sometimes, I don’t want the commitment of an entire pie. That’s what makes this one so awesome! I can make these mini pumpkin pies ahead of time and store them to have the perfect individual late-night snack all week long. There are so many pumpkin treats this time of year and so it’s hard to pick which ones to make! I love this one because it’s not something that you see all the time and it is SOO good! You have to try it!

Ingredients in Mini Pumpkin Pies

You are going to be shocked to find out how easy these mini pumpkin pies are to make! If you stock up on pumpkin puree like me then you probably already have everything that you need to make these! See the recipe card below for a list of exact ingredient measurements.

  • Pie crusts: You can use either store bought or homemade pie crust!
  • Granulated sugar: I use this to sweeten up the pumpkin flavor.
  • Cinnamon: Is the recipe even pumpkin if you don’t combine it with cinnamon??
  • Salt: This will enhance the flavors of all of the other ingredients.
  • Ground ginger and ground cloves: This brings in that earthy, fall flavoring.
  • Eggs: I like to use eggs that are at room temperature. This helps them mix in better!
  • Canned pumpkin: Make sure that you get pumpkin puree and not pumpkin pie filling! The puree doesn’t have any added ingredients to it so you will make it have flavor by adding in these spices.
  • Evaporated milk: I use this to mix all of the ingredients together.
  • Whipped cream: Use a dollop of this for topping!

Let’s Bake Some Pies!

This recipe only takes about 30 minutes from start to finish, including baking time! These mini pumpkin pies are so yummy and your whole family will go crazy over them!

  1. Preheat, roll and chill: Preheat the oven to 400°. Roll the pie crust thin, to about ⅛ inch thick, and cut into 12 3 ½ inch circles. Press the dough circles into the cavities of a muffin tin and place in the fridge to chill.
  2. Combine and whisk: In a large bowl combine the sugar, cinnamon, salt, ginger and cloves. Add in the eggs, pumpkin and evaporated milk. Whisk until fully combined.
  3. Fill and bake: Remove the muffin pan from the fridge and carefully ladle pumpkin filling into the crusts, about 3 tablespoons. Bake for 16-20 minutes, until the filling is set and the crust is starting to brown.
  4. Cool and top with cream: Allow the pies to cool completely before removing gently from the muffin pan. If they are sticking, carefully run a knife around the edge of the crust to loosen them from the pan. Serve with whipped cream.
6 pictures showing step by step baking instructions.

Tips For Making Mini Pumpkin Pies

Pumpkin pie is iconic with its fall flavors! This recipe is no exception and is so easy that you will come back to it again and again! Here are a few tips to use while making this simple dessert.

  • Pie crust: I love homemade pie crust, but using store-bought crust is a great shortcut when you find yourself short on time.
  • Roll the crust thin: When making mini pies, you have to roll the crust out a little extra…even if they’re pre-rolled, pre-made crusts. Otherwise, the crust will be too thick. Nott only will the crust not fully bake, but the crust-to-filling ratio will be off.
  • Don’t overbake: Pumpkin pie filling is technically a custard and will split if it is overbaked. To avoid this, make sure that you don’t overbake your mini pies. To know when they are done, the filling will be set but still be a little wobbly.
Mini pumpkin pies.

Making Ahead and Storing Leftovers

Pumpkin pie is a classic dessert and one of the best parts about it is how well it holds up as leftovers! You can make this ahead and store it or if you are lucky enough to have some leftover, eat it as a late-night snack! Yum!

  • Make ahead and freeze: Make your mini pumpkin pies and let them cool completely. Once they have cooled then place them in a ziplock bag or airtight container (make sure to label it with the date!). When you are ready to eat it, thaw overnight in the refrigerator before serving. Frozen mini pumpkin pies can last 1 month in the freezer!
  • Make ahead and refrigerate: Mini pumpkin pies can be made about 1-2 days ahead of time. Once baked and cooled, completely wrap your pumpkin pies tightly with plastic wrap. Place in the refrigerator until ready to serve.
  • Ready to serve: When ready to serve, take your pumpkin pie out of the refrigerator for about 15 minutes or eat it a little cold immediately.
A zoomed in picture of a mini pumpkin pie.
Print

Mini Pumpkin Pies

Mini pumpkin pies are the perfectly sized dessert that is made just for you! You can indulge in just one or have a few! Either way, they are so delicious that everyone will be asking for the recipe! 
Course Dessert
Cuisine American
Keyword mini pumpkin pies, pie, Pumpkin Pie
Prep Time 15 minutes
Cook Time 20 minutes
Total Time 35 minutes
Servings 12 Pies
Calories 191kcal
Author Alyssa Rivers

Ingredients

  • 2 homemade pie crusts or Pre-made pie crusts
  • ¾ Cup Granulated Sugar
  • 1 Teaspoon Cinnamon
  • ½ Teaspoon Salt
  • ½ Teaspoon Ground Ginger
  • ¼ Teaspoon Ground Cloves
  • 2 large eggs slightly beaten
  • 1 (15 ounces) can Canned Pumpkin
  • 1 (12 ounces) can Evaporated Milk
  • Whipped Cream for topping

Instructions

  • Preheat the oven to 400°. Roll the pie crust thin, to about ⅛ inch thick, and cut into 12 3 ½ inch circles. Press the dough circles into the cavities of a muffin tin and place them in the fridge to chill.
  • In a large bowl combine the sugar, cinnamon, salt, ginger, and cloves. Add in the eggs, pumpkin, and evaporated milk. Whisk until fully combined.
  • Remove the muffin pan from the fridge and carefully ladle pumpkin filling into the crusts, about 3 tablespoons. Bake for 16-20 minutes, until the filling, is set and the crust is starting to brown.
  • Allow the pies to cool completely before removing gently them from the muffin pan. If they are sticking, carefully run a knife around the edge of the crust to loosen them from the pan. Serve with whipped cream.

Nutrition

Calories: 191kcal | Carbohydrates: 27g | Protein: 3g | Fat: 8g | Saturated Fat: 3g | Polyunsaturated Fat: 1g | Monounsaturated Fat: 4g | Trans Fat: 1g | Cholesterol: 31mg | Sodium: 225mg | Potassium: 42mg | Fiber: 1g | Sugar: 13g | Vitamin A: 59IU | Vitamin C: 1mg | Calcium: 13mg | Iron: 1mg


from The Recipe Critic https://ift.tt/3ajgZYM
https://ift.tt/3AlE1Jc

गुरुवार, 8 अक्तूबर 2020

Hot Corn Dip

Hot Corn Dip is super cheesy, packed with flavor and such a crowd pleaser. This always one of the first dips to disappear!

This Corn Dip is a good companion to Crispy Fried Pickles and Cream Cheese Wontons for appetizers that are sure to be a favorite, but are a little different than your average artichoke dip. You will love this!

Hot Corn Dip with onions, peppers, jalapeno and ooey gooey cheese, served with corn chips.

Hot Corn Dip

Sweet luscious corn is combined with savory peppers and spices and then intertwined with ooey gooey cheese. What’s not to love? It’s fairly simple and the ingredients are adaptable. It’ll be your go-to appetizer for parties, gatherings, and holidays. People will be asking you to bring this to your next event.

The wonderful thing about this is you can make it year round. It’s bright and colorful and full of tantalizing flavors. I love this appetizer because it’s different from your typical dips and it’s so GOOD! It’s surprisingly tasty, and oh so addicting. Good luck getting it to the table before it’s gone!

Corn Dip Ingredients

Simple ingredients, dynamite taste! Don’t let this list intimate you, all the flavors become amazing once mixed together.

  • Olive oil: This is to sauté the onion, red pepper and jalapeños pepper.
  • Onion: Dice the onion finely, not huge chunks
  • Red Pepper: Finely chop the pepper so it’s easier to dip
  • Jalapeños: Use Serrano peppers if you want a spicier dish
  • Corn: Sweet and savory all at the same time
  • Cream Cheese: Soften your cream cheese before using
  • Sour Cream: Add a lovely depth and creaminess
  • Colby Jack Cheese: You’ll divide your cheese and use it two different times
  • Chili Powder, Garlic Powder, Paprika: Perfect combo of spices for this hot dip.
  • Salt and Pepper: To taste!
  • Green Onion: Slice these up to garnish

Making Hot Corn Dip

A little bit of prep and a little bit of cooking makes for a whole lot of eating!

  1. Sauté: In a medium saucepan heat the olive oil and saute the onion and peppers till just tender
  2. Mix: In a medium bowl mix the peppers, corn, cream cheese, sour cream, spices and 1 cup of cheese. Stir till combined
  3. Bake: Spread the mixture in a lightly greased 2 quart casserole dish or cast iron skillet. Sprinkle the rest of the cheese and bake at 400 degrees for 15-20 min, till hot and bubbly. Garnish with green onions

Making cheesy spiced Hot Corn Dip with peppers, onions and jalapeno.

Cheesy Hot Corn Dip Tips and Variations

  • Corn:The great thing about this recipe is you can use fresh, canned or even frozen corn. For a deeper rich caramelized flavor sauté your corn before adding it to the dip.
  • Heat: Add more jalapeños or leave some of the seeds in if you want it spicier.
  • Green Chilies: You can add a can of green chilies for a bigger flavor and kick.
  • Spices: To add different zing, try subbing out the chili powder for Chipotle chili powder. Change out the paprika for smoked paprika for an intense smoky flavor. Add cumin too for an extra Mexican spice punch.
  • Cheese: The cheese can be substituted. You can use cheddar, pepper jack or Monterey jack cheese or a mixture of them all.
  • Sour Cream: If you don’t have sour cream you can use Mayonnaise instead, but do not use Miracle Whip.  Honestly that would ruin it.
  • Make ahead: You can easily put this together and throw it in the fridge till you need it. When ready pop it in the oven and cook as directed. You may need a bit longer to get the center done if it’s been cold long.

What to Serve with Corn Dip

  • Tortilla Chips
  • Pretzels
  • Crackers
  • Fritos
  • Veggies
  • Potato Chips

Slow Cooker Corn Dip

You can make this in the slow cooker if that works best for you. Throw the ingredients into your slow cooker and cook on low for 1-2 hours till bubbly. Turn to warm and serve. It’s kind of nice to use a slow cooker to serve from because it will keep it warm and gooey during your event.

Hot Corn Dip with onions, peppers, jalapeno and ooey gooey cheese, served with corn chips.

More Delish Dipping Appetizers

Everyone loves to dip things, try these for your next party.

Print

Hot Corn Dip

Hot Corn Dip is super cheesy, packed with flavor and such a crowd pleaser. This always one of the first dips to disappear! 
Course Appetizer
Cuisine American
Keyword corn dip, hot corn dip
Prep Time 10 minutes
Cook Time 20 minutes
Total Time 30 minutes
Servings 8 People
Calories 279kcal
Author Alyssa Rivers

Ingredients

  • 1 tablespoon olive oil
  • 1/2 onion diced
  • 1 red pepper diced
  • 1 jalapeño seeds removed and diced
  • 2 15 ounce cans corn
  • 8 ounce cream cheese softened
  • 1/2 cup sour cream
  • 2 cups Colby jack cheese shredded and divided
  • 1/2 teaspoon chili powder
  • 1/2 teaspoon garlic powder
  • 1/4 teaspoon paprika
  • salt and pepper
  • sliced green onion for garnish

Instructions

  • Preheat oven to 400 degrees. In a medium sized saucepan add the olive oil, onion, red pepper, and jalapeño. Cook over medium high heat until tender.
  • In a medium sized bowl add pepper mixture, corn, cream cheese, sour cream, 1 cup cheese, chili powder, garlic, paprika, salt and pepper. Stir until combined.
  • Spread in a 2 quart casserole dish or small skillet. Sprinkle remaining 1 cup cheese. Bake for 15-20 minutes or until hot and bubbly golden brown. Garnish with green onions if desired.

Nutrition

Calories: 279kcal | Carbohydrates: 4g | Protein: 10g | Fat: 25g | Saturated Fat: 14g | Cholesterol: 70mg | Sodium: 305mg | Potassium: 143mg | Fiber: 1g | Sugar: 3g | Vitamin A: 1351IU | Vitamin C: 22mg | Calcium: 271mg | Iron: 1mg


from The Recipe Critic https://ift.tt/36NNaPp
https://ift.tt/3nr0S0y