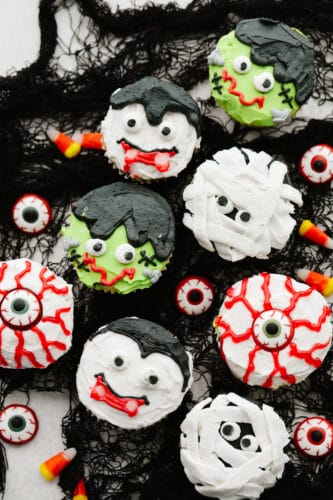
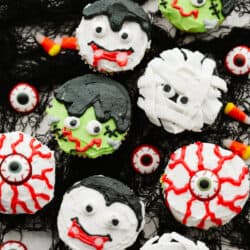
Halloween cupcakes are as tasty as they are cute! Moist vanilla cupcakes are frosted with timeless Halloween characters for an unforgettable treat!
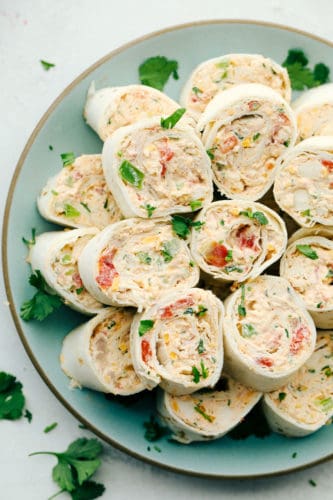
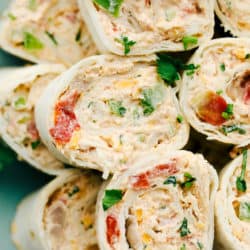
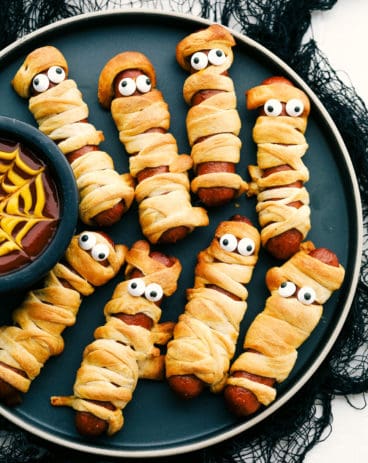
Need more inspiration for your Halloween party? I’ve got you covered. A themed charcuterie board, mummy hotdogs, and mummy cookie bites are all sure to be a hit. They look as good as they taste!

Halloween Cupcake Recipe With Frosting Ideas
My kids love Halloween. As soon as October rolls around, decorations are up in our house. Costumes and decorations aside, one of the best things about Halloween is the treats! One of our favorite traditions is decorating cupcakes. It’s so fun! With just frosting and little candies, I love to see what my kids come up with. They always turn out so cute! Since Halloween is almost here, what better way to celebrate than with some yummy themed cupcakes? I’m sure your family will love these just as much as mine does!
These start with the perfect vanilla cupcake base, supremely moist and sweet! Then, we frost them with the most buttery, homemade frosting! It’s so good, I always catch my girls eating it straight from the bowl. You can also make these with cream cheese or chocolate buttercream frosting. I’ve included 4 fun tutorials to get you started. From Dracula to Frankenstein, these designs are super easy to achieve! And, to make your life a little easier, my Halloween cupcakes use a lot of basic ingredients so they’re the perfect thing to whip up last minute for a party!
Ingredients for Halloween Cupcakes
Don’t let the long list of ingredients fool you. Making Halloween cupcakes is super easy and uses all the staples in your pantry! For decorating, feel free to use whatever candies your heart desires! I’ve included a few ideas below to get you started, but coming up with your own designs is the fun part!
Vanilla Cupcake Base
- Cake Flour: Cake flour is very fine and will give your Halloween cupcakes the perfect, light texture!
- Granulated Sugar: A must for the perfect sweetness!
- Baking Powder and Baking Soda: You need both of these ingredients for your cupcakes to rise properly.
- Salt: Salt is a flavor enhancer, so I add it to my cakes to make them taste better overall!
- Buttermilk: This is my secret ingredient! It makes your cupcakes super moist because of its high fat content. Surprisingly, it’s really easy to make at home! You can find my recipe here.
- Milk: Use whole milk if you can! The high fat content will make your cupcakes moist and soft.
- Clear Vanilla: I like these cupcakes to be bright white, so I use clear vanilla and egg whites! You can certainly use regular vanilla, too, it will just darken your cupcakes a little bit.
- Vegetable Oil: Added for moisture and to bind all of the fats together!
- Egg Whites: Because I want these cupcakes to be white, I omit egg yolks completely.
Frosting
- Unsalted Butter: Butter is the yummy base of your frosting. Make sure it’s room temperature! Everything will mix together more smoothly.
- Powdered Sugar: Powdered sugar is added for an amazing sweetness and smooth texture.
- Milk: Add milk to adjust consistency!
- Pure Vanilla Extract: Pure vanilla will give your frosting a better overall flavor compared to using imitation vanilla. You’ll love how rich and yummy it is!
- Salt: A pinch of salt will make your frosting taste better!
How to Make Your Cupcakes and Frosting
Making Halloween cupcakes is fun and easy! All it takes is a few steps of mixing and baking. Then you can decorate however you’d like!
- Preheat Oven, Prep Pans: Let’s make some cupcakes! To begin, preheat the oven to 350° and line two muffin tins with cupcake liners.
- Mix Dry Ingredients: In a medium bowl, whisk together the flour, sugar, baking powder, baking soda, and salt.
- Mix, Prep Egg Whites: Add the buttermilk, milk, vanilla, and oil to the dry ingredients and beat with the paddle attachment of a stand mixer or a hand mixer just until fully combined. In a separate bowl, whip the egg whites until you get medium stiff peaks and gently fold into the batter.
- Bake: Scoop the batter into the cupcake liners until they are ⅔ of the way full. Bake for 20-22 minutes, until a toothpick comes out clean and the tops of the cupcakes bounce back when lightly pressed.
- Frost and Design: Frost the cupcakes as desired. Check the pictures in this post for a step-by-step tutorial for some cute Halloween designs!
Frosting
- Mix Ingredients: Add butter, powdered sugar, milk, vanilla and salt to the stand mixer bowl. Stir to incorporate all the ingredients, then turn the mixer on high speed and beat until the frosting is white and fluffy, about 10-15 minutes.
- Add Color: Add food coloring to small bowls of frosting. You can use any fun combinations you want! In my designs, I use black, gray, green, and red.

Dracula Design With Candy Corn Fangs
No Halloween cupcakes are complete without Dracula! Here’s how I got my design! He’s almost too cute to eat.
- Frost Top: Frost the top of your cupcake completely with white frosting. I like to use a knife to get this nice and smooth. Use a piping bag with a small, rounded tip and make 2 dots in the center of the cupcake for your Dracula’s eyes.
- Add Eyes and Mouth: Next, we’re going to detail with a small detailing tip. Using black frosting, carefully draw the hairline and fill in completely. Then, add 2 black dots for eyes and a line for a mouth.
- Add Red Details: Still using a very small detailing tip, this time with red frosting, add a thin red line underneath the mouth.
- Cut and Attach Fangs: Cut the white ends off of 2 pieces of candy corn. These will act as fangs! Place them in the mouth area and your Dracula cupcakes are ready to go!

Easy Frankenstein Design
It’s alive!! This green monster is the perfect addition to any Halloween party.
- Green Layer: Frost the top of your cupcake with green frosting. I like to use a butterknife to get everything smooth.
- Add Hair: Using a medium-sized, round tip and black frosting, I start to shape some messy hair for our Frankenstein!
- Adding Details: Next, I use a medium-sized, round tip with white frosting to make 2 dots for the eyes. Then I go in with a very small tip and black frosting to create pupils and scars. To finish up, I use red gel frosting to create a squiggly mouth!

Simple and Cute Mummy Design
This design is one of my favorites! It’s so simple but looks adorable!
- Frost Black Layer: To begin, frost your cupcake completely with black frosting.
- Add Eyes: Use a medium-sized, round tip and white frosting to create 2 dots for the eyes. Using an even smaller tip, use black frosting for the pupils.
- Add Cloth Wraps: Using a flat piping tip and white frosting, create long strips of cloth. Layer these until all but the eyes on your cupcake are covered!

Eyeball Halloween Cupcake Design
Out of all of these designs, the eyeball is the easiest to make in my opinion! To simplify things a little, I use little plastic eyes!
- Place Plastic Eye: To begin, place your plastic eye in the center of a frosted white cupcake. Feel free to frost this design instead of using a decoration!
- Add Vein Details: Using red gel frosting, create little veins that snake out to the edge of the cupcake.

Halloween Cupcake Tips
Now that you’ve learned how to make your cupcakes look good, here are tips and tricks on making them taste just as good! You’ll want to make these all in October!
- Use Room Temperature Ingredients: The secret to smooth cakes and cupcakes is to use room temperature wet ingredients. Allow milk, eggs, butter, and buttermilk to come to room temperature before mixing together.
- Don’t Overmix Egg Whites: You only want to whisk your egg whites together until you reach medium peaks. Mix more, and the your egg whites will break apart. This will keep your cupcakes from being light and fluffy.
- Additional Flavors: If you’re wanting to switch up your cupcakes’ flavor a bit, feel free to fill them with chocolate frosting, chopped nuts, caramel sauce, or even lemon curd!

Storing Leftover Halloween Cupcakes
If these adorable cupcakes don’t get devoured, here is how to store them for later! Note: Unfrosted cupcakes will keep much longer than frosted cupcakes. Keep in mind if you’re planning on making cupcakes in advance!
- At Room Temperature: Since these cupcakes have a buttercream-based frosting, you can store them at room temperature. If you’re using a cream cheese based frosting instead, they’ll need to be stored in the fridge. At room temp, your frosted cupcakes will last for 2-3 days. Make sure they’re in an airtight container or wrapped tightly with plastic wrap. This way, they won’t dry out as quickly.
- Unfrosted cupcakes will last for up to one week, covered or in an airtight container.

More Halloween Treats
Halloween Cupcakes
Ingredients
- 2 ¼ Cups Cake Flour
- 1 ½ Cups Granulated Sugar
- 1 Tablespoon Baking Powder
- ½ Teaspoon Baking Soda
- ½ Teaspoon Salt
Wet Ingredients
- 1 Cup Buttermilk
- ¼ Cup Milk
- 2 Teaspoons Clear Vanilla
- ½ Cup Vegetable Oil
- 4 Egg Whites
Frosting
- 16 Tablespoons unsalted butter, two sticks room temperature
- 3 cups powdered sugar
- 2 tablespoons Milk
- 1 ½ teaspoon pure vanilla extract
- A big pinch of salt
Instructions
-
Preheat the oven to 350° and line two muffin tins with cupcake liners.
-
In a medium bowl, whisk together the flour, sugar, baking powder, baking soda, and salt.
-
Add the buttermilk, milk, vanilla, and oil to the dry ingredients and beat with a stand mixer or a hand mixer just until fully combined. In a separate bowl whip the egg whites until you get medium-stiff peaks and gently fold into the batter.
-
Scoop the batter into the cupcake liners until they are ⅔ of the way full. Bake for 20-22 minutes, until a toothpick, comes out clean and the tops of the cupcakes bounce back when lightly pressed.
-
Frost the cupcakes as desired. Check the pictures in this post for a step-by-step tutorial for some cute Halloween designs!
Frosting
-
Add butter, powdered sugar, milk, vanilla, and salt to the stand mixer bowl. Stir to incorporate all the ingredients, then turn the mixer on high speed and beat until the frosting is white and fluffy about 10-15 minutes.
Nutrition
from The Recipe Critic https://ift.tt/3pgReB2
https://ift.tt/3vBbQ8b