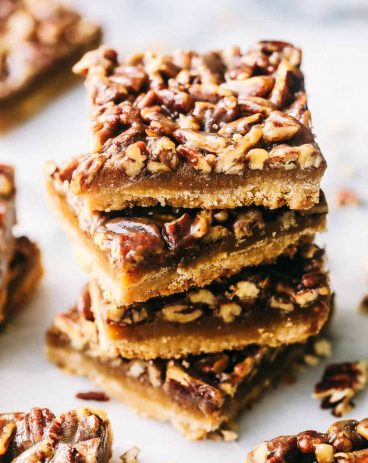
All of the goodness of fall treats combine in these delicious pumpkin pecan pie bars. Layers of buttery shortbread, sweet pecan, and spiced pumpkin will have you hooked!
Is it just me, or do the best treats come out in the fall? I almost drool thinking about pumpkin snickerdoodles, pumpkin cream cheese truffles, and pumpkin pie caramel blondies. These are a few more tasty treats enhanced with a little fall flair!

Insanely Good Pumpkin Pecan Pie Bars Recipe
Fall is my favorite time of the year. I love the crisp fall air and the beautiful big trees in our park that have colorful fall leaves. My other favorite part of fall is the treats! Pumpkin pie is a must. Pecan Pie is a must. So it came to me… I need to combine both! All of the goodness of pumpkin and pecan pie get fused together in this delicious dessert. It starts with a buttery shortbread crust. Then, it is followed by a pumpkin pie layer and topped with a brown sugar pecan topping. The brown sugar adds a caramel flavor as the bars cook. The result? Pure fall perfection.
First, I love these bars because they are perfect for cutting up and feeding a crowd. Second, they are a lot easier than you think! It only takes 10 minutes of prep and then they are hands-off once they go in the oven. The hardest part is waiting for them to finish. The smell that fills my kitchen makes me want to gobble up the whole pan immediately. They are so soft, sweet, buttery, with the best hint of fall spice! You are going to love everything about these delicious bars. If you love pumpkin pie and pecan pie, get ready to go crazy for these!
Ingredients for Pumpkin Pecan Pie Bars
I love that this delicious recipe utilizes a lot of ingredients I have at home. It makes for a simple and inexpensive dessert! The end result will amaze you with its rich, sweet, perfectly spiced flavors. You can find measurements for each ingredient in the recipe card below!
Shortbread Layer
- Flour: Flour is used to give your crust structure. I like to use all-purpose flour because it keeps your crust light and crumbly.
- Oats: You can use old-fashioned or instant here. Oats will give your crust a tasty texture!
- Brown Sugar: This is used to add a sweet, rich flavor to the crust.
- Butter: I use salted butter here for enhanced flavor. You can also use margarine! No matter what you choose, make sure it is softened before adding it to your mixture.
Pumpkin Layer
- Granulated Sugar: For a smooth texture and sweetness!
- Pumpkin: You can use canned pumpkin or homemade pumpkin puree!
- Evaporated Milk: The perfect ingredient for adding delicious creaminess!
- Eggs: Eggs work as a binding agent to solidify your pumpkin layer once baked.
- Pumpkin pie spice: A necessary ingredient to get those amazing fall flavors! In fact, try making this pumpkin pie spice from scratch! It’s super easy!
Pecan Layer
- Pecans: I like to chop mine up into small pieces so they incorporate thoroughly.
- Brown Sugar: For the perfect rich sweetness of a pecan pie!
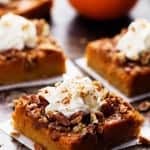
- Whipped Cream: This is used on top. You can whip your own using heavy cream, but canned whipped cream tastes amazing, too!
How to Make Pumpkin Pecan Pie Bars
Making this incredible crowd-pleaser isn’t difficult at all! All you have to do is layer and throw it in the oven. This is a recipe that both beginner and seasoned bakers can thoroughly enjoy! Warning: May cause an irresistible fall scent in your kitchen.
- Prepare Crust: First, preheat your oven to 350° Line a 9×13 inch pan with foil and lightly spray with cooking spray. In a mixing bowl, combine flour, oats, brown sugar and butter and then beat at low speed until mixture is combined and crumbly. Next, press into the bottom of your 9×13 inch pan and bake for 15 minutes. Remove from the oven.
- Pumpkin Layer: To begin, in a medium-sized bowl combine sugar, pumpkin, evaporated milk, eggs, and pumpkin pie spice. Beat for about 1-2 minutes. Next, pour over crust. Bake for 20 minutes and then remove it from the oven.
- Pecan Layer: Combine brown sugar and pecans. Sprinkle over the filling and then continue to bake for 15 -20 minutes or until knife inserted in center comes out clean. Let it cool completely. Lastly, top with whipped cream and serve!

Tips and Tricks
Here are some easy things to keep in mind as you make these tasty pumpkin pie pecan bars! The end result will be so delicious that your friends and family will surely be asking for more!
- Using a food processor: If you are having trouble getting your crust to press down into the pan then your mixture may be too thick. You can blend your dry ingredients in a food processor beforehand for a more finely-milled crust mixture!
- Pumpkin pie spice: If you don’t have this on hand, you can make it at home with a simple blend of cinnamon, nutmeg, and ginger! You can use this recipe as a guide on ratios, but it can easily be customized to fit your individual tastes!
- Let bars cool completely: This is easily the hardest tip to follow, but well worth it! If you try to cut into bars too prematurely then they won’t hold their shape. Pumpkin, specifically, needs time to set in place. In fact, you can stick your bars in the fridge to help this process along. Either way, it will typically take a few hours before they are completely ready.
- Serve with ice cream: I use whipped cream in my recipe, but these bars transform into a decadent dessert when served à la mode! A scoop of homemade ice cream or even frozen yogurt can really take this dessert up a notch.

How to Store Leftovers
These pumpkin pie bars taste fantastic the next day! Here is how you can store them and enjoy them later!
- Refrigerator: If you store your bars in an airtight container, they will keep for 5-6 days.
- Freezer: In an airtight container, your pumpkin pecan pie bars will stay good in the freezer for up to 2 months. Let them thaw in the fridge for 1 whole day before consuming.
More Fall Dessert Favorites
Desserts
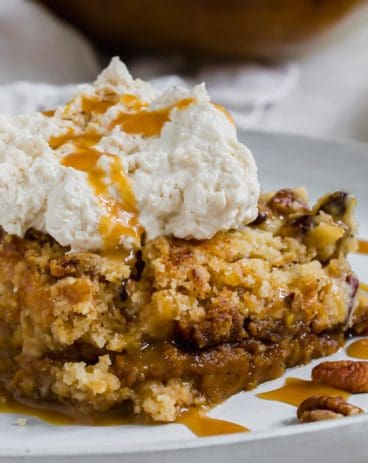
Pumpkin Dump Cake
Desserts
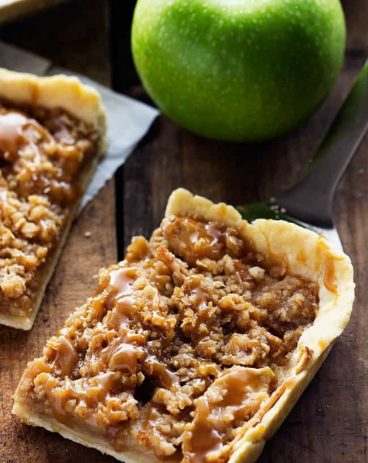
Caramel Apple Slab Pie
Desserts
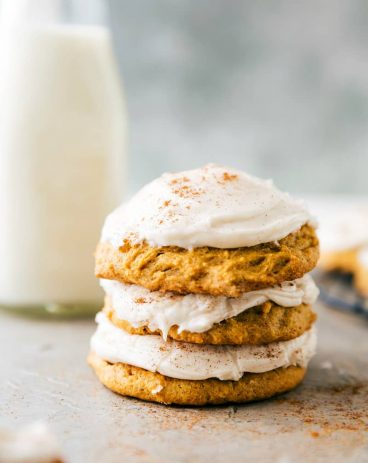
Iced Pumpkin Spice Cookies
Desserts
Best Ever Pecan Pie Bars
A Reader’s Review
Pumpkin Pecan Pie Bars
Ingredients
Shortbread Layer:
- 1 cup all-purpose flour
- 1/2 cup old-fashioned or instant oats
- 1/2 cup packed brown sugar
- 1/2 cup butter or margarine softened
Pumpkin Layer:
- 3/4 cup granulated sugar
- 1 (15 ounces can) pumpkin puree or homemade pumpkin puree
- 1 (12 ounces can) Evaporated Milk
- 2 large eggs
- 2 1/4 teaspoons pumpkin pie spice
Pecan Layer:
- 1/2 cup pecans chopped
- 1/4 cup packed brown sugar
- Whipped cream
Instructions
-
To make the crust: Preheat the oven to 350° Line a 9×13 inch pan with foil and lightly spray with cooking spray. Combine flour, oats, brown sugar, and butter in a small mixer bowl. Beat at low speed until mixture is combined and crumbly. Press into the bottom of your 9×13 inch pan and bake for 15 minutes. Remove from the oven.
To make the pumpkin layer:
-
In a medium-sized bowl combine sugar, pumpkin, evaporated milk, eggs, and pumpkin pie spice. Beat for about 1-2 minutes. Pour over crust. Bake for 20 minutes. Remove from oven.
To make the pecan layer:
-
Combine brown sugar and pecans. Sprinkle over the filling. Continue to bake for 15 -20 minutes or until the knife inserted in the center comes out clean. Cool completely and top with whipped cream.
Video
Notes
Nutrition
from The Recipe Critic https://ift.tt/2qnvLXr
https://ift.tt/2RwG4Uv