Using an Instant Pot is the best way to achieve the perfect baked potato every time! You are going to love how fluffy, golden, and easy to make these Instant Pot baked potatoes are!
Cooking with an Instant Pot is the solution for making delicious meals at home in minutes without any hassle. From spaghetti to chili, mac and cheese to chicken and rice, you will love having this amazing tool in your kitchen arsenal! Every recipe that I have used it with has turned out to be AMAZING!

The BEST Instant Pot Baked Potato Recipe
I’m a sucker for potatoes in all their forms. Whether mashed, roasted or in fry form, it is easily my preferred source of carbs. Sitting at the top of the list, currently, are these Instant Pot-baked potatoes. You can add so many different, delicious toppings to them and they work as a perfect side for so many dishes! Now, if you think you have had the best-baked potato, you need to think again. Making them in an Instant Pot is a game-changer. Not only is it much faster, but I think it tastes better, too! Each time that I have made these baked potatoes, they have turned out amazingly. Cut through the golden, crispy outer layer to reveal the soft, fluffy inside steaming to perfection. I’m sure it will become a favorite of yours just like it has for me!
Both my air fryer and my Instant Pot have been lifesavers over the past little while. They simplify every recipe and put so much time back into my day! The best part is, these recipes taste just as good if not better than their traditionally cooked counterparts. Potatoes are no different! I have been making Instant Pot mashed potatoes a lot recently and I’m surprised every time at how tasty the results are! These recipes are perfect for putting the taste of homecooked meals into busy weeknights. I’m going to give you all the tips you need to make these incredible Instant Pot-baked potatoes at home!
Ingredients Needed for Instant Pot Potatoes
Only 3 simple ingredients are needed here! This recipe is the perfect easy foundation. From there, you are free to add whatever toppings you like! Check out my tips below for delicious flavor combinations.
- Potatoes: I like to use russet potatoes in this recipe. They have a high starch content which makes them light and fluffy when baked. Yukon gold potatoes are also a great substitute.
- Water: Adding water to your instant pot is going to help them steam to perfection.
- Sea Salt: I love the texure of sea salt and the way it enhances a baked potato’s overall flavor. I sprinkle this on top after the baked potatoes are done cooking.
- Olive Oil Spray: Using olive oil spray is an optional step, but if you want your potatoes a little crispier, this is perfect for achieving that.
How to Make Instant Pot Baked Potatoes
This recipe is so incredibly easy, it really is the most foolproof way to make baked potatoes. The Instant Pot does all of the heavy lifting to simplify your life a little bit!
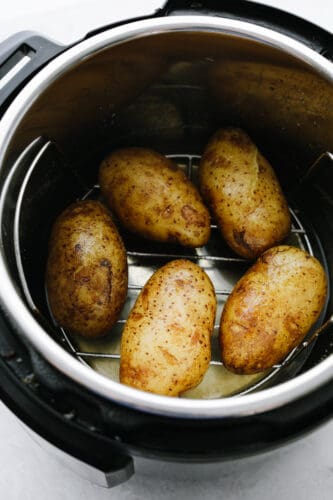
- Prepare Instant Pot and Potatoes: To start, place the metal trivet into the instant pot. Prepare the potatoes by scrubbing them and piercing them all over with a fork.
- Add Water and Potatoes: Next, pour the water into the instant pot and place the potatoes on top. If needed, you can stack them on top of each other.
- Begin Pressure Cooking: Close the lid and set it to the sealed position. Press the manual/pressure cook to high and cook for 12 minutes for small potatoes, 15 minutes or medium and 18 for large potatoes.
- Release Pressure: Let the pressure release naturally. Then, quick release any remaining pressure and carefully open the top.
- (Optional Step) If You Want Potato Skins Crispy: Lay your potatoes on a baking sheet and spray with olive oil spray. Next, place in the oven and turn on high broil for 3-4 minutes or until the skin is slightly crisp. Sprinkle the potatoes with some sea salt and serve as desired.

What to Serve With Your Baked Potatoes
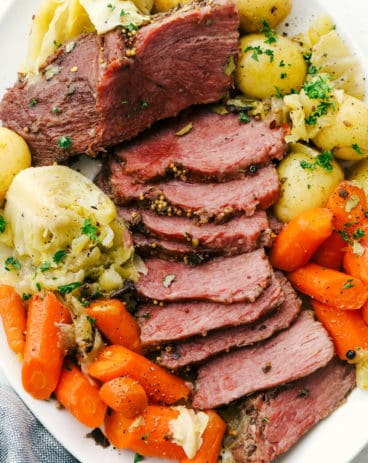
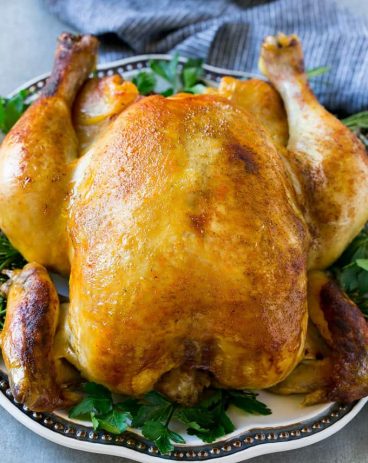
There are so many dishes that would work well with these amazing potatoes! Meat and potatoes is an obvious, delicious choice. Ribeye steak and meatloaf are some of my favorites to serve with these! Things like brown sugar salmon, parmesan garlic chicken, and Dijon garlic pork tenderloin also pair really well. Since baked potatoes have such a versatile flavor, they will pair well with basically any flavorful protein of your choice. You can even simplify your dinners by making other easy Instant Pot favorites like corned beef and ribs!


Tips and Tricks for the Best Instant Pot Baked Potatoes
This recipe is beyond easy as-is, but a few simple tips and tricks can make your baked potatoes taste out of this world! The result is fluffy golden goodness that your family is sure to be drooling over.
- Dry Potatoes: It is really important to wash the dirt off of your potatoes before you cook them. But one mistake that is often overlooked is to dry them completely before use. If there is too much moisture on your potato, it can seep into the skins and prevent them from crisping.
- Crispy Skins: If you want baked potatoes with perfectly crispy skins that still have a soft fluffy inside, don’t skip the broiling step! A quick spritz of olive oil spray and broiling your potatoes for a few minutes is just what they need for the best texture possible.
- Making Sure Your Potatoes Are Ready to Eat: Once your timer goes off, you will want to make sure your potatoes are cooked through completely. One surefire way to check is by inserting a toothpick. If you are able to insert and remove it easily, your potato is ready to eat!
- Cut Your Potatoes Immediately: It’s common sense to want to let your potatoes cool down completely before cutting them open, but unfortunately, letting them sit will alter their texture. Unless you cut them open immediately, the insides will continue to cook and retain water, ultimately becoming more dense rather than fluffy.
Baked Potato Toppings
The sky is the limit when it comes to adding toppings! My go-to is always a little butter, salt and pepper, bacon bits, and sour cream. I also love baked potatoes topped with alfredo sauce– that’s a close second. You can also make your baked potatoes the meal itself! Top them with chili, curry, or even BBQ sauce and pulled pork!

Storing Leftover Baked Potatoes
Instant pot-baked potatoes are best when fresh, but can also be stored and enjoyed a few days after. This makes them a perfect, easy side for a quick dinner!
- In the Refrigerator: Store in an airtight container for up to 5 days. Make sure your baked potatoes are completely cooled before storing!
- In the Freezer: You can freeze baked potatoes without any butter or toppings on them. Wrap them tightly in aluminum foil, place in a ziplock bag, and store for 1-2 months. Let thaw overnight before reheating.
- Reheating: Pop your baked potatoes in the oven at 350 degrees Fahrenheit for about 10-15 minutes or until warmed through.
More Easy Potato Recipes
Side Dishes
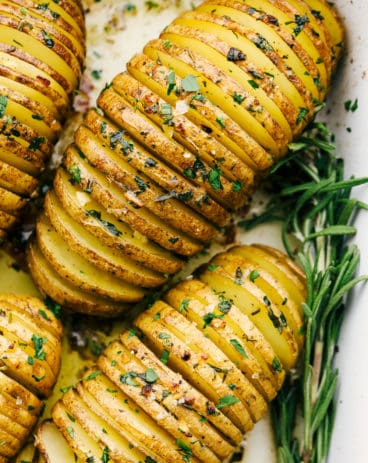
Garlic Butter Hasselback Potatoes

Side Dishes
Crispy Potato Skins
Side Dishes
Slow Cooker Cheesy Bacon Ranch Potatoes
Side Dishes
Parmesan Garlic Roasted Potatoes

Instant Pot Baked Potatoes
Ingredients
- 4-5 medium-sized russet potatoes
- 1 cup water
- sea salt
- olive oil spray
Instructions
-
Place the metal trivet into the instant pot. Prepare the potatoes by scrubbing them and piercing them all over with a fork.
-
Pour the water into the instant pot and place the potatoes on top. You can stack them on top of each other if needed.
-
Close the lid and set it to the sealed position. Press the manual/pressure cook to high and cook for 12 minutes for small potatoes, 15 minutes or medium, and 18 for large potatoes.
-
Let the pressure release naturally. Then quickly release any remaining pressure and carefully open the top.
If you want your potato skins crispy:
-
Lay them on a baking sheet and spray with olive oil spray. Place in the oven and turn on high broil for 3-4 minutes or until the skin is slightly crisp. Sprinkle the potatoes with some sea salt and serve as desired.
Nutrition
from The Recipe Critic https://ift.tt/3zYhUZY
https://ift.tt/3h9vlyv