
This chicken alfredo dip is out of this world! It’s creamy, cheesy, loaded with chicken, AND made from scratch! It’s perfect for an appetizer or a delicious side dish!
I go crazy over anything involving dips! They are SOO good and this one is absolutely no exception!! And while you’re making this one, go ahead and try these others! This Dill Pickle Dip, Million Dollar Dip, and this Hot Crab Dip are some of the BEST!

Chicken Alfredo Dip
If you’re new here then you probably don’t know that I love dips! Like, give me all the creamy and cheesy dips and I will be happy as a clam! Whether it’s a hot dip, a cold dip, or leftover dip that I have to scrape the bowl for, I am here for it! This chicken alfredo dip may just be my favorite. It is cream cheese and homemade Italian seasoning that is loaded with extra cheese and chicken. Then, it’s topped with cheese (obviously), and baked until it’s totally ooey-gooey and irresistible.
It’s perfect for game day or and hearty enough for when you’re entertaining! If we’re being honest here, you could even eat this as a casual lunch or dinner. Pair it with some crackers and some veggies (broccoli is especially great with this!) and you have yourself a very tasty dish! Or… you could use my personal favorite…. bread. You could use any kind of bread but I especially like bread with a hard crust. Like bruschetta or a crostini! This dip is addictive and once you make it once, you will come back to it again and again!
Ingredients in Easy Chicken Alfredo Dip
These ingredients combined together make the most creamy and flavorful chicken alfredo dip! Plus, they are simple and you probably already have them at your house! See the recipe card below for a list of exact measurements.
- Butter and flour: Mixed together, this will create a roux (a thickening agent) for this dip!
- Garlic cloves: Mince up your garlic cloves evenly. If you don’t have any fresh ones, you can use minced garlic from your fridge. ½ tsp equals about 1 clove of garlic.
- Milk: You can use 1% or 2% for this recipe!
- Cream cheese: This brings that delicious tangy flavor. Plus, it works as a base for the whole dip!
- Mozzarella and parmesan cheese: Shredded cheese works the best for this!
- Chicken: A shredded rotisserie chicken is perfect for this recipe!
- Italian seasoning: This homemade Italian seasoning will be worth the extra 5 minutes to make!
- Salt and pepper: Add these flavors in to enhance the other ingredients!
How to Make Chicken Alfredo Dip
If you have 30 minutes, then you have enough time to make this chicken alfredo dip! And for 25 of those minutes, this is baking in the oven! It’s super easy and the taste will be worth every second!
- Prep: Preheat the oven to 350 degrees. In a small skillet over medium high heat add the butter until it is melted. Whisk in flour to create a roux.
- Whisk: Add in minced garlic and milk and whisk until smooth. Reduce heat and add in cream cheese and stir until smooth and creamy.
- Stir: Add in 1 cup mozzarella cheese, parmesan, chicken,Italian seasoning, salt and pepper and stir until combined.
- Bake and serve: Top with ½ cup mozzarella and bake for 20-25 minutes until golden brown and bubbly. Serve with crostini, broccoli and desired veggies.

Varitations To Try
Dips are a favorite of mine because I can switch things up so easily! Depending on what you serve them with, it can be totally different every time! Here are a few ideas on some things that go well with this chicken alfredo dip.
- Veggies: Vegetables are SO tasty with this dip. I like to slice up cucumbers and put a bit of this on top of each of them on a plate! Or, serve this with either cooked or raw broccoli and they go SO well together. Asparagus and peppers are delicious with it too! Really, you can’t go wrong adding any veggies to this.
- Add in some crunch: You can dip any crackers or chips or pretzels in this and they will all complement this dip so well!
- Bread: If you have any bread on hand (especially a baguette or a crostini) then slice it up and put it on a platter with this. It makes an excellent appetizer!
- Add it to pasta: This IS a dip but you can top on your pasta for a rich and filling meal! Trust me, it tastes like homemade alfredo!
- Add toppings: You can top this dip with green onions, bacon, tomatoes or parsley!

Can I Make This and Store it For Later?
YES. This chicken alfredo dip is such a great appetizer and it’s especially nice to be able to cook this beforehand. That way, you can focus your time and attention on your other side dishes or your main entree!
Make it in Advance:
- Mix but don’t cook: If you want to make this beforehand, mix it all up (but DON’T cook it) and store it in your fridge. It can be stored up to 8 hours. Take it out and cook it according to the recipe card below! Add a minute or two to the cooking time since it started out cold.
Storing Leftovers:
- Refrigerate: Once the dip has cooled, store it in an airtight container in your fridge. It can last up to 3-4 days in the fridge.
- Reheating: You can either bake it at 350 degrees for 15 minutes (or until heated through) or, you can microwave it on high for 2 minutes. Stir every 30 seconds. Either way, when you are reheating this, make sure to stir it well after so that the cream cheese doesn’t curdle!

More Delicious Dips to Try
Desserts
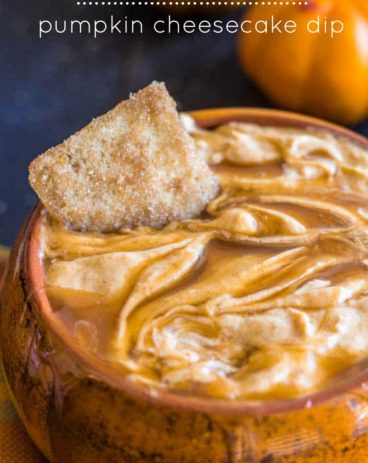
Caramel Pumpkin Cheesecake Dip

Appetizers
Hot Corn Dip
Dressings, Sauces, and Dips
Fluffy Marshmallow Cream Cheese Fruit Dip (3 ingredients!)

Dressings, Sauces, and Dips
S’mores Dip

Creamy Chicken Alfredo Dip
Ingredients
- 2 Tablespoons Butter
- 2 Tablespoons Flour
- 3 garlic cloves minced
- 1 cup milk
- 8 ounces cream cheese
- 1 1/2 cup shredded mozzarella divided
- 1/4 cup grated parmesan
- 1 1/2 cups chicken shredded rotisserie works great
- 1 teaspoon Italian seasoning
- 1/2 teaspoon salt
- 1/4 teaspoon pepper
Instructions
-
Preheat the oven to 350 degrees. In a small skillet over medium-high heat add the butter until it is melted. Whisk in flour to create a roux.
-
Add in minced garlic and milk and whisk until smooth. Reduce heat and add in cream cheese and stir until smooth and creamy.
-
Add in 1 cup mozzarella cheese, parmesan, chicken, Italian seasoning, salt, and pepper and stir until combined.
-
Top with ½ cup mozzarella and bake for 20-25 minutes until golden brown and bubbly. Serve with crostini, broccoli, and desired veggies.
Notes
Nutrition
from The Recipe Critic https://ift.tt/3AnoUiY
https://ift.tt/3tNKta0