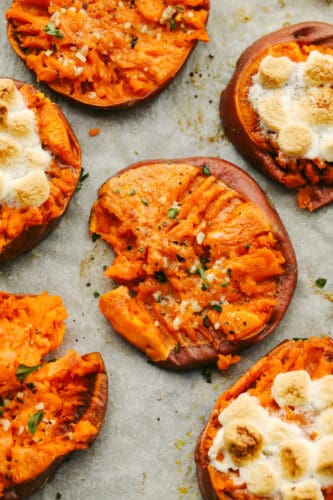
Smashed sweet potatoes are crispy on the outside and soft and smooth on the inside! They can be cooked to taste sweet OR savory and they both have a mouthwatering taste that is divine! You will love every single bite!
I love how simple and easy smashed potatoes are! Anyone can make them and once you do, you will definitely come back for more! If you like these, go ahead and try a few of my other favorite tried and true potato recipes like Potato Wedges, Mashed Potato Balls, and this amazing Sweet Potato Pie!

Smashed Sweet Potatoes
Not to be confused with MASHED potatoes, these sweet potatoes are being SMASHED. And to be honest, they are the absolute best! So move over mashed sweet potatoes, a new recipe has come to town! They are seriously so simple to make and are the best appetizer or side dish. This recipe includes a few different ways to make them: sweet or savory. I wanted to include both because they both have incredible tastes that are very different! And also… we all love to have options on how to mix things up! Because I know that you will absolutely love this recipe, you will need a few varieties so that you can cook it more often!
All you need to make this is some sweet potatoes and a few different ingredients! Cooking them up takes no time at all and you can add them to just about any meal! I especially love sweet potatoes with a French Dip Sandwich, a delicious salad, and this one-of-a-kind lemonade! Or, if you are hosting a party, this makes a fantastic appetizer! It’s a food that everyone will love so it’s an easy choice to make it! My kids request it ALL the time. So go ahead and give it a try! Once you do, you will be finding every excuse to make it again and again!
Ingredients for Sweet AND Savory
Whether sweet or savory is your jam, I’ve got you covered! So, pick whichever smashed sweet potato that you like (or make both kinds!) and you will be licking your lips afterward in satisfaction! See the recipe card below for a list of exact measurements.
- Sweet potatoes: Pick out large sized sweet potatoes for this recipe.
Savory
- Butter: You will want to get unsalted butter for these sweet potatoes!
- Garlic clove: If you don’t have fresh garlic cloves, you can use minced garlic. ½ tsp equals 1 clove of garlic.
- Italian seasoning: I highly recommend using this homemade Italian seasoning. It’s easy and will take any recipe to the next level!
- Salt and pepper: Sprinkle these on to taste.
Sweet
- Butter: Use unsalted butter if you can!
- Honey: This creates that sweet flavor without needing to use sugar.
- Cinnamon: The cinnamon creates that classic sweet potato taste that we all know and love!
- Marshmallows: These are a MUST for this recipe! Like a cherry on top!
How to Make Sweet Potatoes Smashed
If you have 30 minutes, then you definitely have the time to make this delicious recipe! These smashed sweet potatoes are SOO easy and worth every bit of effort!
- Prep: Preheat oven to 425 degrees. Line a sheet pan with parchment paper and set aside.
- Slice: Slice the sweet potatoes ⅗ inch thick and lay in an evenly layer on the baking sheet.
- Bake: Bake for 25-30 minutes or until fork tender. Remove from the oven.
- Smash: Smash the sweet potatoes with a fork.
If you are making them savory
- Mix and pour: Combine the butter, garlic, Italian seasoning, salt and pepper in a small bowl. Pour evenly onto the sweet potatoes.
If you are making them sweet
- Mix and pour: In a small bowl combine the butter, honey, and cinnamon. Pour evenly over the sweet potatoes and top with marshmallows.
- Broil: Broil for 5 minutes or until crisp on top.

How to Pick Sweet Potatoes
For this recipe to be a success, you need to know how to start with the best ingredients! So, in case you haven’t picked out sweet potatoes before, here are some helpful hints to picking them out! It will help make this smashed sweet potatoes recipe the best!
- Texture: Look for a sweet potato that is smooth and firm. You don’t want it to have any cuts or cracks in it!
- Color: A sweet potato that will deliver that classic, delicious taste is going to be red or orange in color.
- Size: For this recipe, because you are going to be slicing them, you want the sweet potatoes to be larger! That way your slices aren’t too tiny!

How to Store Sweet Potatoes
If you have leftovers with these smashed sweet potatoes, make sure to store them right so that you can enjoy them later! Because storing leftovers correctly is important, I’ve come up with a few tips on how to do it!
- Refrigerator: After they have cooled, store the smashes sweet potatoes in an airtight container and put it in your fridge. They will last up to 4 days!
- Reheat: To reheat them, preheat your oven to 350 degrees. Then, take them directly out of your fridge and place them on a cookie sheet. Once you have done that then you will put them in the oven and bake them for 15-20 minutes until they have reached 165 degrees.

More Sweet Potato Recipes You Will Love
Side Dishes
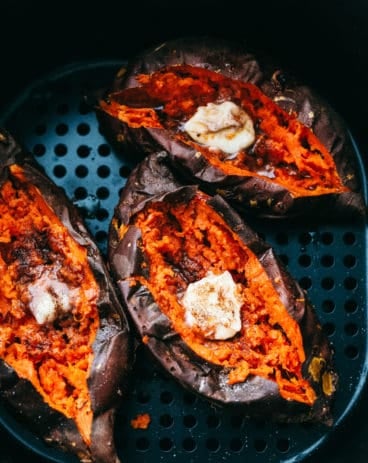
Air Fryer Sweet Potatoes
Side Dishes
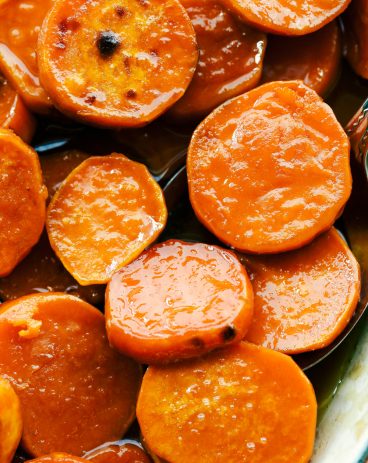
3 Ingredient Candied Sweet Potatoes
Side Dishes
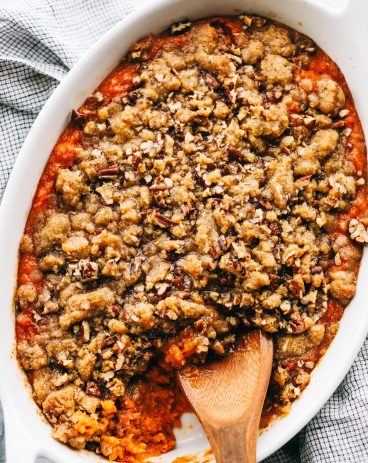
The Best Sweet Potato Casserole
Side Dishes
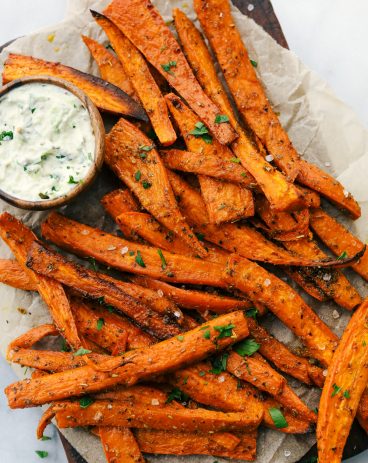
Crispy Garlic Sweet Potato Fries Recipe

Smashed Sweet Potatoes (2 Ways! Sweet AND Savory)
Ingredients
- 3 large sweet potatoes
Savory:
- 3 Tablespoons butter melted
- 1 clove garlic minced
- 1 teaspoon Italian seasoning
- salt and pepper
Sweet:
- 3 Tablespoons butter
- 1 Tablespoon Honey
- 1/2 teaspoon cinnamon
- 1/2 cup marshmallows
Instructions
-
Preheat oven to 425 degrees. Line a sheet pan with parchment paper and set it aside.
-
Slice the sweet potatoes ⅗ inch thick and lay them in an even layer on the baking sheet.
-
Bake for 25-30 minutes or until fork tender. Remove from the oven.
-
Smash the sweet potatoes with a fork.
If you are making them savory:
-
Combine the butter, garlic, Italian seasoning, salt and pepper in a small bowl. Pour evenly onto the sweet potatoes.
If you are making them sweet:
-
In a small bowl combine the butter, honey, and cinnamon. Pour evenly over the sweet potatoes and top with marshmallows.
-
Broil for 5 minutes or until crisp on top.
Nutrition
from The Recipe Critic https://ift.tt/3lGqHto
https://ift.tt/3Apks3q