शुक्रवार, 3 जुलाई 2020

Awesome 7 Layer Dip

Awesome 7 Layer Dip is an addicting creamy dip that includes all of your favorites, like guacamole, refried beans, and sour cream!  You will be amazed how simple it is to put together such an incredibly delicious dip!

If you love creating different dips to entertain your family and friends, you are not alone!  For a recipe with flavors and layers similar to this 7 layer dip, but with a slight twist in presentation, try Individual 7 layer dip.
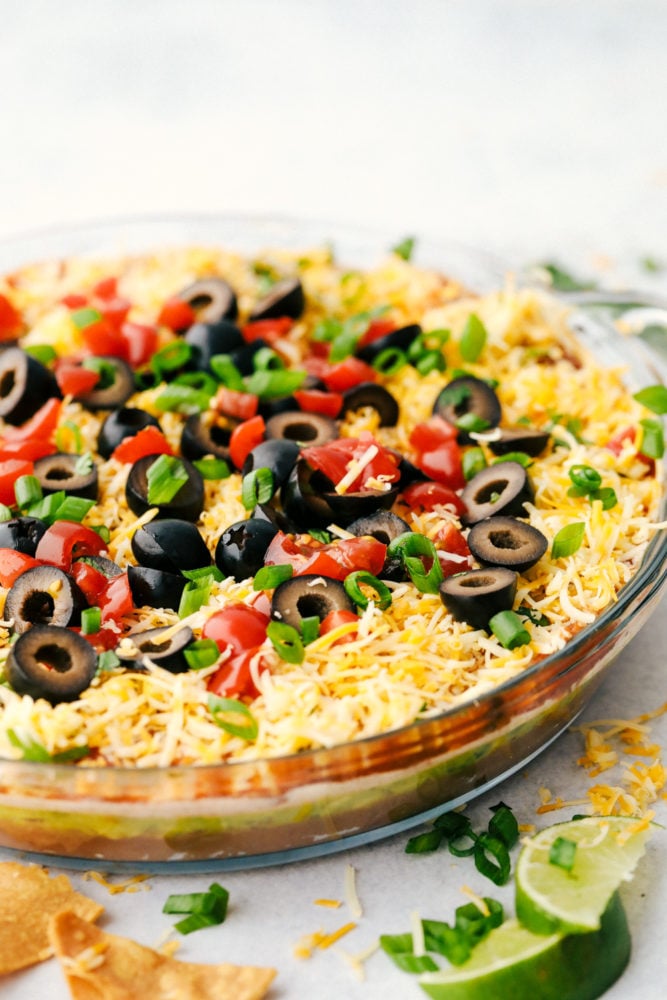
7 layer dip in a clear dish.

Awesome 7 Layer Dip

Layering these tasty ingredients one on top of the other makes dipping into all the delicious flavors at once possible. Not to mention the beautiful colors that are displayed when you make it in a clear dish.  Every bite is bursting with the distinct flavors of each ingredient.  The creamy guacamole, earthy beans, and taco seasonings are amazing together. Everyone loved this dip and it did not last long at all!

Awesome 7 layer dip is so filling and satisfying it makes a great for a snack or an appetizer. It is really perfect for any occasion.  As written it is a pretty mild dip, but it is easy to customize the heat level to your preference by adjusting the salsa and taco seasoning.  No doubt it will be a huge hit and maybe even a new family favorite!  It’s not called amazing for nothing!

What’s in the Layers?

This short list of delicious ingredients come together so well.  Some can even be made from scratch!  Whether you choose to use store bought or homemade ingredients, this dip will turn out fantastic either way!

  • Refried beans: Sweet, earthy flavor to start off the first layer of the dip.
  • Homemade guacamole: Creamy avocado dip is full of flavor.
  • Sour cream: Mix with the taco seasoning for a creamy layer of amazing flavor.
  • Taco seasoning: My homemade taco seasoning is the best!
  • Salsa: Chunky salsa is great or pico de gallo
  • Colby jack cheese: Shredded fresh and sprinkled on top.
  • Olives: Drain canned olives and slice.
  • Cherry Tomatoes: Dice and sprinkle on top.
  • Green Onions: Finely dice them or leave thicker for more crunch in the topping.

Let’s Make Dip!

This will definitely be my new go to dip recipe! Thank goodness it is such a simple recipe that I can throw it together easily and it looks and tastes so incredibly delicious!

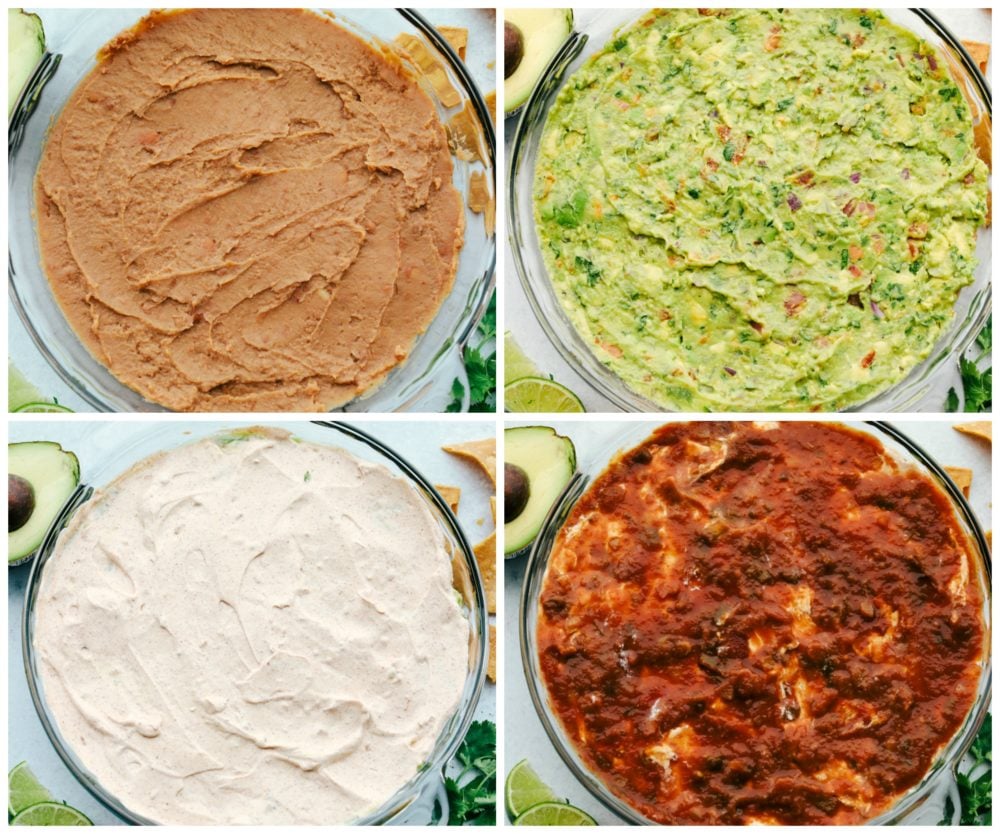
  1. Layer ingredients: In a 8×8 inch dish layer the refried beans, and guacamole. In a small bowl mix the sour cream with the taco seasoning and layer on top of the guacamole.  Then layer salsa on top.
  2. Add toppings: Top with shredded cheese, olives, tomatoes, and green onions.
  3. Serve!

Steps to make 7 layer dip.

Variations of 7 Layer Dip:

This 7 layer dip is an impressive dip that is impossible to mess up!  There are many different versions of it floating around, but this is definitely the best one I have seen!  Here are a few more ideas to make your finished dip even more unique to your family.

  • Add toppings: Jalapenos, green chilies and cilantro are great toppings to give your dip even more personality.
  • Meaty Version: Add taco meat for an even heartier version that could easily take this dip from an appetizer to a full meal.
  • Chill: Cover and place the completed dip in the refrigerator to chill for at least 30 minutes before serving. This will bring the flavors together!
  • Thick salsa: Use a thick salsa or pico de gallo so it’s not too runny.
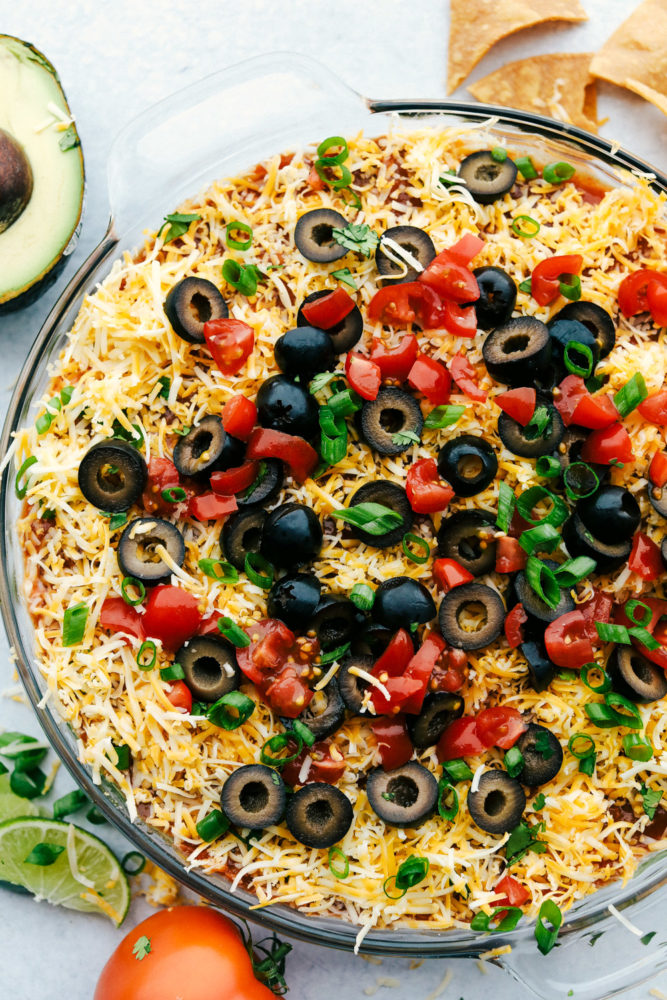
View of finished 7 layer dip.

Can You Make 7 Layer Dip Ahead?

This dip is best served shortly after making it.  This is mostly because of the freshness of the ingredients, like the guacamole and pico de gallo.  However, the leftovers will still be good for a 3-4 days in the refrigerator.  Especially since the guacamole is between the bean and sour cream layers.  Placing it in a center layer will keep it from turning brown when the air hits it.  It may start looking less appealing after a couple of days, but it will still be safe to eat and taste fantastic!
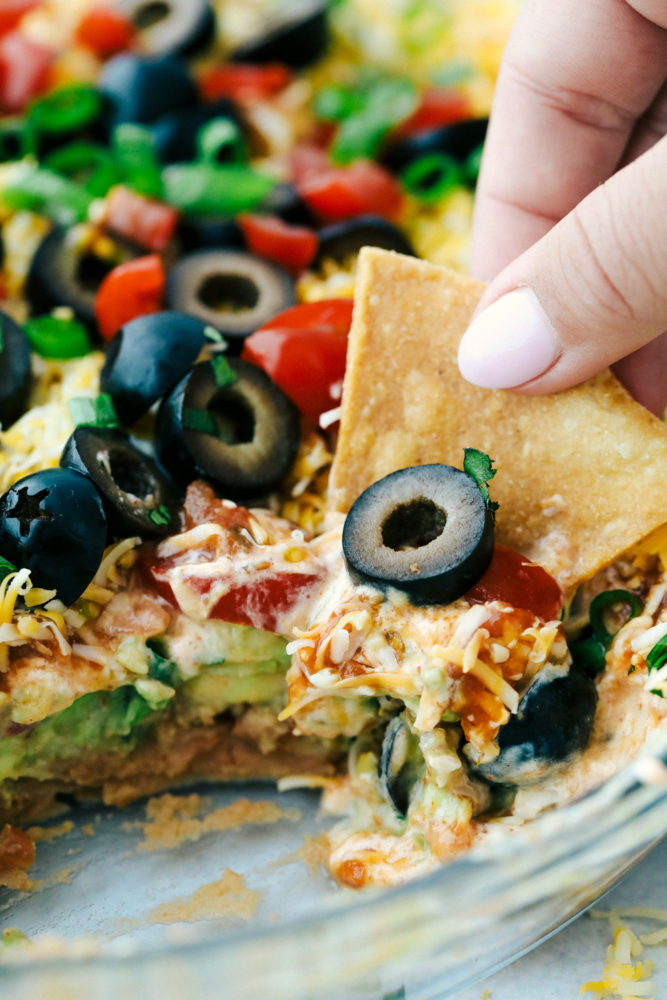
Dipping a chip into 7 layer dip.

More Crave-Worthy Dip Recipes:

Print

Awesome 7 Layer Dip

Awesome 7 Layer Dip is an addicting creamy dip that includes all of your favorites, like guacamole, refried beans, and sour cream!  You will be amazed how simple it is to put together such an incredibly delicious dip!
Course Appetizer, Side Dish, Snack
Cuisine American, Mexican
Keyword 7 layer dip, awesome 7 layer dip
Prep Time 10 minutes
Total Time 10 minutes
Servings 12 People
Calories 97kcal
Author Alyssa Rivers

Ingredients

Instructions

  • In a 8x8 inch dish layer the refried beans, and guacamole. In a small bowl mix the sour cream with the taco seasoning and layer on top of the guacamole. Then layer salsa on top.
  • Top with shredded cheese, olives, tomatoes, and green onions.

Nutrition

Calories: 97kcal | Carbohydrates: 3g | Protein: 3g | Fat: 8g | Saturated Fat: 5g | Cholesterol: 20mg | Sodium: 357mg | Potassium: 115mg | Fiber: 1g | Sugar: 2g | Vitamin A: 429IU | Vitamin C: 2mg | Calcium: 107mg | Iron: 1mg


from The Recipe Critic https://ift.tt/2D9Gsqp
https://ift.tt/2VIj9dy
गुरुवार, 2 जुलाई 2020

Apple Butter

Apple Butter is a sweet velvety concentrated apple spread that you’ll want to put on everything. It requires just a few ingredients and a little bit of patience to make this yummy jam like condiment.

Apple season will be here before we know it and the best way to enjoy this delicious fall fruit is in Apple Butter! You won’t be able to go a day without spreading this heavenly apple concentrate on something. For more delicious apple recipes, try Apple PieApple Danish, and Overnight Cinnamon Apple French Toast Casserole.

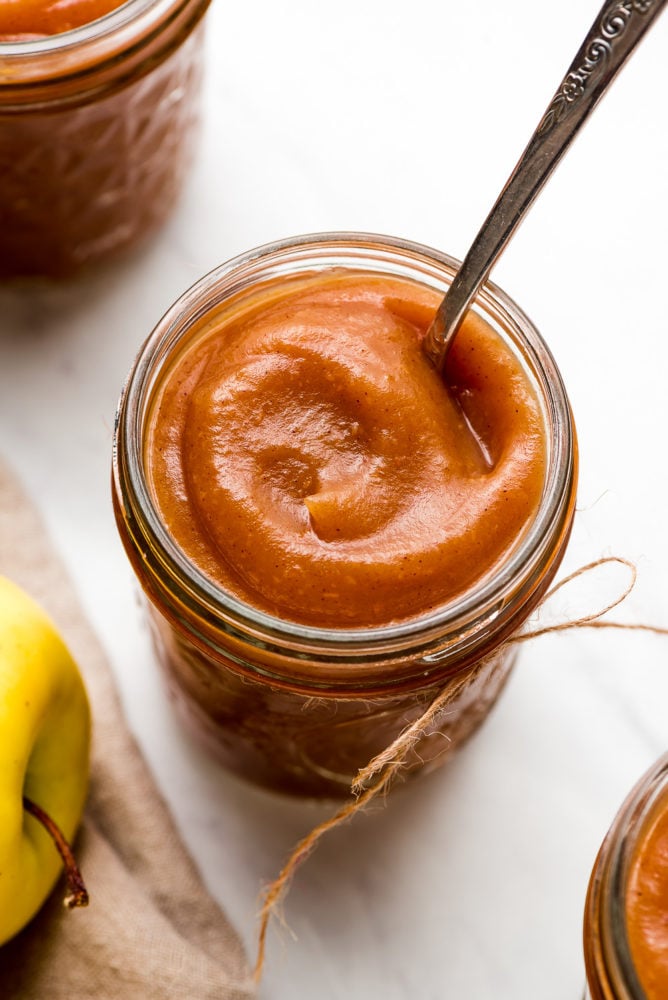
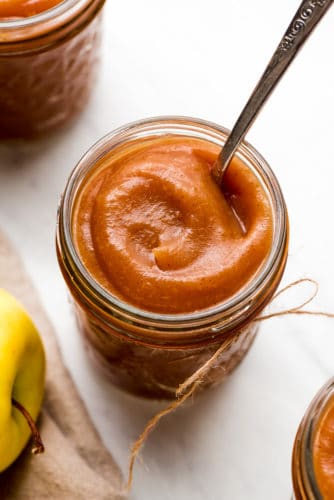
A jar of silky smooth Apple Butter with a spoon in it.

Delicious Apple Butter

If you love apples, wait until you try apple butter! This smooth concentrated apple sauce is amazingly delicious, requires few ingredients, and is easy to make. It tastes like apple pie filling but in sauce form. So yummy!

What Is Apple Butter?

Apple Butter contains no butter but is very similar to apple sauce in that apples are cooked down with sugar and spices. The additional steps of pureeing the apples until smooth and then cooking again to caramelize it is what makes the sauce thicker and stronger in flavor.

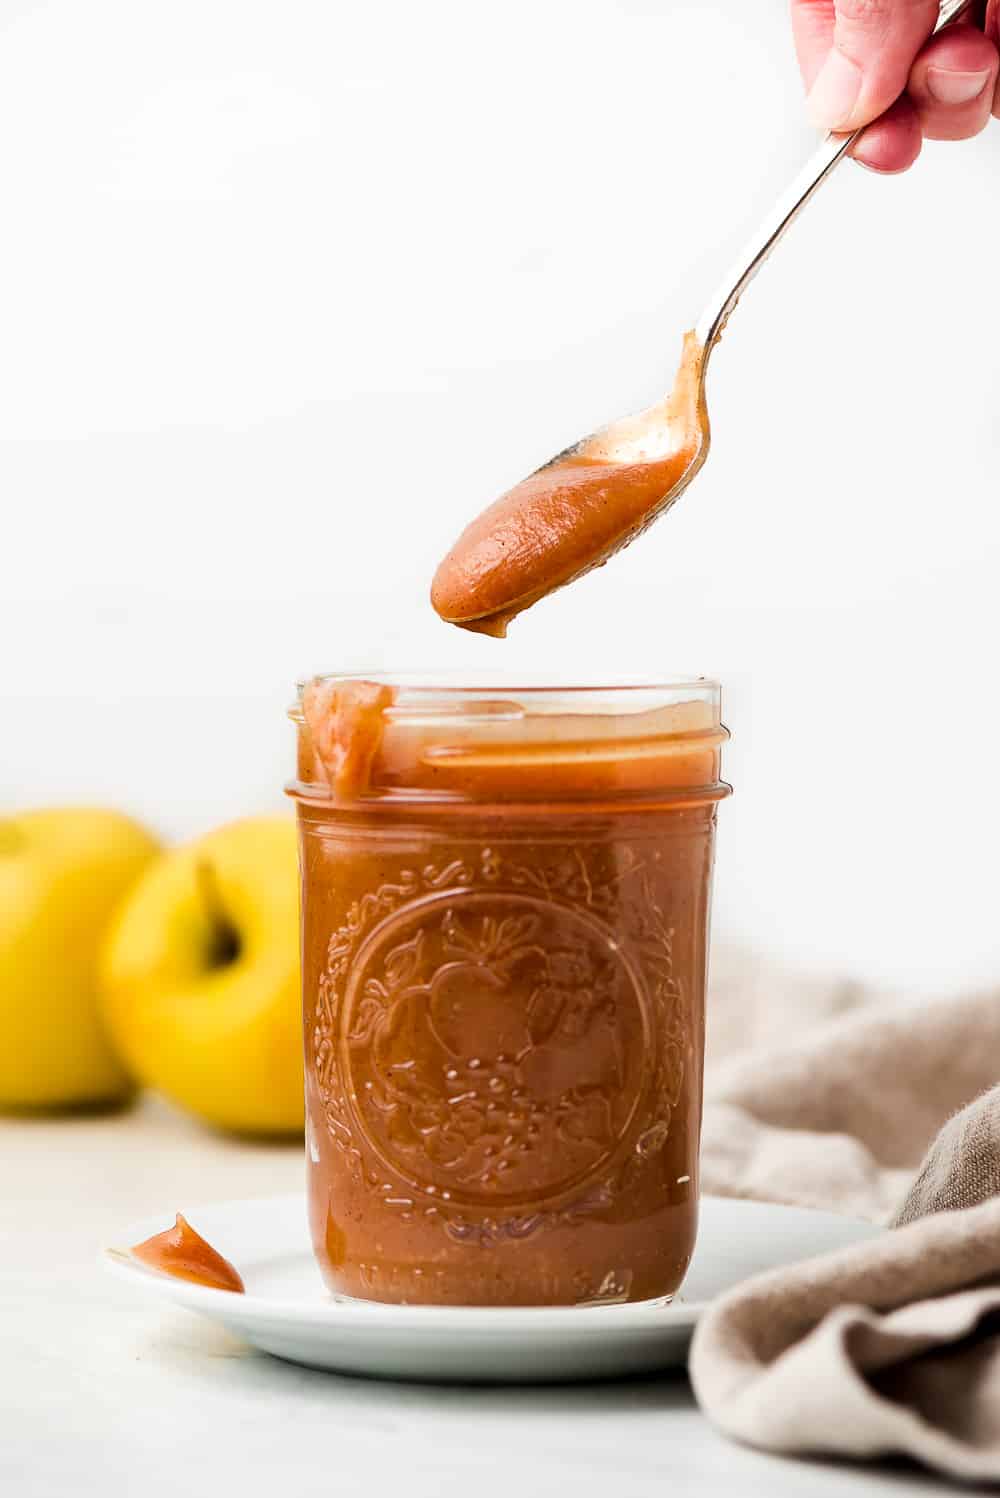
Lifting a spoonful of Apple Butter out of a jar on a plate with apples in the background.

Ingredients For The Best Apple Butter:

  • Apples: You do not need to peel the apples. The skin will get soft as the apples simmer. If using the skin, I do recommend using fresh picked apples since they won’t have any wax on them.
  • Cider: You can find this next to the apple juice in the juice aisle. Plain apple juice or water can be substituted.
  • Brown Sugar: This adds sweetness and a depth of flavor to the butter.
  • Cinnamon: This warm spice gives the butter so much more flavor.
  • Nutmeg: A little goes a long way. You can also add a pinch of cloves if you like them.
  • Salt: This little amount of salt doesn’t make the butter salty, it helps accentuate the other flavors.
  • Vanilla: Use pure vanilla extract. For a slight tangy flavor you can use lemon juice instead.

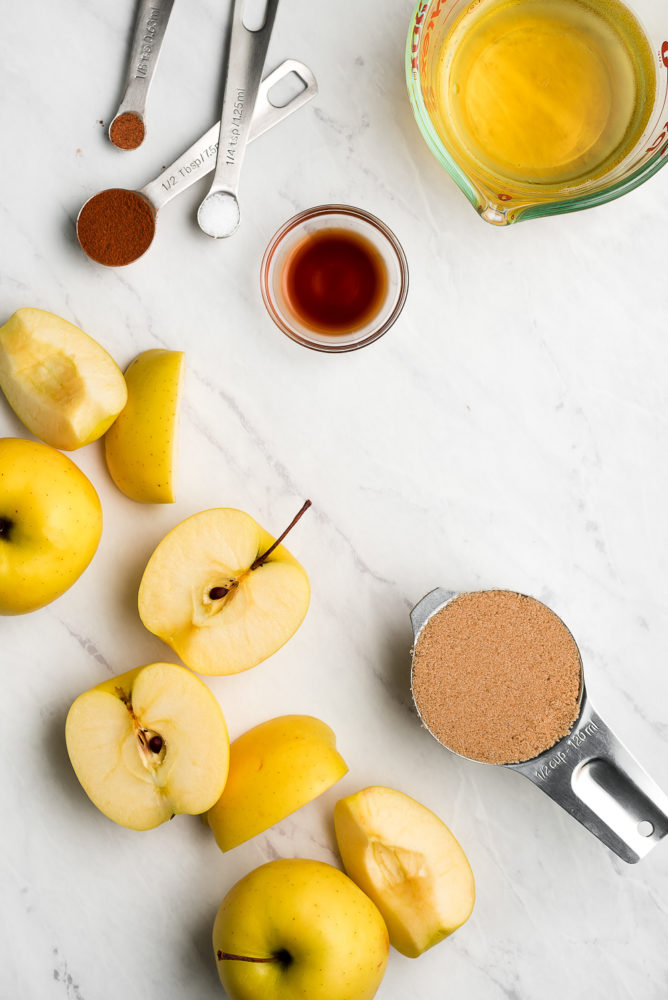
Apples cut in half and quarters, teaspoons of spices, a small bowl of vanilla extract, a liquid measuring cup of apple cider, and a measuring cup of brown sugar.

How To Make Homemade Apple Butter:

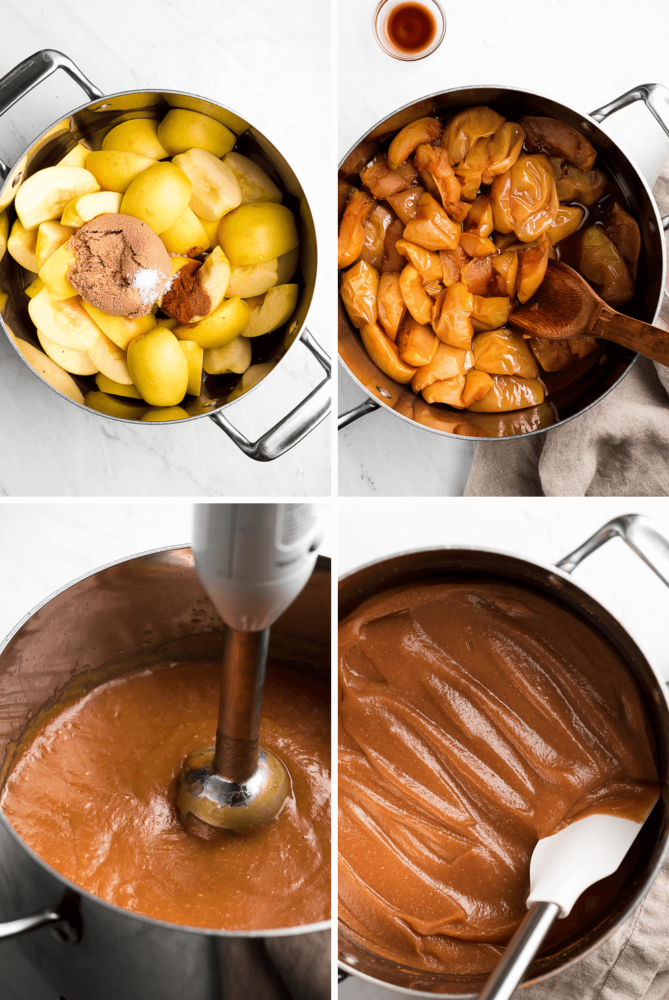
  1. Place apple in a large pot with cider, brown sugar, cinnamon, salt, and nutmeg.
  2. Cook covered over medium-low heat for 1 hour, stirring every 10 minutes, until very soft.
  3. Puree apples with a hand blender or a high powered blender until smooth. Stir in vanilla.
  4. Cook UNcovered over low heat for about 1 hour, stirring occasionally (about every 5 minutes) until dark in color.
  5. Place in jar and store in the fridge for up to 3 weeks.

Process shots of cooking apples and pureeing them.

What Are The Best Apples?

Apples that break down easily are best. I like to use Golden Delicious but some other good options are McIntosh and Fuji.

How to Serve Apple Butter:

You can eat apple butter on anything you would put jam on- toast, rolls, English muffins, bagels… It could also be used as a sauce on meats.

This is a great homemade gift to give to others during the holidays.

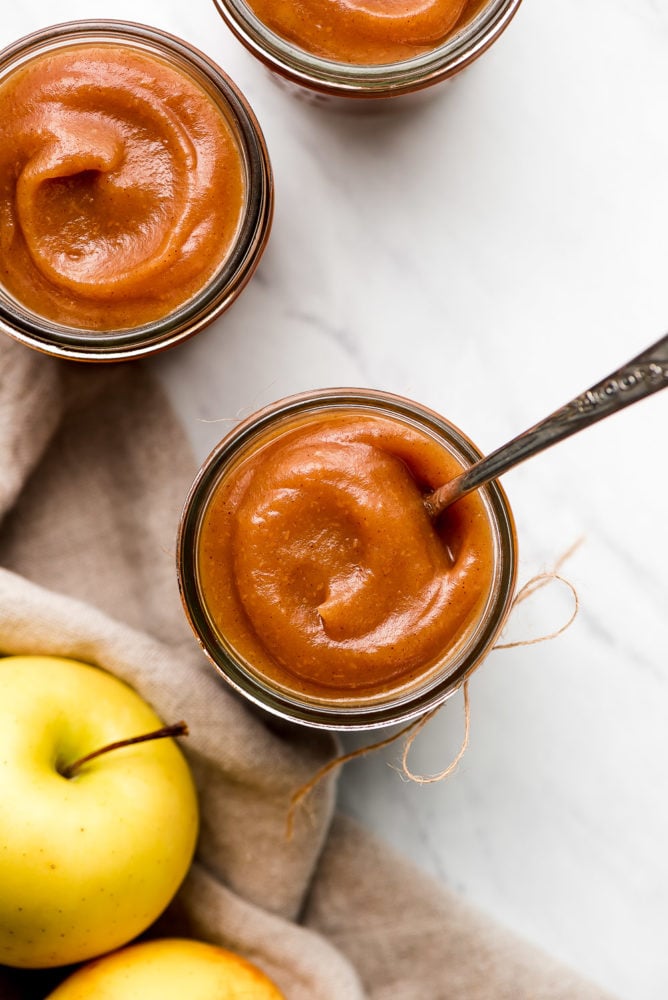
Top view of jars of thick apple butter.

More Apple Recipes You’ll Love:

Print

Apple Butter

Apple Butter is a sweet velvety concentrated apple spread that you’ll want to put on everything. It requires just a few ingredients and a little bit of patience to make this yummy jam like condiment.
Course Appetizer, Breakfast, Side Dish, Snack
Cuisine American
Keyword Apple Butter, apple butter recipe
Prep Time 15 minutes
Cook Time 2 hours
Total Time 2 hours 15 minutes
Servings 28 Tablespoons
Calories 44kcal
Author Melanie Dueck

Ingredients

  • 3 pounds golden delicious apples quartered and cored
  • 3/4 cup apple cider or apple juice
  • 1/2 cup brown sugar packed
  • 1/2 tablespoon ground cinnamon
  • 1/4 teaspoon kosher salt
  • 1/8 teaspoon nutmeg
  • 1 teaspoon vanilla extract

Instructions

  • Place apple in a large pot with cider, brown sugar, cinnamon, salt, and nutmeg.
  • Cook covered over medium-low heat for 1 hour, stirring every 10 minutes, until very soft.
  • Puree apples with a hand blender or a high powered blender until smooth. Stir in vanilla.
  • Cook UNcovered over low heat for about 1 hour, stirring occasionally (about every 5 minutes) until dark in color.
  • Place in jar and store in fridge up to 3 weeks. (Makes about 3 1/2 8-ounce jars.)

Nutrition

Calories: 44kcal | Carbohydrates: 11g | Protein: 1g | Fat: 1g | Saturated Fat: 1g | Sodium: 23mg | Potassium: 64mg | Fiber: 1g | Sugar: 9g | Vitamin A: 26IU | Vitamin C: 2mg | Calcium: 8mg | Iron: 1mg


from The Recipe Critic https://ift.tt/2Zqyssm
https://ift.tt/2CWmuz2

Baked Beans from Scratch

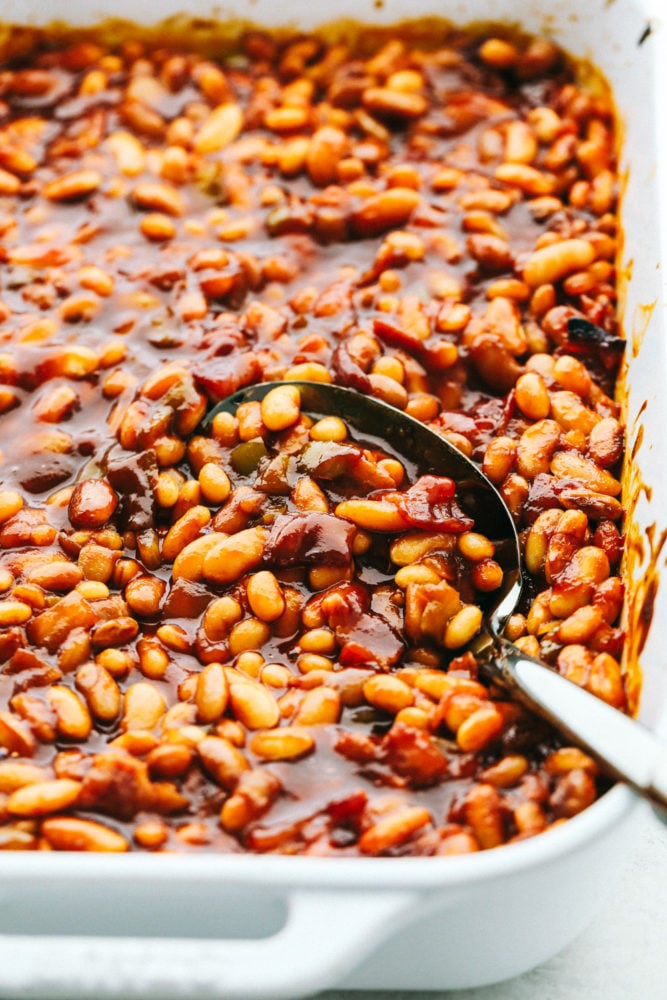
My baked beans recipe is a fan favorite on the blog, but readers have been asking for a baked beans recipe from scratch.  I am showing you how to make the best baked beans from start to finish.  Making homemade baked beans is a lot easier than you think!

If you are looking for more family favorite side dishes that are perfect for a barbecue try Classic Potato Salad or KFC Copycat Cole Slaw.  They are great with the smokey flavors from the grill!

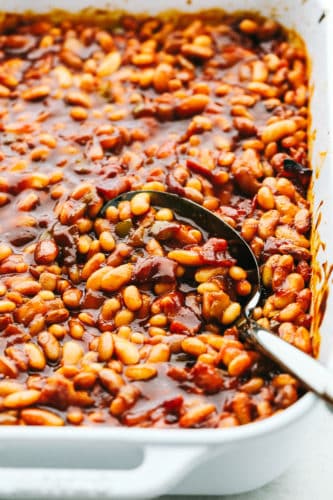
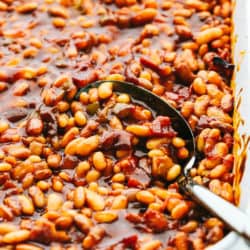
Scooping up baked beans with a serving spoon.

Boston Baked Beans:

Summertime is in full swing and our grill is full of smoky tender meat like my grilled barbecue chicken.  Meat that good begs for an incredibly delicious side, like these family favorite baked beans.  The best part is, making them from scratch is so simple!  From beginning to end you will find that you are using familiar ingredients that you love.  This will be a recipe you end up memorizing because it is such a huge hit and you will make it again and again.

Homemade Boston baked beans are packed with sweet and savory flavors the whole family will go crazy over.  The sweetness from the brown sugar and molasses keep you craving more. The savory bacon adds incredible flavor and crunch to the creamy sauce and tender baked beans.  If you are looking for an outstanding made from scratch favorite, you must try this recipe!

Ingredients in Homemade Baked Beans:

The sweet and tangy flavors in these baked beans are so perfectly balanced and insanely delicious! The best part is how easy it is to create using all simple ingredients you know well!

  • Dried beans: Navy beans or northern beans work great!
  • Bacon: Crispy, chewy, and salty bites of heaven in these beans.
  • Green bell pepper: Slightly bitter taste to balance the sweet and tangy flavors.
  • White onion: Dice finely so it blends well.
  • Ketchup: Adds both sweet and tangy flavors.
  • Brown sugar: Adds sweetness.
  • Molasses: Even more rich sweetness!
  • Worcestershire sauce: Tangy flavor in the creamy sauce.
  • Water: You can either use fresh water or some of your soaking water.

How to Make the Best Baked Beans:

Making baked beans from scratch is so easy you will wonder why you have never done it before!  It is so simple and will become a favorite to make and take or just enjoy at home!

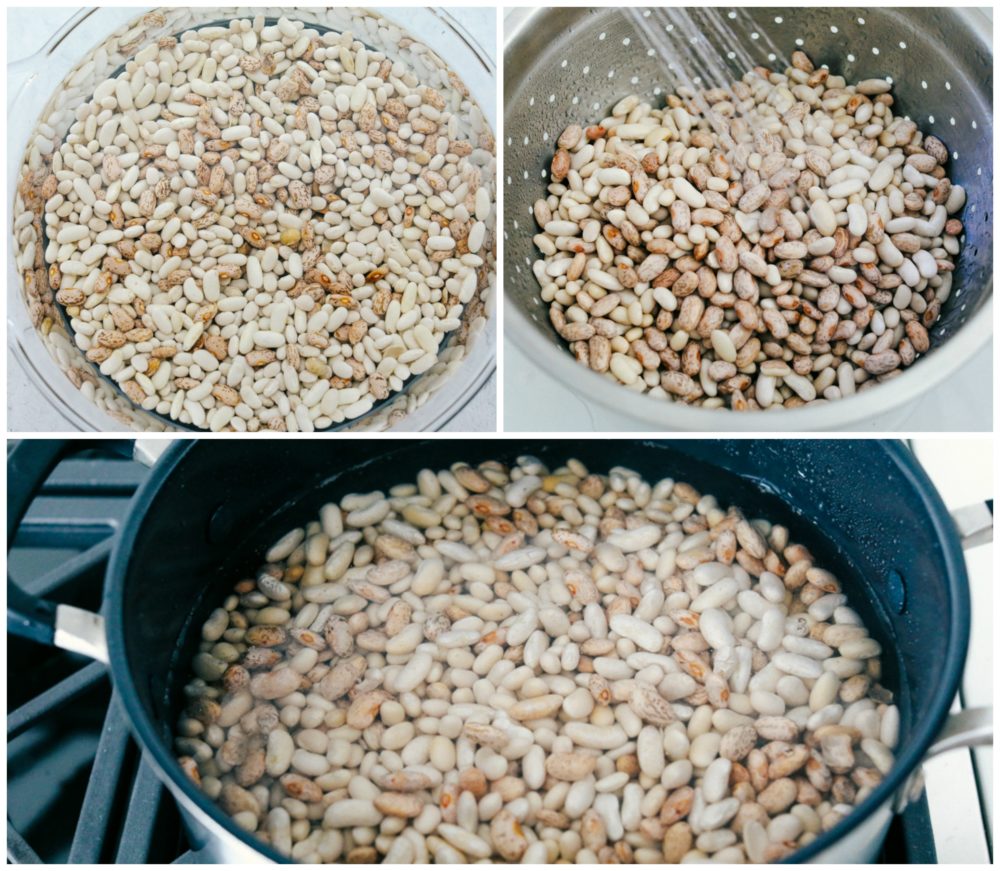
  1. Soak Beans: Start by adding your beans to a container and filling with water until the beans are covered with an inch of water. Soak the beans for 12 hours or overnight.
  2. Cook and drain beans: Rinse the beans and place into a large pot. Fill with water until completely immersed and bring to a boil.  Reduce the heat and simmer for one hour or until beans are tender.  Drain the beans and rinse. Return the beans the pot.
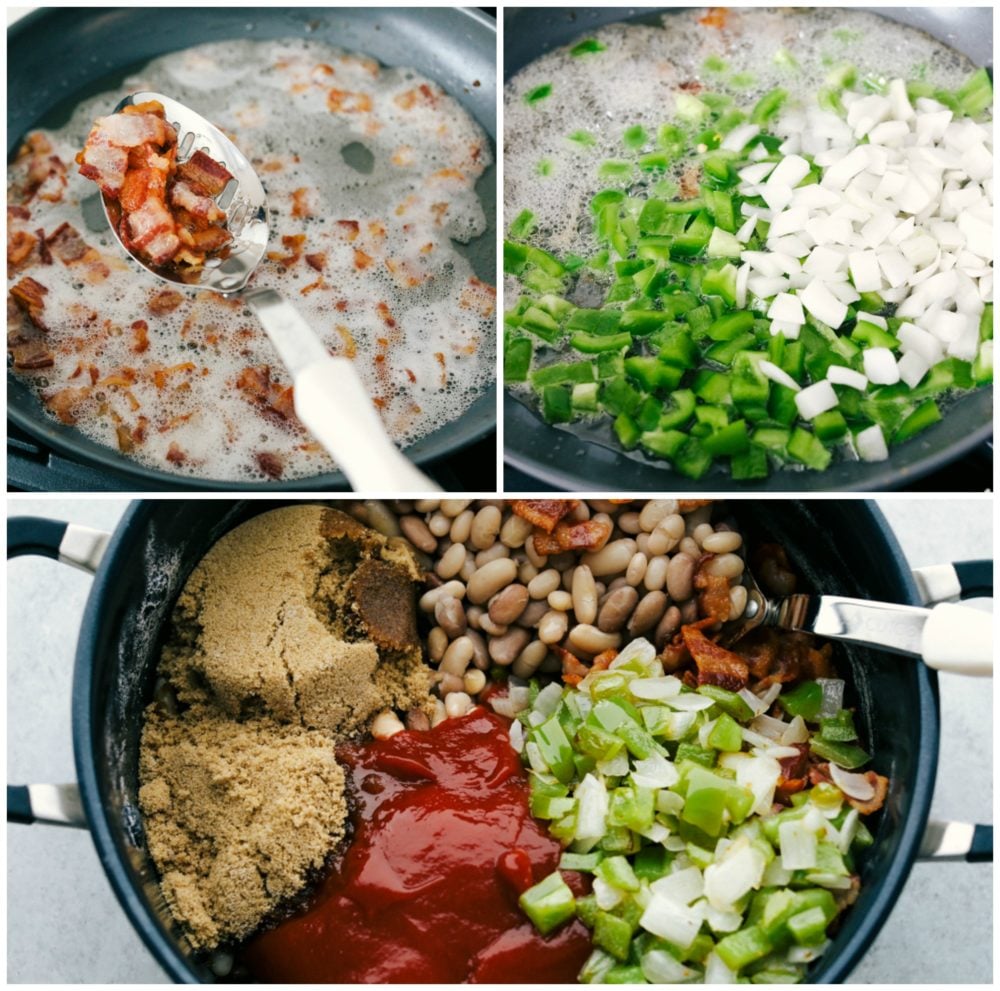
  3. Fry Bacon: In a medium saucepan add the bacon and cook until crispy. Remove the bacon with a slotted spoon.  Add in the onion and green pepper and sauté until tender.
  4. Combine ingredients: Add the bacon and the onion and green pepper to the large pot. Then add in the ketchup, brown sugar, molasses, Worcestershire sauce, and water.  Mix and add more water if needed.
  5. Bake: Preheat oven to 300 degrees. Add the beans to a 9×13 inch dish and bake covered for 2 hours.  Remove the foil the last 30 minutes.

Steps to soak beans for baked beans.

Easy Tips for Baked Beans:

This comfort food is a simple way to liven up any summer meal.  Since it is a made from scratch recipe there are a few tips to keep in mind as you are cooking.

  • Serve: These baked beans are great when paired with hamburgers and hot dogs, so even your kids will love it!
  • Do not add salt: Resist the urge to salt the water as you soak the beans.  Adding salt will keep the beans from getting tender.  If you feel the need to add salt, wait and add it along with the ketchup and other sauces at the end. However, keep in mind your bacon will be salty and taste before adding to much salt.
  • Quick soak: If you are short on time and do not want to wait 12 hours to soak your beans, you can do a quick soak.  You will pour beans into a pot of cold water.  Then bring the water to a boil.  Now, turn off the stove and let the beans continue to soak for another hour and a half.
  • Use the soaking water: Set aside some of your soaking water to use for your 1/2 cup water later in the recipe.

Steps to make baked beans.

Storing Made from Scratch Baked Beans:

Baked beans are a great dish to enjoy at home or to pack and bring with you on a picnic.  They also make great make ahead camping food if you are out enjoying nature and are looking for a hearty meal.

  • Make ahead: These beans will last 3-4 days in the refrigerator.  So they are great to make ahead and pack in a heavy duty cooler or RV refrigerator.  Then, just reheat over a campfire.
  • Freeze: Pack tightly and store in the freezer for up to 2 months. Word of warning the beans will be even softer after freezing and thawing.
  • Reheating: Heat in a microwave stirring every 30 seconds, on the stove top over low heat with a splash of water, or in the oven covered with aluminum foil at 350 degrees for 20 minutes or until heated throughout.

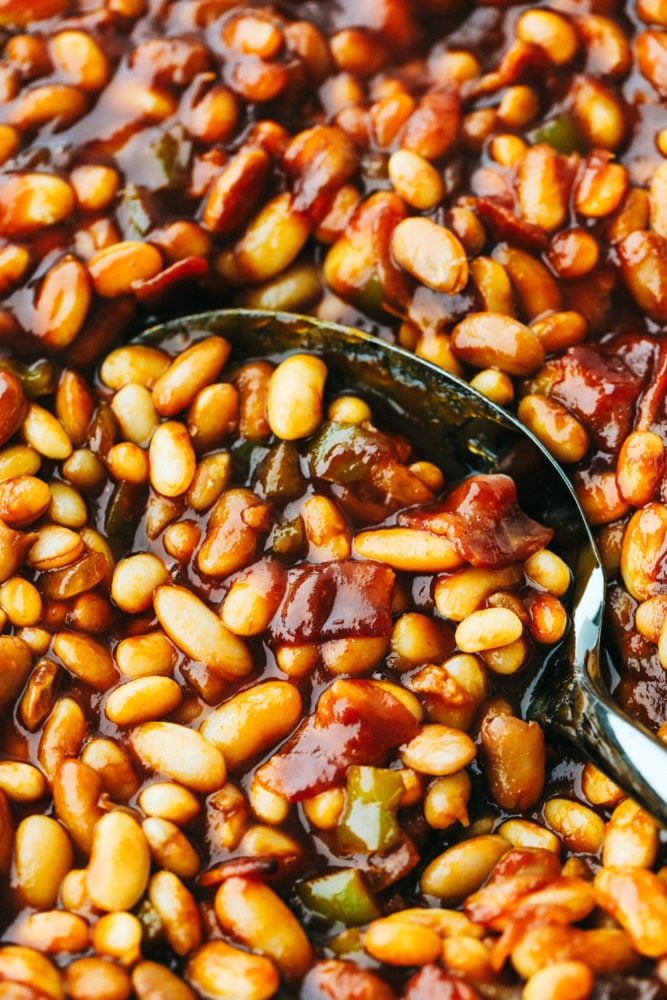
Close up on finished baked beans being scooped with a serving spoon.

More Side Dish Recipes:

Print

Baked Beans

I am showing you how to make the best baked beans from start to finish.  Making homemade baked beans is a lot easier than you think!
Course Side Dish
Cuisine American
Keyword baked beans
Prep Time 15 minutes
Cook Time 2 hours 15 minutes
Total Time 2 hours 30 minutes
Servings 8 People
Calories 563kcal
Author Alyssa Rivers

Ingredients

  • 3 cups dried beans I used Navy, Pinto, and Great Northern
  • 1/2 pound bacon chopped
  • 1 green bell pepper chopped
  • 1 white onion chopped
  • 2 cups ketchup can use tomato sauce
  • 1 cup brown sugar
  • 1/4 cup molasses
  • 1 Tablespoon Worcestershire sauce
  • 1/2 cup water

Instructions

  • Start by adding your beans to a container and filling with water until the beans are covered with an inch of water. Soak the beans for 12 hours or overnight.
  • Rinse the beans and place into a large pot. Fill with water until completely immersed and bring to a boil. Reduce the heat and simmer for one hour or until beans are tender. Drain the beans and rinse. Return the beans the pot.
  • In a medium saucepan add the bacon and cook until crispy. Remove the bacon with a slotted spoon. Add in the onion and green pepper and sauté until tender.
  • Add the bacon and the onion and green pepper to the large pot. Add in the ketchup, brown sugar, molasses, Worcestershire sauce, and water. Mix and add more water if needed.
  • Preheat oven to 300 degrees. Add the beans to a 9x13 inch dish and bake covered for 2 hours. Remove the foil the last 30 minutes.

Nutrition

Calories: 563kcal | Carbohydrates: 96g | Protein: 20g | Fat: 12g | Saturated Fat: 4g | Cholesterol: 19mg | Sodium: 774mg | Potassium: 1437mg | Fiber: 11g | Sugar: 50g | Vitamin A: 373IU | Vitamin C: 19mg | Calcium: 120mg | Iron: 6mg


from The Recipe Critic https://ift.tt/2BUAN6M
https://ift.tt/2BV48Or

बुधवार, 1 जुलाई 2020

Crispy Parmesan Fried Zucchini

Crispy Parmesan Fried Zucchini are savory parmesan and panko coated zucchini bites.  They will quickly become a favorite for an easy and crowd-pleasing snack, appetizer or side dish!

If you love zucchini, but you are looking for an alternative to frying, try Baked Zucchini Fries or Roasted Parmesan Garlic Zucchini Spears. These recipes deliver flavorful zucchini with a light and tasty crisp!

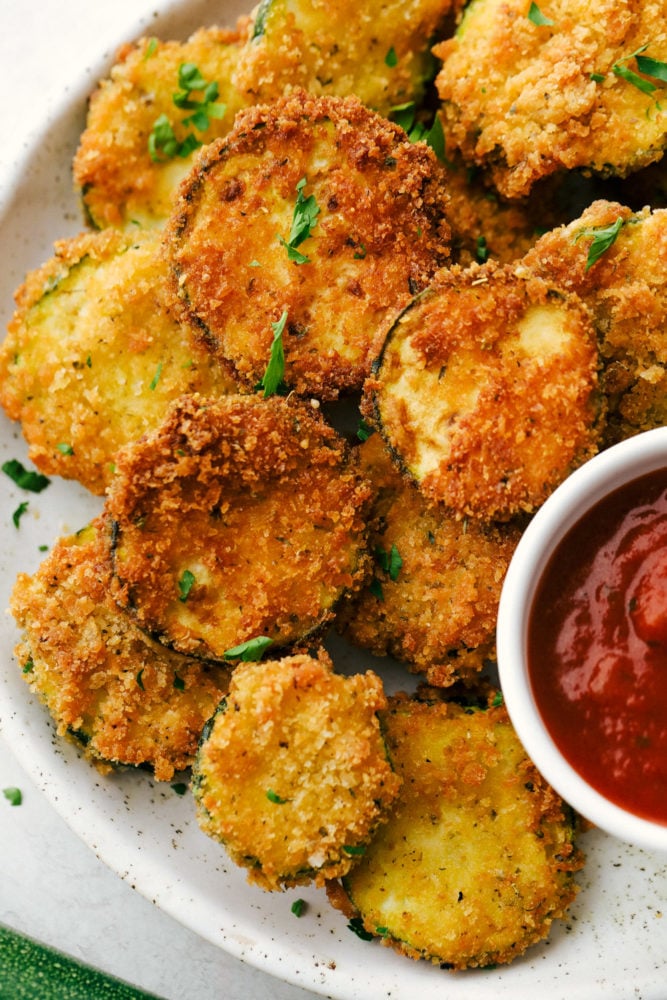
Crispy Parmesan Fried Zucchini on a white plate with marinara sauce.

Crispy Parmesan Fried Zucchini

Zucchini is one of my favorite summer sides because there are so many amazing ways to cook it!  This crispy parmesan version has to be one of my best versions so far.  The crunch of a simple panko breading on the outside and the tender zucchini on the inside tastes so good.  You won’t be able to eat just one.They are so incredible you will keep going back for more!

Just because something is fried does not mean it is has to taste heavy and oily.  The panko bread crumbs in this recipe give the outside of the zucchini a light and airy crunch and the italian seasonings keeps the flavor fresh.  The crispy texture of each bite and the nutty parmesan flavor is addicting!  Serve them as an appetizer, snack, or side dish and this will become a family favorite in no time!

Zucchini Ingredients:

These ingredients are all you need to create the perfect crisp zucchini.  The texture and flavor they give this healthy veggie is amazing. This will be the best zucchini you have had!

  • Medium Zucchini: Look for a zucchini that is about 6-8 inches long.  It should feel heavy and have smooth dark green skin.
  • Salt and Pepper: To taste.
  • Flour: All purpose flour works well for frying.
  • Eggs: Lightly beat egg in a small bowl.  Dredging the zucchini slices in this will create a thicker more stable crust.
  • Panko: Since panko is so light and airy it creates the perfect crispy skin.
  • Parmesan Cheese: The nutty flavor of the cheese is the perfect balance to the
  • Italian Seasoning: This seasoning blend is so versitile and goes great with the panko and parmesan crust.
  • Oil: Olive oil or canola oil need to be heated to 350 degrees before adding zucchini.

How to Fry Crispy Parmesan Fried Zucchini:

Slice and season the zucchini then batter and fry.  The steps to the perfect fried parmesan zucchini are quick and easy to follow.  It is a simple recipe that will be a huge hit!

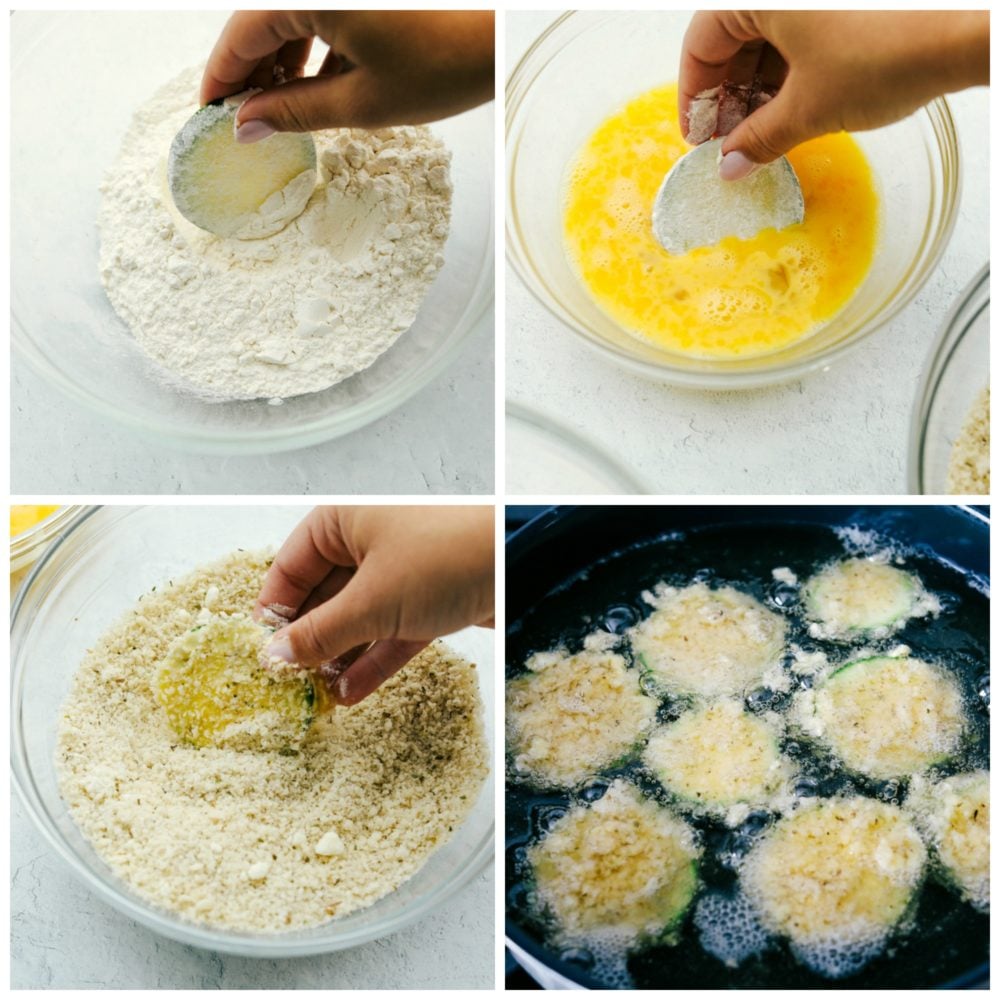
  1. Prepare zucchini: Evenly slice zucchini and sprinkle with salt and pepper. Then allow to sit for a few minutes and pat dry any excess moisture with a paper towel.
  2. Prepare batter stations: Put the flour in a small bowl.  In a separate bowl, whisk the eggs. In a third bowl, combine the Panko, parmesan cheese, and Italian seasoning.
  3. Dip the zucchini: First dip in the flour, then the egg, then lastly in the Panko mixture.
  4. Fry: Add the oil to a medium saucepan 1/2 inch up the sides. Then preheat to medium high heat (350 degrees).  When the oil is ready, add the zucchini and fry for 4-5 minutes or until the zucchini is brown and crispy.
  5. Serve: Ranch, marinara or any favorite dipping sauce like fry sauce would go great with this parmesan zucchini.

Steps to make crispy parmesan fried zucchini.

Tips for Frying the Most Crispy Parmesan Zucchini:

The best part of fried parmesan zucchini is the perfect crisp in each bite.  To achieve the soft and flavorful zucchini inside without an over-done crust, it is important to pay attention to a few easy details.

  • Even slices: Slice all pieces to the same thickness.  Otherwise, some will be overcooked and some under.  A slicer will give you the most consistent slices.
  • Pat dry: Remove as much liquid as possible from the sliced zucchini before frying.  To do this, season with salt and let it sit for a few minutes.  Then pat dry with a paper towel.
  • Thin batter: Don’t cake on batter to each slice or it will just fall off as it fries. Go for a nice even thin coating of the delicious batter.
  • Keep your oil hot! The oil needs to stay in the 350-375 degrees range.  This will cook the zucchini quickly and not soak in too much oil.
  • Even spacing: Space out your zucchini slices in the pan and do not let them overlap.

Storing Fried Zucchini:

This amazing parmesan zucchini does not have to be enjoyed only in the summer, because this recipe does freeze well!  That means you will have some delicious zucchini ready to go well into the fall and winter to keep this family favorite recipe coming for many months of the year!

  • Refrigerator Storage: You should store your zucchini in the refrigerator at all times and it will keep well for up to 5 days.
  • To Freeze already cooked zucchini: Lay zucchini out on a parchment paper lined baking sheet and place in the freezer.  This will allow the slices to freeze individually and save you a headache when reheating.  Once the slices are frozen, you can move them to a ziploc bag and store in the freezer.
  • To Freeze raw whole zucchini: For best tasting zucchini you will want to blanch them before storing.  This will help the veggie keep its flavor and color.  To blanch: Add zucchini slices to boiling salt water for 2-3 minutes then add to ice water for 3 minutes.  Drain very well and dry completely before freezing.
  • Reheating Directions: When you are ready to pull out your frozen whole zucchini you can thaw it by placing it in the refrigerator overnight or by heating in the oven.  If you thaw in the refrigerator, you will want to cook within 3-4 days.  For cooked zucchini, you do not need to thaw and can reheat it right away.  Bake in the oven at 375 or broil them until they are crispy and sizzling all over.

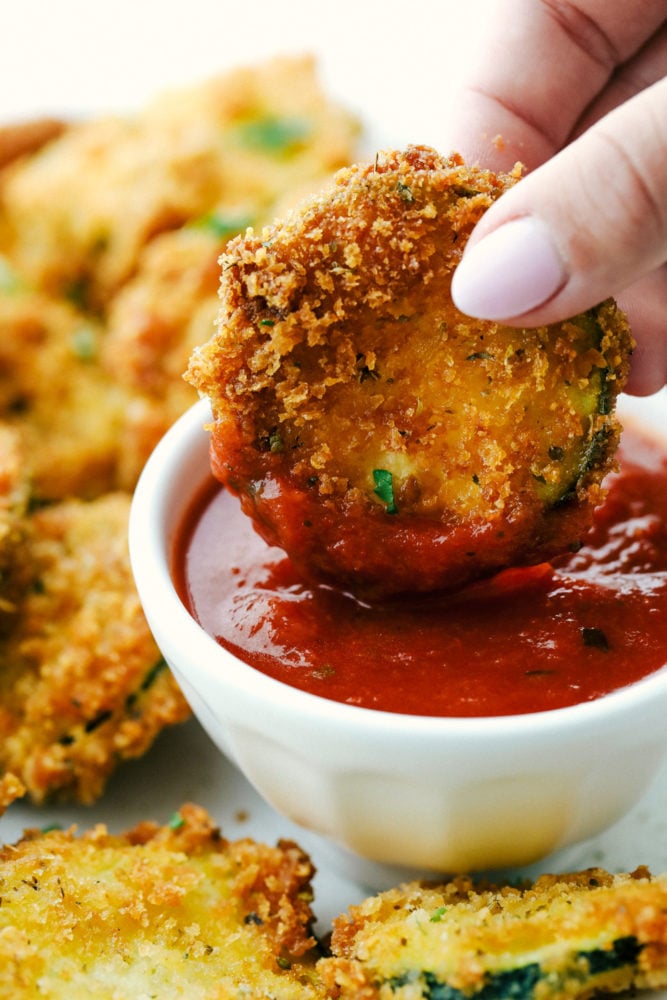
Dipping a zucchini slice in marinara sauce.

More Savory Zucchini Recipes:

Print

Crispy Parmesan Fried Zucchini

Crispy Parmesan Fried Zucchini are savory parmesan and panko coated zucchini bites.  They will quickly become a favorite for an easy and crowd-pleasing snack, appetizer or side dish!
Course Appetizer, Side Dish, Snack
Cuisine American
Keyword crispy fried zucchini, crispy parmesan zucchini, crispy parmsan fried zucchini, crispy zucchini, fried zucchini, parmesan fried zucchini, zucchini recipes
Prep Time 10 minutes
Cook Time 5 minutes
Total Time 15 minutes
Servings 4 People
Calories 240kcal
Author Alyssa Rivers

Ingredients

  • 2 medium sized zucchini sliced
  • salt and pepper
  • 1 cup flour
  • 3 large eggs
  • 1 cup Panko
  • 1/4 cup parmesan cheese
  • 1 Tablespoon Italian seasoning
  • oil for frying

Instructions

  • Salt and pepper the sliced zucchini. Put the flour in a small bowl. Whisk the eggs in a small bowl, and combine the Panko, parmesan cheese, and Italian seasoning in another small bowl.
  • Dip the zucchini in the flour, then the egg, then lastly in the Panko mixture.
  • Add the oil to a medium saucepan 1/2 inch up the sides. Preheat to medium high heat (350 degrees). Add the zucchini and fry for 4-5 minutes or until the zucchini is brown and crispy. Serve with ranch, marinara or favorite dipping sauce.

Nutrition

Calories: 240kcal | Carbohydrates: 39g | Protein: 11g | Fat: 5g | Saturated Fat: 1g | Cholesterol: 123mg | Sodium: 166mg | Potassium: 380mg | Fiber: 3g | Sugar: 4g | Vitamin A: 395IU | Vitamin C: 18mg | Calcium: 86mg | Iron: 4mg


from The Recipe Critic https://ift.tt/2NGuWVr
https://ift.tt/2Ai1PVc