गुरुवार, 17 सितंबर 2020

How to Bake the Perfect Bacon (Step By Step!)

Everyone loves Bacon, and once you try baking it, you’ll love it even more!  It’s just perfectly crisp, amazing flavor, and easy clean up. You will have bacon every morning!

This Perfectly Baked Bacon will go swimmingly with these other “perfect” recipes; Perfect Crepes, Grandma’s Perfect Fluffy Pancakes, or Perfect Chocolate Chip Zucchini Bread.
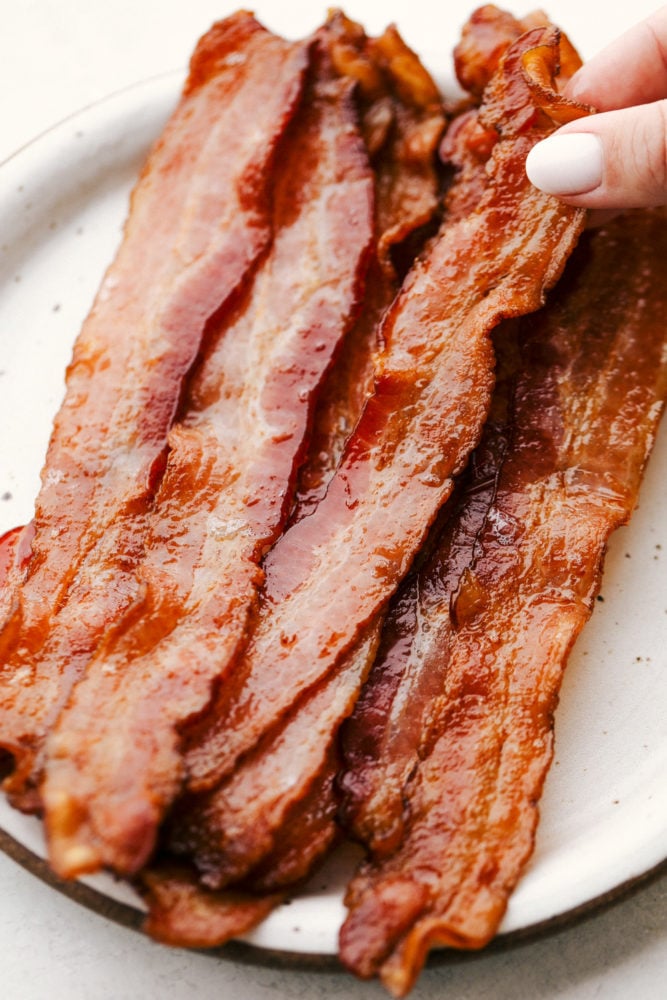
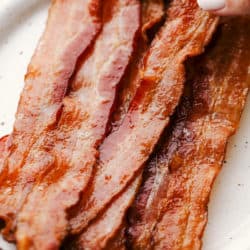
Crispy baked bacon on a plate.

Oven Baked Bacon

Crispy savory perfectly cooked bacon is everyone’s favorite and this will become your favorite way to cook it. It’s so easy, it may take a little more time but you won’t mind after you see the results. The bacon will be straight, it won’t curl, perfect for sandwiches. In the oven it also cooks evenly with no white fatty pieces on one end and burnt on the other.

Another reason you’ll love this perfectly baked bacon is that it’s completely hands off. You don’t have to babysit it, you don’t even have to flip it! How easy is that? And because you bake it in the oven, you can cook large batches at once. And it’s all done at the same time.

What You Need to Bake Bacon:

  • Bacon: 16 oz package will fill your sheet pan
  • Rimmed Baking Sheet: The rimmed baking sheet will keep the grease from dripping.
  • Aluminum foil:  Use non stick aluminum foil.
  • Cooling Rack: This is essential for letting the bacon’s grease drip.

How to Bake the Perfect Bacon (Step By Step!):

There will be no more splattering of grease all over the stove and yourself.  You won’t have half burnt half under cooked slices. And no more stale bacon smell wafting through the house hours after breakfast.

  1. Preheat the oven to 375 degrees
  2. Line a rimmed baking sheet with non-stick aluminum foil.
  3. Place the cooling rack in the baking sheet.
  4. Lay the bacon on the cooling rack careful not to overlap.
  5. Bake for 12-15 minutes or until desired crispness. Remove and set on a paper towel lined plate.
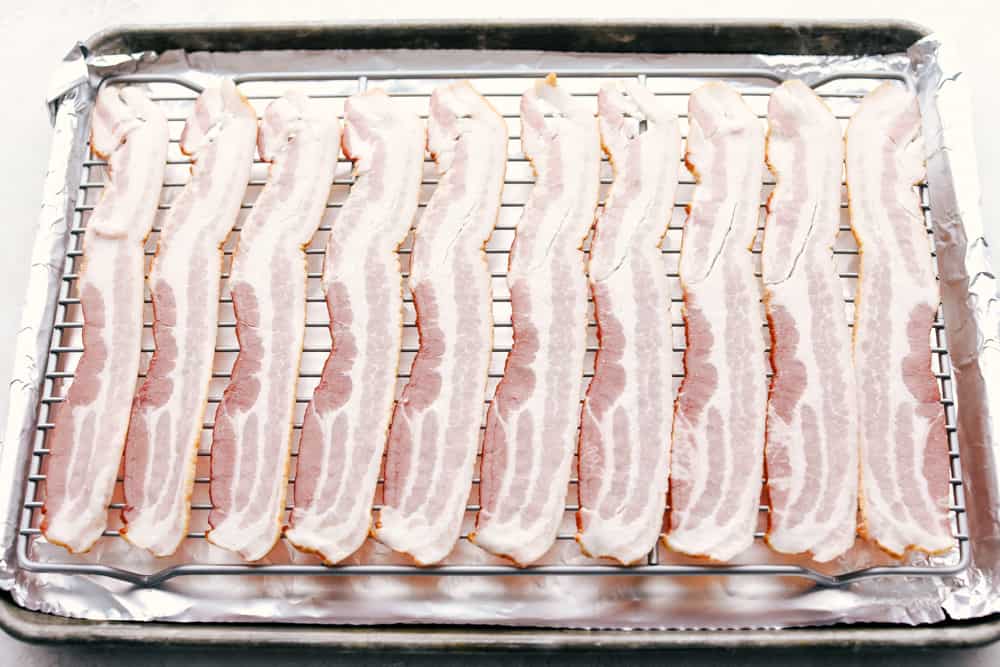
Raw Bacon on a lined cookie sheet getting ready to Bake

Tips for Baking The BEST Bacon:

It’s super easy but here are some tips to ensure it is truly the best.

  • When is it done: Depending on the thickness and how you like your bacon will depend on how long you cook it for. If you have thicker cut, you’ll need to cook it longer. If you like it super crispy, also cook it longer. If you soft and chewy bacon or it’s a thinner cut, you’ll need less time. Every oven is different so I suggest keeping an eye on it till it’s just right for you.
  • Remove: Take the bacon off of the rack or baking tray as soon as you take it out of the oven, it continues to cook as long as it’s in the pan.
  • Flavor:  You can some kick to your bacon by adding black pepper, or brown sugar on top before baking. Super easy and flavorful.
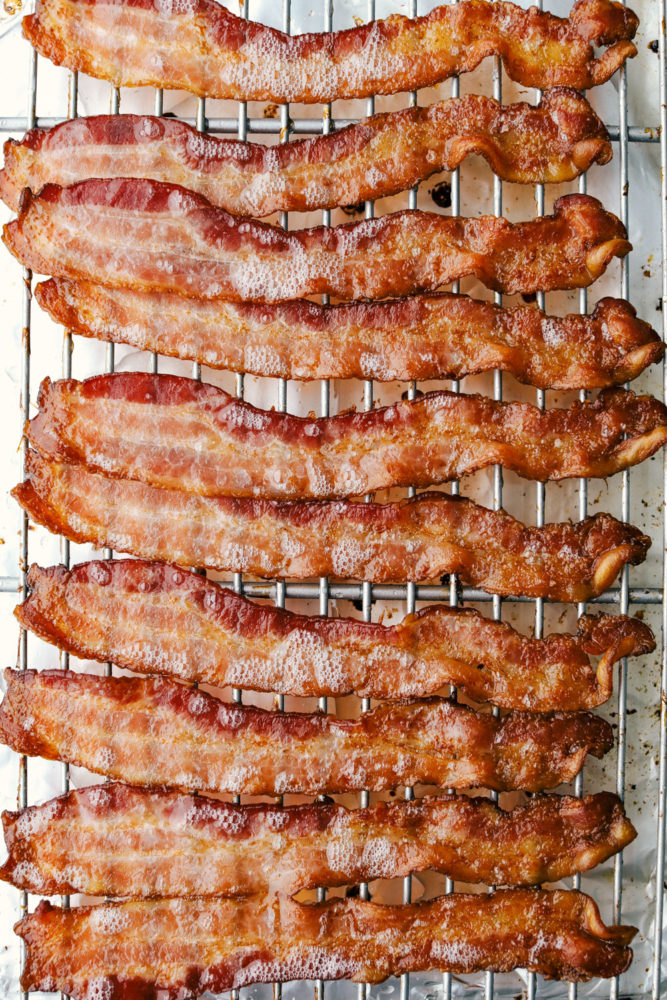
Perfectly Baked Bacon


Baked Bacon Storage Tips:

  •  Store. Leftover bacon will lose it’s crispness, but stores well in a refrigerator for up to 5 days. Microwave or recrisp your slices in the oven at 375.
  • To Freeze: If you want to freeze your bacon, under cook it slightly, and freeze in ziploc freezer bags for up to 2 months. Then simply reheat what you need in the microwave for 15-30 seconds. It’s such an easy way to have bacon when you need it quickly.
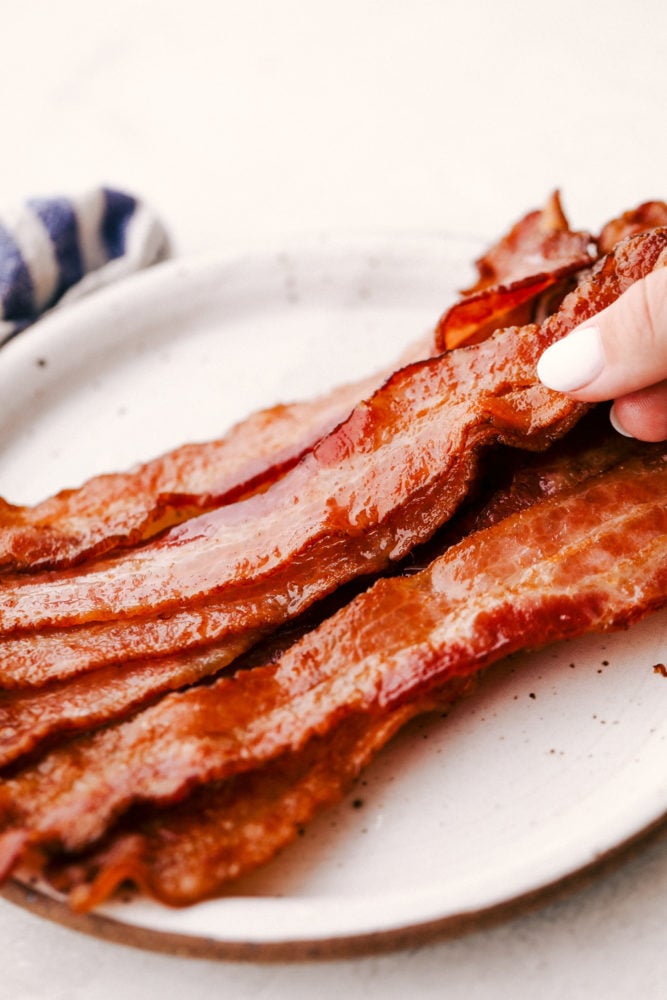
Perfectly Baked Crispy Bacon on a white plate.

Recipes to Use Bacon in:


Print

How to Bake the Perfect Bacon (Step By Step!)

Everyone loves Bacon, and once you try baking it, you'll love it even more!  It's just perfectly crisp, amazing flavor, and easy clean up. You will have bacon every morning!
Course Breakfast, Side Dish
Cuisine American
Keyword bacon, baked bacon
Prep Time 5 minutes
Cook Time 15 minutes
Total Time 20 minutes
Servings 4 People
Calories 17kcal
Author Alyssa Rivers

Ingredients

  • 1 16 ounce package bacon
  • rimmed baking sheet
  • non-stick aluminum foil
  • cooling rack*

Instructions

  • Preheat oven to 375 degrees. Line a rimmed baking sheet with aluminum foil and place the wire cooling rack on top of the baking sheet.
  • Place the bacon evenly in a row careful not to overlap. Bake for 12-15 minutes or until desired crispiness. Remove and set the bacon on a paper towel lined plate.

Notes

*I have made it before without the cooling rack and is optional.

Nutrition

Calories: 17kcal | Carbohydrates: 1g | Protein: 1g | Fat: 2g | Saturated Fat: 1g | Cholesterol: 3mg | Sodium: 26mg


from The Recipe Critic https://ift.tt/2H4tThL
https://ift.tt/2FCAD6h
बुधवार, 16 सितंबर 2020

Instant Pot Hard Boiled Eggs

Instant Pot Hard Boiled Eggs are hands down the best thing to make in your electric pressure cooker! Not only do they turn out perfect every time, but they peel better than any other method!

Hard boiled eggs are a great healthy snack to always have on hand in the fridge. Or use them to make Classic Deviled EggsAvocado Egg Salad, and the Best Macaroni Salad!

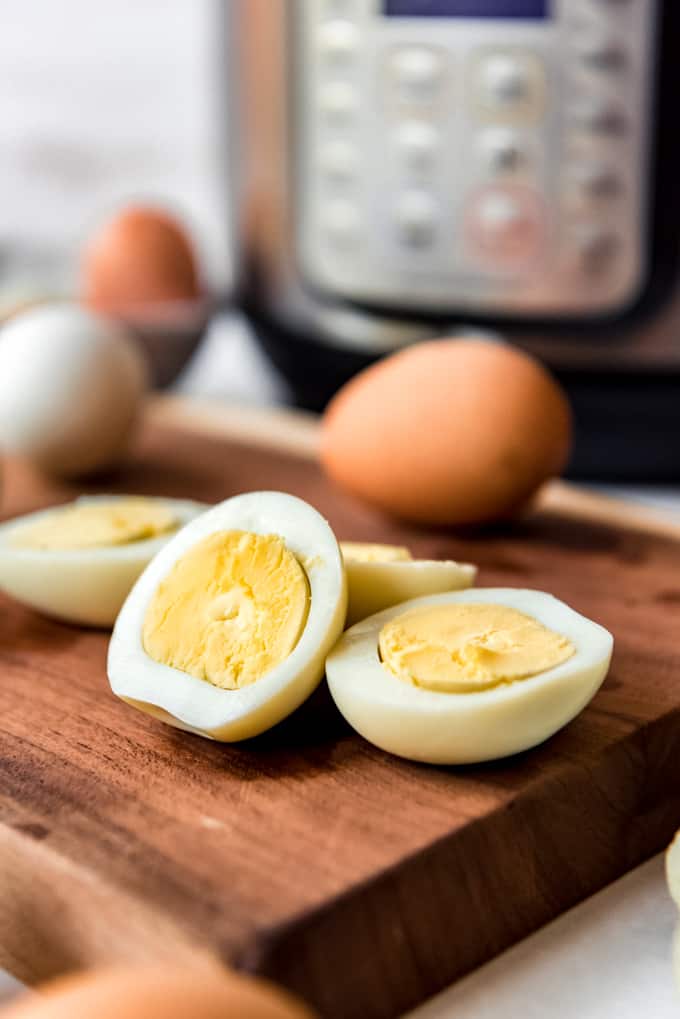
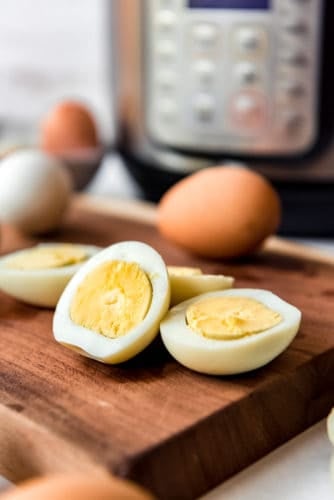
Sliced hard boiled eggs in front of an Instant Pot.

Instant Pot Hard Boiled Eggs

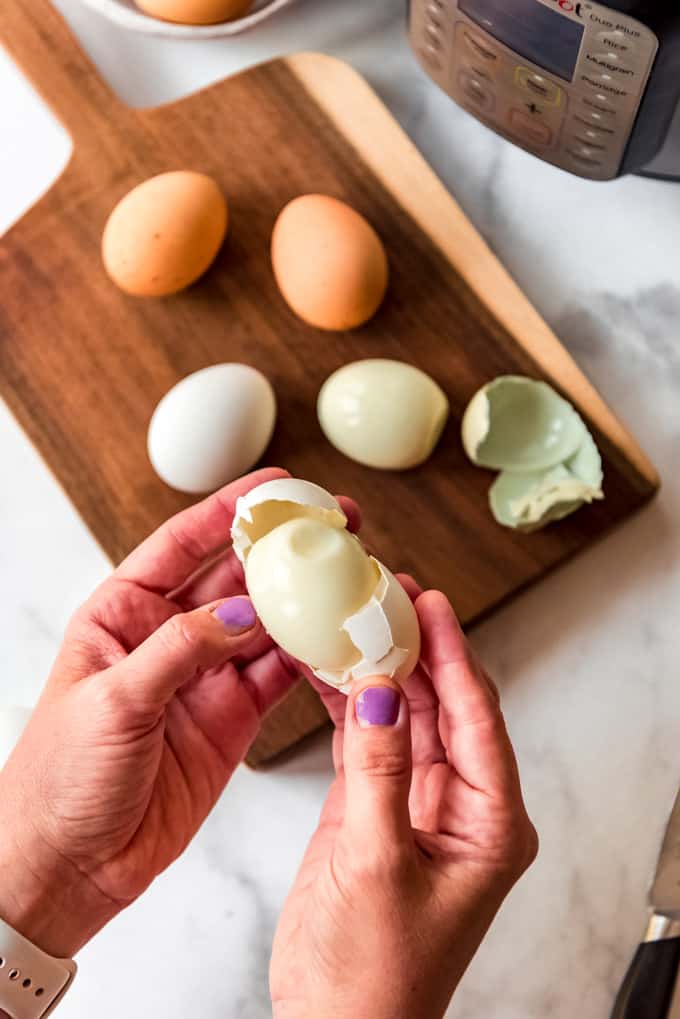
Peeling hard boiled eggs has been a hit-or-miss undertaking for me for years. I swear I have tried every trick in the book, but always with inconsistent results. Until now. Making hard boiled eggs in the Instant Pot has been a total game changer for me.

I don’t know exactly what it is about the science of the pressure cooker that makes these hard boiled eggs so easy to peel, but it’s mind-blowing. This is the only way I plan to make hard boiled eggs from now on!

We have tested this with farm fresh eggs from our backyard chickens, as well as older store-bought eggs that we aged for a couple of weeks in the fridge. And honestly, they still turn out perfect and peel without any effort. EVERY. SINGLE. TIME.

Plus, I love that you don’t have to stay near the stove to watch for eggs to boil. This method takes the guess work out of making hard boiled eggs.

Sliced hard boiled eggs on a wooden cutting board.

What you need to make hard boiled eggs in the Instant Pot:

  • Eggs: You can do anywhere from 2 to 12 eggs (or more if they fit comfortably in your IP!). The timing and amount of water stays the same no matter how many you are doing at a time!
  • Water: You always have to have some liquid for the Instant Pot to function properly.
  • 6-quart Instant Pot: Really, any electric pressure cooker will work.
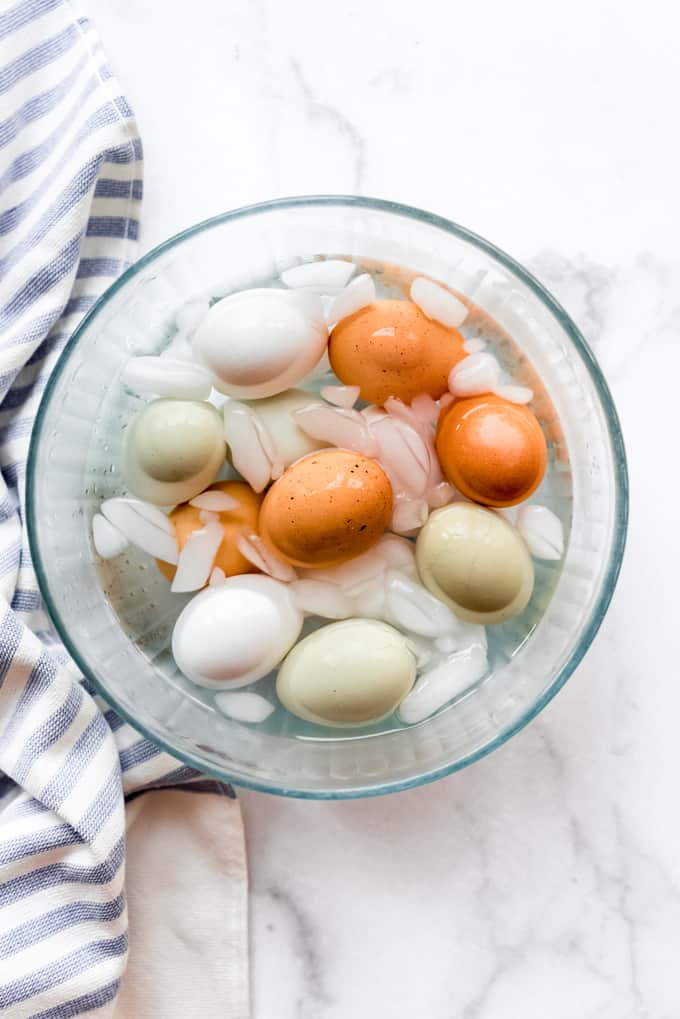
  • Ice water bath: This will help stop the cooking process and quickly cool down the eggs once they are done.

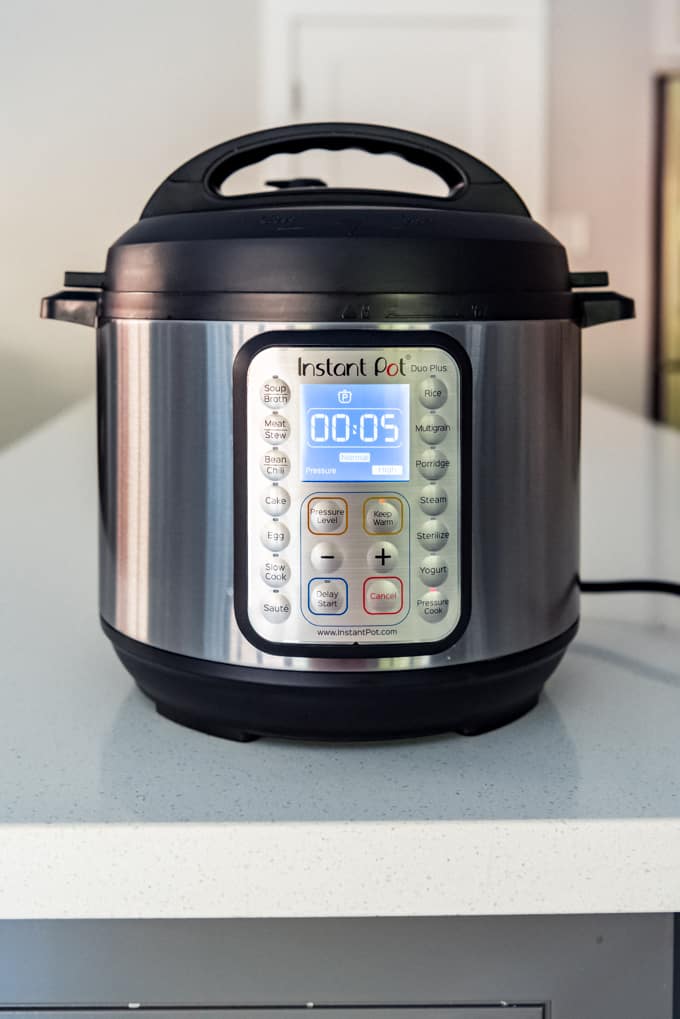
An Instant Pot set to cook on high pressure for 5 minutes.

How to make Instant Pot Hard Boiled Eggs

  1. Prep the Instant Pot: Place the metal trivet that came with the Instant Pot down into the pot and fill with 1 cup of water.
  2. Arrange eggs: Gently place the eggs into the Instant Pot. They can be stacked on top of each other, but be sure to check for cracks before placing them.
  3. Set cooking time: Manually set the Instant Pot to cook on high pressure for 5 minutes. Once the timer goes off, let it do a natural release for 5 minutes before doing a quick release by turning the pressure release valve.
  4. Cool quickly: Immediately transfer the cooked eggs to an ice water bath for five minutes to stop the cooking process. Then crack and peel to enjoy right away or use in a recipe!

Hard boiled eggs in an ice water bath.

How to Store Hard Boiled Eggs:

Always refrigerate hard boiled eggs right away. They should not be left out at room temperature for longer than 2 hours.

If unpeeled, hard boiled eggs can be stored in a bowl in the fridge and will last for up to a week. If you peel them right away, the eggs should be stored in an airtight container and eaten within 3-4 days.

Are older eggs better for making hard boiled eggs?

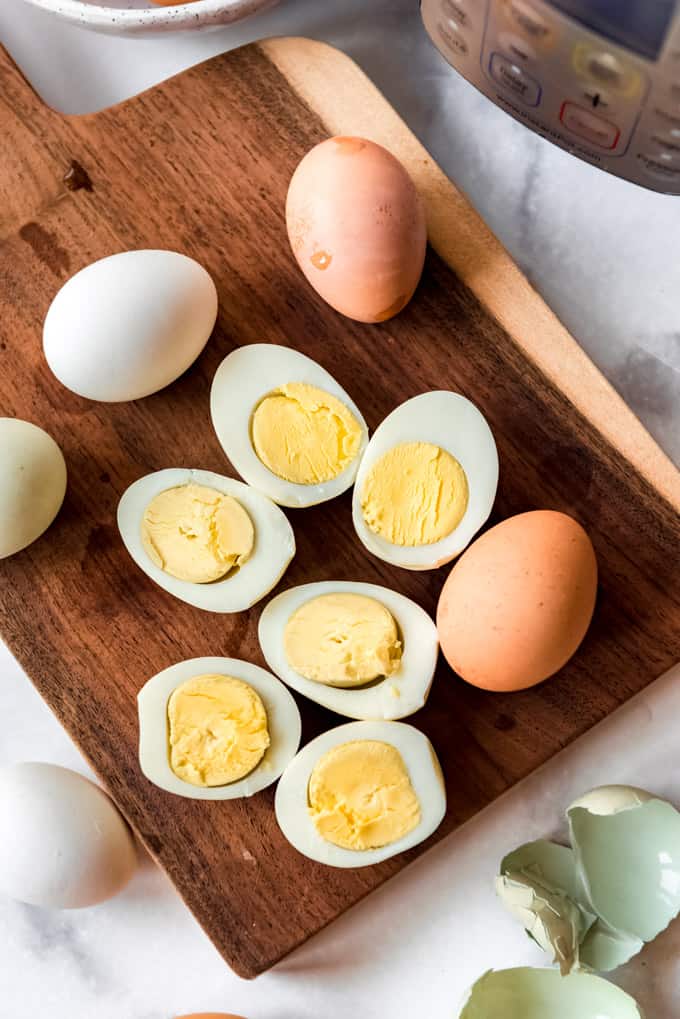
I have found this to be the case in the past when making hard boiled eggs on the stovetop, but that doesn’t seem to be the case with the Instant Pot. Some of the pale green and speckled brown eggs in these images were laid fresh that day from our backyard chickens and they peeled just as easily as the white ones from the store.

Hands holding a peeled hard boiled egg.

More Egg Recipes:

Print

Instant Pot Hard Boiled Eggs

Instant Pot Hard Boiled Eggs are hands down the best thing to make in your electric pressure cooker! Not only do they turn out perfect every time, but they peel better than any other method!
Course Appetizer
Cuisine American
Keyword boiled eggs, hard boiled eggs
Prep Time 5 minutes
Cook Time 5 minutes
Ice water bath 5 minutes
Total Time 15 minutes
Servings 12 eggs
Calories 72kcal
Author Amy Nash

Ingredients

  • 12 large eggs
  • 1 cup water

Instructions

  • Place the metal trivet that came with the Instant Pot into the bottom of a 6-quart Instant Pot. Add the water, then gently place the eggs, checking for cracks first. They can be stacked on top of each other, if necessary. Cover and secure the lid, then set the valve to "sealing".
  • Select "manual" high pressure and set for 5 minutes. It will take a few minutes for the Instant Pot to come up to pressure, then it will cook for 5 minutes. Prepare an ice water bath in a large bowl.
  • When the timer goes off, let it do a natural release for 5 minutes before releasing any remaining pressure using a quick release by switching the pressure valve to venting. Be careful of any venting steam and use a towel to protect your hands when doing a quick release.
  • Immediately transfer the hard boiled eggs to the ice water bath and let them sit for 5 minutes to quickly stop the cooking process. Store in the fridge for up to 1 week, or peel and enjoy right away.

Nutrition

Serving: 1g | Calories: 72kcal | Carbohydrates: 1g | Protein: 6g | Fat: 5g | Saturated Fat: 2g | Cholesterol: 186mg | Sodium: 72mg | Potassium: 69mg | Sugar: 1g | Vitamin A: 270IU | Calcium: 28mg | Iron: 1mg


from The Recipe Critic https://ift.tt/33xGDVY
https://ift.tt/2FBHw7v

मंगलवार, 15 सितंबर 2020

Slow Cooker Teriyaki Chicken

Slow Cooker Teriyaki Chicken is a simple saucy, sweet and tangy chicken served over tender long grain rice that truly satisfies. The aroma that will fill your kitchen will make your mouth water all day, the hardest part of this will be waiting till it’s done. It’s so simple and so flavorful, it’ll become a standard in your recipe rotation.
Serve this with a Creamy Poppy seed Fruit Salad and some Egg Rolls for the perfect family dinner on busy weeknight. This will bring the family running to the table.
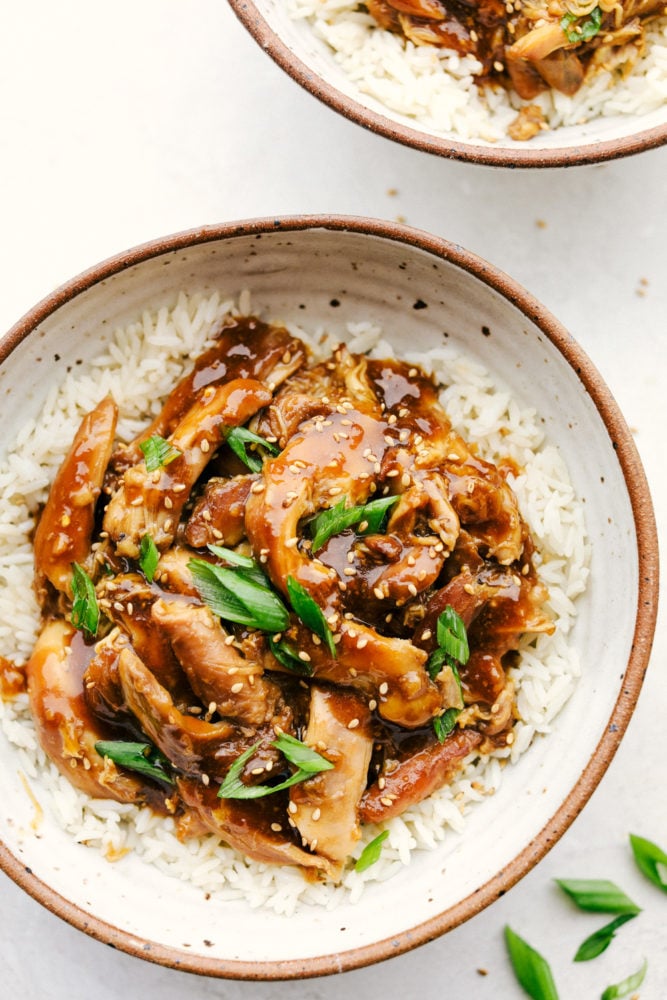
Slow Cooker Teriyaki Chicken on top of rice.

Slow Cooker Teriyaki Chicken

Teriyaki is one of the most favorites of the Asian flavors around. The combination of garlic, ginger, soy sauce, sugar and vinegar is like magic. Teriyaki sauce makes everything taste better. From Shrimp to veggies to steak. It just goes with so many things.

Slow Cooker Teriyaki Chicken is rich and flavorful and so easy to throw together. Slow Cooker meals are a favorite go to when life gets busy and this will be a winner.  Tender chicken is drenched a thick sweet sauce with minimal preparation but will taste like you slaved all day. This is so good!

Teriyaki Chicken Ingredients:

Simple ingredients come together quickly for the perfect meal.

  • Chicken Thighs: Save time by buying boneless skinless chicken thighs. Otherwise you’ll want to de-bone and skin your chicken thighs.
  • Sugar: Balances out the soy sauce to make the perfect sauce.
  • Soy Sauce: You can use low sodium soy sauce if you’d like.
  • Cider Vinegar: Adds zing and tenderizes the chicken.
  • Ground Ginger: Makes the sauce sing.
  • Minced Garlic: You can use jarred minced garlic.
  • Pepper: Try using fresh ground pepper for the best flavor.
  • Cornstarch:  Thickens the sauce.
  • Cold Water: needed to dissolve the cornstarch
  • Rice: Long grain brown or white rice is best.

How to Make Slow Cooker Teriyaki Chicken:

Using the Slow cooker makes every thing easier. Just a few simple steps is all you need to impress.

  1. Place: Put the chicken in the slow cooker.
  2. Mix: In a large bowl mix the sugar, soy sauce, cider vinegar, ginger, garlic and pepper. Pour it over the chicken.
  3. Cook: Cook on low for 4-5 hours till chicken is tender.
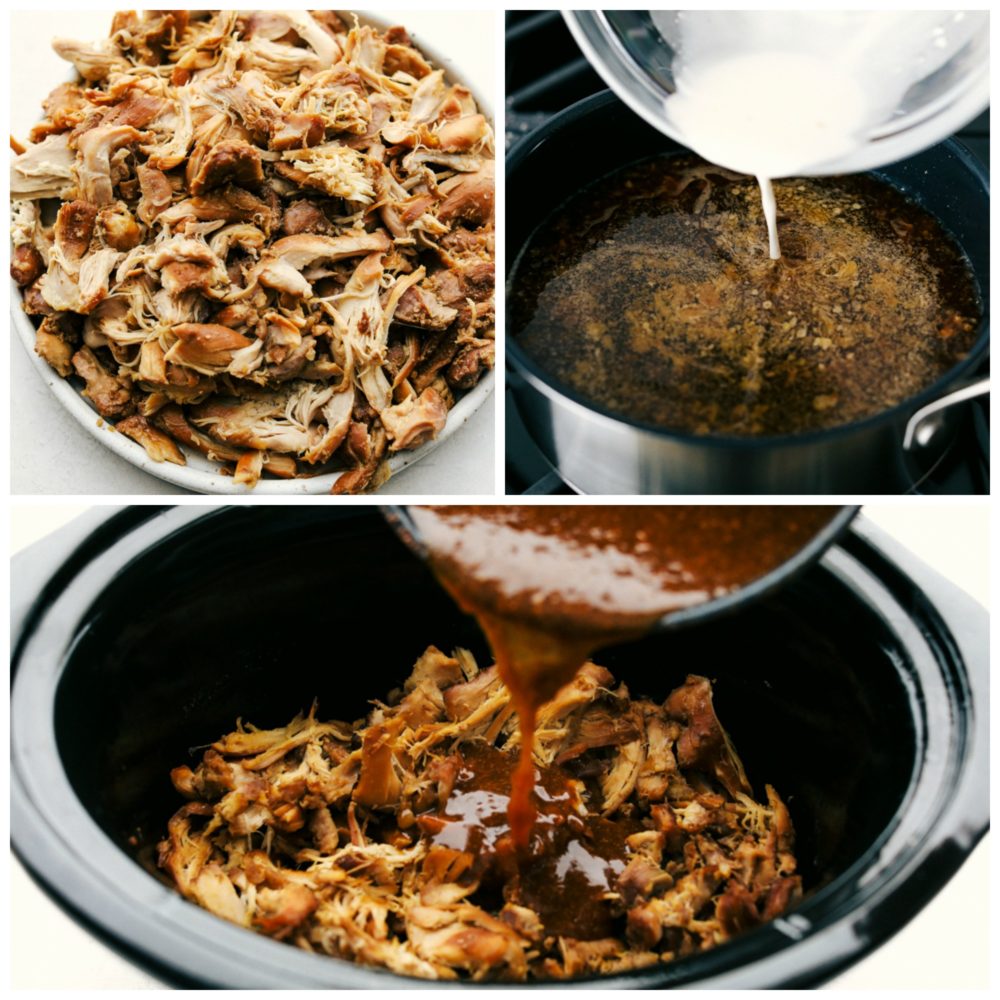
  4. Remove: When the chicken is done remove and shred on a platter and keep warm.
  5. Sauce:  Skim the fat from the cooking liquid. Place the liquid in a pot and bring to a boil. Mix the cold water and cornstarch together in a small bowl. Slowly add to the sauce and stir till thickened.
Making Slow Cooker Teriyaki Chicken with sauce.

Teriyaki Tips and Variations:

You will love how versatile this recipe is, it’ll be everyone’s favorite.

  • Chicken: The recipe calls for boneless skinless chicken thighs, but chicken breasts can easily be used and will be super tender and flavorful.
  • Trim the Fat: Which ever kind of chicken you use, you’ll want to trim off any excess fat.
  • Honey: If you’re looking for a sugar substitute try honey. It’s sweeter than sugar so you can use less. It will add a nice deep richness to the sauce. Try using 2/3 cup honey instead of the sugar.
  • Sauce: If your sauce seems too thin even after adding the cornstarch. Mix another 1 teaspoon of cornstarch with 2 teaspoons of cold water and add. Continue to add the cornstarch slurry till you get the thickness you desire. It will thicken as it cools.
  • Flavor: If you want to intensify the flavor use fresh garlic and fresh grated ginger for a deep rich flavor.

Serving and Storing Teriyaki Chicken:

Slow cooker chicken is so easy and so versatile, you’ll love having some leftovers.

  • Double: This is an easy recipe to double and save half for later.  Leftovers often taste better anyway as flavors continue to meld together.
  • Variations: Besides rice you can try serving it over quinoa. Roast or steam vegetables and turn the meal into a stir fry or a rice bowl. Use the chicken in sandwiches or to top a Teriyaki Chicken salad.
  • Store: Leftovers can be stored in the fridge for up to 5 days and in the freezer for up to 3-4 months.
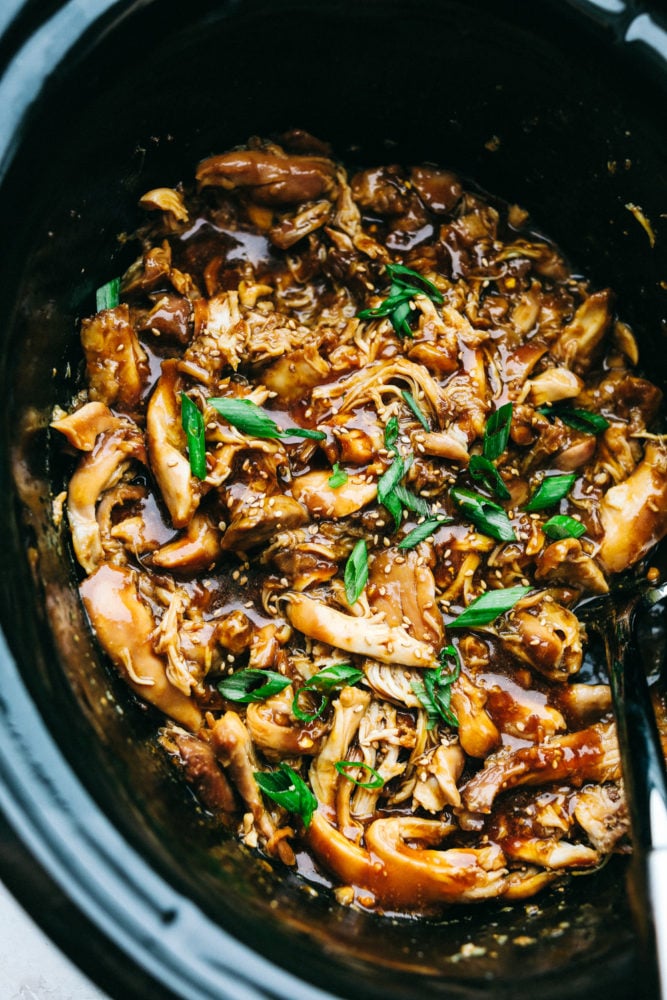
Slow Cooker Teriyaki Chicken in sauce in Crockpot.

More Tempting Teriyaki Recipes:

Teriyaki is such a tantalizing flavor, try these other great recipes with this amazing taste.

Print

Slow Cooker Teriyaki Chicken

Slow Cooker Teriyaki Chicken is a simple saucy, sweet and tangy chicken served over tender long grain rice that truly satisfies. The aroma that will fill your kitchen will make your mouth water all day, the hardest part of this will be waiting till it's done. It's so simple and so flavorful, it'll become a standard in your recipe rotation.
Course Dinner, Main Course
Cuisine Asian American, Chinese
Keyword slow cooker treiyaki chicken, teriyaki chicken
Prep Time 10 minutes
Cook Time 4 hours
Total Time 4 hours 10 minutes
Servings 6 people
Calories 394kcal
Author Alyssa Rivers

Ingredients

  • 12 boneless skinless chicken thighs about 3 pounds (I used 4 boneless skinless chicken breasts)
  • 3/4  cup sugar
  • 3/4 cup soy sauce
  • 6 tablespoons cider vinegar
  • 3/4 teaspoon ground ginger
  • 3/4 teaspoon  minced garlic
  • 1/4 teaspoon pepper
  • 2 tablespoons cornstarch
  • 2 tablespoons cold water
  • Hot cooked long grain rice

Instructions

  • Place chicken in a 4 quart slow cooker.
  • In a large bowl, combine the sugar, soy sauce, cider vinegar, ginger, garlic and pepper.  Pour over chicken.
  • Cover and cook on low for 4 to 5 hours or until chicken is tender.
  • Remove chicken to a serving platter; keep warm.
  • Skim fat from cooking liquid.  Place liquid in a saucepan and bring to a boil.  Combine cornstarch and water until smooth.  Gradually stir into liquid and stir until sauce is thickend.  Serve with chicken and rice.

Notes

Updated on September 15, 2020
Originally Posted on November 13, 2012

Nutrition

Calories: 394kcal | Carbohydrates: 29g | Protein: 47g | Fat: 9g | Saturated Fat: 2g | Cholesterol: 215mg | Sodium: 1822mg | Potassium: 626mg | Fiber: 1g | Sugar: 26g | Vitamin A: 54IU | Vitamin C: 1mg | Calcium: 26mg | Iron: 3mg


from The Recipe Critic https://ift.tt/32ByOzn
https://ift.tt/3knRdWl

सोमवार, 14 सितंबर 2020

Coffee Cake

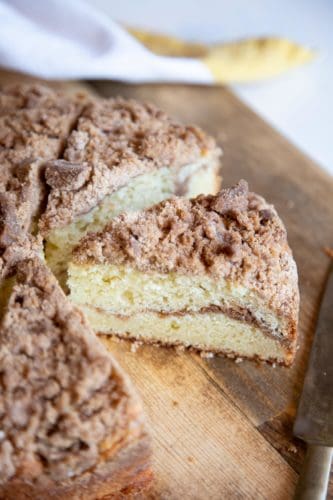
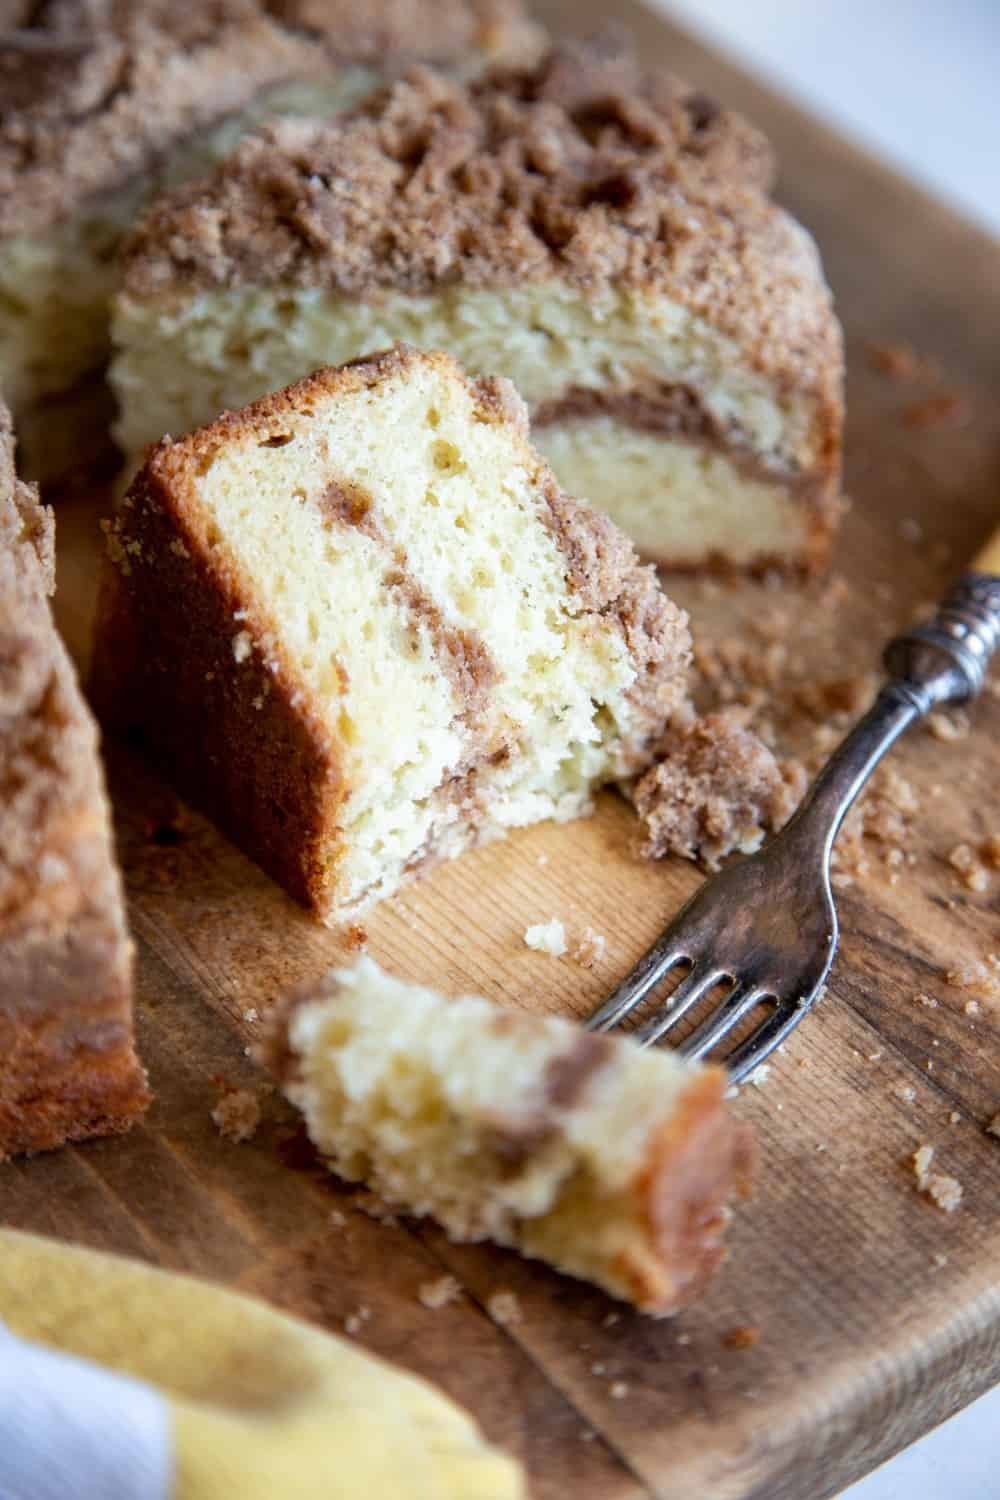
Coffee cake slices on a wooden board

This classic Coffee Cake is super easy to whip up and makes a great companion to your morning routine. It will soon become your favorite sweet brunch dish to serve for any celebrations you’re hosting or just any time the mood strikes.

If you love coffee cake everything, you will for sure love these Coffee Cake Muffins, or these Coffee Cake Scones, or this Skinny Blueberry Coffee Cake.

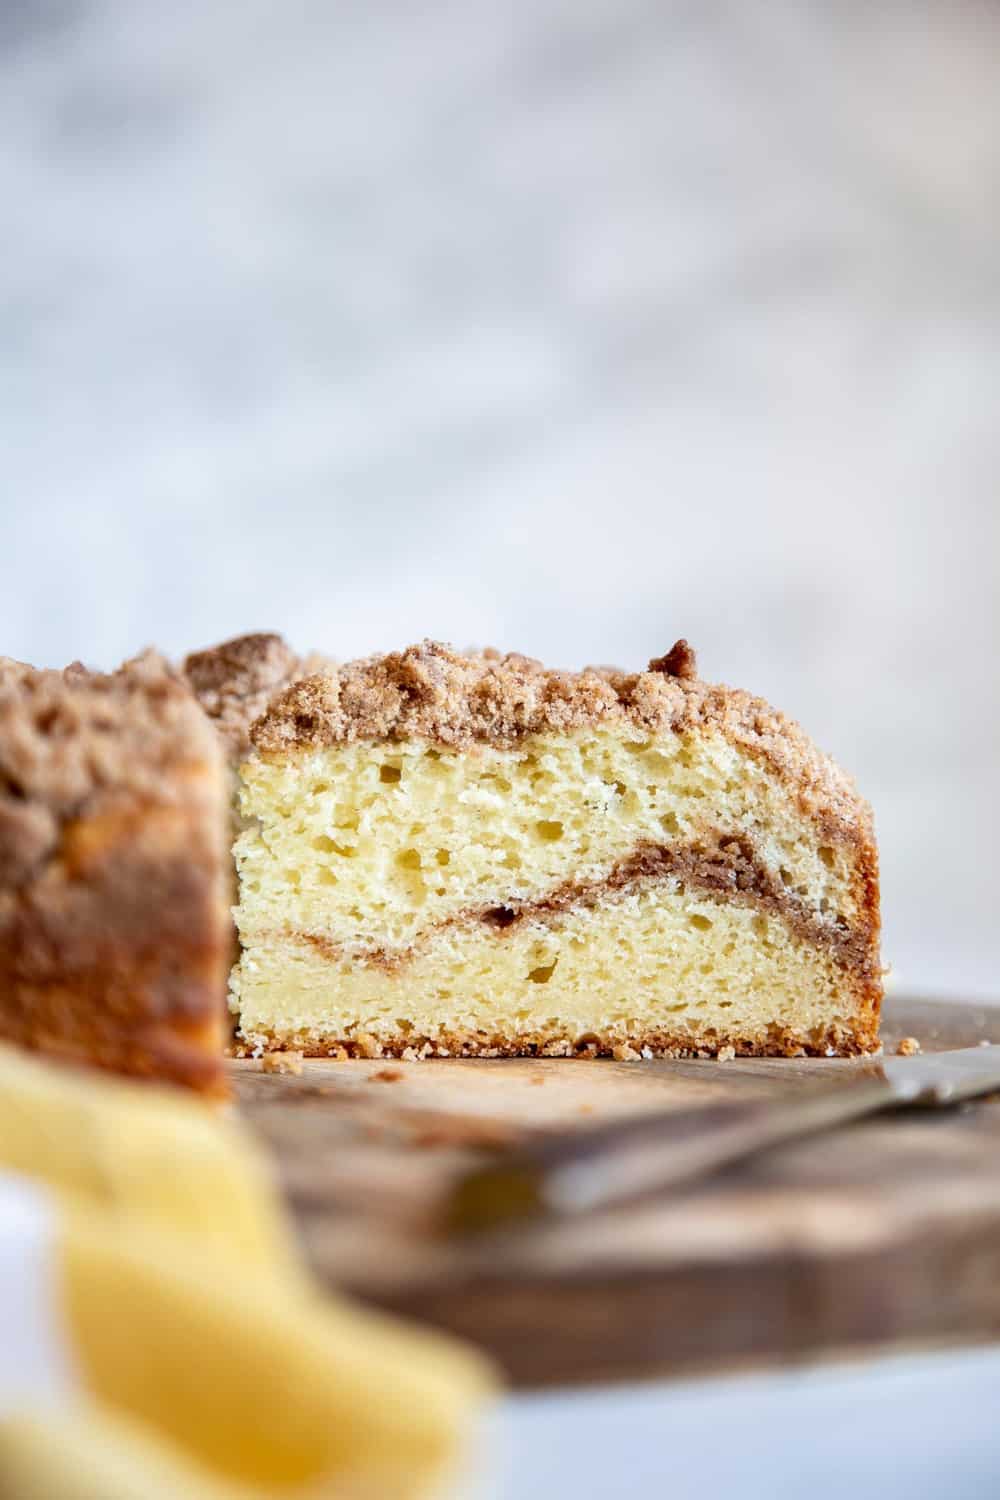
Cross section of a coffee cake

Coffee Cake Recipe

When I first discovered coffee cake, I was surprised to find out it doesn’t actually have any coffee in it. But instead it’s a soft, moist and delicious cake laced with cinnamon streusel in the middle and on top. The sweet cinnamon compliments breakfast wonderfully and gives an extra sweet treat in the morning!

Making the Streusel:

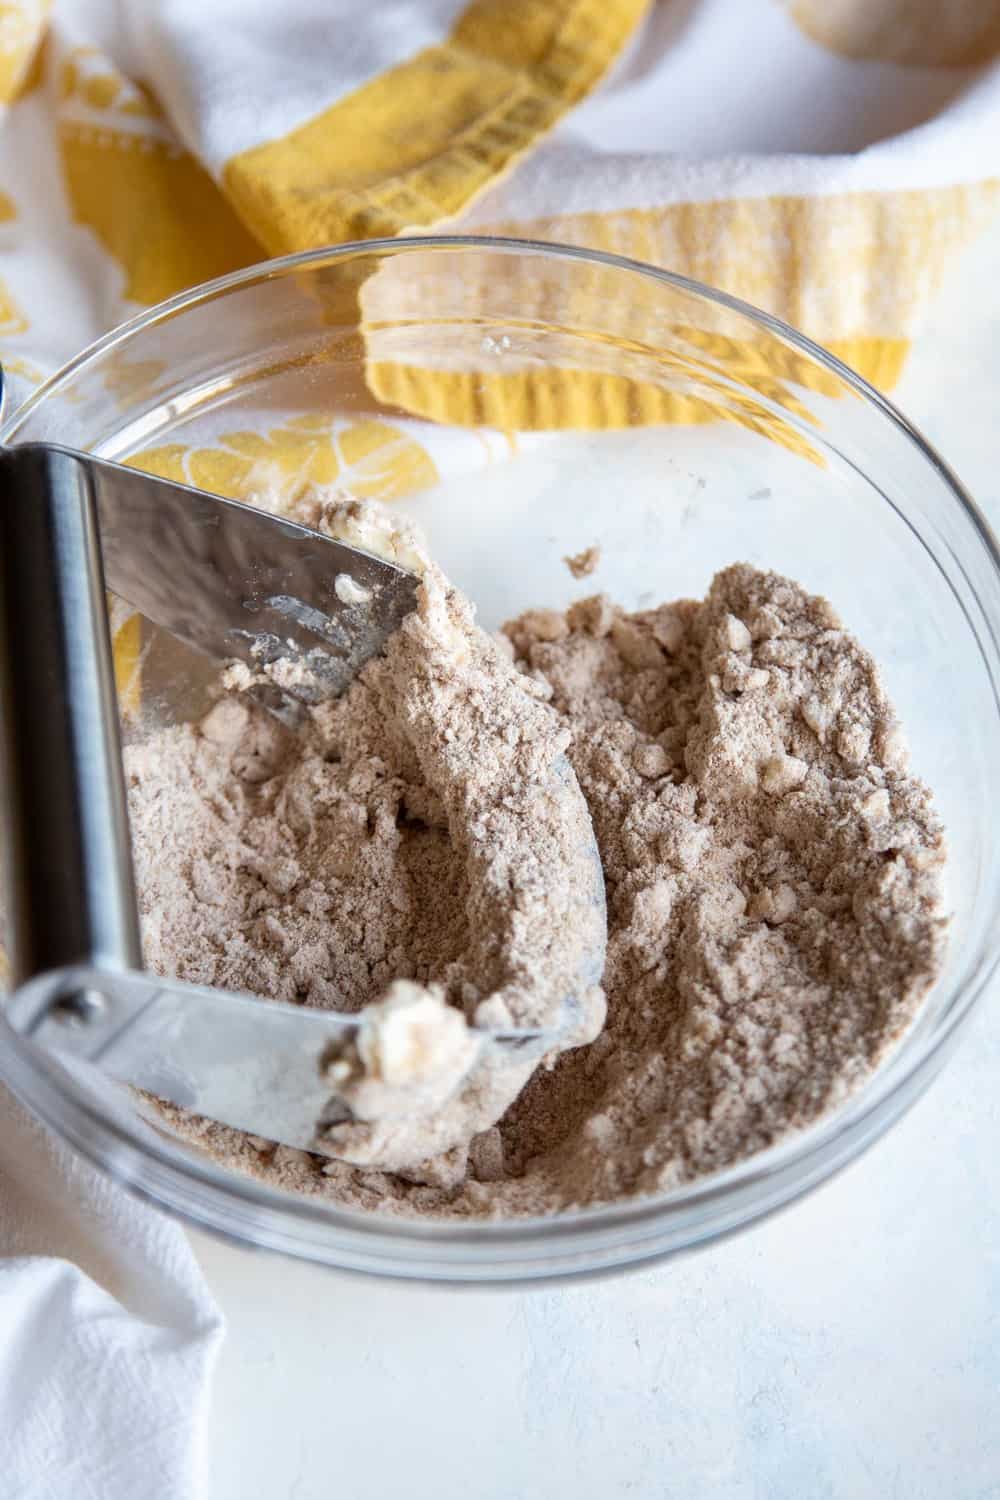
  1. Mix Together: The cinnamon streusel is made with a mixture of flour, sugar, just a tiny pinch of salt, lots of cinnamon and butter. You can use a pastry blender to cut the cold butter into the flour mixture, or simply use your fingers if you don’t have a pastry blender.
  2. Butter Tip: You want to work the butter into the mixture such that it becomes crumbly like wet sand, but work quickly so you don’t melt the butter. Keep the streusel in the freezer until you are ready to use it. If you don’t have space in the freezer, keep it in the refrigerator.
  3. Keep it Cold: Keeping the streusel cold is important so it becomes crumbles once baked instead of melting into the cake completely.

Making the cinnamon streusel in a bowl

Making the Cake Batter:

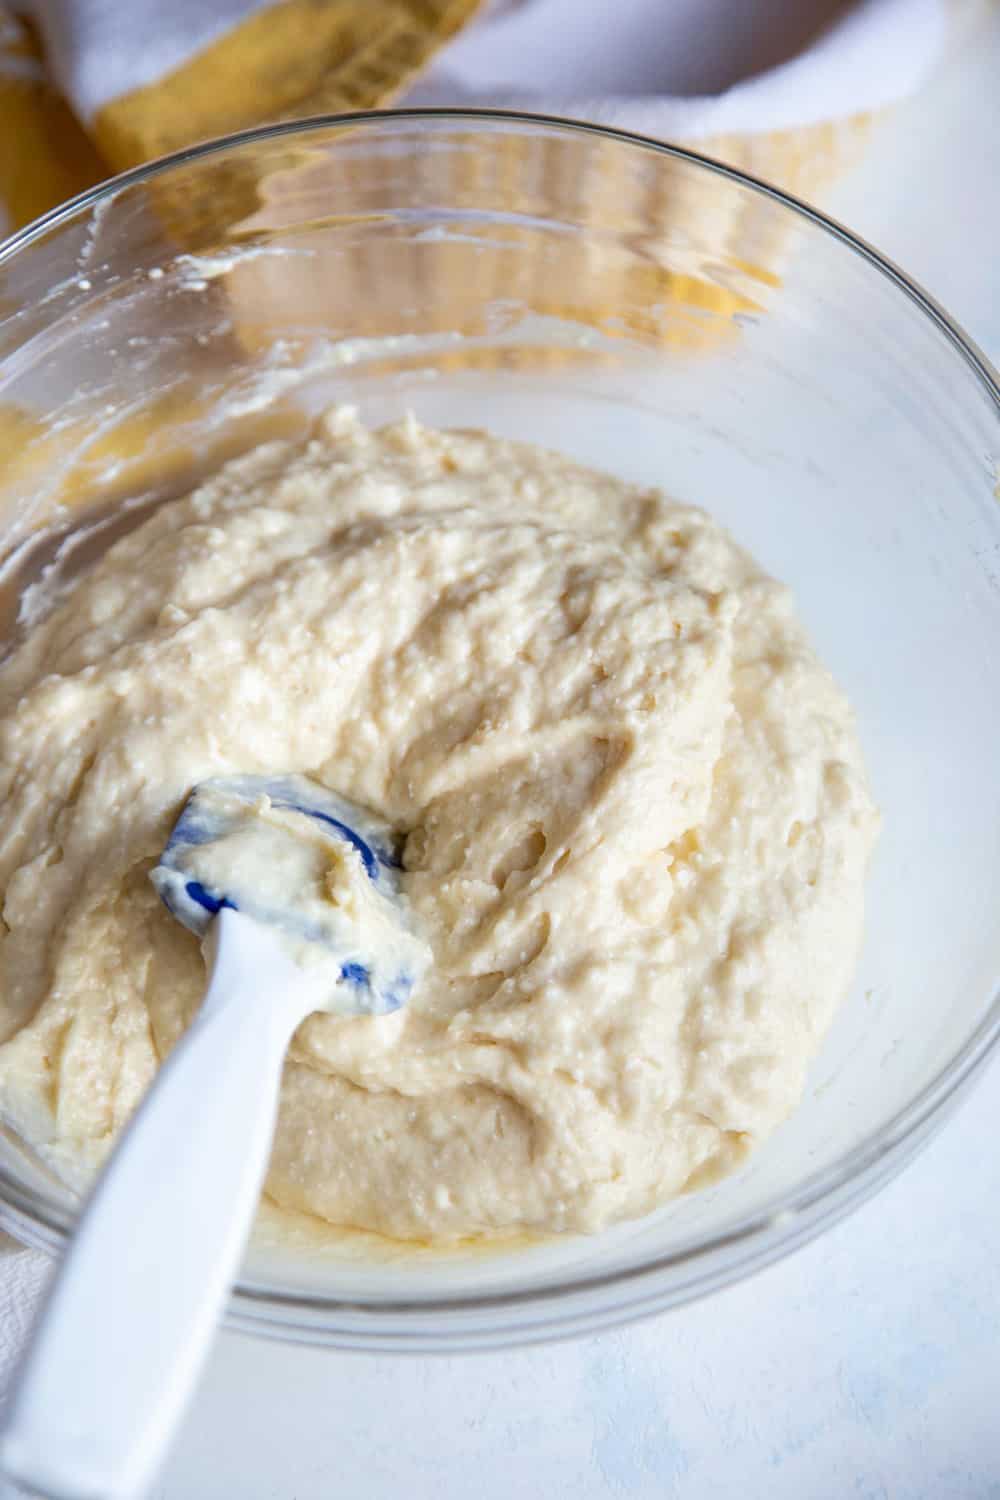
  1. Beat Wet Ingredients: This cake batter is very simple, just beat together the wet ingredients which include sour cream, melted butter, eggs, and vanilla extract. I use sour cream in this recipe, but you can replace it with yogurt or buttermilk if you wish.
  2. Sift Together: You’ll need a separate mixing bowl to sift together the dry ingredients, then fold the flour mixture into the wet ingredients until just combined. Don’t overmix the batter to avoid drying out the cake.

Coffee cake batter in a mixing bowl

Assemble for Baking:

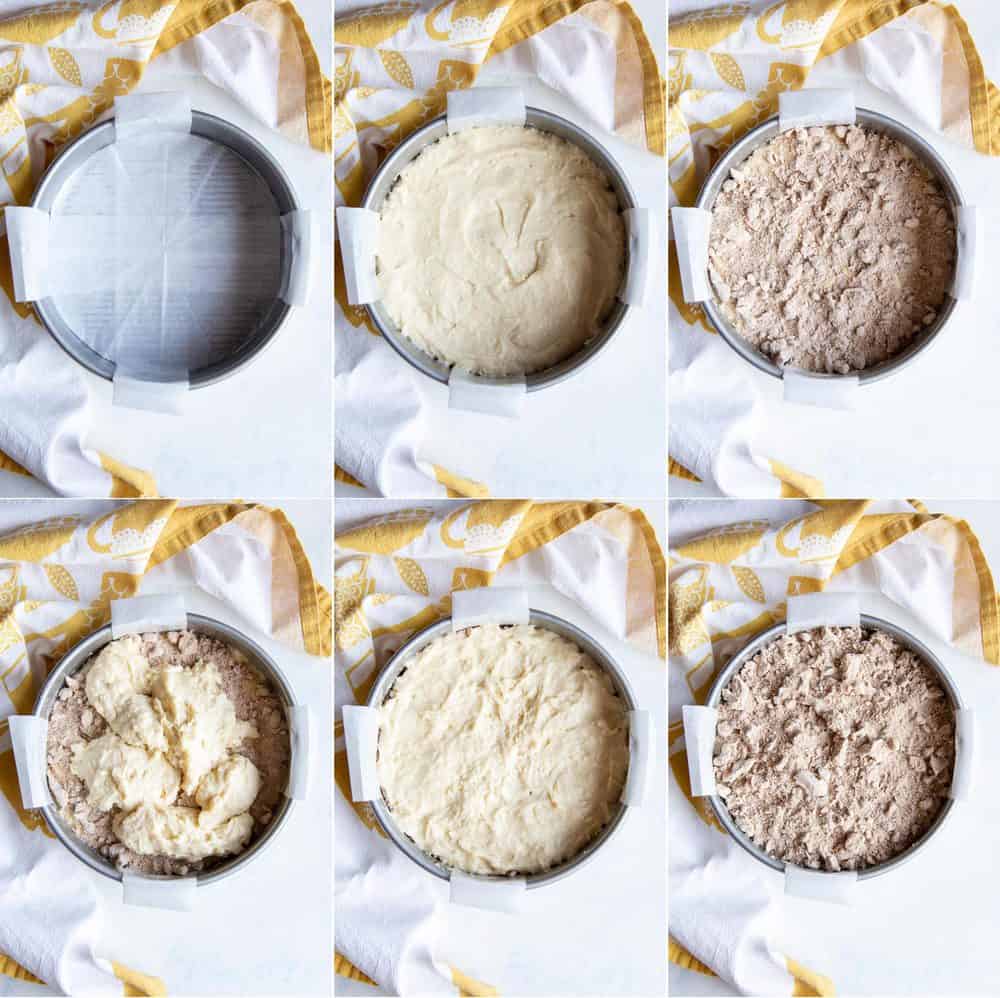
To get the classic layer of cinnamon streusel in the middle of your cake, you’ll need to do a little bit of assembling before baking.

  1. Get your cake pan ready before assembling the cake. I’m using an 8” cake pan here. Brush it with melted butter and line with parchment paper as shown.
  2. Add half the cake batter to the prepared pan, spread it into a flat layer.
  3. Add half the streusel on top, you may need to break up some of the larger clumps to spread it evenly over the cake batter.
  4. Dollop the remaining cake batter on top of the streusel layer.
  5. Use your fingers to nudge it into an even layer.
  6. Sprinkle the rest of the streusel on top.

Now your cake is ready for the oven. This recipe bakes in 45 minutes at 350°F using an 8” round cake pan.

You can use whatever size pan you have but if your pan is larger, your cake will bake faster, so check the doneness using a toothpick inserted in the middle of the cake. If the toothpick comes out clean, your cake is done.

A collage of how to assemble coffee cake

Storing Leftover Cake:

This coffee cake can be kept at room temperature in an airtight container for up to 3 days. You can also keep it refrigerated for up to a week.

Coffee cake slices on a wooden board

More Amazing Breakfast Cake Recipes:

A slice of half eaten coffee cake

Coffee cake slices on a wooden board
Print

Coffee Cake

This classic Coffee Cake is super easy to whip up and makes a great companion to your morning coffee. It will soon become your favorite sweet brunch dish to serve for any celebrations you’re hosting or just any time the mood strikes.
Course Breakfast, brunch, Cake, Dessert
Cuisine American
Keyword coffee cake, coffee cake recipe, coffee cake recipes
Prep Time 20 minutes
Cook Time 45 minutes
Total Time 1 hour 5 minutes
Servings 10 slices
Calories 388kcal
Author Trang Doan

Ingredients

Coffee Cake

  • 1 ⅓ cup all-purpose flour
  • cup granulated sugar
  • ½ teaspoon kosher salt
  • ½ teaspoon baking soda
  • ¾ teaspoon baking powder
  • 1 cup sour cream room temperature
  • 2 large egg room temperature
  • 4 oz unsalted butter melted & cooled
  • 1 teaspoon pure vanilla extract

Streusel

  • ¾ cup all-purpose flour
  • ¼ cup dark brown sugar packed
  • ¼ cup granulated sugar
  • A pinch of kosher salt
  • 1 ½ teaspoon cinnamon
  • 3 oz unsalted butter cold & cubed

Instructions

  • Make the streusel by combining flour, brown sugar and granulated sugar, just a pinch of salt, and cinnamon in a small bowl, mix together thoroughly with a whisk.
  • Cut the cold butter into small cubes and add to the dry mixture. Use a pastry blender to cut the butter into the dry mixture or pinch it together with your fingers until the texture is of wet sand. Cover and freeze until ready to use.
  • Preheat the oven to 350°F.
  • Melt the butter in a microwave-safe bowl for about 30 seconds.
  • Use the melted butter to brush an 8” cake pan, line the pan with two pieces of long parchment paper and a piece of round parchment paper to cover the bottom of the pan, let the excess hang over the sides for handles. Then brush the parchment paper with melted butter as well.
  • Set the baking pan aside and allow the rest of the melted butter to cool.
  • In a medium mixing bowl, add sour cream, eggs, the cool butter, and vanilla extract, beat with a whisk until smooth.
  • In another mixing bowl, sift together the flour, baking soda, and baking powder. Add salt and sugar and whisk to distribute evenly. Then add the flour mixture to the wet ingredients. Fold with a spatula until just combined.
  • Add half the cake batter to the prepared pan, and use a spatula to spread it into a flat layer. Sprinkle half of the streusel over the top, about 1 cup. Then add the rest of the cake batter over the streusel layer in dollops and gently nudge it into a flat layer with your fingers. Sprinkle the rest of the streusel on top evenly.
  • Bake for about 45 minutes until an inserted toothpick comes out clean.
  • Let cool on a wire rack completely before unmolding the cake. To remove the cake from the pan, take a butter knife to gently loosen the side then lift the cake out of the pan using the parchment paper “handles”.

Notes

  • You can bake this coffee cake in a 9” cake pan or a 8” square baking pan but bake time will be shorter.
  • Using a springform pan will make unmolding the cake easier. But be sure to place the springform pan on a baking sheet when baking since the springform pan may leak a little bit.
  • You can substitute sour cream with plain yogurt or buttermilk.

Nutrition

Calories: 388kcal | Carbohydrates: 45g | Protein: 4g | Fat: 22g | Saturated Fat: 13g | Cholesterol: 87mg | Sodium: 207mg | Potassium: 110mg | Fiber: 1g | Sugar: 24g | Vitamin A: 687IU | Vitamin C: 1mg | Calcium: 59mg | Iron: 1mg


from The Recipe Critic https://ift.tt/3ivbAjR
https://ift.tt/33tX59p